Hasegawa 1/48 Bf-109K-4
|
KIT # |
JT 63 (9063) |
|
PRICE: |
$25.95 MSRP |
|
DECALS: |
Two aircraft |
|
REVIEWER: |
|
|
NOTES: |
|
HISTORY |
 All K models were new built airframes and production commenced
in late summer of 1944. Actually the planned start-up of the K model was mid
1943, but events (such as a lack of engines and work on the Me-209 and 309) were
such that this never occurred. The DB 605D engine was more powerful and as such,
consumed more fuel than the earlier versions so range was actually less than the
earlier G models. This wasn't really a problem by this time in the war as the
Reich was slowly shrinking. Thanks to the relocation of some systems, such as
the MW 50 injection system, the balance of the plane was improved to similar to
the F models, an aircraft that most 109 pilots have said was the best flying of
the lot. A number of aircraft had the outer gear doors removed and the tail
wheel fixed in the lowered position.
All K models were new built airframes and production commenced
in late summer of 1944. Actually the planned start-up of the K model was mid
1943, but events (such as a lack of engines and work on the Me-209 and 309) were
such that this never occurred. The DB 605D engine was more powerful and as such,
consumed more fuel than the earlier versions so range was actually less than the
earlier G models. This wasn't really a problem by this time in the war as the
Reich was slowly shrinking. Thanks to the relocation of some systems, such as
the MW 50 injection system, the balance of the plane was improved to similar to
the F models, an aircraft that most 109 pilots have said was the best flying of
the lot. A number of aircraft had the outer gear doors removed and the tail
wheel fixed in the lowered position.
K models started to enter unit service in numbers during the fall of 1944. No other variants were built other than the K-4, though a number of variants were proposed. Despite a lot of conjecture, no photos of other versions/prototypes have ever surfaced. All 109Ks were built by Messerschmitt, unlike the other versions that were built by a number of companies. To my knowledge, no K models have survived.
|
THE KIT |
For a look at what comes in the box, please visit the preview.
|
CONSTRUCTION |
I'm nearly embarrassed to say that it has been over a year
since I built a 109. Not sure just why the long (for me) drought, but this
kit was actually started around February of this year and it wasn't until
August that I decided to actually sit down and finish it. Perhaps it was
the fiddling around with the resin cockpit that did it. I find resin/etched
metal aftermarket cockpits to be nice, but something that, for me, really
drags out the construction.
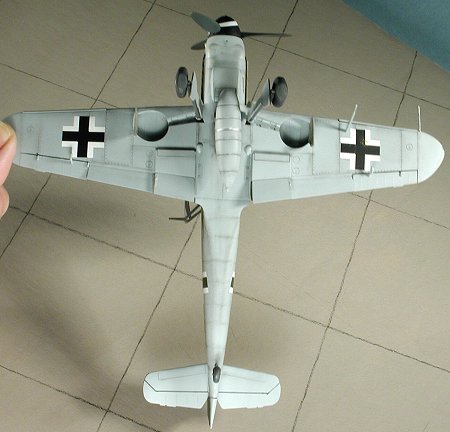
When I returned to the kit, I installed the wing radiators,
painted them black and gave them a bit of a drybrush with aluminum. Then
the upper wing areas were glued to the lower section, but not until I'd
opened up the holes for the upper wheel bulges and the lower antenna. I
also opened the holes for the drop tanks and filled in the vent on the
bottom that the K didn't have. Once the wings were together, I used a touch
of filler around the slat areas and in a spot where the part had broken
from the sprue and left a gouge.
While that was going on, I removed the small box from the
back cockpit wall and glued in the brass access panel and handle. These
items were held in using clear paint. Same with the instrument film behind
the instrument panel brass. If a part doesn't have any stress on it, there
is no need to use superglue. Helps avoid a real mess as well. During this
time the upper cowl was glued in place. An outstanding fit. Same for the
supercharger intake.
Next I glued on the wings. The
fit is really super and I don't think I'll even be needing more than a
touch of filler. Tail planes fit equally well with no problems at all. At
this stage, the best thing to work on would be the flaps and radiator door
openings. There are a variety of positions in which these can be displayed;
from full down to full up and stages in between. Having done quite a few
with the flaps down, I decided on flaps almost all the way up on this with
the radiator doors fully lowered. None of my other 109s are in this
configuration. I only glued the flaps and lower radiator door at this time
for the upper door would have to be taped up when it came to painting. At
this time the slats were also glued in place.
Now for something a bit different. The plane I'm going to
model is an early production aircraft in the 230xxx production range.
Photos of planes whose serial number is just before and just after it show
a very dark landing gear leg. Apparently it was not uncommon for gear legs
to be painted RLM 66. RLM 02 and bare metal were also used. I decided to
give the RLM 66 a try as I'd not done one with this color before.
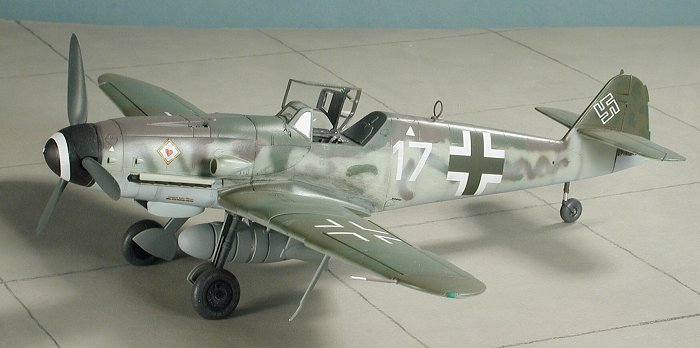
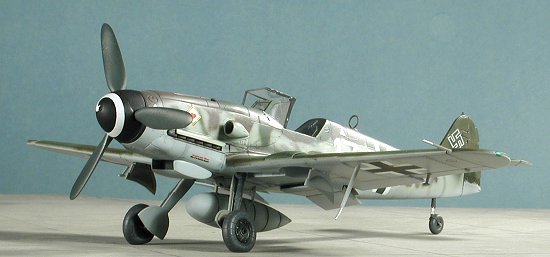
CAMOUFLAGE & MARKINGS
Colors for this plane are RLM 81/83/76 with some of that greenish RLM 76
that many call "RLM 84". I decided to use the new 'Colors of
Eagles' acrylic paint. This paint is an acrylic that is made by Vallejo
paints in Spain. It is thinner than Vallejo's normal line and part of the
Aeromaster/Eagle Strike line of companies. I was told at the Nationals that
this paint could be sprayed right from the bottle, though there is a
suggestion that it be mixed 10-15% with distilled water. I went for the
'right from the bottle' bit and it seemed to work just fine, though it
wouldn't hurt to thin it a bit. The benefit of the 'nose drops' bottle is
that you can squirt some right into the airbrush if you want to do a small
touch-up. No need to mess up a bottle or color cup! Anyway, it dries to a
satin finish and can easily be handled within a short period of time. I
waited 4-6 hours between colors. It accepts Tamiya Masking tape with no
problems, but like any acrylic, will lift up if sprayed on a greasy surface
or if cut.
With the camo pretty well on, though I really didn't like it that much, I
overcoated the kit with Future and took it back to the workbench to add on
some of the final pieces.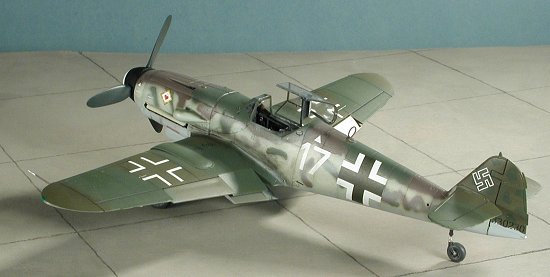 Anyway, I did first start with
the cockpit. I had a very nice Aires cockpit set that is a combination of
resin and etched metal. Well the resin part went together without a hitch.
I painted everything in there RLM66 and left the sidewalls off until I was
ready to insert it. Then I basically walked away for it for six months.
Anyway, I did first start with
the cockpit. I had a very nice Aires cockpit set that is a combination of
resin and etched metal. Well the resin part went together without a hitch.
I painted everything in there RLM66 and left the sidewalls off until I was
ready to insert it. Then I basically walked away for it for six months.
 On to the fuselage which
was painted RLM 66 on the inside and then glued together. Don't forget to
trap the piece in the front to which the spinner will attach. I used filler
on the chin radiator area, upper and lower fuselage. There are some sink
areas near the aft wing attachment point. A bit of modification needs done
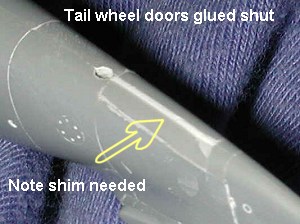
as well. For some reason, Hasegawa molded the tail wheel gear doors open.
Nice, but not at all prototypical. You see, when the gear was down, these
doors were closed unless some sort of maintenance was going on. In fact, so
troublesome was the door mechanism that the tail wheel retraction mechanism
was often 'hard wired' in the down position. That means you have to cut off
the doors and glue them shut. Naturally, it doesn't work that way so in
addition to the doors, I needed some card to fill in the space between them
and then had to sand the dickens out of them to get them to conform to the
fuselage.
On to the fuselage which
was painted RLM 66 on the inside and then glued together. Don't forget to
trap the piece in the front to which the spinner will attach. I used filler
on the chin radiator area, upper and lower fuselage. There are some sink
areas near the aft wing attachment point. A bit of modification needs done
as well. For some reason, Hasegawa molded the tail wheel gear doors open.
Nice, but not at all prototypical. You see, when the gear was down, these
doors were closed unless some sort of maintenance was going on. In fact, so
troublesome was the door mechanism that the tail wheel retraction mechanism
was often 'hard wired' in the down position. That means you have to cut off
the doors and glue them shut. Naturally, it doesn't work that way so in
addition to the doors, I needed some card to fill in the space between them
and then had to sand the dickens out of them to get them to conform to the
fuselage.
 After completing the interior and
giving it the usual dry-brushing, it was installed in the fuselage. Now I
should mention at this time that first the instrument panel had to be glued
in place. Not exactly a snap as there is a very thin attachment area for
it. I also discovered that the two aft alignment bars for the kit cockpit
needed to be removed. The instructions say nothing about this, but if it
isn't, the cockpit sits too far forward. The back of the seat should be
about in line with the opening in the fuselage. It took come careful
cutting to get this done, but one complete a bit of superglue was used to
hold all the pieces in place.
After completing the interior and
giving it the usual dry-brushing, it was installed in the fuselage. Now I
should mention at this time that first the instrument panel had to be glued
in place. Not exactly a snap as there is a very thin attachment area for
it. I also discovered that the two aft alignment bars for the kit cockpit
needed to be removed. The instructions say nothing about this, but if it
isn't, the cockpit sits too far forward. The back of the seat should be
about in line with the opening in the fuselage. It took come careful
cutting to get this done, but one complete a bit of superglue was used to
hold all the pieces in place.
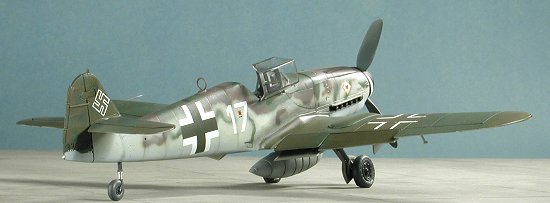
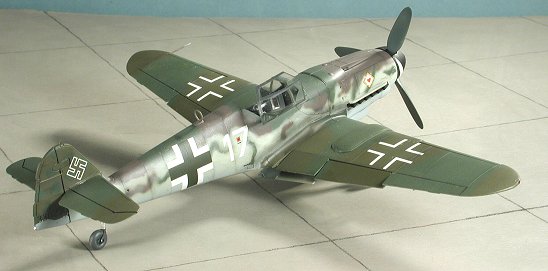 Bf-109Ks were painted in three distinct camouflage patterns, though there
were some detail differences. The first batch used a very high fuselage
demarcation line aft of the canopy with a medium line forward that could
have some rather deep 'dips' of the upper camo scheme. You could see
similar schemes on 109G-10s built around the same period. Later schemes
carried the upper colors down the fuselage more and I'll cover those when I
get around to doing another one. Since this plane was from the initial
production batch, the drawings in the decal sheet were correct for this
particular serial number.
Bf-109Ks were painted in three distinct camouflage patterns, though there
were some detail differences. The first batch used a very high fuselage
demarcation line aft of the canopy with a medium line forward that could
have some rather deep 'dips' of the upper camo scheme. You could see
similar schemes on 109G-10s built around the same period. Later schemes
carried the upper colors down the fuselage more and I'll cover those when I
get around to doing another one. Since this plane was from the initial
production batch, the drawings in the decal sheet were correct for this
particular serial number.
 The first color sprayed on was RLM 76. When dry, I masked the tail planes
and then masked the canopy parts. I found that fitting the windscreen was a
bit of a problem with the etched instrument panel as it made the gun sight
slightly interfere with the clear part. A little 'adjustment' was needed
and then the clear parts were glued/tacked on for painting. The upper
surface was then given an overall coat of the RLM 83 Dark Green. The RLM 81
brown was then sprayed on freehand to provide the second upper camo color.
Finally the RLM 84 was sprayed after masking some of the RLM 76 bits. Then
I started to do the fine detail stuff. At least I tried. I found that Color
of Eagles acrylic was just like all the other acrylics I've tried and
failed to give me the kind of fine detail I wanted. I tried all sorts of
air pressure and mixing ratios with no luck. Then I put the acrylics away
and tried to fix stuff up as best I could with enamels. Hindsight tells me
that I should have just resprayed the entire model with enamels from the
start, but I wanted to try to salvage the paint scheme. Bad move on my
part. I hand painted the blotches on the fin/rudder as these were painted
separately from the airframe using masks.
The first color sprayed on was RLM 76. When dry, I masked the tail planes
and then masked the canopy parts. I found that fitting the windscreen was a
bit of a problem with the etched instrument panel as it made the gun sight
slightly interfere with the clear part. A little 'adjustment' was needed
and then the clear parts were glued/tacked on for painting. The upper
surface was then given an overall coat of the RLM 83 Dark Green. The RLM 81
brown was then sprayed on freehand to provide the second upper camo color.
Finally the RLM 84 was sprayed after masking some of the RLM 76 bits. Then
I started to do the fine detail stuff. At least I tried. I found that Color
of Eagles acrylic was just like all the other acrylics I've tried and
failed to give me the kind of fine detail I wanted. I tried all sorts of
air pressure and mixing ratios with no luck. Then I put the acrylics away
and tried to fix stuff up as best I could with enamels. Hindsight tells me
that I should have just resprayed the entire model with enamels from the
start, but I wanted to try to salvage the paint scheme. Bad move on my
part. I hand painted the blotches on the fin/rudder as these were painted
separately from the airframe using masks.
|
FINAL CONSTRUCTION |
First up, the True Details wheels were glued in after enlarging the
holes to fit on the axles. Then the inner and outer gear doors were fixed
into place as was the tail wheel. I assembled the prop but without the
spinner. Then I applied the decals. I used the 9./JG 77 'White 17' markings
of Aeromaster 48-223
'Operation Bodenplatte pt
2'. They went on without any problems. After
the spiral decal was put on the spinner, it was glued to the backing
plate and onto the nose of the plane.
 The guns were then installed in the
cowl. Exhausts, which were painted Burnt Iron, and the glare shields were
then glued in place. I left off the aileron balances, Morane antenna and
pitot tube until the last. I did attach the radio mast and DF loop antenna,
which were hand painted once put on. Then the kit was given a semi-matte
coat.
The guns were then installed in the
cowl. Exhausts, which were painted Burnt Iron, and the glare shields were
then glued in place. I left off the aileron balances, Morane antenna and
pitot tube until the last. I did attach the radio mast and DF loop antenna,
which were hand painted once put on. Then the kit was given a semi-matte
coat.
Returning to the bench, I highlighted all the panel lines with dark grey pastels. These were scrubbed into the panel lines and then the entire kit was wiped down with a tissue to remove the excess. The end result is quite pleasing and looks much better on the lighter portions of the aircraft than the dark, where they can barely be seen. Another overcoat with matte to seal in the pastels. Then the other small bits were attached and had the paint touched up. While attaching the canopy in the open position, I noticed that the instrument panel had come adrift! Getting it glued back in was a real chore and I managed to break the resin control stick in the process. I was getting frustrated now so took a few minutes to compose myself. I figured that rather than do more damage trying to attach a radio wire, I'd leave it off. Removing the masks and gently gluing the canopy in place, I took the model to be photographed. Half way through the canopy fell off! I reglued it, finished the photo session and quickly put the model into the display case before I broke something else.
|
CONCLUSIONS |
Many will tell you these Hasegawa kits are a breeze. In many way they are and in others they do take careful construction. Despite the problems I ran into during the final stages (self-induced though they were), I enjoyed building this one. Especially since it is the first 109 I've done in what seems like a year. I'll give another one a try here in the near future and am sure it will turn out MUCH nicer.
September 2003
#1281 in a series
Review kit courtesy of me.
If you would like your product reviewed fairly and fairly quickly, please contact the editor or see other details in the Note to Contributors.