Hasegawa 1/48 Bf-109G-14
| KIT #: | 09445 |
| PRICE: | $ I don't remember but it wasn't more than about $15.00 as the bags had been opened. |
| DECALS: | One option |
| REVIEWER: | Scott Van Aken |
| NOTES: | 2002 Limited Edition "Finland Postwar" |
| HISTORY |
 Though numerically the last G model, it wasn't the last one
put into production. That goes to
the G-10. However, the G-14 did incorporate all of the updates and upgrades made
to the 109G-6 into a single airframe. This included the Erla developed canopy, a
tall wooden fin and rudder and in some cases, the taller tail wheel. It did not
include the wider main wheels. Though it tried to standardize on the DB605AM
with MW50 boost, there was the special high altitude G-14/AS with the DB605ASM
engine and this type also had a smoother cowling as used on the G-10 and K-4
versions. It is estimated that well over 5,000 G-14s were built with the first
seeing combat in June 1944.
Though numerically the last G model, it wasn't the last one
put into production. That goes to
the G-10. However, the G-14 did incorporate all of the updates and upgrades made
to the 109G-6 into a single airframe. This included the Erla developed canopy, a
tall wooden fin and rudder and in some cases, the taller tail wheel. It did not
include the wider main wheels. Though it tried to standardize on the DB605AM
with MW50 boost, there was the special high altitude G-14/AS with the DB605ASM
engine and this type also had a smoother cowling as used on the G-10 and K-4
versions. It is estimated that well over 5,000 G-14s were built with the first
seeing combat in June 1944.
| THE KIT |
This will probably be quite repetitive for those of us who
have built a lot of 1/48 Bf-109s, but for a goodly amount of time Hasegawa
pretty much had the market cornered and have produced a large number of various
boxings of the round winged 109s. It wasn't until Eduard came out with its
corrected 109 that there was any real competition, though the Eduard kit is said
to be a fiddly build. I have not built any of the G
 models, but the Eduard 109E
was an experience I don't care to repeat. Recently Tamiya has released a 109G in
this scale and it looks to be super. Again, I've not built it so cannot comment
on it.
models, but the Eduard 109E
was an experience I don't care to repeat. Recently Tamiya has released a 109G in
this scale and it looks to be super. Again, I've not built it so cannot comment
on it.
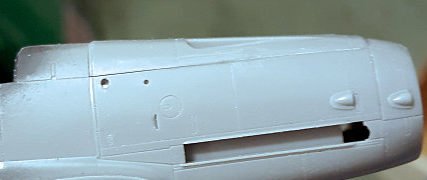
The kit provides a fairly well appointed cockpit and is enough to please the majority of builders. Instrument panel has a decal you can place over the raised detail if you so wish. The wings are for the F model so you need to square off the outer wheel wells and add in a panel line. You also need to open holes in the upper wing for the wheel fairings. The wings have separate flaps and radiator coolant exhaust doors, but the ailerons, rudder and elevators are molded in the neutral position.
You can build the fuselage and then install the completed cockpit from the underside, which is nice. The cockpit has detailed sidewalls. Other features are a drop tank, a sand filter for the supercharger intake, separate blades for the prop, fairly well detailed landing gear and main wells. You can also pose the canopy open or closed.
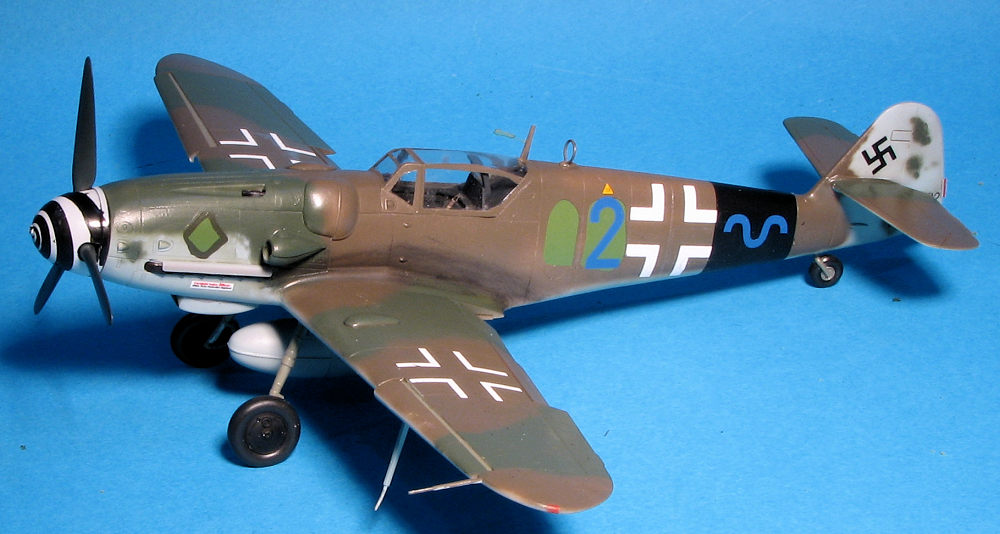
This particular boxing is in RLM 74/75/76 with heavy fuselage mottling with some black stripes for the box art plane and one that is a solid medium green on the upper surfaces. Decals for this are old school with the whites that are off white.
| CONSTRUCTION |
 It has been
probably a year and a half since I did a 109 and while I know there
are newer kits available, I've just not gotten all dewy-eyed about the latest
and greatest. This is probably because I have a pretty good selection of
Hasegawa kits and since I don't build for contests, simply cannot see the
reason, at the moment, to build others. For sure the detail level on say, the Tamiya and Eduard kits, is higher with considerably more parts and they are well
worth picking up, but for a nice, comfortable build to put on the shelves, these
kits are just fine.
It has been
probably a year and a half since I did a 109 and while I know there
are newer kits available, I've just not gotten all dewy-eyed about the latest
and greatest. This is probably because I have a pretty good selection of
Hasegawa kits and since I don't build for contests, simply cannot see the
reason, at the moment, to build others. For sure the detail level on say, the Tamiya and Eduard kits, is higher with considerably more parts and they are well
worth picking up, but for a nice, comfortable build to put on the shelves, these
kits are just fine.
I then built up the interior bits, dry brushing them with white. I added a set of Eduard seat belts as a cockpit looks pretty bare without belts. When attaching the side panels to the floor, I splayed them outward a tiny bit. In this way, they will press up against the fuselage halves when the cockpit is inserted and provide a tighter fit.
 While that was going on I installed the wing radiators and
cemented the fuselage halves together, trapping the prop shaft piece in the
process. Then the upper wings halves were attached. I then sanded the seams,
filling where needed. Note that the 109 should have a seam on the upper and
lower fuselage, even though this is invisible in photos unless the light is just
right. With the fuselage done, I installed the instrument panel and then the
cockpit. Next are the tail planes and for this one uses the set with the
additional panel line near the leading edge. I then glued on the upper cowling
piece. This had a step at the front and back that required sanding and filler to
level out. This may have been self-induced when I sanded down the seams before
and after it.
While that was going on I installed the wing radiators and
cemented the fuselage halves together, trapping the prop shaft piece in the
process. Then the upper wings halves were attached. I then sanded the seams,
filling where needed. Note that the 109 should have a seam on the upper and
lower fuselage, even though this is invisible in photos unless the light is just
right. With the fuselage done, I installed the instrument panel and then the
cockpit. Next are the tail planes and for this one uses the set with the
additional panel line near the leading edge. I then glued on the upper cowling
piece. This had a step at the front and back that required sanding and filler to
level out. This may have been self-induced when I sanded down the seams before
and after it.
The wing was then glued in place. As usual, I had a bit of filler needed for this, but nothing major. The supercharger intake and the gun bay bulges were next. The instructions have you install the one with the little additional piece on the right. I was originally not going to use that part, but most of the period photos I found of that side of G-14s showed it being used so I installed it. I then attached the gun sight followed by the canopy and windscreen. I know most modelers pose the canopy open, but I think the Erla version looks silly when open so I glued it shut. Finally, the radiator was attached to its housing and glued in place. I then filled in the wheel wells with silly putty and headed for the paint shop.
| COLORS & MARKINGS |
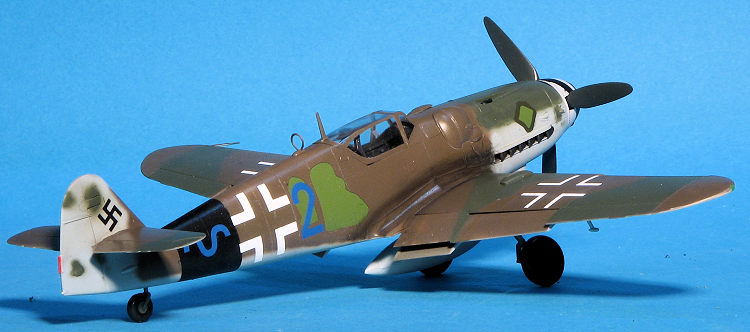
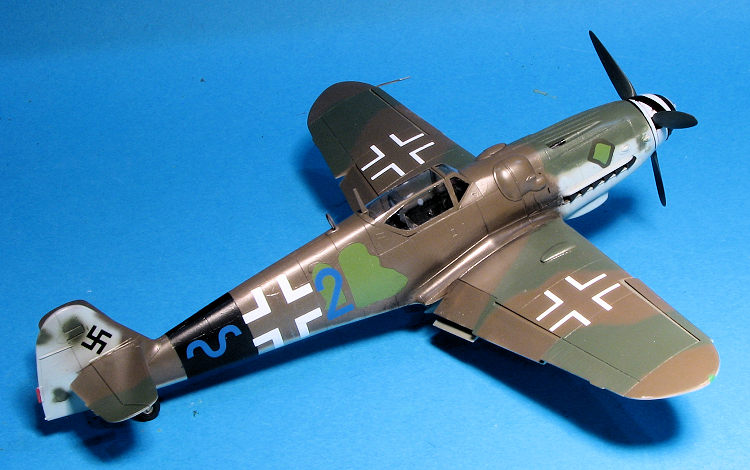 The aircraft shown in the Aeromaster sheet was in the
late war colors of dark brown and dark green. It had the dark brown quite far
down the fuselage sides with only a tiny amount of mottling on the fin/rudder
and forward cowling. I first painted the light blue undersides, then masked off
the tailplanes and painted the two upper colors. When dry, the upper portions of
the tailplanes were masked and any overspray was then taken care of.
The aircraft shown in the Aeromaster sheet was in the
late war colors of dark brown and dark green. It had the dark brown quite far
down the fuselage sides with only a tiny amount of mottling on the fin/rudder
and forward cowling. I first painted the light blue undersides, then masked off
the tailplanes and painted the two upper colors. When dry, the upper portions of
the tailplanes were masked and any overspray was then taken care of.
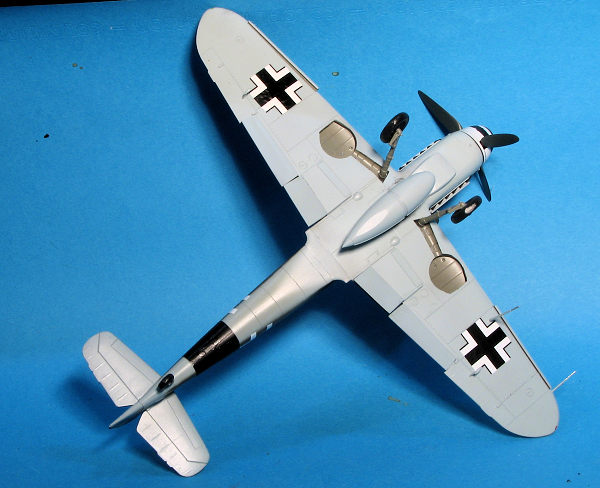
I then put the airframe on its landing gear. Hasegawa's gear mounts are a bit loose and so one has to take care when attaching them. I inevitably get things off just a tad and so is the case here. The radiator exhaust doors were attached as were the various antennas. The exhaust and shields were then installed and are a rather tight fit. With those in place, I clear coated the airframe and then started applying the decals. It was now that I discovered I should have painted the prop spinner white instead of black as Aeromaster had provided a black spiral instead of the usual white one.
 I had considerable issues with this sheet as the
markings tended to break up. The spiral on the prop was the worst, requiring a
goodly portion of it to be hand painted. Even after a nice coat of decal film, I
still had a few problems with the rest. Nothing that couldn't be patched, but
I'd rather have not had those sorts of issues. As the fuselage was rather
heavily overpainted, I was able to dispense with all but the most basic data
markings. Eventually, they were on on and the airframe given a coat of matte
clear.
I had considerable issues with this sheet as the
markings tended to break up. The spiral on the prop was the worst, requiring a
goodly portion of it to be hand painted. Even after a nice coat of decal film, I
still had a few problems with the rest. Nothing that couldn't be patched, but
I'd rather have not had those sorts of issues. As the fuselage was rather
heavily overpainted, I was able to dispense with all but the most basic data
markings. Eventually, they were on on and the airframe given a coat of matte
clear.
There were a few last minute items to attach such as the aileron mass balances, the drop tank and the nose guns. This plane apparently operated without main gear doors, which was not unusual for winter ops, especially late in the war and when the landing grounds would have been covered with quite a bit of snow.
| CONCLUSIONS |
I have quite a few Hasegawa 109s in my stash and I see no reason to get rid of them just because there is something newer out there. They build into very nice models right from the box and can usually be found on the second hand market for $15 or so. So if you are on a budget or have some of these already, consider building them. I'm sure you will be pleased with the results.
28 September 2018
Copyright ModelingMadness.com. All rights reserved.
If you would like your product reviewed fairly and fairly quickly, please contact the editor or see other details in the Note to Contributors.
Back to the Main Page Back to the Review Index Page Back to the Previews Index Page