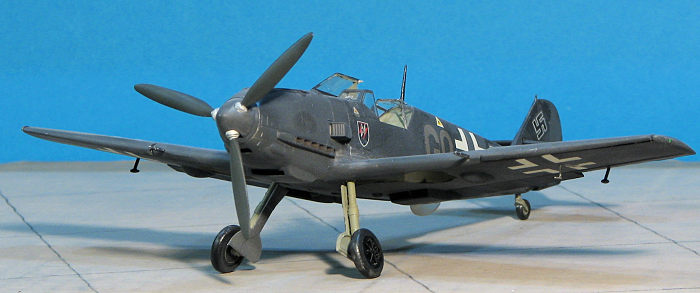
Hasegawa 1/48 Bf-109E 'Night Fighter'
| KIT #: | 09733 |
| PRICE: | 2600 yen SRP when new |
| DECALS: | Two options |
| REVIEWER: | Scott Van Aken |
| NOTES: | 2007 Limited Edition. |
| HISTORY |
Though most of you probably already know a ton about
the 109, I'll just say that the E model was the last of the 'square wing'
versions and about as far as the airframe could be modded in its current
configuration. It was the first of the production Daimler-Benz engine aircraft,
using the DB 601 as was
 offered in the later F model. It produced about a
thousand horsepower, which was a huge improvement over the lower powered Junkers
engines used in earlier variants. The Bf-109E-3 was built side by side with the
Bf-109E-1 at a 6 to 4 ratio. The difference was that the E-3 had two wing cannon
while the E-1 had machine guns in there. Neither were produced with head armor,
though that was later added. Several were retrofit with E-4 windscreen and
canopy with some others getting plumbed for either a drop tank or a bomb.
offered in the later F model. It produced about a
thousand horsepower, which was a huge improvement over the lower powered Junkers
engines used in earlier variants. The Bf-109E-3 was built side by side with the
Bf-109E-1 at a 6 to 4 ratio. The difference was that the E-3 had two wing cannon
while the E-1 had machine guns in there. Neither were produced with head armor,
though that was later added. Several were retrofit with E-4 windscreen and
canopy with some others getting plumbed for either a drop tank or a bomb.
Though pretty well gone from front line units on the Western Front by late 1941, it was still active up until that time, participating in combat on the Russian front and against Yugoslavia and Greece. Many were also sold to nations in the Axis like Hungary and Romania and Bulgaria where they were used for air defense and in the fight against the Russians. Some aircraft were converted to night fighters. In these instances, they were provided with homing beacons in an antenna under the fuselage. This was not radar, but did help ground controllers guide the pilot to the targets.
| THE KIT |
I don't think it would be too far from incorrect to state that Hasegawa may well have more boxings of the 1/48 109E than perhaps any other manufacturer in this scale, though it has probably been eclipsed by the Tamiya and Eduard kits in terms of detailing. In terms of ease of construction it is still well regarded.
When Hasegawa (and Tamiya) initially produced the E model 109,
both had incorrectly shaped nose sections. Those early kits can be
identified by a J kit number. The Jt boxings are
those that have been corrected. I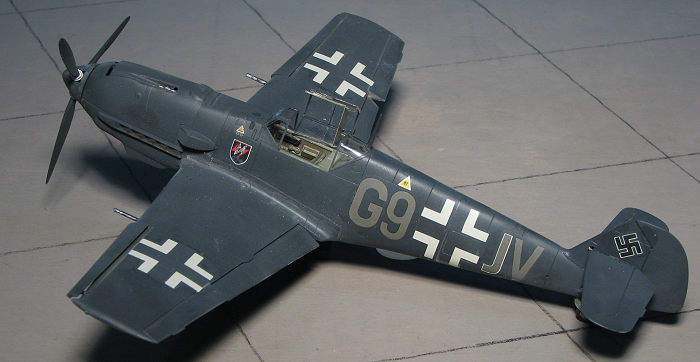 t has a respectable interior with belts molded onto the
seat. A small photo etch fret incorporates head armor and radiator grilles.
t has a respectable interior with belts molded onto the
seat. A small photo etch fret incorporates head armor and radiator grilles.
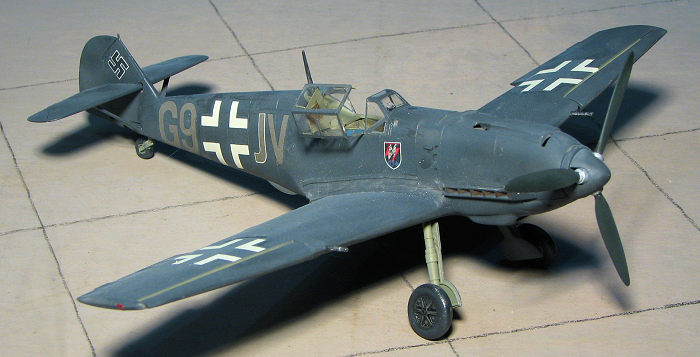
The kit offers lowered flaps as well as separate slats. There is a separate windscreen and canopy so you can pose it open if you so wish. This kit includes both the earlier canopy and windscreen used on the E-1/3 along with the later canopy and windscreen used on the E-4/7 variants. Though a bomb and rack are provided on the sprues, those are not used in this boxing. What is included in this one is a clear resin antenna housing. It is solid so there is no antenna.
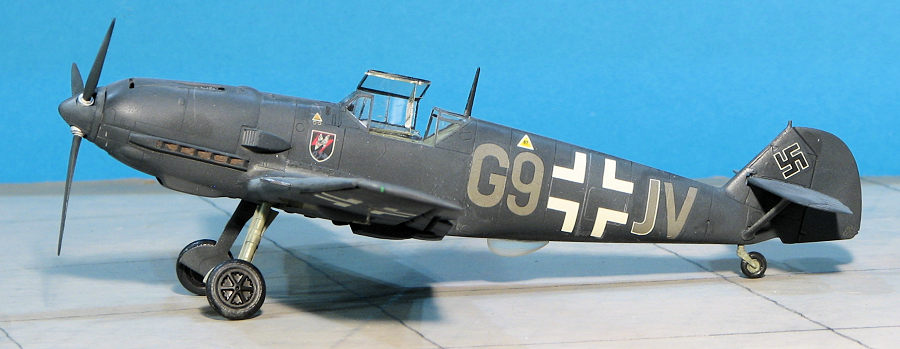
Instructions are well done with the usual Gunze paint references. Two options are included. One is the box art plane in overall dark grey from III./NJG 1 in October of 1941. The other is a plane from I.(J)/LG2 in April 1941 with a yellow nose, rudder, elevators, wing tips and trailing edges of the wings. The large decal sheet is well printed, but is the older version with whites that are off-white. It also includes many of the yellow bits used on the second option. Fortunately, 109E aftermarket decals are not difficult to find.
| CONSTRUCTION |
As with most aircraft, I started with the interior. Hasegawa provides a more than adequate interior and provides the option of using a decal for instruments or using the raised detail. Once I painted everything with RLM 02 (pretty much all E models and earlier had RLM 02 interiors), I started doing a bit of detail painting while assembling the interior. I then trapped the interior between the fuselage halves. Next I assembled the p.e. radiator and splitter and installed that.
 Moving to the lower wing, I installed
the wing radiator p.e. and then the upper wings. This was then attached to
the fuselage. I've always had issues with the lower rear wing fuselage join
on this kit and this time was no exception. I then attached the upper
cowling. It wasn't until later that I realized I forgot to glue in the guns
so those will be added later. Somewhere along the line, the prop hub went
missing so I couldn't glue in that part. Later, I used a section of sprue.
The supercharger intake was next. It was at this time, that I glued on the
lower fuselage radome. The instructions show its position. Next, the later
canopy pieces were masked and attached.
Moving to the lower wing, I installed
the wing radiator p.e. and then the upper wings. This was then attached to
the fuselage. I've always had issues with the lower rear wing fuselage join
on this kit and this time was no exception. I then attached the upper
cowling. It wasn't until later that I realized I forgot to glue in the guns
so those will be added later. Somewhere along the line, the prop hub went
missing so I couldn't glue in that part. Later, I used a section of sprue.
The supercharger intake was next. It was at this time, that I glued on the
lower fuselage radome. The instructions show its position. Next, the later
canopy pieces were masked and attached.
At this time, I painted the slat areas and the main gear wells with RLM 02. I then filled the gear wells and installed the slats. I also glued on the flaps along with the tailplanes and their struts. I attached the oleo scissors to the landing gear and painted the gear RLM 02 before setting those aside.
| COLORS & MARKINGS |
I had decided to build the night
fighter version. This was overall RLM 66 and for that, I used Tamiya German
Grey. Once the airframe was painted, along with the outer gear doors, I
gloss coated it in
 preparation for the decals. The Hasegawa decals took a
bit to come free from the backing paper as I did not use hot water on them.
I had no issues with them aside from the off white of the insignia. Then
snuggled right down after an application of Mr. Mark Softer, which is
designed for Japanese kit decals.
preparation for the decals. The Hasegawa decals took a
bit to come free from the backing paper as I did not use hot water on them.
I had no issues with them aside from the off white of the insignia. Then
snuggled right down after an application of Mr. Mark Softer, which is
designed for Japanese kit decals.
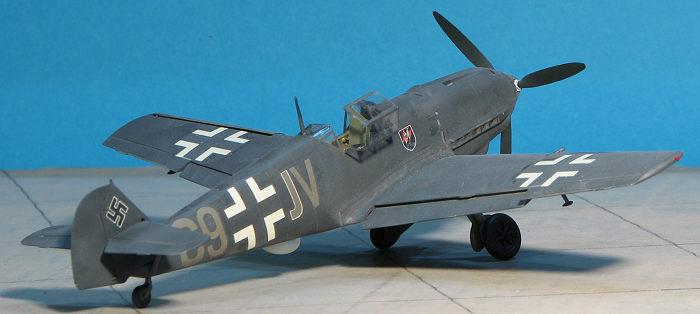
Then the kit was returned to the bench where the exhaust was painted using Vallejo's Tinny Tin. The smaller bits that I usually break off such as the radio mast and aileron balances were attached and painted. I'd somehow lost the pitot so a new one was made from sprue. A coat of Tamiya's clear matte sealed it all in and hazed the clear radome so you can't see there is nothing there. The clear bits were unmasked, the p.e. head armor was poorly attached and the canopy attached in the open position using Cementine clear glue.
| CONCLUSIONS |
So there you have it. This isn't a difficult kit to build, but my lack of motivation since late last year means it took about 8 months to complete. Despite the off white whites of the kit decals, they went on well and did not silver. I know there are more detailed E model 109s out there, but I like the Hasegawa offerings and I have quite a few of them in the stash. Well worth picking up as you can generally find them in the $20-25.00 range.
16 July 2021
Copyright ModelingMadness.com. All rights reserved. No reproduction in part or in whole without express permission.
If you would like your product reviewed fairly and quickly, please contact the editor or see other details in the Note to Contributors.