Hasegawa 1/48 Bf-109E-3
| KIT #: | 09108 (Jt8) |
| PRICE: | 2000 yen SRP when new |
| DECALS: | Four options |
| REVIEWER: | Scott Van Aken |
| NOTES: | 1993 release. |
| HISTORY |
 Though most of you probably already know a ton about
the 109, I'll just say that the E model was the last of the 'square wing'
versions and about as far as the airframe could be modded in its current
configuration. It was the first of the production Daimler-Benz engine aircraft,
using the DB 601 as was offered in the later F model. It produced about a
thousand horsepower, which was a huge improvement over the lower powered Junkers
engines used in earlier variants. The Bf-109E-3 was built side by side with the
Bf-109E-1 at a 6 to 4 ratio. The difference was that the E-3 had two wing cannon
while the E-1 had machine guns in there. Neither were produced with head armor,
though that was later added. Several were retrofit with E-4 windscreen and
canopy with some others getting plumbed for either a drop tank or a bomb.
Though most of you probably already know a ton about
the 109, I'll just say that the E model was the last of the 'square wing'
versions and about as far as the airframe could be modded in its current
configuration. It was the first of the production Daimler-Benz engine aircraft,
using the DB 601 as was offered in the later F model. It produced about a
thousand horsepower, which was a huge improvement over the lower powered Junkers
engines used in earlier variants. The Bf-109E-3 was built side by side with the
Bf-109E-1 at a 6 to 4 ratio. The difference was that the E-3 had two wing cannon
while the E-1 had machine guns in there. Neither were produced with head armor,
though that was later added. Several were retrofit with E-4 windscreen and
canopy with some others getting plumbed for either a drop tank or a bomb.
Though pretty well gone from front line units on the Western Front by late 1941, it was still active up until that time, participating in combat on the Russian front and against Yugoslavia and Greece. Many were also sold to nations in the Axis like Hungary and Romania and Bulgaria where they were used for air defense and in the fight against the Russians. Many also saw long service in fighter pilot schools and a few were used in early night fighter units, where they were not very successful when you think of the time expended in training and operating the aircraft. That particular role is the main subject for this boxing.
| THE KIT |
I don't think it would be too far from incorrect to state that Hasegawa may well have more boxings of the 1/48 109E than perhaps any other manufacturer in this scale, though it has probably been eclipsed by the Tamiya and Eduard kits in terms of detailing. In terms of ease of construction it is still well regarded.
 When Hasegawa (and Tamiya) initially produced the E model 109,
both had incorrectly shaped nose sections. Those early kits can be
identified by a J kit number. The Jt boxings are
those that have been corrected. In that light, this may well be Hasegawa's
first E-3 kit. It has a respectable interior with belts molded onto the
seat. A small photo etch fret incorporates head armor and radiator grilles.
When Hasegawa (and Tamiya) initially produced the E model 109,
both had incorrectly shaped nose sections. Those early kits can be
identified by a J kit number. The Jt boxings are
those that have been corrected. In that light, this may well be Hasegawa's
first E-3 kit. It has a respectable interior with belts molded onto the
seat. A small photo etch fret incorporates head armor and radiator grilles.
The kit offers lowered flaps as well as separate slats. There is a separate windscreen and canopy so you can pose it open if you so wish. Though a bomb and rack are provided on the sprues, those are not used in this boxing.
Instructions are well done with the usual Gunze paint references. All four options are in RLM 71/02/65 with some having fairly heavy side mottling and some having none. The first option is Josef Priller's plane with 6./JG 51 in 1940 based in Belgium. Next is a 6. JG/54 plane from the summer of 1941. This one has a very complex mottling design. Free from any mottling is Heinz Bar's plane when with 1./JG 51. Finally, the aircraft of the Kommodore of JG 2, also bereft of mottling. The large decal sheet is well printed, but should not be used unless you like whites that are very much off white. Fortunately, 109E aftermarket decals are not difficult to find.
| CONSTRUCTION |
 As usual, I started off by painting all the bits that would
take RLM 02, which included the interior parts, gear wells and the inside of
the main gear doors. The cockpit is quite straight forward and you are
provided a decal in case you want to use it for the instrument panel. While
no seat harness is provided, there is some harness detail on the seat
itself. When the sidewalls were detailed a little, all the cockpit items
were brought together. The instrument panel and gun sight were then added
while there was room to get to them. The p.e. oil radiator grille was built
up and installed in one fuselage halve along with the cockpit. Note that you
can install the grille section after the fuselage halves have been glued
together.
As usual, I started off by painting all the bits that would
take RLM 02, which included the interior parts, gear wells and the inside of
the main gear doors. The cockpit is quite straight forward and you are
provided a decal in case you want to use it for the instrument panel. While
no seat harness is provided, there is some harness detail on the seat
itself. When the sidewalls were detailed a little, all the cockpit items
were brought together. The instrument panel and gun sight were then added
while there was room to get to them. The p.e. oil radiator grille was built
up and installed in one fuselage halve along with the cockpit. Note that you
can install the grille section after the fuselage halves have been glued
together.
Next, the wings were built up and this includes the etched radiator grilles, which fit very nicely into the housings. The wings were then glued chut and the flaps added. The slats were pushed into place in preparation for painting. I had to trim one a bit as it was a tad too long. I then installed the tailplanes, but not the braces. The upper cowling was then glued into place. I forgot to install the gun barrels so that is something that would cause a bit of concern later in the build. Next item was to mask the canopy and attach it. The front and rear sections of the cockpit housing were glued in place and the canopy section was simply pushed into place so I could pose it open later.
| COLORS & MARKINGS |
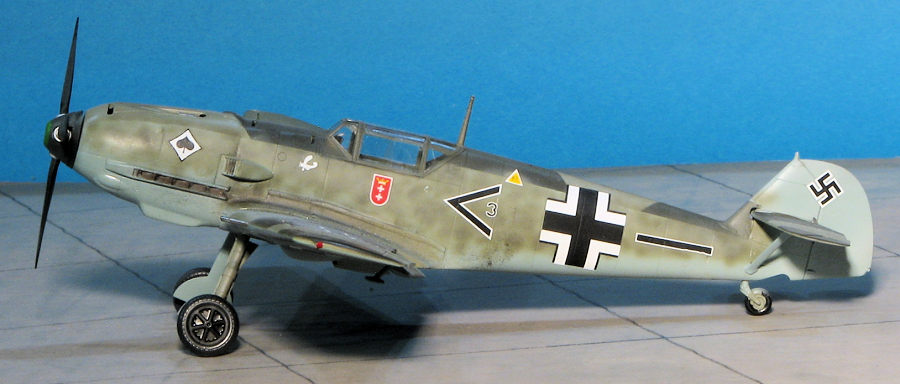
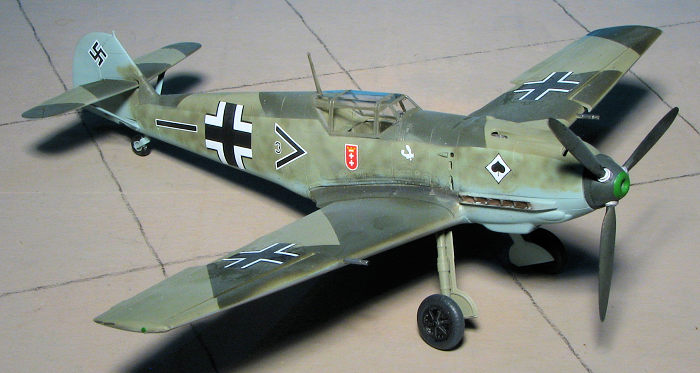
 Now it was time to paint. In this case, I decided to do an RLM
71/02/65 scheme and used a set of LF camouflage masks. These work quite well
and you can easily remove and reapply them to get things properly lined up.
They are a vinyl type of mask. I also found them to be a bit more work than
the usual kabuki tape I normally use. You have to be quite careful of the
order in which you paint things and often I found myself repainting areas.
Not that they are not useful, as they are. They just seemed to me to take a
bit longer. I used Mr.Color lacquers with all three shades and got
exceptional results.
Now it was time to paint. In this case, I decided to do an RLM
71/02/65 scheme and used a set of LF camouflage masks. These work quite well
and you can easily remove and reapply them to get things properly lined up.
They are a vinyl type of mask. I also found them to be a bit more work than
the usual kabuki tape I normally use. You have to be quite careful of the
order in which you paint things and often I found myself repainting areas.
Not that they are not useful, as they are. They just seemed to me to take a
bit longer. I used Mr.Color lacquers with all three shades and got
exceptional results.
Once all was dry, I returned to the bench to install the main landing gear legs and the wheels. I used no aftermarket parts in this though I will admit that the overall detail would have improved had I used a resin cockpit and wheels. With the wheels installed, I gloss coated everything with what is now the replacement for Future. Sprayed it right out of the bottle and it went on perfectly. It was at this time that I went looking for a scheme. I found a nice one that one rarely sees in Kagero's 'Luftwaffe's Baptism of Fire', one of their Top Colors offerings, I'd already used one set of markings from this to do a Spanish Civil War E-1 so knew the decals are quite good.
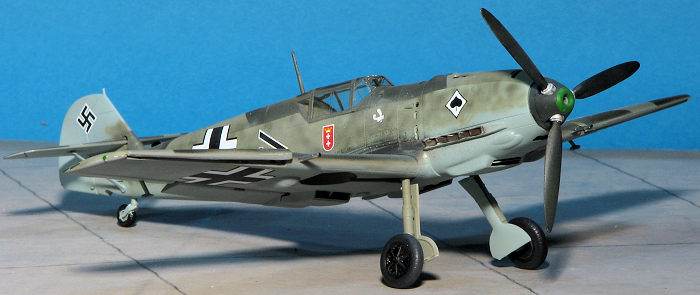
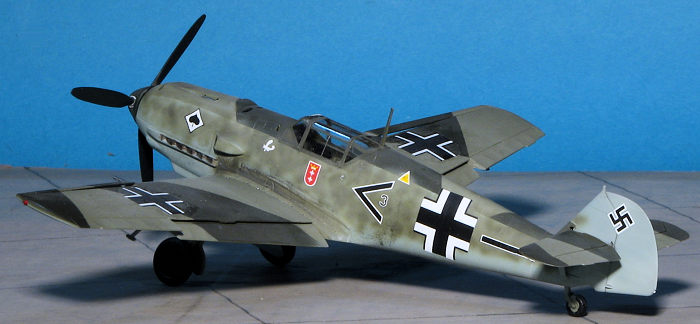
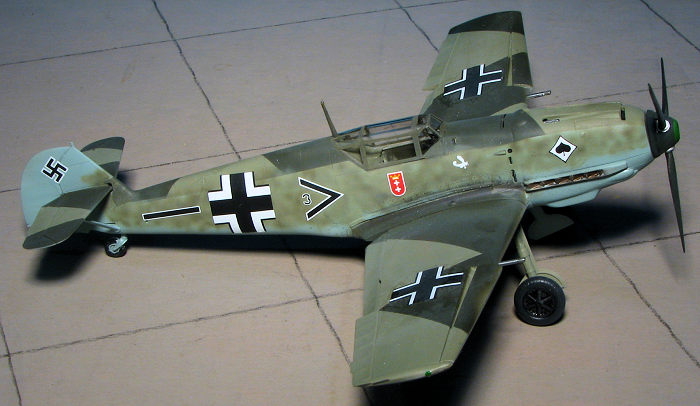 This option had a lot of side mottling on the fuselage so that
had to be added to the scheme. This mottling was in RLM 71 and RLM 02. One
thing I noticed is that the RLM 71 mottling turned out quite light, nearly
as light as the 02. Still it was fun to paint and when dry, clear coated.
Now the 'trouble' with using Kagero decals is that these did not come with
common markings. The kit decals were out of the question as they were simply
too old and yellowing. What I had to do was to use a mixture of Microscale,
Three Guys, and KP decal sheets to get the insignia in place. When that was
done, the unique markings from the Kagero sheet were added. These are nice
decals but don't give you a lot of time to work with them as the glue
dissipates rather quickly compared to some other decals. The scheme is for a
plane from Stab II./JG 53 based at Mannheim, Germany in April 1940.
This option had a lot of side mottling on the fuselage so that
had to be added to the scheme. This mottling was in RLM 71 and RLM 02. One
thing I noticed is that the RLM 71 mottling turned out quite light, nearly
as light as the 02. Still it was fun to paint and when dry, clear coated.
Now the 'trouble' with using Kagero decals is that these did not come with
common markings. The kit decals were out of the question as they were simply
too old and yellowing. What I had to do was to use a mixture of Microscale,
Three Guys, and KP decal sheets to get the insignia in place. When that was
done, the unique markings from the Kagero sheet were added. These are nice
decals but don't give you a lot of time to work with them as the glue
dissipates rather quickly compared to some other decals. The scheme is for a
plane from Stab II./JG 53 based at Mannheim, Germany in April 1940.
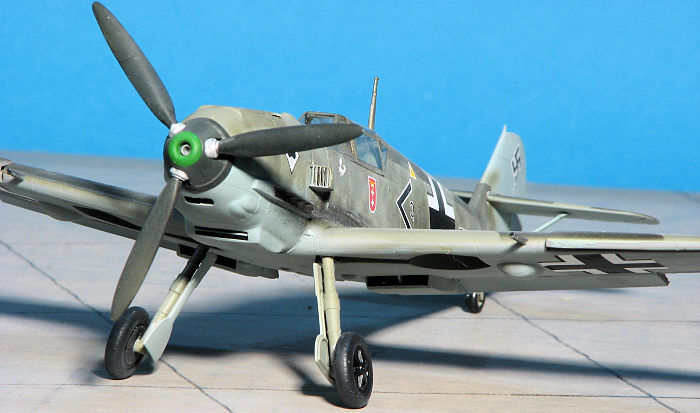
With the decals in place, I started adding all the final pieces like landing gear doors, pitot tube and the aileron mass balances. A bit more painting was needed in terms of the prop/spinner and doing the exhaust. It was then given a coat of near-matte clear using Tamiya paint. The guns were painted and installed followed by the exhaust. I then removed the masking. Naturally, I somehow lost the pitot tube even though it was one of the last things attached.
| CONCLUSIONS |
So there you have it. Yes, it is not the latest and greatest. There are other more detailed kits on the market. However, it is a known quality and I have a lot of them still in the kit stash. Add to it that there is a ton of aftermarket for it if you want to add to it. Though it has been a while since Hasegawa released this kit, they are not at all difficult to find.
October 2021
Copyright ModelingMadness.com. All rights reserved. No reproduction in part or in whole without express permission.
If you would like your product reviewed fairly and fairly quickly, please contact the editor or see other details in the Note to Contributors.