Fly 1/72 Bf-108B 'Taifun'
| KIT #: | 72032 |
| PRICE: | $25.00 plus shipping |
| DECALS: | Sixteen options |
| REVIEWER: | Scott Van Aken |
| NOTES: | Two full kits. Resin. |
| HISTORY |
Originally designated the M 37, the aircraft was designed as a four-seat sports/recreation aircraft for competition in the 4th Challenge International de Tourisme (1934). The M 37 prototype flew first in spring 1934, powered by a 250 PS (247 hp, 184 kW) Hirth HM 8U 8.0 litre displacement, air-cooled inverted-V8 engine, which drove a three-blade propeller.
 Although it was outperformed by several other aircraft in the competition, the M
37's overall performance marked it as a popular choice for record flights.
Particular among these traits was its low fuel consumption rate, good handling,
and superb takeoff and landing characteristics.
Although it was outperformed by several other aircraft in the competition, the M
37's overall performance marked it as a popular choice for record flights.
Particular among these traits was its low fuel consumption rate, good handling,
and superb takeoff and landing characteristics.
The Bf 108A first flew in 1934, followed by the Bf 108B in 1935. The Bf 108B used the substantially larger, 12.67 litre displacement Argus As 10 air-cooled inverted V8 engine. The nickname Taifun (German for "typhoon") was given to her own aircraft by Elly Beinhorn, a well-known German pilot, and was generally adopted.
The Bf 108 was adopted into Luftwaffe service during World War II, where it was primarily used as a personnel transport and liaison aircraft. The aircraft involved in the Mechelen Incident was a Bf 108.
Production of the Bf 108 was transferred to occupied France during World War II and production continued after the war as the Nord 1000 Pingouin.
| THE KIT |
For decades, the only real option for a 1/72 Bf-108 has been the Heller kit. It is a nice kit, but is a bit simplified in some areas. Thankfully, Fly models has produced this kit in a modern tooling that also includes resin parts for additional detail. This particular boxing has two full kits and a killer decal sheet.
The resin bits are for the engine face, oil cooler, aileron mass balances, pitot tube, prop hubs, and several interior items. The interior has two front seats and a rear bench seat. Control sticks are resin and the rudder pedals are molded onto the forward bulkhead. There are side panes with nice detail and you are provided a nice instrument panel with raised detailing. After installing the rear quarter windows, this is all trapped between the fuselage halves.
 In front, the resin engine face fits into the forward cowling
piece, You are provided three props. One is a plastic single piece wooden prop.
Others have metal props with one having a vaned spinner. The instructions
provide no information on what prop is used on what option. You also cannot tell
from the markings guide.
In front, the resin engine face fits into the forward cowling
piece, You are provided three props. One is a plastic single piece wooden prop.
Others have metal props with one having a vaned spinner. The instructions
provide no information on what prop is used on what option. You also cannot tell
from the markings guide.
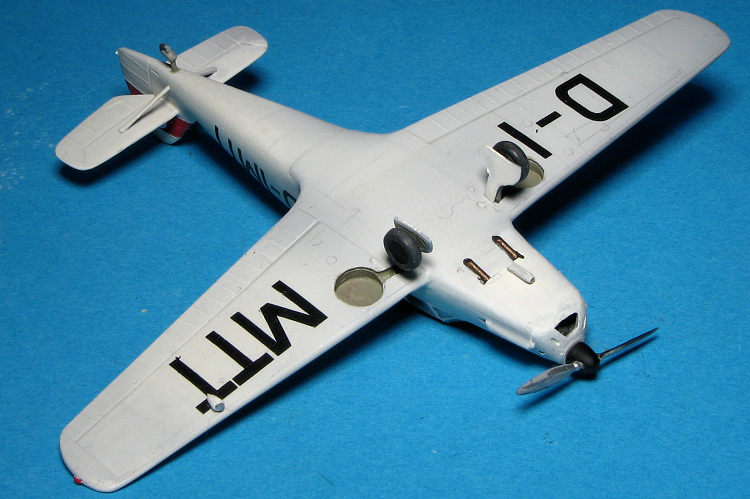
With the fuselage closed, the canopy section is added as well as the wheel well inserts in the lower wing. The wing is then assembled and attached. In the back are the tailplanes and their struts along with the rudder and the tail wheel. you have to fill in part of the rudder hinge line. I guess the one there is for the post war French builds. For under the wings are the aileron mass balances, landing light, and pitot. An exhaust piece fits in the lower fuselage. Wheels and struts have nice detail, unlike the toy-like ones with the Heller kit. The gear doors are the last thing to install.
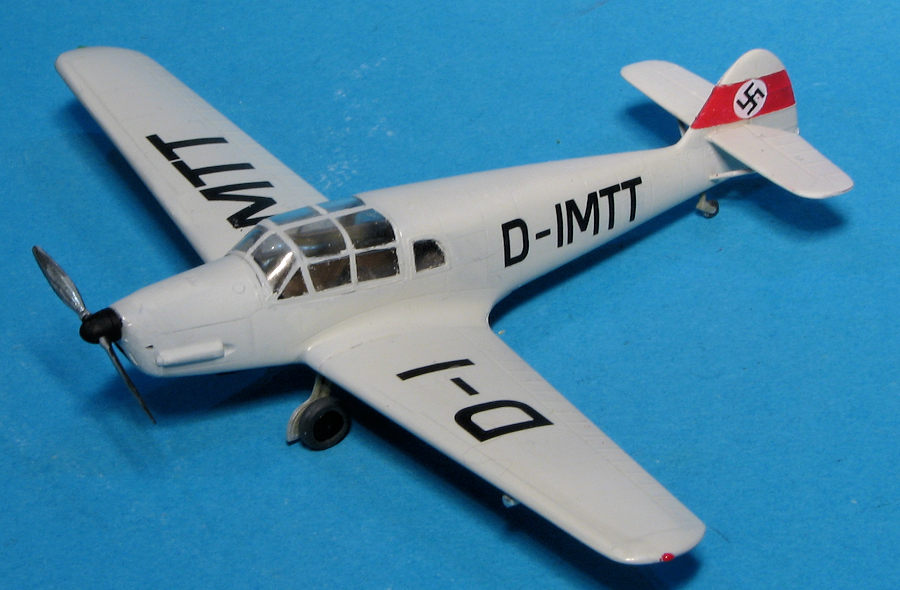
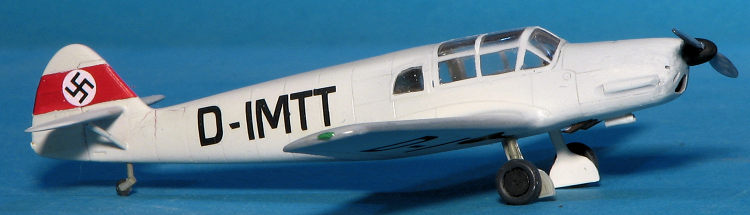
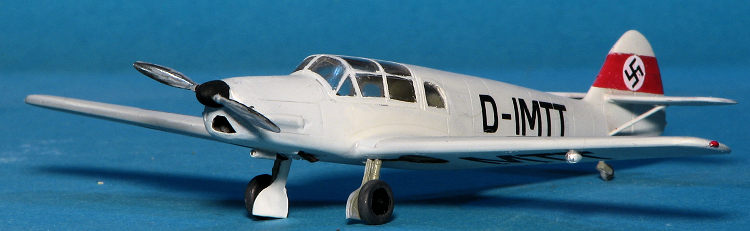
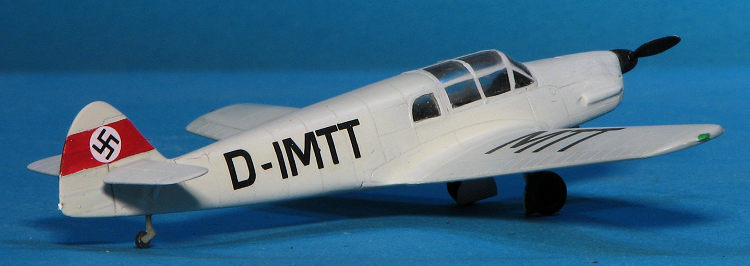
Instructions are nicely drawn and provide color information using the AK line of paints (which I'm sure everyone has). The paint chart is on the side of the box. I won't go into the full list of markings options as you can see these in the accompanying image. The decal sheet is very nicely done and will provide a good source of markings for your Heller kit. Note that rudder and tailplane stripes will have to be painted as will the red tail band on the early German civil markings. I would have liked to have seen more Luftwaffe options as many units had at least one of these as a hack. However, Fly has a dedicated Luftwaffe boxing along with several others.
| CONSTRUCTION |
I was looking for something to build after a recent completion and, instead of picking something well engineered and easy, I gravitated towards this Fly kit. It only has one sprue plus some resin detail parts. What could go wrong?
 First thing I did was remove the fuselage and wing parts and
clean up the attachment points. I also test fit a few items to be sure the
shallow ejector towers wouldn't interfere. Then I started building the interior.
Initial gluing occurred on the seats and while the bench seat fit well, the
front seat backs seemed a bit narrow. The resin center section was next after
which the fore and aft bulkheads were attached to the floor pan. The front one
has the rudder pedals molded in place. Resin is used for the control sticks and
what I guess is either the flap handle or parking brake.
First thing I did was remove the fuselage and wing parts and
clean up the attachment points. I also test fit a few items to be sure the
shallow ejector towers wouldn't interfere. Then I started building the interior.
Initial gluing occurred on the seats and while the bench seat fit well, the
front seat backs seemed a bit narrow. The resin center section was next after
which the fore and aft bulkheads were attached to the floor pan. The front one
has the rudder pedals molded in place. Resin is used for the control sticks and
what I guess is either the flap handle or parking brake.
I first attached the seats after painting the interior with RLM 02 as recommended by the instructions. You can really paint it a number of shades as restored planes have medium grey and several shades of leather. I did paint the seats and side pockets a brownish leather shade. This was followed by the side panels which are an OK fit, but not great. I then taped the fuselage halves together and test fit installing the interior from the underside. This seemed to work well so after installing the quarter windows and masking them, I assembled the fuselage halves.
This turned out to be a bit of a mistake. You see, the engine face piece is supposed to fit into the forward cowling piece. No way will this work because not only is there a large ejector tower in the way, but the upper piece of the resin engine face won't allow it. So I glued it into one of the fuselage halves. You really won't even see much unless you shine a flashlight in there so you could just as easily use a blanking plate made from plastic card. With the fuselage halves together, I attached the forward cowling piece. This fit well but had torn free from the sprue during shipping and there was a fairly large divot to fill.
 During this process I also drilled out the small vents on the
forward cowling piece and the holes for the attachment of the resin oil cooler
on the underside. I also chose to attach the instrument panel to the anti-glare
panel instead of the interior assembly to make sure it fit properly. I was not
surprised to find that the curvature of the panel and the attachment area were
not the same.
During this process I also drilled out the small vents on the
forward cowling piece and the holes for the attachment of the resin oil cooler
on the underside. I also chose to attach the instrument panel to the anti-glare
panel instead of the interior assembly to make sure it fit properly. I was not
surprised to find that the curvature of the panel and the attachment area were
not the same.
I then installed the interior on reflection, I should have trimmed the forward area of the upper sidewalls where they meet the instrument panel. This is because when I installed the wing, the wing would not fit well. I ground off a fair amount of the bottom of the interior until I got an OK wing fit, but it wasn't great and resulted in more sanding and filler.
Next step was to mask and attach the canopy. This fit fairly well. I then attached the tailplanes, though broke one of the supports so had to make another one out of spare plastic. Now was a good time to paint as the airframe was mostly together.
| COLORS & MARKINGS |
 et
them to tear. With the markings in place, the airframe was given a clear
coat to seal in the decals.
et
them to tear. With the markings in place, the airframe was given a clear
coat to seal in the decals. | CONCLUSIONS |
Well, I still have the second kit to build, but I learned a lot from this one and that should help when #2 is finally completed. It is a much more accurate kit than the old Heller offering, but not easier to build. I guess one has to choose between simplicity and ease of construction or a higher level of detail and a more difficult build. For those with experience building short run kits, this would be the choice.
| REFERENCES |
https://en.wikipedia.org/wiki/Messerschmitt_Bf_108_Taifun
27 January 2023
Copyright ModelingMadness.com. All rights reserved. No reproduction in part or in whole without express permission from the editor.
If you would like your product reviewed fairly and fairly quickly, please contact the editor or see other details in the Note to Contributors.
Back to the Main Page Back to the Review Index Page Back to the Previews Index Page