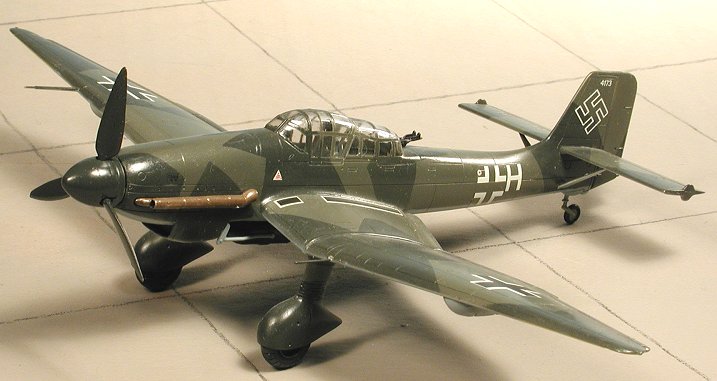
Fujimi 1/72 Ju-87D-8
|
KIT # |
F-16 |
|
PRICE: |
$12.00 |
|
DECALS: |
One aircraft |
|
REVIEW : |
|
|
NOTES: |
Builds either a D-5 or D-8 |
|
HISTORY |
Despite the obsolescence of the Ju-87 aircraft, there was really nothing else that performed the job that the Stuka was doing in the Eastern front. Unlike the Western front where the Ju-87 had proven to be easy meat in 1940, the Russian front was one that was so large that the Luftwaffe could easily have local control of the skies. In this environment as well as in the Balkans where there was little opposition, the Stuka was still a viable weapons platform.
 Needing an
upgraded aircraft, Junkers added a more powerful Jumo 211 engine, upped the
armament and the carrying capability. There were also some aerodynamic
improvements to the wheel pants, tail struts and canopy sections in addition to
the new engine 'power egg'. The new version was the Ju-87D and it was
immediately liked by pilots who had flown the older versions.
Needing an
upgraded aircraft, Junkers added a more powerful Jumo 211 engine, upped the
armament and the carrying capability. There were also some aerodynamic
improvements to the wheel pants, tail struts and canopy sections in addition to
the new engine 'power egg'. The new version was the Ju-87D and it was
immediately liked by pilots who had flown the older versions.
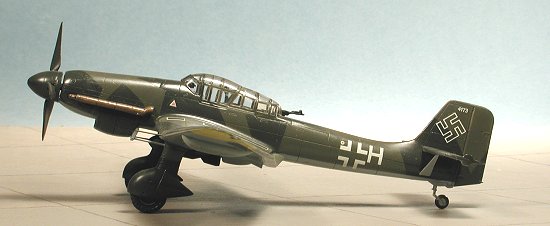
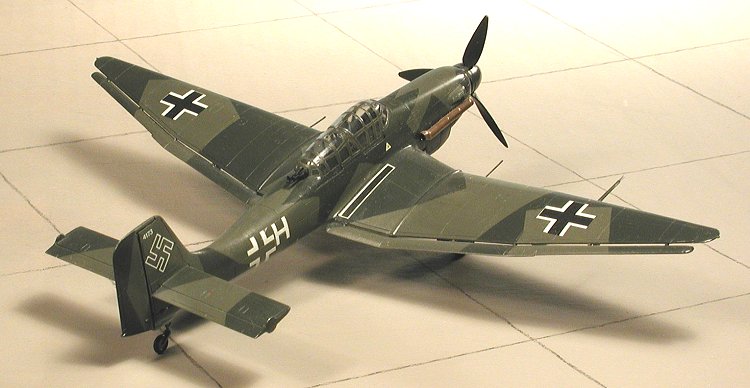
In order to even more increase carrying capabilities, the Ju-87D-5 came out with a wing of increased span. Basically it was a lengthening of the wing tips that gave this increased span. In addition, the dive brakes were removed from the aircraft. This plane was not designed for dive bombing, but solely for ground attack. A subtype of the D-5 was the Ju-87D-8. This variant could be spotted by its new flame dampening exhaust. The D-8 was optimized for the night intruder role and as such had the twin forward firing MG 17 machine guns replaced by MG1/51/20 cannon. The type served until the end of the war.
|
THE KIT |
For those of you who are unfamiliar with Fujimi kits, there was a time in the mid/late 1980s when they produced some of the finest kits around. Their A-7, F-86 and A-4 kits are still the best there are in 1/72 and are unlikely to be replaced by any others. As it typical with kits of this period, the panel lines are engraved, there are multiple bits and pieces for the different variants of the aircraft. Interiors are sparse by today's standards, but are complete, though you might find the instrument panel and side consoles to be decals instead of raised details. This kit can do either a Ju-87D-5 or a Ju-87D-8
 The
canopy on this kit is a single piece and a bit thick but quite clear. Weapons
include a centerline bomb as well as under wing bomb racks with smaller bombs.
Decals are for two aircraft, both from the Russian front and painted basically
the same in RLM 70/71 over 65 with yellow wing tips. The D-5 has a yellow
fuselage band. Kit instructions are quite good and easy to follow. Paints are
geared to the Gunze Sangyo line, which is pretty typical of many Japanese kits.
Decals are a bit thick as one would expect, but historically, they fit quite
well and need no setting solution.
The
canopy on this kit is a single piece and a bit thick but quite clear. Weapons
include a centerline bomb as well as under wing bomb racks with smaller bombs.
Decals are for two aircraft, both from the Russian front and painted basically
the same in RLM 70/71 over 65 with yellow wing tips. The D-5 has a yellow
fuselage band. Kit instructions are quite good and easy to follow. Paints are
geared to the Gunze Sangyo line, which is pretty typical of many Japanese kits.
Decals are a bit thick as one would expect, but historically, they fit quite
well and need no setting solution.
|
CONSTRUCTION |
Shall we start with the cockpit? Very well. This is basically a floor with seats, control stick, instrument panel. There is some sidewall detail, but it is minimal and you won't be able to see much of it. A decal is provided for the instrument panel, which is really quite adequate in this scale. The interior was painted RLM 02 as were the fuselage insides and the wheel hubs. Had I been more into Luftwaffe back in 1989 when this kit was built, I'd have painted it RLM 66, but I slavishly followed the kit instructions in this regard!
 While
waiting for the interior to dry, I opened the required holes in the wings and
glued them together. Fit was superb with very little filler needed. I also glued
the wheel pants together, trapping the wheels in them in the process. These were
later sanded down and what filler needed, applied.
While
waiting for the interior to dry, I opened the required holes in the wings and
glued them together. Fit was superb with very little filler needed. I also glued
the wheel pants together, trapping the wheels in them in the process. These were
later sanded down and what filler needed, applied.
I then set about installing the radiators to the underside of the wing and also putting them into the fuselage halves. The prop shaft was also installed at this time. When the interior was done, it was trapped between the fuselage halves and the fuselage glued. The usual filler was applied to the fuselage seams and sanded down. Take special care of the tail wheel as it is molded into one fuselage side. I personally don't like this arrangement, but there it is. Once the fuselage was cleaned up, the wings were attached. Fit here is excellent and no filler was used on the upper surfaces, though I did use some on the aft attachment point.
The next thing glued on were the tailplanes. These were attached without the struts. This was done to facilitate painting. After that, the canopy was glued in place and masked. Last bits attached were the bomb shackles, but not the bomb. The plane was now ready for the paint shop
|
PAINT |
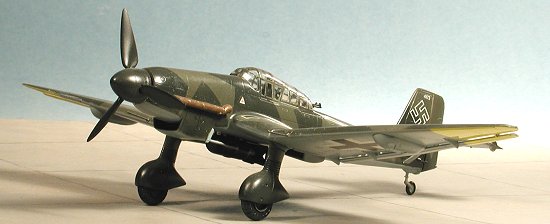
This particular aircraft was painted in standard colors of RLM 70/71 upper and RLM 65 lower. This kit had yellow wing tips so those areas were first painted white. Other than this white, all other colors used are Gunze acrylics. The wing tips were then painted a pale yellow and when dry masked off. The underside was then painted RLM 65 as were the tailplane struts.
The RLM 65 was masked and the rest of the plane painted RLM 71 dark green. Then that area was masked off using low tack tape and the plane painted RLM 70 as was the prop and spinner. The wheel pants were painted overall RLM 70 as per the instructions. There was the usual back and forth painting to take care of overspray, but basically, that was it for paint. The bomb was painted in RLM 70.
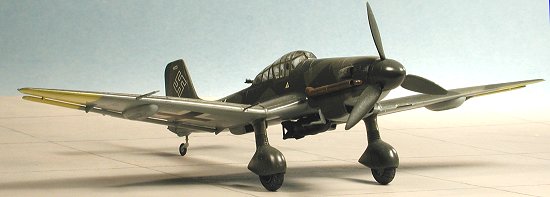
 The wheel hubs were painted RLM
02 and the tires painted a very dark grey. This was done with a brush and the
wheel spun in the mount when one area was dry to get to another. Not very fancy,
but it works. The landing gear was then glued into the slots in the lower wing.
Actually, they fit so well, that glue probably wasn't needed. The tailplane
struts were glued in place as was the bomb, pitot tube, antenna mast and the
machine guns.
The wheel hubs were painted RLM
02 and the tires painted a very dark grey. This was done with a brush and the
wheel spun in the mount when one area was dry to get to another. Not very fancy,
but it works. The landing gear was then glued into the slots in the lower wing.
Actually, they fit so well, that glue probably wasn't needed. The tailplane
struts were glued in place as was the bomb, pitot tube, antenna mast and the
machine guns.
Now that everything was dry, the decals were applied. They gave me absolutely no trouble and fit very well. I did not use Future under these as the Gunze dries to a semi-gloss. Besides, I was overseas at this time and had run out of Future and clear matte finishes (having taken everything I thought I'd need with me when I was originally sent over).
The last things attached were the exhaust, which were painted with a bottle of 'Jet Exhaust' color. Actually, this color sucks and it was probably the only kit I ever used it on! The masking was taken off and the kit was complete. Over the years and several moves, the radio mast has disappeared and while it would be easy enough to make a new one, I haven't gotten around to it yet.
|
CONCLUSIONS |
Needless to say, this kit is probably the finest 1/72 Ju-87 on the market. It is relatively hassle free and builds into a great kit. Probably the most difficult thing about it will be finding one. These kits have been unavailable here in the US for a long time, though they are sporadically reissued in Japan.
Copyright ModelingMadness.com. All rights reserved. No reproduction in part or in whole without express permission from the editor.
Review kit courtesy of me and my wallet!
If you would like your product reviewed fairly and fairly quickly, pleasecontact the editor or see other details in the Note to Contributors.