ProModeler 1/48 Ju-52
|
KIT # |
5944 |
|
PRICE: |
$33.98 |
|
DECALS: |
See Review |
|
REVIEW BY : |
|
|
NOTES: |
|
|
HISTORY |
The Allies had the C-47 and the European Axis had the Ju-52. A definite jack of all trades, the 'Tante Ju' was seen in every theater of operations. Built about the same time as the DC-1, but not with the sophistication of the Douglas product, the '52 first saw service with Lufthasa Airlines. It's carrying ability was not lost on the new Luftwaffe and it was quickly turned into a bomber version. It saw action in Spain in that role as well as that of normal cargo transport.
The production run of the Ju-52 was not that long compared to the C-47 and only about 4,500 aircraft were built, including those manufactured post-war. Their lumbering speed and the decimation of a huge number of them in the taking of Crete meant that as the war continued, the number of Ju-52s decreased. While there were always plans made to produce a replacement, the Ju-352 was only built in a very few numbers.
Despite the huge losses during the war, the Ju-52 went on to serve in a number of Air Forces. They were produced in France and Spain well after the war ended. Probably the last military Ju-52s were the three of the Swiss Air Force which were retired in the mid 1980s. Today, there are still a few of them flying the warbird circuit and they are in many museums the world over.
|
THE KIT |
 Promodeler's kit of the Ju-52 comes in a huge box, similar to
the one that holds the 1/48 C-47 and B-29. There are well over 150 parts in
Monogram's (I guess that should be Revell's) typical medium grey plastic.
Detailing is superb as one would expect from the designers of all those
excellent kits over the years. The instruction sheet is typical of a ProModeler
sheet with each step logically sequenced and color call-outs throughout the
sheet. There are two decal options; one for a Spanish Civil War bomber and
another for the Crete operation in 1941. It has a typical Scalemaster sheet in
that it is out of register as are all the Scalemaster sheets I have ever gotten
with a ProModeler kit.
Promodeler's kit of the Ju-52 comes in a huge box, similar to
the one that holds the 1/48 C-47 and B-29. There are well over 150 parts in
Monogram's (I guess that should be Revell's) typical medium grey plastic.
Detailing is superb as one would expect from the designers of all those
excellent kits over the years. The instruction sheet is typical of a ProModeler
sheet with each step logically sequenced and color call-outs throughout the
sheet. There are two decal options; one for a Spanish Civil War bomber and
another for the Crete operation in 1941. It has a typical Scalemaster sheet in
that it is out of register as are all the Scalemaster sheets I have ever gotten
with a ProModeler kit.
Options are for a bomber version complete with the underfuselage 'dustbin' gun emplacement. For this you need to cut a hole in the floor. This version also has wheel spats. The other option is a regular troop carrier. You get four paratrooper figures so that you can do a diorama with the kit. One thing I noticed is that, like Fujimi Bf-109s, all versions of the Ju-52 are provided for in the fuselage and floor parts. There are enough hatches and doors scribed on them to enable one to do a multitude of variants. Unfortunately, figuring out how to fill in those doors and hatches on a corrugated surface are beyond my abilities. To my understanding, rarely did one fine a '52 with all of those options on one airframe! One just needs to hope that one doesn't run across a Junkers 'experten' if displaying this kit at a contest!!
|
CONSTRUCTION |
 Without sounding too trite, construction begins with the interior! In fact, you
will be spending a lot of time doing this part, mostly because of the huge
number of bits and pieces that go in there. While I was assembling this section,
I also glued together the wings and wheels. The wheels are nicely flat spotted
on the bottom. The instructions tell you that if you are doing an in-flight
aircraft (the only way you can pose the 'dustbin' gun emplacement in the down
position) to simply turn the wheels around and hide them in the wheel 'spats'.
The spats are not typical of the troop carrier version later in the war, though
you can find pictures of them.
Without sounding too trite, construction begins with the interior! In fact, you
will be spending a lot of time doing this part, mostly because of the huge
number of bits and pieces that go in there. While I was assembling this section,
I also glued together the wings and wheels. The wheels are nicely flat spotted
on the bottom. The instructions tell you that if you are doing an in-flight
aircraft (the only way you can pose the 'dustbin' gun emplacement in the down
position) to simply turn the wheels around and hide them in the wheel 'spats'.
The spats are not typical of the troop carrier version later in the war, though
you can find pictures of them.
I also glued the wings. These
are very long indeed, and both of mine were warped. Not really that much of a
surprise, considering their length, but one that needs careful gluing. One of my
wings worked out great and the other didn't . It needed lots of filing and
filling to correct. 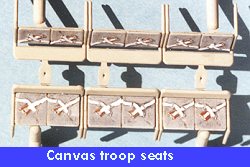
Rather than a blow-by-blow account of all the interior pieces, I'll hit a few spots. First of all, try to glue as many of the partitions in place prior to painting as possible. These require some fiddling to get right. Be especially careful of installing the cockpit to cabin doors as they don't want to fit too well. Clamps are required when gluing the floor onto the left fuselage half. Same when doing the other fuselage half. All the little bits fit rather well, but on the right fuselage half there is a small crank. This is for the radio operator's long wire antenna. The instructions are not too clear on mounting, but you need to mount it on the higher of the two small longerons to have it fit properly when assembling the fuselage halves.
 I'm not sure how much one can
see in the interior when it is done, but like most of you, I will detail the
heck out of the inside, only to have 95% of it be invisible from the outside.
Typical of me and large Monogram kits! Interior color is RLM02 grey and for
that, I used Aeromaster's enamels. After the details were painted, the sections
were washed and drybrushed to bring out details.
I'm not sure how much one can
see in the interior when it is done, but like most of you, I will detail the
heck out of the inside, only to have 95% of it be invisible from the outside.
Typical of me and large Monogram kits! Interior color is RLM02 grey and for
that, I used Aeromaster's enamels. After the details were painted, the sections
were washed and drybrushed to bring out details.
Once all the bits and pieces have been installed, painted, washed and drybrushed, it was time to glue the two fuselage halves together. Now this kit is unusual in that it also has a top and a bottom. Except for the interior, there is only the tail and the very front nose section that are joined together at this time. One has to be very careful during this process to ensure everything is properly aligned with the slots on each fuselage side. Don't forget to trap the tail wheel in its strut. I almost forgot about it!

In order to ensure good fit, the bottom was attached before the fuselage sides had completely dried. This way, the not-quite set fuselage side could be tweaked a bit to get a good fit. Filler isn't really an option over most of the fuselage as the corrugations make any attempt at repair problematical at best. Undoubtedly one of the trickiest parts for me was the addition of the upper fuselage section. Were I to do another kit, I would remove the mounting tabs as they tended to give me quite a struggle. The downside of taking them off is that if the fuselage isn't straight, it will look horrible. The end result isn't as good a fit as I got with the rest, there being several gaps that needed filled.
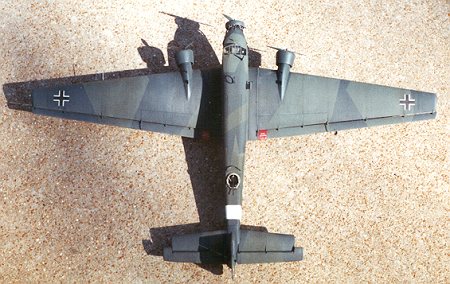
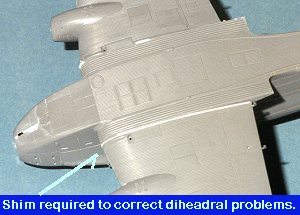 Next are the wings. Man,
these things are really huge. I'd say it has an even longer span the the Tamiya
Betty and similar to the Monogram DC-3. I decided to glue the top part of the
wing root first so if there were any glitches, they'd be on the bottom where
they weren't as likely to be easily see. After a day of drying, the bottom
section of the wing roots were glued. As I had feared, the wings were not the
same dihedral. This meant a shim was needed on one wing. I used a piece of
.30x.30 Evergreen strip plastic to make up the difference. It worked just fine
and with all that corrugation, almost looks like it belongs there. The few gaps
that happened with filled and carefully sanded.
Next are the wings. Man,
these things are really huge. I'd say it has an even longer span the the Tamiya
Betty and similar to the Monogram DC-3. I decided to glue the top part of the
wing root first so if there were any glitches, they'd be on the bottom where
they weren't as likely to be easily see. After a day of drying, the bottom
section of the wing roots were glued. As I had feared, the wings were not the
same dihedral. This meant a shim was needed on one wing. I used a piece of
.30x.30 Evergreen strip plastic to make up the difference. It worked just fine
and with all that corrugation, almost looks like it belongs there. The few gaps
that happened with filled and carefully sanded.
The landing gear were my next step. I really wanted to use the beefier early version gear, but had committed myself to a mid-war aircraft with the thinner gear. The gear and mountings don't look like they'd be strong enough to hold up such a large aircraft, but the parts fit just fine once they were glued together. At this time, the canopy was also installed. Fit wasn't as good as I had expected and there were a few gaps that needed filled, which I did using white glue.
While all that was going on, the engines were attended to. The shields, cylinders and pushrod casings were all painted flat black. The engines were then drybrushed with steel. The exhaust and intakes were painted burnt iron and steel. They were then inserted into the cowlings and then filled with tissue in preparation for painting. As a note on the engines, the bits that attach to the engine cylinders all look the same, but they are not. Make sure that those parts shown as for the nose engine go on that engine or you will cause yourself grief when it comes time to install them on the fuselage. The engines were then set aside for painting. They will be installed as one of the final steps.
 The final bits to be glued on
prior to painting were the horizontal stabilizers, elevators, and ailerons. The
horizontal stabilizers have tongues on them that are supposed to interlock. They
seem to me to be too long and they interfere with each other when trying to
install the stabs. I cut the tongues back about 2/3 of the way before gluing the
stabilizers in place. Once they were glued in and before they dried, I dry
fitted the aft struts in place to make sure they fit. They just snap in place.
Once the stabs were dry, the struts were removed to facilitate painting.
The final bits to be glued on
prior to painting were the horizontal stabilizers, elevators, and ailerons. The
horizontal stabilizers have tongues on them that are supposed to interlock. They
seem to me to be too long and they interfere with each other when trying to
install the stabs. I cut the tongues back about 2/3 of the way before gluing the
stabilizers in place. Once they were glued in and before they dried, I dry
fitted the aft struts in place to make sure they fit. They just snap in place.
Once the stabs were dry, the struts were removed to facilitate painting.
The elevators fit just beautifully and do not need to be glued in place until the final assembly. If you are painting yours yellow, it would be a good idea to wait until then. Since I am not doing that scheme, I glued them on at this time, leaving them in a down position that is so often seen on large aircraft at rest. The ailerons were not as easy as the elevators. They are a very long, skinny molding that was slightly warped. This makes gluing it in place a bit difficult. It also didn't help that I had bent several of the trailing edge attachment points while working on this huge kit. The ailerons were glued in stages to ensure a good, tight fit. I would recommend against superglue for those of you in a hurry. You really need the strength of a solvent glue for these parts. Once done, it was off to the paint shop!
|
PAINT & DECALS |
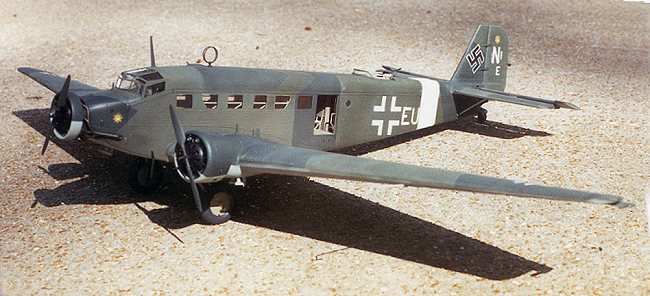
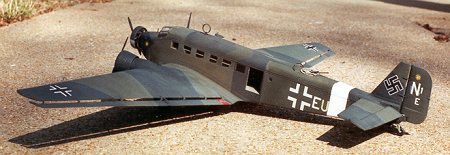
Now that the airframe was basically complete, it was painted. I left off all the actuating arms, antenna and other little bits that would be broken off during this session. I find that it is much easier to completely paint the aircraft, then go back, add the 'fussy bits' and then repaint those areas. Since this was to be a North African aircraft from IV./TG 3, I didn't need any yellow areas. I chose a scheme that I saw in the old Ju-52 in Action book. In fact, according to my reference, this aircraft only had a white fuselage band. Though I really wanted to do a Norway based Ju-52 with it's large white wing bands or nose band, the lack of any available unit insignia kept me from doing one of these planes.
 Anyway, all the requisite clear bits were masked and using
Aeromaster RLM 70/71 and 65 enamels, the airframe was painted according to the
kit diagrams. You will use a lot of paint on this kit, that is for sure.
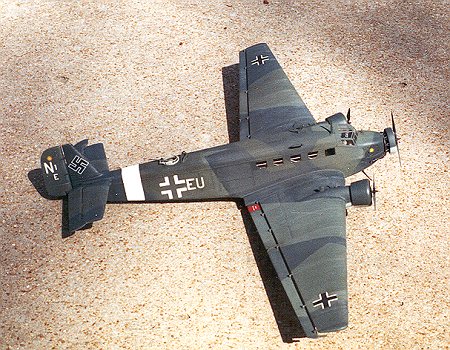
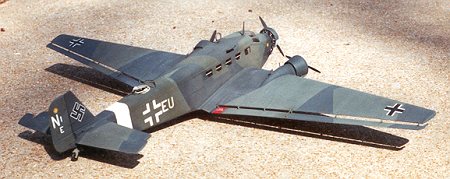
First, the undersides were painted RLM 65 blue. When dry, the undersides of the
horizontal stabilizers and elevators were masked and the upper surface painted
RLM 71 dark green. Then the white area for the fuselage band was painted
white. When that was dry, the 71 areas and the white band I wanted to keep were
masked and the remaining areas painted RLM 70 black green. Though there are
masking sets for the camo pattern on the '52, I have better things to do with
$20. Splinter patterns really are easy to do, though this one took a LOT of
tape. It also took a lot of time. There is so much aircraft to paint, that
it had to be done in stages.
Anyway, all the requisite clear bits were masked and using
Aeromaster RLM 70/71 and 65 enamels, the airframe was painted according to the
kit diagrams. You will use a lot of paint on this kit, that is for sure.
First, the undersides were painted RLM 65 blue. When dry, the undersides of the
horizontal stabilizers and elevators were masked and the upper surface painted
RLM 71 dark green. Then the white area for the fuselage band was painted
white. When that was dry, the 71 areas and the white band I wanted to keep were
masked and the remaining areas painted RLM 70 black green. Though there are
masking sets for the camo pattern on the '52, I have better things to do with
$20. Splinter patterns really are easy to do, though this one took a LOT of
tape. It also took a lot of time. There is so much aircraft to paint, that
it had to be done in stages.
Finally the painting was done. The last go around was when all the little bits and pieces such as oil coolers and antenna were added. Then those pieces and the surrounding areas were painted the appropriate colors. When all had dried, the areas where decals go were sprayed with Future.
Decals are a bit of a quandary. There are no aftermarket decals for this kit, and, as of this writing, it has been on the market for a year! The only choice is to give the kit decals a try to see how well they may work, a real challenge on the kit's corrugated surface.
Well, the decals reacted much better than I would have thought. When applying the first one, I placed the decal and then let it dry, blotting it as the instructions suggested. It sort of lay on top of the corrugations. Then, I applied Champ setting solution. That helped quite a bit, though I smeared a bit of the decal when trying to get air bubbles out of it. For the rest of the decals, I found the best way to do it was to apply solution to the surface, put the decal on it and then reapply the Champ.
 While Champ makes mush out of Aeromaster and Superscale decals,
the Monogram ones are surprisingly resilient. They do eventually succumb, though
on most of the decals there were air bubbles trapped in the corrugations. This
meant several sessions of poking the bubbles and reapplying the
Champ. However, not is all well with the decals. Some of them refused
to cooperate and wouldn't settle down. These were slit to assist in conforming,
but let the underside color show through. Others had clear areas with lots of
bubbles showing in them that refused to go away. These trouble spots were
painted with the appropriate color or underlying color. Not a perfect solution,
but one that was successful.
While Champ makes mush out of Aeromaster and Superscale decals,
the Monogram ones are surprisingly resilient. They do eventually succumb, though
on most of the decals there were air bubbles trapped in the corrugations. This
meant several sessions of poking the bubbles and reapplying the
Champ. However, not is all well with the decals. Some of them refused
to cooperate and wouldn't settle down. These were slit to assist in conforming,
but let the underside color show through. Others had clear areas with lots of
bubbles showing in them that refused to go away. These trouble spots were
painted with the appropriate color or underlying color. Not a perfect solution,
but one that was successful.
Finding code letters and unit insignia was another real problem. By scrounging through some Modeldecal 1/72 RAF letter sheets, I was able to get most of the white code letters. The Brit and German style is similar enough to use them interchangeably without any real problem. As with the Hasegawa Hs-126, getting a colored letter the right size was a real problem, not to mention finding unit badges! None of the RAF ones were large enough to use in the color I needed. However, I did stumble across an old 1/48 Microscale sheet that had a 'U' that was close enough and by combining two of them, I was able to get the right height. The unit insignia were from a 1/72 ESCI sheet and while not large enough, were the best I could find.
|
FINAL CONSTRUCTION |
Now that the kit was painted and the decals applied (a process that actually took several weeks), the final bits needed to be added. This included the bracing struts for the horizontal tailplanes, the landing light, the gunner's position and the engines. The engines were tackled first by gluing in place the outboard engines. These had the exhaust pipes painted burnt iron and the interior bits painted black. I had thought of drilling them out, but that would not have really improved things too much.
The front engine was a bit of a more complicated process. The engine had the exhaust glued to it and then it was glued to the mount. There is a cross-over piece that includes some sort of cooler that fits on the underside of the fuselage. This was supposed to be fit in place in an early assembly sequence, but the clever builder will hold off. There are two ways to fit this and only one is the best way. The instructions don't tell you which is which. You will find out after the exhaust are in place by dryfitting. Getting the crossover pipes from the exhaust to glue up to the cooler pipes is also a real challenge that needs a steady hand, superglue, and accelerator. Then you can fit on the front engine cowl ring if you choose. It was not uncommon for the Ju-52 to fly with this uncowled.
Finally, an application of clear matte sealed everything in place. Then the pastels came out to add some exhaust and general grunge. When satisfied, that was clear matted into place. Then the many masks were taken off the windows and the fuselage antenna added. At last!! A very nice, large scale Ju-52. Something to hog a lot of space in my display cabinet full of German WW2 aircraft.
|
CONCLUSIONS |
Really a very nice kit and well done. I can only hope that enough of these were sold to make it worthwhile for ProModeler. I know that I bought two of them! The only problem with the kit is where to put it when done. It really is quite an imposing kit when done. Though not the same bulk as the DC-3, the wingspan is comparable. If you have the space for it, I can highly recommend building it.
|
REFERENCES |
Junkers Ju-52 In Action #10, by Uwe Feist, 1973
Copyright ModelingMadness.com April 2000
Review copy courtesy of me and my wallet!!
Copyright ModelingMadness.com. All rights reserved. No reproduction in part or in whole without express permission from the editor.
If you would like your product reviewed fairly and fairly quickly, please contact the editor or see other details in the Note to Contributors.