| KIT #: | 02003 'Priller Combo' |
| PRICE: | 3000 yen SRP |
| DECALS: | Three options |
| REVIEWER: | Scott Van Aken |
| NOTES: | Includes two kits |
| HISTORY |
 Such was the success and robustness of the Fw-190 that it was slated to replace
the Ju-87 in areas that required a ground attack aircraft that wasn't a sitting
duck when it came to enemy air defenses. The radial engine was much more able to
take damage and return its pilot home than the liquid cooled Jumo that powered
the Ju-87. The 190 was also able to carry nearly as much of an offensive load
and be able to protect itself against enemy fighters if met. Another plus was
that the FW-190 was a much smaller aircraft than the Junkers aircraft.
Such was the success and robustness of the Fw-190 that it was slated to replace
the Ju-87 in areas that required a ground attack aircraft that wasn't a sitting
duck when it came to enemy air defenses. The radial engine was much more able to
take damage and return its pilot home than the liquid cooled Jumo that powered
the Ju-87. The 190 was also able to carry nearly as much of an offensive load
and be able to protect itself against enemy fighters if met. Another plus was
that the FW-190 was a much smaller aircraft than the Junkers aircraft.
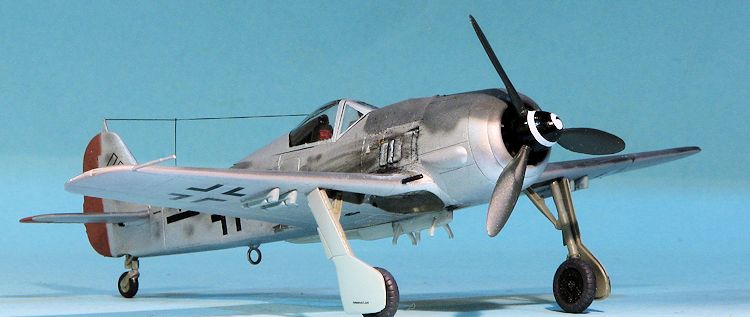
The F-8 was a derivative of the A-8 fighter and both were built at the same time and carried much of the same equipment. The major difference was the installation of wing bomb racks on the F-8 version as well as some extra armor and the deletion of the outer wing guns.
| THE KIT |
This isn't really going to be a 'Pips' Priller build. I needed an FW-190A from which to steal parts and I knew I'd not do two of his planes so one was chosen. The kit itself is standard Hasegawa 1/72 FW-190, but comes with the bits in each kit to do either an A-5, A-6 or A-8 variant. That means an additional upper gun cowling piece for the smaller 7.7mm guns in the A-5 version and a new pitot tube as this was placed farther inboard on the earlier variants.
 The cockpit is basic but adequate with a seat, stick and instrument panels.
Decals for the instruments and side consoles. There is a single piece cowling
with some detail, but it is all but hidden behind the engine cooling fan. The
wing is a single lower section with two upper halves. There are a lot of holes
on the insides of these parts and you simply open whichever ones are required
for the variant you are doing. As these are all fighter version, you get the
centerline rack with tank and none of the bomb stuff.
The cockpit is basic but adequate with a seat, stick and instrument panels.
Decals for the instruments and side consoles. There is a single piece cowling
with some detail, but it is all but hidden behind the engine cooling fan. The
wing is a single lower section with two upper halves. There are a lot of holes
on the insides of these parts and you simply open whichever ones are required
for the variant you are doing. As these are all fighter version, you get the
centerline rack with tank and none of the bomb stuff.
The only canopy supplied is the early 'flat' version and that is two pieces with a separate windscreen and separate moveable canopy section. You get both early and late headrests but will only need the early one. Landing gear come with retraction struts and there is a single piece main gear door. The tail wheel is molded in place. For a prop, you get separate blades and spinner, all which mount on the engine cooling fan piece.
Instructions are well done with Gunze paint references. All three decal options are in RLM 74/75/76 with yellow rudder and lower cowling. Mottling is relatively light. These markings cover an A-5, an A-6 and an A-8 variant and are nicely printed. There are swastikas and the black areas behind the exhaust are included on the sheet.
| CONSTRUCTION |
 As I had stupidly removed the lower wing shell ejector chutes
based on Hasegawa's instructions in another build, I decided to go ahead and use
that wing for an F-8 build using this kit and the bomb racks from the other. So I opened the holes for the centerline rack and
the wing racks in the lower wing. I also painted all the bits while still on the sprue even though I knew I'd be repainting many of them when I scraped the mold
seams from the parts. The paint does, actually, make these mold seams easier to
see.
As I had stupidly removed the lower wing shell ejector chutes
based on Hasegawa's instructions in another build, I decided to go ahead and use
that wing for an F-8 build using this kit and the bomb racks from the other. So I opened the holes for the centerline rack and
the wing racks in the lower wing. I also painted all the bits while still on the sprue even though I knew I'd be repainting many of them when I scraped the mold
seams from the parts. The paint does, actually, make these mold seams easier to
see.
Hasegawa provides decals for the instruments and that is more than adequate for this aircraft due to the tiny cockpit opening. I did, however, fork over the $11 for a set of prepainted Luftwaffe fighter harnesses from Eduard, though only one of the five sets is for the 190. The lap belts were attached to the seat prior to installation and once all the cockpit bits were in place, the fuselage halves were closed. The two halves were warped, but this is as much due to the lack of stiffness in the fuselage center section as anything as ever Hasegawa 1/72 190 I've built is like this.
Once that was done, the upper gun cowling piece was attached.
Fit here is not the greatest, but is apparently prototypical as it seems the gun
covers were not a great fit. I then applied the usual filler to
 the seams and
smoothed things out. The wings were assembled minus the racks and glued on.
Worst fit is at the rear as the other areas fit very well. Tailplanes were
installed as was the forward engine cowling piece I then filled the cockpit with
tissue and sprayed the area behind it with RLM 66. As with the interior bits, I
used Tamiya German Grey, which is a good substitute.
the seams and
smoothed things out. The wings were assembled minus the racks and glued on.
Worst fit is at the rear as the other areas fit very well. Tailplanes were
installed as was the forward engine cowling piece I then filled the cockpit with
tissue and sprayed the area behind it with RLM 66. As with the interior bits, I
used Tamiya German Grey, which is a good substitute.
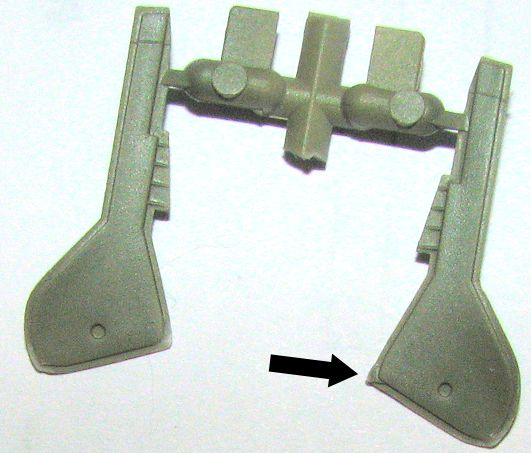
That being completed, the canopy and windscreen were masked. I then attached the windscreen and then installed the head rest in the canopy. This was then glued on and it was pretty much ready for paint. In the meanwhile, I worked on the gear doors. These took a bit more work than one would think. You see, Hasegawa along with many other kit makers, tend to have the sprue attachment point intrude into the kit part. In this case, it is the very thin part of the edge of the gear door. The only way to make it look good is to remove this excess plastic, which is not all that easy. The method that works best for me is to use a low speed, low torque, battery powered motor tool. I then grind away the offending plastic lumps until they are gone. A bit time consuming, but it works. You can also use files if you don't like motorized tools. You can see from the image the results of this and how it looks before the work is done. Each gear door has three sprue attachment points.
Before heading for the paint shop, I drilled out the wing and nose guns using a #78 drill bit and then glued on the canopy in the closed position.
| COLORS & MARKINGS |
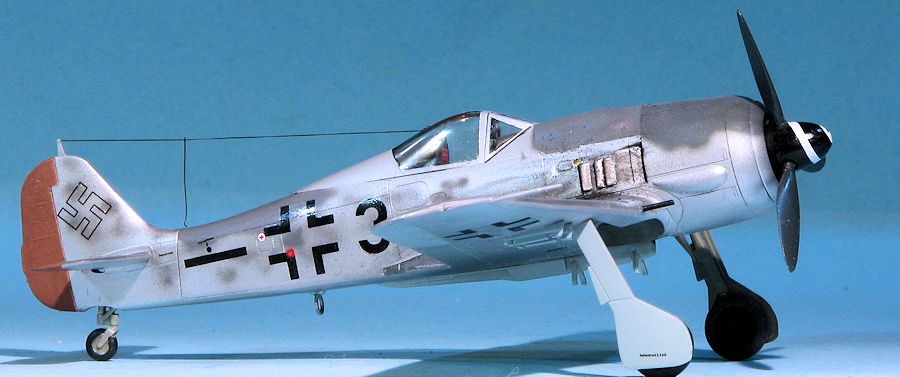
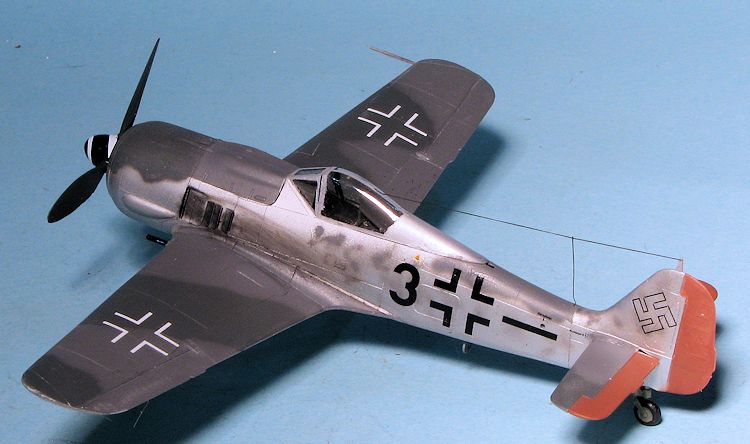
 This particular aircraft has an interesting history. It was
one in which the pilot placed his girl friend into the radio compartment and
flew to US forces at the end of the war. Every year after they were married, the
couple travelled to where they were lucky enough to escape the horrors of being
captured by the Russians. The aircraft itself is mostly unpainted metal with
primered rudder and elevators. Planes at this time had components produced at
widely separated locales and then brought together for assembly. In this case,
the upper wings, upper horizontal stabs and part of the upper fuselage were in
RLM 74/75 with some mottling. The wing and fuselage underside were unpainted
save for the bottom of the ailerons and the lower horizontal stabs along with
the gear doors.
This particular aircraft has an interesting history. It was
one in which the pilot placed his girl friend into the radio compartment and
flew to US forces at the end of the war. Every year after they were married, the
couple travelled to where they were lucky enough to escape the horrors of being
captured by the Russians. The aircraft itself is mostly unpainted metal with
primered rudder and elevators. Planes at this time had components produced at
widely separated locales and then brought together for assembly. In this case,
the upper wings, upper horizontal stabs and part of the upper fuselage were in
RLM 74/75 with some mottling. The wing and fuselage underside were unpainted
save for the bottom of the ailerons and the lower horizontal stabs along with
the gear doors.
I first primered everything and then masked all but the wings
and tail planes. These areas were given a freehanded camo scheme using RLM 74/75
from the Model Master enamel line. I then masked around the elevators and
rudder, painting them with Vallejo Saddle Brown as the closest I had in my
paints to the RLM's primer brown. I also painted the bomb racks in RLM 76. I
then painted the upper fuselage and later
 did some light mottling using the RLM
75. The wheel wells were brush painted RLM 02 and the landing gear attached.
This is a fairly loose fit so I used super glue. I also replaced one of the
broken guns with small diameter brass tubing. I should have replaced the other
as well.
did some light mottling using the RLM
75. The wheel wells were brush painted RLM 02 and the landing gear attached.
This is a fairly loose fit so I used super glue. I also replaced one of the
broken guns with small diameter brass tubing. I should have replaced the other
as well.
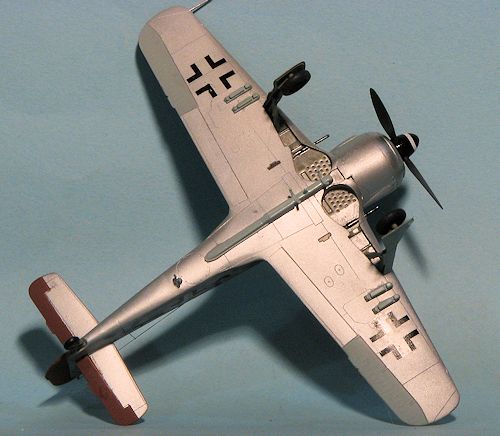
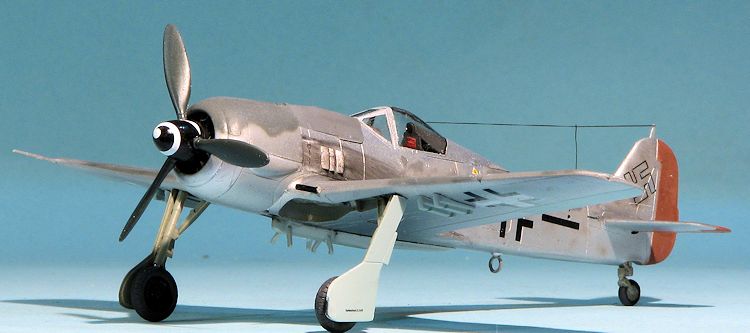
The upper wings and rear fuselage got a coat of clear gloss in preparation for decals. For this aircraft I used Eagle Cals 72-166 that I reviewed about a week back. There are a ton of stencils supplied and I used quite a few of them to do Black 3 and FW-190A-8 from 5./SG 2 in the last month of the war.
With the markings in place, a coat of clear matte was applied to the camouflaged areas. Despite a couple of applications of setting solution, I had a some silvering. I then attached some of the last bits which included the bomb racks, gear doors and wheels. I did not include bombs as its last flight would have been without them. I used some EZ-line for the radio antenna and some pastels for the exhaust. The last step was to push on the prop and that was it.
| CONCLUSIONS |
 I have
developed a fondness for the FW-190 over the last ten years or so ago that I did
not have previous to this. I'd actually though the plane was rather 'boring',
not having the variety of camo schemes that one finds on the 109. Yet there is
enough out there to make some pretty nice models. The Hasegawa kit is often
considered the best out there, even after Airfix's recent release. However, I
think it may well have been usurped by the new Eduard kit, which is today's kit
preview. Regardless, it makes into a great little model and unlike the Eduard
kit, is not fiddly to build. If you have them, build them. If you find one at a
nice price, go ahead and pick it up and give it a go. I think you'll be pleased.
I have
developed a fondness for the FW-190 over the last ten years or so ago that I did
not have previous to this. I'd actually though the plane was rather 'boring',
not having the variety of camo schemes that one finds on the 109. Yet there is
enough out there to make some pretty nice models. The Hasegawa kit is often
considered the best out there, even after Airfix's recent release. However, I
think it may well have been usurped by the new Eduard kit, which is today's kit
preview. Regardless, it makes into a great little model and unlike the Eduard
kit, is not fiddly to build. If you have them, build them. If you find one at a
nice price, go ahead and pick it up and give it a go. I think you'll be pleased.
November 2015
Copyright ModelingMadness.com
Thanks to me for the review kit. Thanks to Eagle Cals for the decal sheet.
If you would like your product reviewed fairly and fairly quickly, please contact the editor or see other details in the Note to Contributors.