Admiral 1/72 Fw-190A-4 'Jabo'
|
KIT # |
No kit number anywhere. Perhaps it was their first release. |
|
PRICE: |
Do not remember |
|
DECALS: |
Two aircraft |
|
REVIEW: |
|
|
NOTES: |
Short run with etched fret, resin parts and injected canopy |
|
HISTORY |
The Fw-190A-4 was the link between the early 190 variants and
the later ones. It had many of the airframe
 mods that would be standard and
pretty well unchanged in later versions, yet still had the short nose of the
early 190s. It was built is relatively large numbers and used on all fronts. It
was the A-4 version that finally got an engine reliable enough where fires were
not a constant worry.
mods that would be standard and
pretty well unchanged in later versions, yet still had the short nose of the
early 190s. It was built is relatively large numbers and used on all fronts. It
was the A-4 version that finally got an engine reliable enough where fires were
not a constant worry.
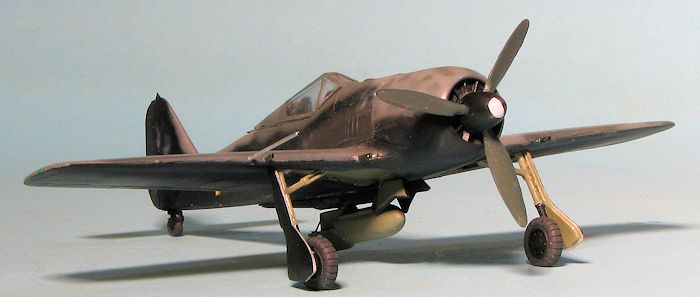
The Jabo version is one that is outfitted with a bomb rack and able to carry up to a 500kg bomb. Normally the lighter 250kg version was carried to allow more range. The ground attack 190s were initially just field modified fighter versions, however with the advent of the 190A-5 fighter variant, the F and G models were purpose built for ground attack on the assembly line. Many Jabo units were used for hit and run night attacks on British bases during 1942/43 and the 190A-4 was the aircraft of choice due to its speed and ability to defend itself once the ordnance load was gone.
|
THE KIT |
This is the first I have seen of an Admiral kit and I have to put it into the
pigeon-hole of 'typical Czech short-run kit'. About the only thing different is
that it has an injected canopy. Resin is used for the interior, bomb rack, bombs
and wheels, while the etched fret has interior parts and the fins for the bomb.
There is also a short piece of very sharp metal rod that I immediately stuck in
the end of my finger when opening the bits bag. The single sprue contains the
rest of the airframe parts, and also includes, oddly enough, a plastic bom
The kit is fairly well molded, though the detailing is just a touch 'soft'.
Panel lines are lightly engraved and the wheel well is complete, though a bit
shallow. There really isn't that much else to say about it as there are not many
parts!
Instructions are basic, but
adequate for the job of building the kit. There are two decal options and a very
complete set of color guides for the aircraft in question. RLM colors are given
so painting shouldn't be a problem. One aircraft is from I/JG 54 and painted in
what is shown as RLM 70/71 over 76 with white areas on the upper surface. OK, I
can go for that as JG 54 had some rather unique paint schemes. The other is for
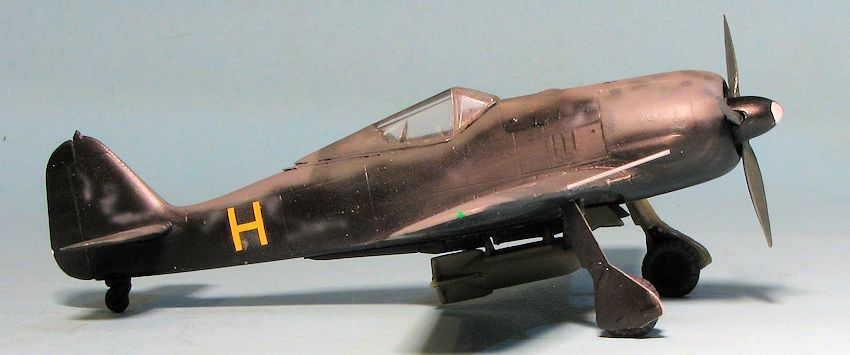
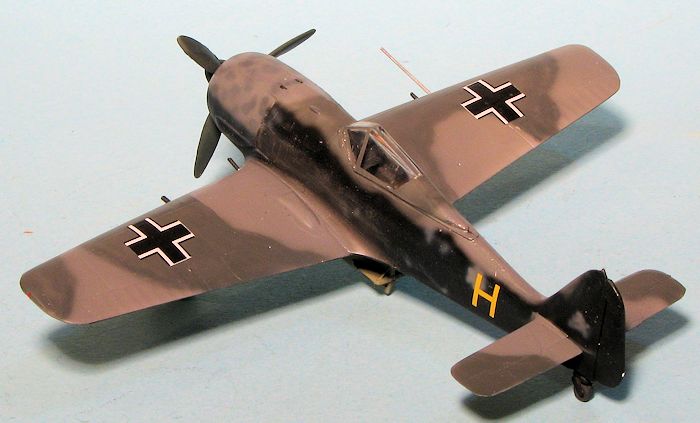
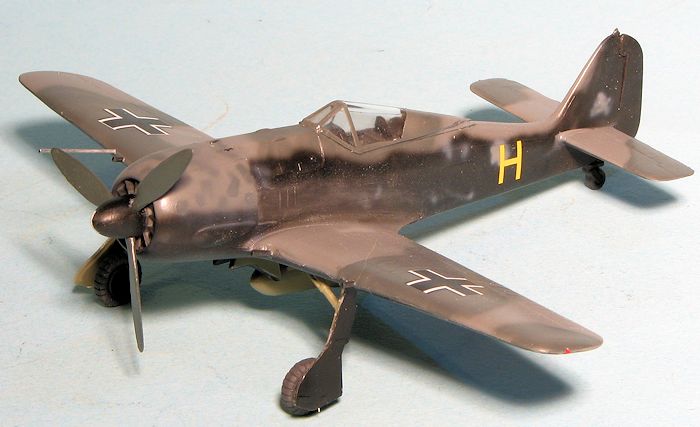
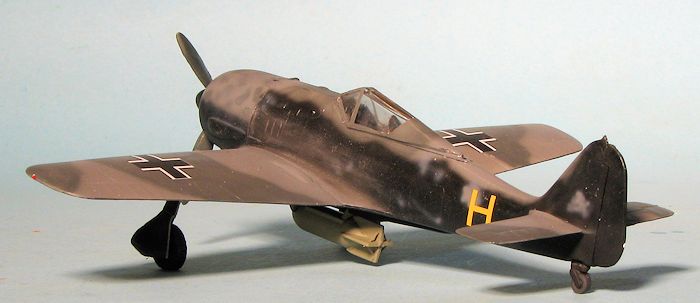
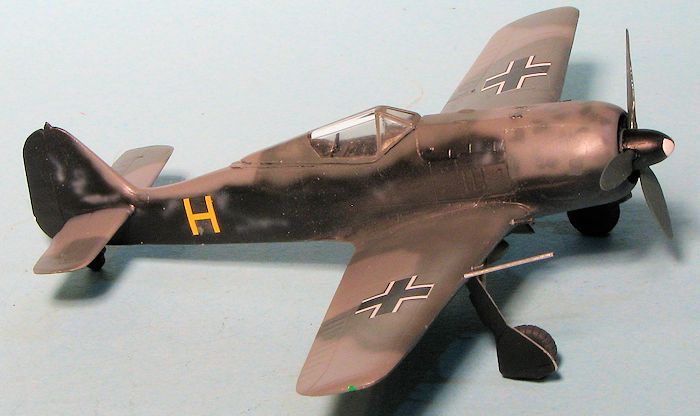
a Jabo of I/SKG 10 in 1943 as shown on the box art. This plane is standard RLM
74/75 upper, but with black where the RLM 76 is usually painted. It has only
upper wing crosses and a yellow aircraft number on the side in terms of
markings. The small decal sheet is well printed and thin. Not sure how opaque it
is, especially when putting the yellow H over a black surface, but one won't
know until one tries. CONSTRUCTION
Often times I ask myself why I build a kit. This one was a combination of
factors. One was the reading of a book on the Luftwaffe's hit and run raids of
1942 and 1943. Another was that I've been slowly building FW-190s of every
company that makes them in this scale and I'd not built this particular kit,
despite it having been sitting in my collection for a considerable time; perhaps
a couple of decades.
The resin bits were then sawed away from their pour stubs. I noticed some air
holes in the seat back and lower cockpit tub. Unlike some short run kits, with
the exception of the bomb, the resin is required to build the kit. Same goes for
the photo etch.
Eventually, I got all the cockpit bits installed. One thing I noticed is that
the instrument panel really fits too far back on the cockpit as once I got the
cockpit installed, it pretty much disappeared from view. The upper instrument
panel fits atop a plastic backing. One side was installed in the fuselage half
and then the p.e. instrument panel was attached. When it came time to close the
fuselage halves, I had to thin out one side of the fuselage quite a bit to get
the halves to join properly. Meanwhile, I'd glued the wing assembly together,
opening the appropriate holes for the pitot and the guns. There are some rather
large sink areas on the wing tips that will need to be filled.
There is no proper head armor assembly, only the plate itself. This is to be
glued directly to the rear cockpit plate. In any regard, it is far too large to
fit. The reason being that the canopy is about two scale feet thick. One needs
to trim about half of the head armor in height and width to get the canopy on.
Fit is not a word used for the canopy as even with thinning the cockpit coaming,
it only touches in a few areas. I put it in place then filled the numerous gaps
with clear gloss paint and reinforced some areas with super glue. I should also
mention that Admiral did not provide a gun sight, though by this time, I had
realized that this was not one of the best FW-190 kits ever done in this scale.
I then put the resin bomb rack base back together (it has broken in three
small pieces while getting it removed from the sprue), and attached it to the
underside of the fuselage. I then masked the canopy (despite the lack of well
defined frames), and headed for some paint.
COLORS & MARKINGS
FINAL BITS
The landing gear was then glued in place. I had to really enlarge the attachment
holes as they are far too small, even after cleaning up the gear tabs. There is
no inward cant to the main gear. To achieve this, most
 b.
There are no optional parts, not even a drop tank.
b.
There are no optional parts, not even a drop tank.
 So I popped open the end-opening box and poured the contents into one of my may
spare Tamiya boxes, which are just the right size for kits like this. I looked
over the bits and started removing major pieces from the sprues. I then cleaned
up all the mating edges and test fit some of the parts. Not surprisingly, I
found that not only did some of the sprue gates flow into the parts themselves,
but some parts had small bits of plastic detritus that had to be cleaned out.
Sprue gates are generally rather thick so a saw might be a good idea for some
pieces. There is also some flash on most parts. Nothing really major and
actually pretty clean for a short run kit from this era.
So I popped open the end-opening box and poured the contents into one of my may
spare Tamiya boxes, which are just the right size for kits like this. I looked
over the bits and started removing major pieces from the sprues. I then cleaned
up all the mating edges and test fit some of the parts. Not surprisingly, I
found that not only did some of the sprue gates flow into the parts themselves,
but some parts had small bits of plastic detritus that had to be cleaned out.
Sprue gates are generally rather thick so a saw might be a good idea for some
pieces. There is also some flash on most parts. Nothing really major and
actually pretty clean for a short run kit from this era.
 With the fuselage together and the usual mass of filler required to take care
of the seams, the rudder was carefully trimmed to fit and glued on. Same with
the tail planes. I then attached the wing which, to my delight, actually fit
quite well aside from the usual lower wing to fuselage join, which seems to be
an issue on many 190 kits. The photo etch rear cockpit piece was attached and it
was then time for the gun cover and nose piece. The gun cover fit fairly well
and the nose piece was far too small for the front of the kit. After removing
the three large ejector towers from the inside of the nose piece, I proceeded to
grind away at the inside circumference. This was not enough so the fuselage join
area was also reduced in size until the parts fit together. Even then, the fit
was less than optimal and several filler and sanding sessions were needed to
smooth things out.
With the fuselage together and the usual mass of filler required to take care
of the seams, the rudder was carefully trimmed to fit and glued on. Same with
the tail planes. I then attached the wing which, to my delight, actually fit
quite well aside from the usual lower wing to fuselage join, which seems to be
an issue on many 190 kits. The photo etch rear cockpit piece was attached and it
was then time for the gun cover and nose piece. The gun cover fit fairly well
and the nose piece was far too small for the front of the kit. After removing
the three large ejector towers from the inside of the nose piece, I proceeded to
grind away at the inside circumference. This was not enough so the fuselage join
area was also reduced in size until the parts fit together. Even then, the fit
was less than optimal and several filler and sanding sessions were needed to
smooth things out.
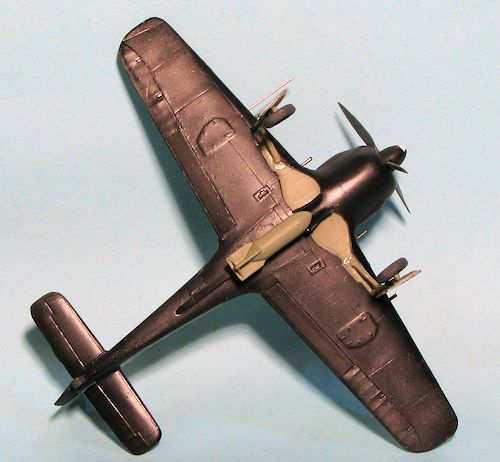
 With First steps were to paint all the undersurfaces with black. When
dry, the upper surface colors of RLM 74 and RLM 75 were sprayed on in a standard
pattern. For these paints, I used Model Master enamels. I then went back and
forth with the three colors to add the mottles with the fuselage ones being done
in RLM 75. I also mottled the upper surface of the forward cowling with RLM 74.
The wheel wells were painted RLM 02 using Vallejo paint, the same color being
used on the inner landing gear doors.
With First steps were to paint all the undersurfaces with black. When
dry, the upper surface colors of RLM 74 and RLM 75 were sprayed on in a standard
pattern. For these paints, I used Model Master enamels. I then went back and
forth with the three colors to add the mottles with the fuselage ones being done
in RLM 75. I also mottled the upper surface of the forward cowling with RLM 74.
The wheel wells were painted RLM 02 using Vallejo paint, the same color being
used on the inner landing gear doors.
 f the retraction strut
would need to be cut away. The
wheels were painted and glued in place using super glue. This was followed by
the main gear doors after removing the top section so they would not be too
long. I drilled out the holes for the guns and pitot and installed those using
stretched sprue for the pitot tube. The prop was glued on and once dry, the
upper wings and fuselage were given a coat of gloss clear in preparation for the
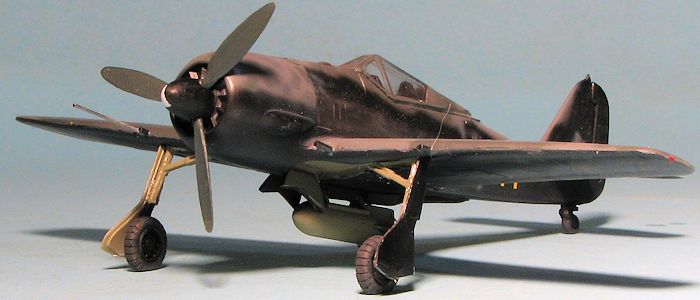
few decals. Meanwhile, I attached the brass braces to the fins of the plastic
bomb and painted all of that with RLM 02. The spinner was attached as was the
bomb. Once the decals were applied (and they fit nicely despite the wing crosses
being a tad bit out of register), a coat of clear matte was applied and the
masking removed. A bit of touch up painting was done and that was it.
f the retraction strut
would need to be cut away. The
wheels were painted and glued in place using super glue. This was followed by
the main gear doors after removing the top section so they would not be too
long. I drilled out the holes for the guns and pitot and installed those using
stretched sprue for the pitot tube. The prop was glued on and once dry, the
upper wings and fuselage were given a coat of gloss clear in preparation for the
few decals. Meanwhile, I attached the brass braces to the fins of the plastic
bomb and painted all of that with RLM 02. The spinner was attached as was the
bomb. Once the decals were applied (and they fit nicely despite the wing crosses
being a tad bit out of register), a coat of clear matte was applied and the
masking removed. A bit of touch up painting was done and that was it.
|
CONCLUSIONS |
 I have to say that this is one of the worst kits that I
have built in a long time. The photo etch did not fit the airframe, the resin
was only fair and 'engineering' has to be a word that the manufacturer had not
yet learned. This was more of a case of finishing something just to get it out
of the way. Many would have tossed the kit early into the build, but I have to
at least try to finish anything I start. It is a character flaw I guess.
Needless to say, it is not recommended. If you want a nice 190A-4 then get the
Zvezda kit. Despite its lack of things under wings, it is a nice kit. Want more
detail and I fear you will have to stick with short run and the AZ kit.
I have to say that this is one of the worst kits that I
have built in a long time. The photo etch did not fit the airframe, the resin
was only fair and 'engineering' has to be a word that the manufacturer had not
yet learned. This was more of a case of finishing something just to get it out
of the way. Many would have tossed the kit early into the build, but I have to
at least try to finish anything I start. It is a character flaw I guess.
Needless to say, it is not recommended. If you want a nice 190A-4 then get the
Zvezda kit. Despite its lack of things under wings, it is a nice kit. Want more
detail and I fear you will have to stick with short run and the AZ kit.
March 2014
Review kit courtesy of my kit collection. If you would like your product reviewed fairly and fairly quickly, please contact
the editor or see other details in the Note to
Contributors.