Planet Models 1/72 FW-190v13
| KIT #: | 228 |
| PRICE: | £ |
| DECALS: | Two options |
| REVIEWER: | Scott Van Aken |
| NOTES: | Resin with vacuformed clear bits and metal landing gear |
| HISTORY |
 The FW-190 was the Luftwaffe's second most important fighter after the
Bf-109 and in many ways was superior (which wasn't all that amazing as it
was a later design). The aircraft was also modified a great deal to try to
provide better overall performance, especially at a higher altitude. One of
those modifications involved using an early FW-190A airframe to test the DB
603 inline engine that was intended for the FW-190C. In fact, several
airframes were so modified and while none of them led to the production of
the 190C, they did provide good information for the later 190D.
The FW-190 was the Luftwaffe's second most important fighter after the
Bf-109 and in many ways was superior (which wasn't all that amazing as it
was a later design). The aircraft was also modified a great deal to try to
provide better overall performance, especially at a higher altitude. One of
those modifications involved using an early FW-190A airframe to test the DB
603 inline engine that was intended for the FW-190C. In fact, several
airframes were so modified and while none of them led to the production of
the 190C, they did provide good information for the later 190D. | THE KIT |
Planet Models got their big boost with the Luft '46 craze of a couple of decades back and slowly worked its way into doing more esoteric subjects. Prototypes are definitely in that range of subjects and so we have this particular offering.
 As usual with Planet (a
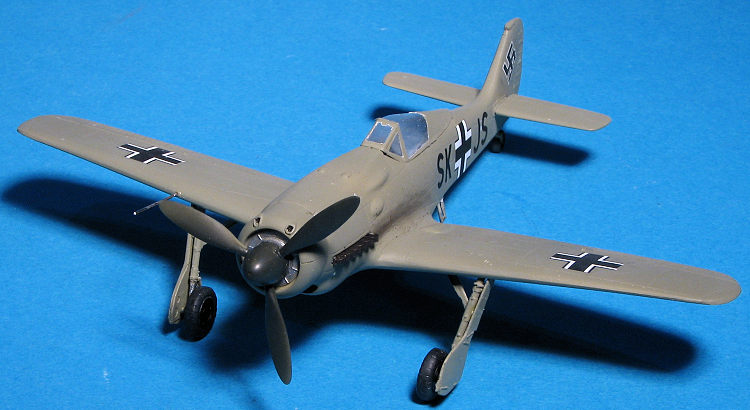
subsidiary of CMK), the resin casting is very good. Since the landing gear of
the 190 sort of jut out, they have wisely produced that part of the kit in white
metal. I have another 190 prototype from a different company that had resin
gear, and the weight of the airframe warped that into a nice curve after a few
years. This was in the days before SAC's metal gear, which would have taken care
of that issue.
As usual with Planet (a
subsidiary of CMK), the resin casting is very good. Since the landing gear of
the 190 sort of jut out, they have wisely produced that part of the kit in white
metal. I have another 190 prototype from a different company that had resin
gear, and the weight of the airframe warped that into a nice curve after a few
years. This was in the days before SAC's metal gear, which would have taken care
of that issue.
Anyway, there really is not all that much to the aircraft. It does have a separate cockpit tub into which one plunks a seat, control stick and instrument panel. 190 cockpit openings are very small so the most I'd do is seat belts. The kit provides a small radiator grille for under the forward cowling and once that and the cockpit are in place, the fuselage halves can be glued together.
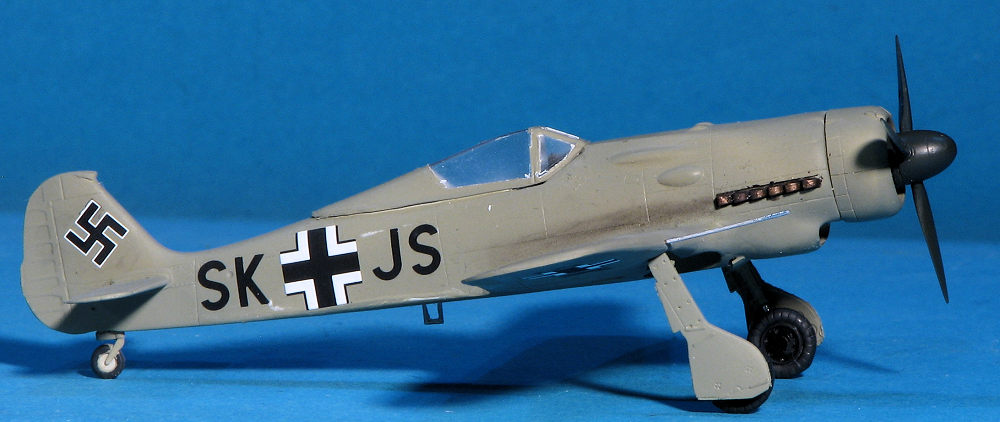
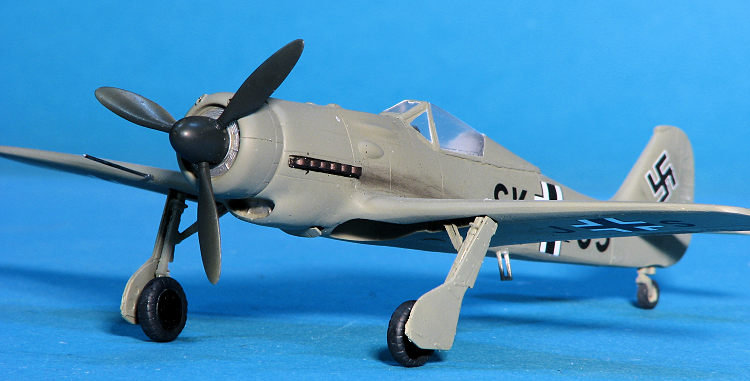
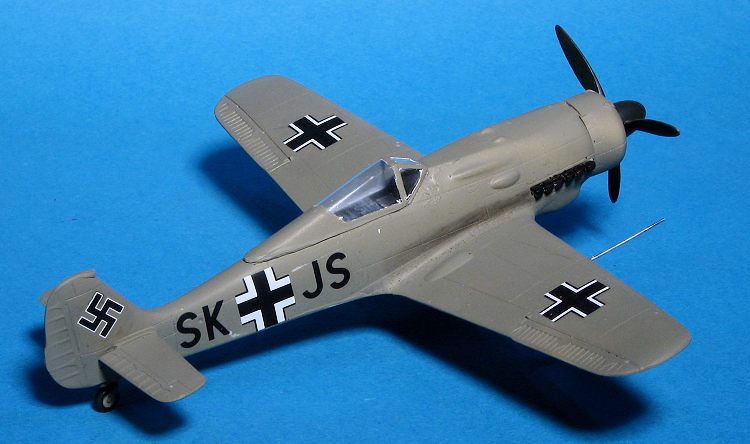
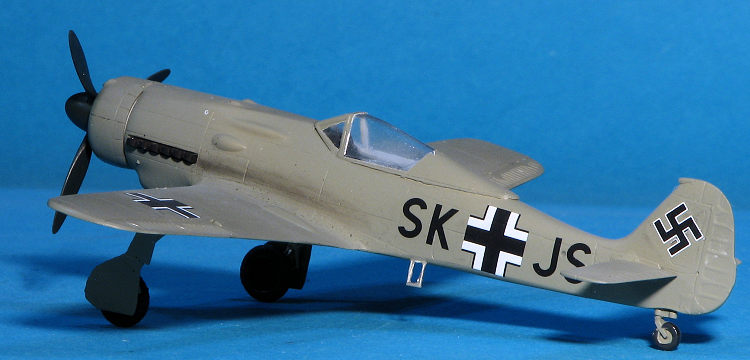
There are separate prop placed which basically butt join onto a prop shaft and the spinner is glued atop it. This is an early set of blades from the look of it, before the paddle blades were common. One then attaches the forward cowling, wings and tailplanes along with the landing gear and doors. Exhaust are separate so you can wait until the end to install those. The only external difference between the V13 and V16 is that the latter has a supercharger intake on the side of the engine cowling. You are provided two vacuform canopies.
The only unique markings these planes carried were different radio call signs and the decal sheet provides those along with split swastikas for the fin. The V13 is in overall RLM 02 while the V16 has a standard RLM 74/75/76 scheme with lots of mottling. Instructions are more than adequate and you get a full color painting and placement guide. I have no idea what decals #7 are for as they are not shown in the instructions.
| CONSTRUCTION |
First step is to remove as many of the large parts from the sprue as possible. I generally leave the small ones attached so I don't lose them. Then comes removing the pour stubs, which can get messy (dust) so it is wise to wet sand these items. I then painted all the cockpit bits with Mr.Color RLM 66. With that done, these pieces were dry-brushed with white to bring out detail. No need to go nuts on 190 interiors as the opening is fairly small and little will be seen without a strong light.
 I then glued in the front
radiator opening. Note that in the instructions this part is mis-labeled as #17,
but when you look at the sprue, you'll easily see that it should be #18.This was
then glued into one half of the fusealge. A couple of things I should
mention. Planet seems to have used standard kit bits when designing this one.
For instance, there is a hole in the instrument panel anti-glare panel for a gun
sight and one just behind the seat for the armor plating. Neither of these items
were used on these aircraft so you have some holes to fill.
I then glued in the front
radiator opening. Note that in the instructions this part is mis-labeled as #17,
but when you look at the sprue, you'll easily see that it should be #18.This was
then glued into one half of the fusealge. A couple of things I should
mention. Planet seems to have used standard kit bits when designing this one.
For instance, there is a hole in the instrument panel anti-glare panel for a gun
sight and one just behind the seat for the armor plating. Neither of these items
were used on these aircraft so you have some holes to fill.
With the radiator installed, the upper forward fuselage sections were glued together. I did this as the resin fuselages were a bit on the warped side as in warped outward and so I thought cementing the fuselage in sections might be the best way to to. I then checked to see if I could install the cockpit through the wing opening and it turned out I could, so the tail section was glued, moving up the fuselage to the cockpit and wing openings. I could fit the cockpit from the wing opening and did so.
After dealing with the filler required, especially at the forward part of the fuselage where the cowling attached, it was time for the wing. I was told many years ago that it is not unusual for parts to be fairly far off in terms of size and so it was with this one. The wing was a good size for fitting to the fuselage in terms of width, but was too long and too wide at the back. However, better too large than too small so a bit of sanding took care of that. Fit at the front wasn't bad as things go.
 Once the wing was dealt with, the
tailplanes were attached. These are a butt join. I also attached the engine
cowling and the lower cowl flap. Then one of the two vac canopies was cut out
and masked. Once that was accomplished, it was attached using Cementine clear
cement. Meanwhile the prop pieces were removed from the casting sprues. Note
that the prop blades are keyed so don't get crazy when removing these.
Once the wing was dealt with, the
tailplanes were attached. These are a butt join. I also attached the engine
cowling and the lower cowl flap. Then one of the two vac canopies was cut out
and masked. Once that was accomplished, it was attached using Cementine clear
cement. Meanwhile the prop pieces were removed from the casting sprues. Note
that the prop blades are keyed so don't get crazy when removing these.
I then attached the tail gear and the main landing gear legs. These had the attachment holes deepened. When attaching the MLG a lot of care has to be taken as the openings are a lot larger than the stub on the metal gear into which they fit. Makes for a very wiggly attachment until the super glue dries. Attaching the retraction struts was a bit of a fussy job as well. I'm thankful that the gear legs are metal otherwise they would sag under the weight of the model. I then attached the main gear doors. There is a lower radiator exhaust piece that needs to be added. It is too large for the opening so was posed open. Seemed like a good time to paint.
| COLORS & MARKINGS |
 The kit decals are very thin so one does need to be careful when applying
them not to have them fold over or tear. Lots of water is usually the key. I
don't like split swastikas so used a pair from an Aeromaster 1/72 FW-190
insignia sheet. The kit decals snuggled down very well without the use of
setting solution. I used Microset for the swastika. A flat coat was applied
using Tamiya matte clear. The prop was attached after drilling a hole in the
back of it so it would fit on the small stub in the center of the cowling.
Last item was the foot step. Masking was removed, a bit of exhaust stain and
that was it.
The kit decals are very thin so one does need to be careful when applying
them not to have them fold over or tear. Lots of water is usually the key. I
don't like split swastikas so used a pair from an Aeromaster 1/72 FW-190
insignia sheet. The kit decals snuggled down very well without the use of
setting solution. I used Microset for the swastika. A flat coat was applied
using Tamiya matte clear. The prop was attached after drilling a hole in the
back of it so it would fit on the small stub in the center of the cowling.
Last item was the foot step. Masking was removed, a bit of exhaust stain and
that was it.
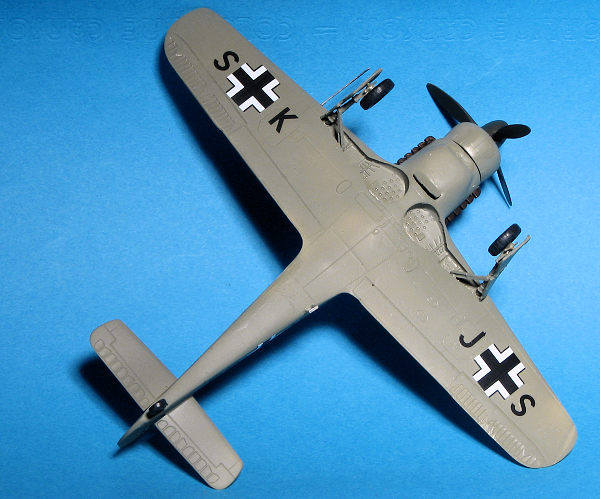
This is a fairly nice resin kit of an interesting prototype. It is fairly obvious that Planet Models used the Hasegawa 1/72 FW-190A-8 as a basis and just added the little lump on the forward fin found on the early short nose 190s. The wing has the underside access hatch and the DF antenna mount found on the later 190s, so those items were filled/sanded away. In all, if you have built other resin kits, then this one will be fairly easy. This one took me about three weeks to finish, which is less time than usual for me to complete a kit.
| REFERENCE |
https://en.wikipedia.org/wiki/List_of_Focke-Wulf_Fw_190_variants#High-altitude_developments
7 January 2022 Copyright ModelingMadness.com. All rights reserved.
No reproduction in part or in whole without express permission in writing from
the editor.
If you would like your product reviewed fairly and fairly quickly, please
contact
the editor
or see other details in the
Note to
Contributors. Back to the Main Page
Back to the Review
Index Page
Back to the Previews Index Page