Tamiya 1/48 FW-190F-8
|
KIT # |
61039 |
|
PRICE: |
$26.00 MSRP |
|
DECALS: |
Four aircraft |
|
REVIEWER: |
|
|
NOTES: |
This boxing is currently not in production |
|
HISTORY |
By the time that Focke-Wulf FW-190 production reached the A-8
version, the very similar ground attack or jabo version was being built
side by side on the assembly line. The reason was that these aircraft were
nearly identical with respect to basic airframe and engine. The only real
differences were in armament. Initially, the requirement for a jabo 190 was for
additional armor protection and for the inclusion of four wing racks (two on
each side) capable of handling a 50 kg bomb. However, the increased weight of
the armor plating and the wing racks/bombs to the standard aircraft was too much
so initial aircraft were delivered
 without the wing racks. Removal of the outer
wing guns reduced the weight so that the racks could be installed. Contrary to
popular belief, the landing gear was not strengthened in any way, only the shock
absorber pressure was increased to handle the additional weight.
without the wing racks. Removal of the outer
wing guns reduced the weight so that the racks could be installed. Contrary to
popular belief, the landing gear was not strengthened in any way, only the shock
absorber pressure was increased to handle the additional weight.
The Fw-190F-8 variant production was started in March of 1944 along with the A-8 fighter. Initial production aircraft had sand filters and lots of armor as standard equipment. However, because all this weight adversely affected the handling and speed of the plane, all armor protection except the engine oil cooler ring and armored windscreen were removed. Much of this loss of speed was gained back by more powerful BMW 801 engines in later versions. In late 1944 new ETC 71 bomb racks, which were slimmer, lighter and cheaper to build replaced the older under wing racks. The centerline rack was also replace in many planes with a slimmer, lighter and cheaper ETC 504 rack that replace the ETC 501. In January 1945 the new 'blown' canopy was introduced on the production line and retrofitted to many older versions. Along this time more wood was used in construction of the plane including tail assemblies, flaps, propellers, and interior parts. A very similar Fw-190F-9 was produced starting in November 1944. It had a more powerful engine and differed from the F-8 by a 14 blade engine fan (vice 12) and a wider 'paddle bladed' prop. In all other respects they were externally identical.
|
THE KIT |
Well, this one looks very much like every other Tamiya FW-190 and in many cases it is. However, the quick-eyed reader will notice that there is an entire sprue that has various bombs and other weapons as well as two fuselage halves, bomb racks, drop tank, upper cowl piece and wheels/gear. One of the complaints about the FW-190D was the wheels and though I don't know if that has been fixed or not, I'm sure a reader will get me up to speed on that. There are optional canopies as well as the choice of bombs or rockets for the outer wings. I'm guessing these are the 'Panzerblitz' rockets.
 Instructions are superb as expected, except for the paint thing
that I constantly fuss about regarding Tamiya kits. Markings are for four
aircraft. According to the instructions, all the colors must be mixed. It is BS
that the RLM numbers are not provided. Anyway, all but one appear to be in RLM
74/75/76, but I'd take that with a grain of salt as it could have easily been
some late war colors for the uppers. I'd check other sources to verify those
paints.
Instructions are superb as expected, except for the paint thing
that I constantly fuss about regarding Tamiya kits. Markings are for four
aircraft. According to the instructions, all the colors must be mixed. It is BS
that the RLM numbers are not provided. Anyway, all but one appear to be in RLM
74/75/76, but I'd take that with a grain of salt as it could have easily been
some late war colors for the uppers. I'd check other sources to verify those
paints.
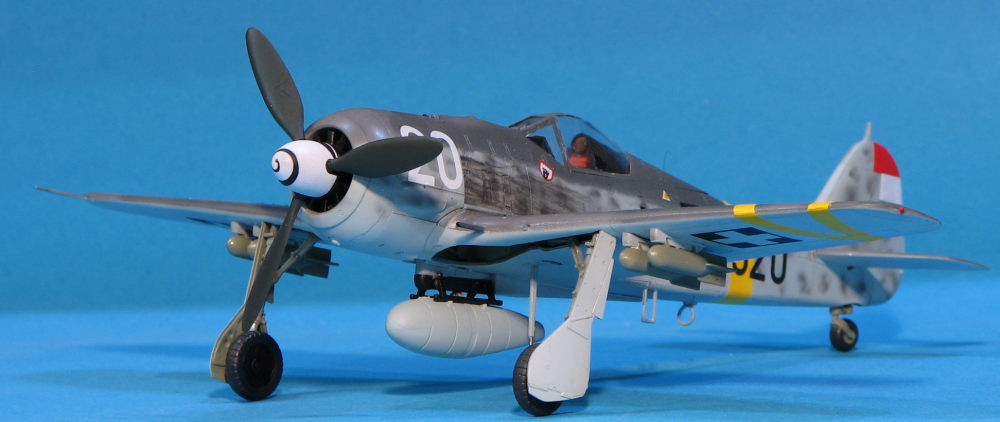
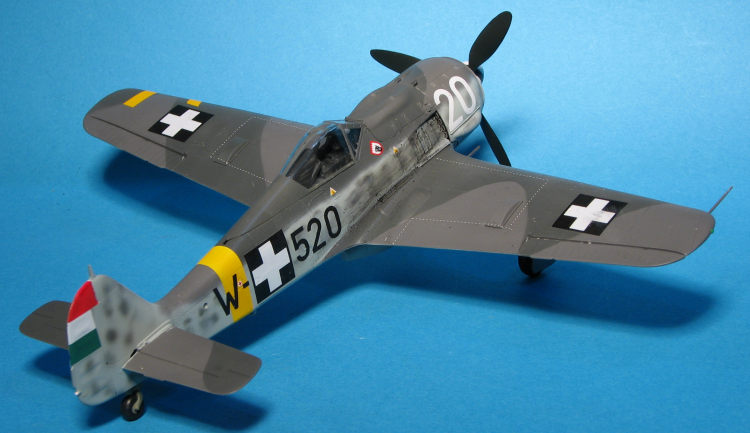
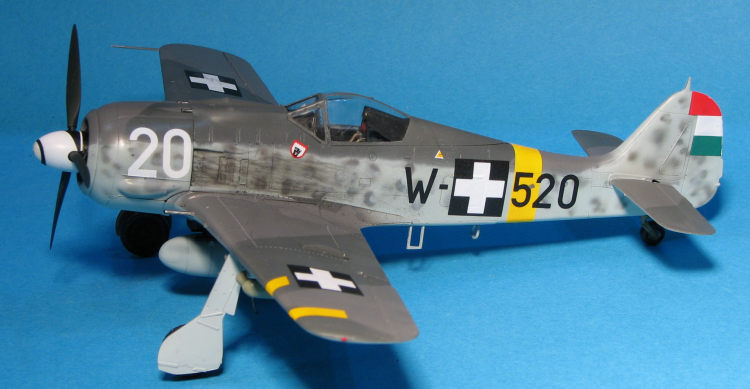
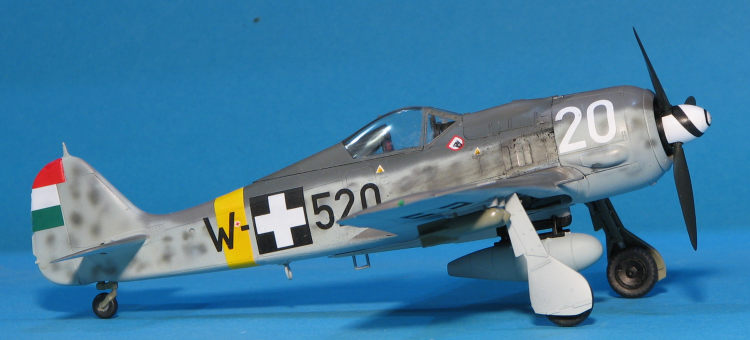
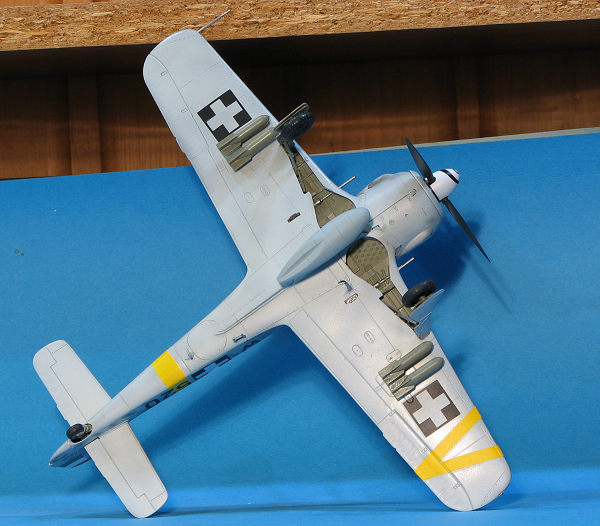
First aircraft is white 7 from 1/SG 2 in Hungary during 1944-45. It has a yellow fuselage band and 'V' under the left wing. Next is << from an unknown unit in spring 1945. It has a yellow nose band. A desert camo plane from 2./SG 4 in Italy is probably in RLM 78/79/80 with the upper half of the fuselage band over-painted. Finally, a I./SG 2 aircraft, again from Hungary in 1945, has a winter camo scheme and a red forward cowling. Most have the 'blown' canopy, though the Italian front aircraft is an earlier one with the 'straight' version. The 'blown' canopy was added to production planes starting in January 1945. Decals are a bit thick though they should work well with some care.
|
CONSTRUCTION |
 Before building anything, I went through the instructions and
started painting stuff. I have most of the colors required in the Tamiya line to
deal with the detail stuff so used those for the RLM 66 and other shades. The
RLM 02 came from the Mr.Color lacquer line. This kit was released in 1995, which
was before Tamiya started providing decals for the instruments or the seat
harness. I drybrushed all the interior bits to bring out some detail. I then
built up the interior, adding some Eduard p.e. belts. For those who like really
detailed cockpits, there are several aftermarket sets available, though thanks
to the size of the opening, much will be hidden.
Before building anything, I went through the instructions and
started painting stuff. I have most of the colors required in the Tamiya line to
deal with the detail stuff so used those for the RLM 66 and other shades. The
RLM 02 came from the Mr.Color lacquer line. This kit was released in 1995, which
was before Tamiya started providing decals for the instruments or the seat
harness. I drybrushed all the interior bits to bring out some detail. I then
built up the interior, adding some Eduard p.e. belts. For those who like really
detailed cockpits, there are several aftermarket sets available, though thanks
to the size of the opening, much will be hidden.
The cockpit was trapped between the fuselage halves. The
engine assembly was built and attached as well, though it was simply pressed on.
I then assembled the main gear well and installed it into the lower wing after
drilling out the holes for the various racks. The upper halves were then
cemented into place. This was atta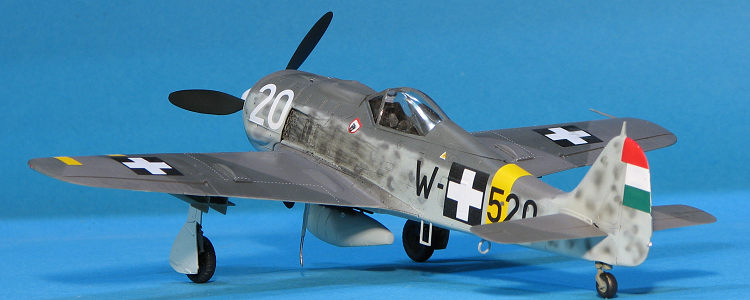 ched to the fuselage and the tailplanes were
glued in place. I then looked for the cowling, but it could not be found. This
was a bit of an issue as there are no aftermarket pieces available. I contacted
Tamiya USA about it and they said the kit was out of production. I then pointed
out several other kits that had the same part and they told me they'd look into
finding one. As nothing arrived in the mails after several weeks of waiting, I
robbed the cowling out of their FW-190A-8 kit that I have. It fit.
ched to the fuselage and the tailplanes were
glued in place. I then looked for the cowling, but it could not be found. This
was a bit of an issue as there are no aftermarket pieces available. I contacted
Tamiya USA about it and they said the kit was out of production. I then pointed
out several other kits that had the same part and they told me they'd look into
finding one. As nothing arrived in the mails after several weeks of waiting, I
robbed the cowling out of their FW-190A-8 kit that I have. It fit.
The canopy armor was built up and installed in the canopy. I also attached the gun sight and masked the clear bits. These were attached, the wheel wells painted and filled with silly putty as was the engine cowling.
|
COLORS & MARKINGS |
 er
grey. I used small amounts of Cementine to hold the paper in
place. This works great but actually holds a bit too well. When removing the
masks, they usually tear where the glue was attached. This can be easily
removed by scraping with a fingernail. If you use acrylics, this
will damage the underlying paint, but the nice, hard, lacquer is unfazed by
this sort of treatment.
er
grey. I used small amounts of Cementine to hold the paper in
place. This works great but actually holds a bit too well. When removing the
masks, they usually tear where the glue was attached. This can be easily
removed by scraping with a fingernail. If you use acrylics, this
will damage the underlying paint, but the nice, hard, lacquer is unfazed by
this sort of treatment. |
CONCLUSIONS |
Aside from the mistakes I made, the kit was a pleasure to build. It fit well and
gave me a minimum of issues. I'd rate this as the best 1/48 FW-190 I have built
with the Hasegawa kit close and the Dragon third. I've not built any of the
Eduard 190 kits, but have a few on the shelves. I would definitely recommend
this one to you.
If you would like your product reviewed fairly and fairly quickly, please contact
the editor or see other details in the Note to
Contributors. June 2020 Copyright ModelingMadness.com. All rights reserved.