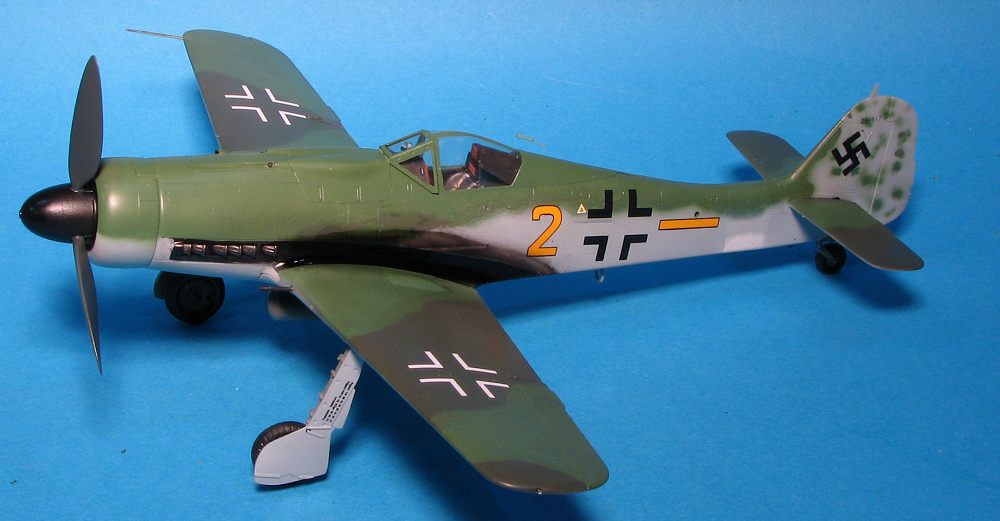
Hobby Boss 1/48 FW-190D-9
| KIT #: | 81716 |
| PRICE: | $28.99 SRP |
| DECALS: | Two options |
| REVIEWER: | Scott Van Aken |
| NOTES: | Includes photo etch fret |

| HISTORY |
The Fw 190 D (nicknamed the Dora; or Long-Nose Dora, "Langnasen-Dora") was intended to improve on the high-altitude performance of the A-series enough to make it useful against the American heavy bombers of the era. In the event, the D series was rarely used against the heavy-bomber raids, as the circumstances of the war in late 1944 meant that fighter-versus-fighter combat and ground attack missions took priority. A total of 1,805 D-9s were produced. Production started in August 1944.
With the D version the power plant was changed from the radial engine of earlier models to a 12-cylinder inverted-Vee liquid-cooled engine. The Jumo 213A generated 1,750 PS (1,726 hp, 1,287 kW), and could produce 2,100 PS (2,071 hp, 1,545 kW) of emergency power with MW 50 injection, improving performance to 426 mph (686 km/h) at 21,650 ft (6,600 m). In order to fit the new engine in the Fw 190 fuselage while maintaining proper balance, both the nose and the tail of the aircraft were lengthened, adding nearly 1.52 m (4.99 ft) to the fuselage, bringing the overall length to 10.192 m (33.438 ft) versus the 9.10 m (29.9 ft) of the late war A-9 series. The lengthened tail required a straight-sided bay, 30 cm (12 in) long, spliced in forward of the rear angled joint and tail assembly of the fuselage. To further aid balance, the pilot's oxygen bottles were moved aft and located in the new bay. This gave the rear fuselage a "stretched" appearance.
Furthermore, the move to a V12 engine from a
radial engine required more components to be factored into the design, most
significantly the need for coolant radiators (radial engines are air-cooled). To
keep the design as simple and as aerodynamic as possible, Tank used an annular
radiator (the AJA 180 L) installed at the front of the engine, similar to the
configuration used in the Jumo powered versions of the Junkers Ju 88. The
annular radiator with its adjustable cooling g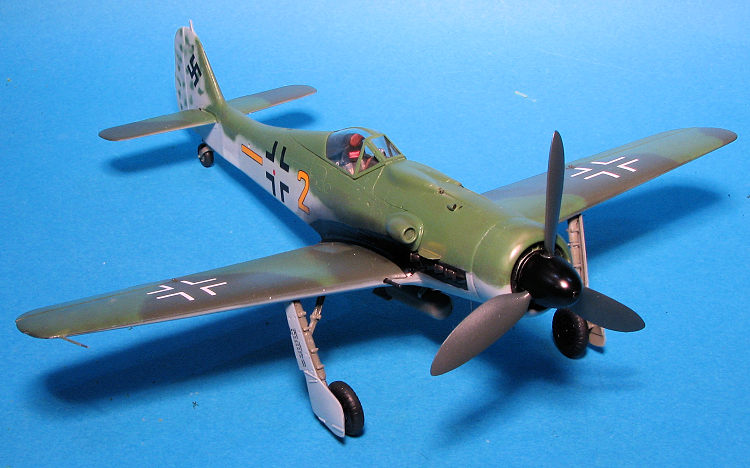 ills resembled a radial engine
installation, although the row of six short exhausts stacks on either side of
the elongated engine cowling showed that Jumo 213 was an inverted vee-12 engine.
While the first few Doras were fitted with the flat-top canopy, these were later
replaced with the newer rounded top "blown" canopy first used on the A-8 model.
With the canopy changes, the shoulder and head armour plating design was also
changed. Some late model Doras were also fitted with the Ta 152 vertical
stabilizer and rudder, often called "Big Tails" by the Luftwaffe ground crews
and pilots, as seen on W.Nr. 500647
Brown 4 from 7./JG 26 and
W.Nr. 500645 Black 6
from JG 2. The centreline weapons rack was changed to an ETC 504 with a
simplified and much smaller mounting and fairing.
Early D-9s reached service without the MW 50 installation, but in the meantime Junkers produced a kit to increase manifold pressure (Ladedrucksteigerungs-Rüstsatz) that increased engine output by 150 PS to 1,900 PS, and was effective up to 5,000 m (16,400 ft) altitude. It was fitted immediately to D-9s delivered to the units from September, or retrofitted in the field by TAM. By the end of December, all operational Doras, 183 in total, were converted. From November 1944, a simplified methanol water (MW 50) system (Oldenburg) was fitted, which boosted output to 2,100 PS. By the end of 1944, 60 were delivered with the simplified MW 50 system or were at the point of entering service. The 115 L tank of the Oldenburg system would hold the MW 50 booster liquid, which was single purpose, while later systems were to be dual purpose, holding either MW 50 or additional fuel.
The fighter lacked the high turn rate and higher rate of roll of its close coupled radial-engined predecessor. It was a bit faster, however, with a maximum speed of 680 km/h (422 mph) at 6,600 meters (21,650 ft). Its 2,240 horsepower with methanol-water injection (MW 50) gave it an excellent acceleration in combat situations. It also climbed and dived more rapidly than the Fw 190A, and so proved well suited to the dive-and-zoom ambush tactics favored by the Schlageter pilots. Many of the early models were not equipped with tanks for methanol, which was in very short supply in any event. At low altitude, the top speed and acceleration of these examples were inferior to those of Allied fighters. Hans Hartigs recalled that only one of the first batch of Dora 9s received by the First Gruppe had methanol water injection, and the rest had a top speed of only 590 km/h (360 mph).
Owing to the failure of multiple attempts to create an
effective next-generation 190, as well as the comments of some Luftwaffe pilots,
expectations of the Dora project were low. These impressions were not helped by
the fact that Tank made it very clear that he intended the D-9 to be a stopgap
until the Ta 152 arrived. These negative opinions existed for some time until
positive pilot feedback began arriving at Focke-Wulf and the Luftwaffe command
structure. Sporting good handling and performance characteristics, the D-9 made
an effective medium altitude, high speed interceptor, although its performance
still fell a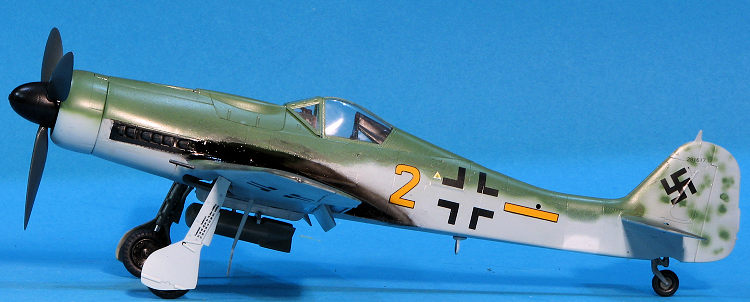 way at altitudes above about 20,000 ft (6,100 m). When flown by
capable pilots, the Fw 190D proved the equal of Allied types.
As it was used in the anti-fighter role, armament in the "D" was generally lighter compared to that of the earlier aircraft—usually the outer wing cannon were dropped so that the armament consisted of two 13 mm (.51 in) MG 131, with 400 rounds per gun, and two 20 mm MG 151/20E cannon with 250 rounds per gun; all four weapons were synchronized to fire through the propeller arc. The wings of the D-9 still had the electrical circuits and attachment points for the underwing WGr 21 rocket propelled mortar, although none appeared to have used these operationally. While inferior to the A-series in roll rate, the "D" was superior in turn rate, climb, dive and horizontal speed. The Dora still featured the same wing as the A-8, however, and was capable of carrying outer wing cannon as well, as demonstrated by the D-11 variant, with a three-stage supercharger and four wing cannon (two MG 151s and two MK 108s). The first Fw 190 D-9s started entering service in September 1944, with III./JG 54. It was quickly followed by other units including I./JG 26 which flew its last operations on the A-8s on 19 November 1944.
Some Fw 190 Ds served as fighter cover for Me 262 airfields, as the jet fighters were very vulnerable on take-off and landing. These special units were known as Platzsicherungstaffel (airfield defence squadrons). One unit, known as the Würger-Staffel, was created in April 1945 by Leutnant Heinz Sachsenberg at the behest of Adolf Galland, and was part of JV 44. The role of the Staffel was to guard the airfield and JV 44's Messerschmitt Me 262s as they landed; as such the Fw 190s were supposed to take off before the jets and circle the airfield in pairs (a Rotte). However, to allow the 262s a clear run back to the airfield the 190s had to land before the jets, negating their protection. To help anti-aircraft artillery protecting the airfields to quickly identify friendly aircraft, the under-surfaces of the Würger-Staffel 190s were painted red with narrow white stripes. leading to the alternative nickname of Papageien Staffel (parrot squadron) from the bright red color.
| THE KIT |
 Hobby
Boss started their FW-190 series of fighters with two short wing Ta-152C kits.
It was obvious to most of us that we would see a series of FW-190D kits as well,
since much of the airframe was the same between the two. I would be equally
surprised if Hobby Boss did not decide to to A and F model FW-190s as well. Some
may wonder if the hobby really needs to have another FW-190D-9 as there are
already nice kits out there by Dragon and Tamiya and Eduard, with the Dragon
versions having been reboxed by Revell and Italeri. Apparently the answer is
'yes' as now we have a very nice one from Hobby Boss, and at a price that is
lower than what the others can be found for on the shelves. This new kit also
provides Hobby Boss the opportunity to improve on some of the things that were
not quite right with the others.
First thing that you notice is that the sprues are all individually bagged to protect them. You also notice that things like the prop, fuselage halves, wings, upper cowling, supercharger intakes and so on are on separate sprues. This sort of planning is what allows Hobby Boss to mix and match so to speak, in order to come up with the different variants of the 190.
Now I am not all that well versed on the 190D, but I do know that previous kits were lambasted for not having a visible engine accessory section and this one has that feature. I am going to go out on a limb and assume they have taken care of the fuss made over the main landing gear on the Tamiya kit as well. Cockpit is nicely appointed with seat, rudder pedals, instrument panel (with decal) and control stick. The design of the kit is such that one has to install the exhaust prior to closing the fuselage halves which is easy, but makes it difficult to paint them unless one paints the fuselage around them first before installing pre-painted exhausts. The kit comes with just the 'blown' canopy so you will need to keep that in mind if using aftermarket decals. The windscreen and canopy are separate to display the cockpit. Really, only a seat harness is actually needed to help in this area as the 190 cockpit is quite small. There are separate wing gun barrels that fit through the wheel wells and will need to be installed prior to installing the separate wells and closing up the wings. You can attach outer wing bomb racks if you wish and a centerline rack is provided. This can be equipped with either a bomb or a late drop tank.
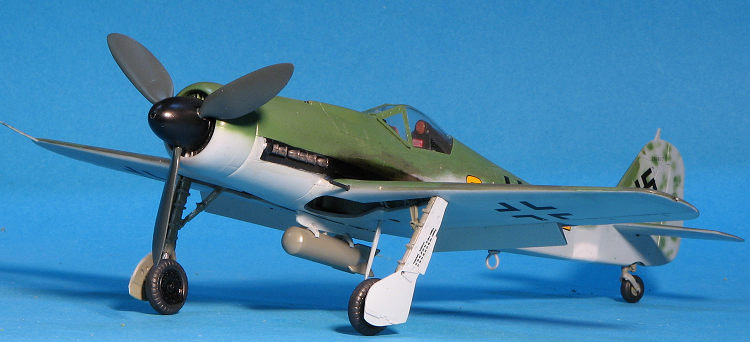 Other
features are the option of open or closed cowl flaps (each option has its own
cowling) and there is a photo etch fret that includes the area behind the
cockpit, a cockpit control wheel, a part of the head armor assembly,
a supercharger intake screen and the shield placed just in front of the
supercharger intake above the exhaust to keep the engine from ingesting exhaust
gasses. There is an oval screen that is not used and that would be for the D-13
version.
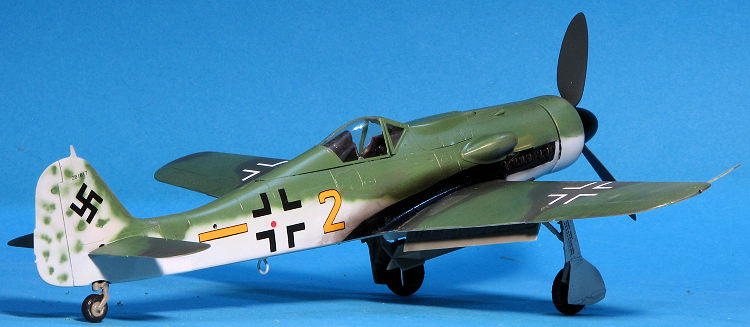
Instructions are well drawn with construction color information provided where applicable. There are two markings options. One is the box art plane from 7./JG 301 in RLM 83/75 over 76 while the other is with II./JG 6 in RLM 77/82/83 over 84 with sections of the underside in RLM 76. Decals are nicely printed, but like many Hobby Boss decals, I find the yellow and red to be too bright.
| CONSTRUCTION |
Even though I have the Eduard 190D-9, what I'd heard about how well this one built and my previous experience with Hobby Boss kits made this the one to reach the bench. I actually had not intended to do one of these, but I have a Bodenplatte decal sheet on which I'd used two of the five options and figured I should go ahead and do a third.
First step was to paint all the bits that would be RLM 02 and RLM 66. I used AK interactive acrylics for this, brushing them onto bare plastic. It holds quite well and almost reminds me of Polly Scale in terms of coverage and stick. I then started building both the accessory compartment and the interior.
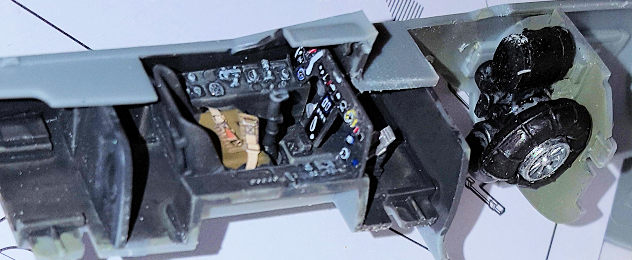 When doing the interior, I recommend not adding the bulkheads or the lower
instrument panel until you get the seat, control and rudder pedals installed. It
will just be easier. Note also that it is easy to install the large oval tank in
the accessory compartment upside
down. For this you need the filler cap on it to be near the top. I used the
supplied decals for the instrument panel parts. The carrier on these is quite
large so be advised. A bit of dry brushing and the use of Eduard belts adds to
the interior, even though you won't see much when done. For painting the
accessory area I used mostly steel with some aluminum and matte black.
The gear well was assembled at this time and I opened the holes for the centerline rack. The plane I'm modeling carried a single SC250 bomb and the weapons sprues do have this bomb even though the instructions make no mention of it. The wheel well assembly was built up and this includes installing the inner gun barrels. Not a big fan of this sort of thing as it just begs for them to be knocked off. However, even during the sanding of the leading edges, I had no issues in this regard.
Hobby Boss has you install the exhaust before closing the fuselage halves. I don't like this method as it makes it difficult to paint after the fact. Same with the tail gear assembly. I did not install the tailwheel or other fork when I glued this in place. The accessory section and interior have very positive locator sockets and make their installation a breeze. These were glued in place and the halves joined. I then said goodbye to most of the detail as I installed the upper cowling piece.
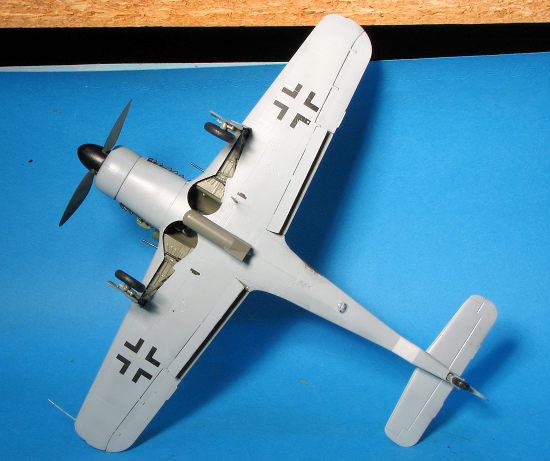 Fit of the
tailplanes and wings was actually fairly good, though not filler free regarding
the wings. I then installed the shoulder belts and glued in the armor section
into the canopy. Then I masked the canopy. Unfortunately, I misplaced the
windscreen and while I am sure it will turn up, I had to find a replacement. I
robbed one out of a Dragon FW-190A-3 kit and while it sort of fit, it is wider
than the one in the Hobby Boss kit. That was masked and the canopy cemented
shut. I used Silly Putty to fill the wheel wells. I also glued the flaps in the
dropped position. Period photos showed these could be either up or down. They
don't fit too well up as I tried that first. I chose the nose section with the
closed cowl flaps as all my other D-9s had them open. The DF antenna and bomb
rack ere installed as they would be painted the underside color. Then it was off
to the paint shop.
| COLORS & MARKINGS |
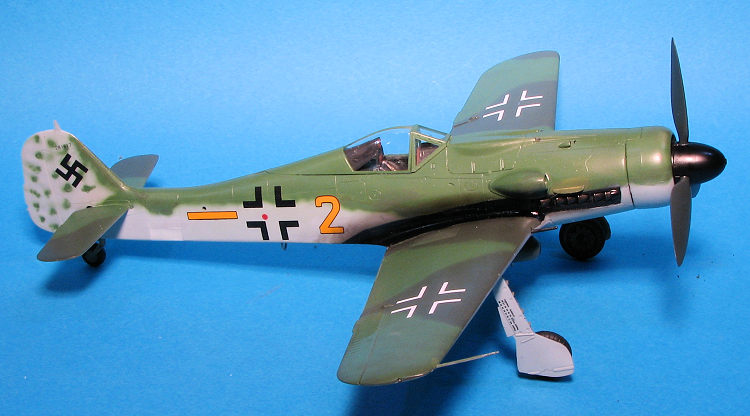 Once all
the painting was done, I returned to the bench to install the landing gear.
I thought I had a nice pair of Barracudacast wheels for this, but couldn't
find them so used the kit offerings, which look fairly nice. With the kit on
its gear, I put on the decals. I had issues with some of these breaking, and
while that was still the case, it wasn't too bad. I did have to use some of
the kit insignia, which worked just fine. The reason I didn't add some decal
film is the issue I had with curling on a previous model. With the decals in
place, I installed a number of other items like the lower radio antenna and
the pitot tube as well as the prop assembly. It was then off to the paint
booth again for a clear semi-matte.
 | CONCLUSIONS |
I have to agree with those who commented on how nice this kit was to build. It perhaps does not have the detail level of the Eduard kit, but then, it is MUCH less hassle to build. I'd put it right up there with the Tamiya kit in terms of ease of construction, and without the small glitches of the Tamiya kit in terms of lack of accessory compartment and the proper size wheels. I'm sure this one has its faults, but they are not noticeable to me as I'm not steeped in knowledge of the type. If you want detail and the headaches that come with the build, go for the Eduard kit. If you want a pleasant build with sufficient detail to please most, then I can recommend this one.
| REFERENCES |
http://en.wikipedia.org/wiki/Fw190
19 October 2018
Copyright ModelingMadness.com. All rights reserved.
If you would like your product reviewed fairly and fairly quickly, please contact the editor or see other details in the Note to Contributors.