Hasegawa 1/72 FW-190A-8
| KIT #: | 51303 |
| PRICE: | $2.50 at a swap meet |
| DECALS: | Two options |
| REVIEWER: | Scott Van Aken |
| NOTES: | original 1992 issue |
| HISTORY |
 The FW-190A-8 was pretty much the culmination of the radial engine
190A series. Though the A-9 did enter production, few were completed before
the end of the war as engine production was severely hampered by Allied
bombing. The A-8 version differed from the earlier variant by replacing the
7.7mm cowling machine guns with 13 mm versions for more punch. It retained
the wing mounted cannon. Most pilots preferred the 190 over the older 109
because it was easier to fly, had better ground handling and landing
characteristics and carried greater armament without the plane feeling too
loaded down and sluggish. In the field, some pilots had the outer wing guns
removed to lessen wing loading and improve performance and maneuverability.
The FW-190A-8 was pretty much the culmination of the radial engine
190A series. Though the A-9 did enter production, few were completed before
the end of the war as engine production was severely hampered by Allied
bombing. The A-8 version differed from the earlier variant by replacing the
7.7mm cowling machine guns with 13 mm versions for more punch. It retained
the wing mounted cannon. Most pilots preferred the 190 over the older 109
because it was easier to fly, had better ground handling and landing
characteristics and carried greater armament without the plane feeling too
loaded down and sluggish. In the field, some pilots had the outer wing guns
removed to lessen wing loading and improve performance and maneuverability.
| THE KIT |
In 1992, Hasegawa released a series of FW-190 kits in
1/72. Those were the FW-190A-8, FW-190F-8 and the FW-190D-9. These three kits
shared some common sprues, with basically the fuselage sprue being the main
difference between them. From there, Hasegawa branched out to other variants and
to a considerable number of Limited Edition kits, which were basically just
decal changes, though some of
 them included additional resin or cast metal
parts. It is to their credit that many modelers still consider these now nearly
25 year old kits to still be the best in the market. They have been good
builds with almost no hassle.
them included additional resin or cast metal
parts. It is to their credit that many modelers still consider these now nearly
25 year old kits to still be the best in the market. They have been good
builds with almost no hassle.
This issue is your basic A-8 boxing. The molding on this initial issue is excellent with no sign of flash or sink areas. it does have ejector pin marks on the one side of the wheels, but those are easily handled and of no real consequence. I should also mention that this kit only has the upper cowling for the upgunned A-8 variant and only comes with the older canopy and not the 'bulged' version put on production aircraft starting in January 1945. This is standard Hasegawa as they rarely provide bits to do other variants, sometimes even cutting the additional pieces from the sprues before boxing. As you can see from looking at the parts diagram, the only part not used is the later head rest for the blown canopy version.
You'd expect this one to have a decal for the instruments and
you'd be right. Though the
clear, two piece windscreen/canopy can be posed open, the cockpit of the 190 is
so tiny that little will be seen. However, there are a number of nice
aftermarket cockpits if you are so inclined to spruce things up. Your things
 under the fuselage is limited to a drop tank. You also need to open up some
holes for the tank mount and for the upper wing cannon bulges.
under the fuselage is limited to a drop tank. You also need to open up some
holes for the tank mount and for the upper wing cannon bulges.
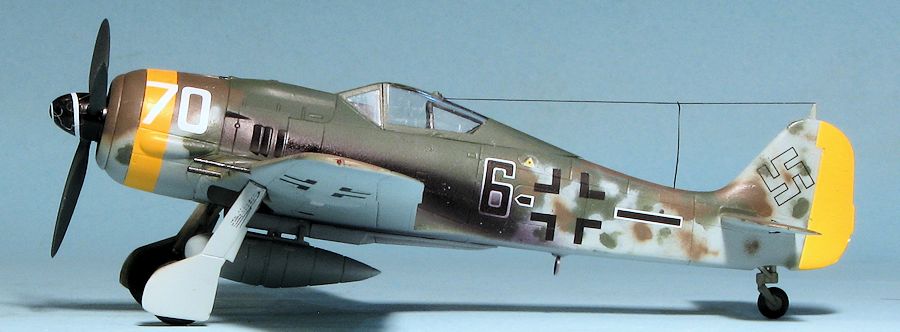
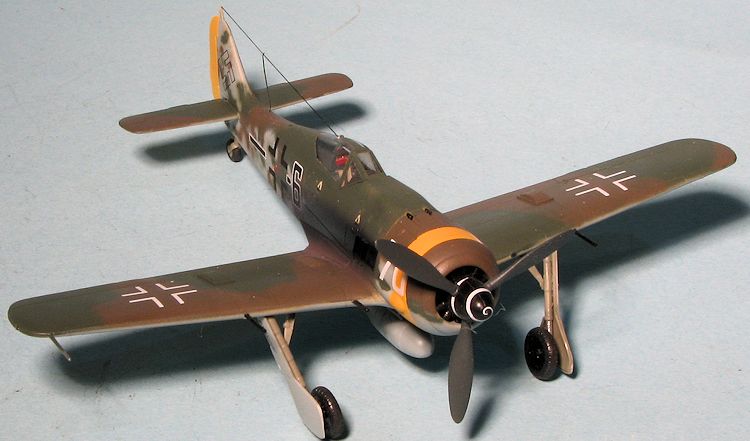
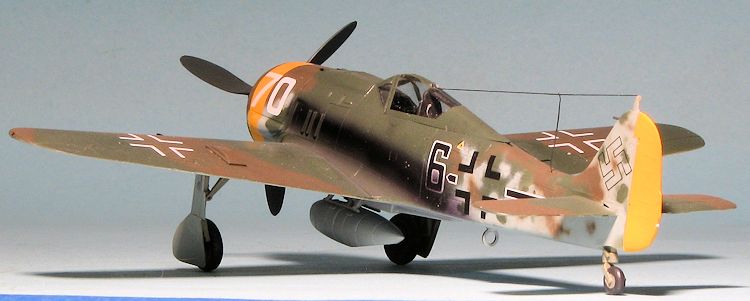
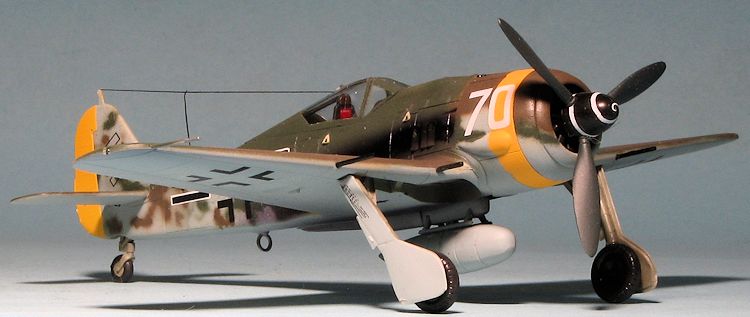
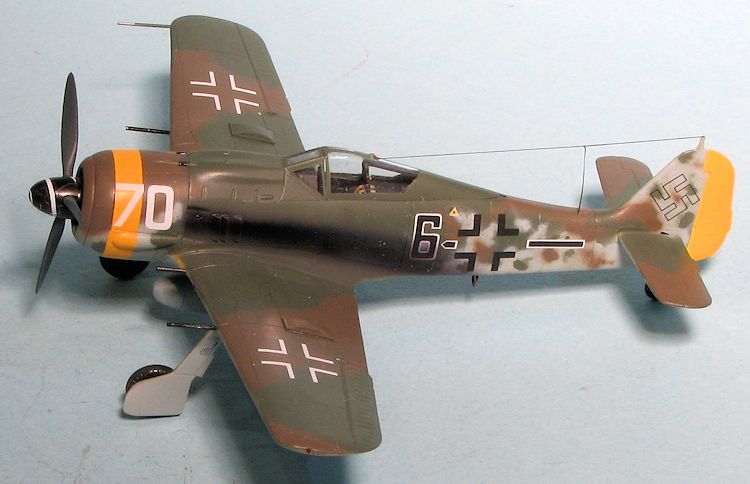
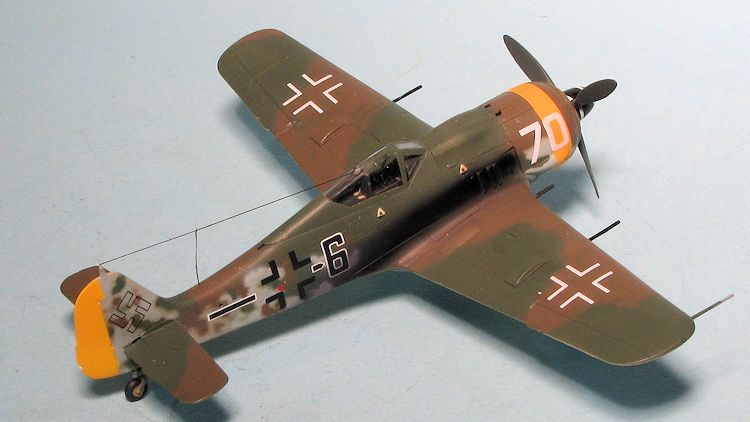
The well done instruction sheet offers 6 nicely illustrated construction steps and I can tell you that the parts fit well and the kit will build quickly. The markings are for two planes. The box art plane os frp, 12/JG 5 and flown by Rudi Linz from Herdla, Norway in early 1945. The other is a rather intriguing airplane that is almost overall RLM 81 except for the forward lower wings which are RLM 76 and the lower and forward cowling which are yellow. This plane was with III./JG 301 in late 1944. Decals are nicely printed but are the 'old school' with off white whites. Fortunately, aftermarket decals have been done so you can do different markings if you so wish.
| CONSTRUCTION |
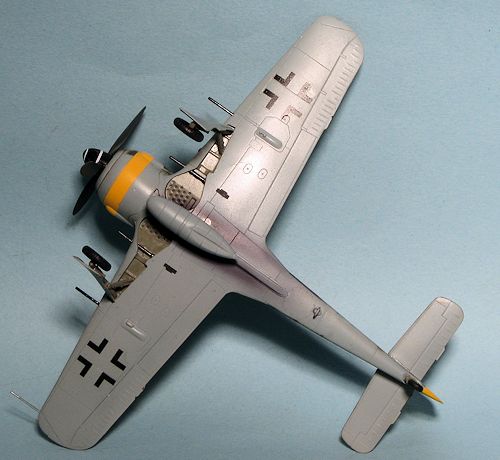
I started this build by drilling holes. In the upper wing, holes need to be drilled for the cannon clearance bulges while on the lower wing the mounts for the centerline rack have to be taken care of. Of course, if you are modeling your 190 without this feature, you can leave these closed. I then glued the upper and lower wing pieces together. At the interior I painted all the inside bits with RLM 66 and applied the decals to the instrument panels and side consoles. Probably due to age, these broke up into sections when I removed them from the backing. I also added some Eduard belts as the seat is quite visible, even through a closed canopy. A note on 190 seat harnesses. The shoulder belts attach to the decking behind the cockpit and not the seat so you should wait to install those once the fuselage has been completely assembled and sanded.
 Eventually, what little there is of the cockpit was finished and it was glued
into one fuselage half, followed by the cementing of both fuselage halves
together. The seams were dealt with using super glue for filler and the
wings were assembled and cleaned up. These were then fit onto the fuselage. The
fit is really very good with only the rear fuselage/wing join needing any help.
The upper cowling piece was also glued on. Note that these often did not fit
well in the rear so having it rather sloppy is just fine. I had oversanded the
sprue attachment stub on the front and had to use some filler to take care of
that.
Eventually, what little there is of the cockpit was finished and it was glued
into one fuselage half, followed by the cementing of both fuselage halves
together. The seams were dealt with using super glue for filler and the
wings were assembled and cleaned up. These were then fit onto the fuselage. The
fit is really very good with only the rear fuselage/wing join needing any help.
The upper cowling piece was also glued on. Note that these often did not fit
well in the rear so having it rather sloppy is just fine. I had oversanded the
sprue attachment stub on the front and had to use some filler to take care of
that.
Next the tail planes were glued on followed by the upper wing cannon bulges, the forward cowling piece and the bomb rack. I broke the rack hold down section removing it from the sprue, so you may want to saw that piece. Next, the armor plate piece was painted and decalled. This was then installed into the canopy section at the back. Meanwhile, the windscreen was glued on and it along with the canopy were masked. Hasegawa's frame lines are very faint so masking their clear bits is often a challenge. Frequently, I 'pre-scribe' the frame lines so I can see them through the Tamiya tape.
| COLORS & MARKINGS |
 With the clear bits in place and masked, it was time to paint. For this kit I
used another scheme from Aeromaster 72-042, Reich Defense part III. This has
markings for five FW-190s and this venture makes the fourth scheme I've used
from this sheet. It is a plane in RLM 81/82/76 from an unknown unit. It has a yellow nose stripe and rudder. I used Model Master for the RLM 76 and
82 and Aeromaster enamel for the RLM 81. This has a rather neat fuselage
treatment of the colors so I enjoyed applying the scheme. Overall it is rather
dark, but typical for late war planes. Despite the age of the sheet, the decals,
printed by Microscale, gave me no issues.
With the clear bits in place and masked, it was time to paint. For this kit I
used another scheme from Aeromaster 72-042, Reich Defense part III. This has
markings for five FW-190s and this venture makes the fourth scheme I've used
from this sheet. It is a plane in RLM 81/82/76 from an unknown unit. It has a yellow nose stripe and rudder. I used Model Master for the RLM 76 and
82 and Aeromaster enamel for the RLM 81. This has a rather neat fuselage
treatment of the colors so I enjoyed applying the scheme. Overall it is rather
dark, but typical for late war planes. Despite the age of the sheet, the decals,
printed by Microscale, gave me no issues.
| FINAL BITS |
Once the decals were in place, I attached the landing
gear and the gear doors. The gear have a lot of play in them so one has to get
the doors on as soon as possible to help with the proper forward alignment. One
often sees 190s with the gear straight down from the wing and this just looks
odd. The upper section
 of the main gear door needs to be trimmed off to fit
properly. There is a line on the inner door to show where this is to be done.
The wheels were then glued on and left to dry.
of the main gear door needs to be trimmed off to fit
properly. There is a line on the inner door to show where this is to be done.
The wheels were then glued on and left to dry.
I then painted the prop spinner and the fan black. The decal for the spinner required some Solvaset to fit properly. The RLM 70 blades were ten glued on the fan section and the spinner attached. I also glued on the DF loop antenna and painted the gun barrels with Tamiya gunmetal before installing them. I then glued on the prop assembly. The airframe was given a coat of mostly matte clear, a concoction I make by mixing Future with Tamiya flat base. A heavy exhaust stain was provided by spraying Alclad II's clear smoke. Late war fuels were very 'sooty' so even low time airframes (which most late war planes were), would have a lot of exhaust staining. This staining is actually a bit greasy looking and not matte. The masking was removed from the canopy and windscreen, The drop tank installed, and a radio long wire was made using EZ Line. The last step was to add formation lights using AK Interactive clears.
| CONCLUSIONS |
This isn't the only Hasegawa 1/72 FW-190 I've done over the years, but I find them to be very good builds. The fit is quite good and while it is a bit lacking in the cockpit, there are inexpensive aftermarket sets out there for those who like to have a lot of detail in there. I realize that either 1/72 or FW-190s are not high on everyone's list of subject to build, but if they are, then you really cannot go wrong with this one.
February 2015
Thanks to me for the review kit.
If you would like your product reviewed fairly and fairly quickly, please contact the editor or see other details in the Note to Contributors.