
Hasegawa 1/48 FW-190A-3
| KIT: | Hasegawa 1/48 FW-190A-3 |
| KIT #: | 09090 (Jt 90) |
| PRICE: | $30.00 MSRP |
| DECALS: | Three options |
| REVIEWER: | Scott Van Aken |
| NOTES: |
| HISTORY |
Kurt Tank's most famous fighter, the FW190, was actually flying in 1939 when World War II began. However, its delayed debut, much like it's entire development history, was marked by also-ran status. During the mid to late 1930s, conventional wisdom held that air cooled radial engines presented too much drag for a fighter aircraft. Tank might not have challenged this notion except that there were no proven water cooled power plants available for the FW190. The premier water cooled engine at the time was the Daimler Benz 600, and Benz could barely keep up with the demands of Messerschmitt 109 and 110 production.
 So Tank tried a different tactic - he'd use
the high output BMW 801 radial, and apply its 1700 horsepower, compared to the
DB601's 1100hp, to compensate for the added drag. It worked. The FW190 was the
fastest front line fighter in the world when it finally reached combat units,
late in 1941. At the time, British Spitfire Mk V pilots were holding their own
against the Luftwaffe's front line fighter, the Bf109. The sudden appearance of
the Focke Wulf 190 nearly threw the RAF into panic. Faster, more maneuverable,
and possessing the most devastating armament yet seen in a fighter, the Focke
Wulf was to become Germany's most impressive mass produced prop fighter of World
War II.
So Tank tried a different tactic - he'd use
the high output BMW 801 radial, and apply its 1700 horsepower, compared to the
DB601's 1100hp, to compensate for the added drag. It worked. The FW190 was the
fastest front line fighter in the world when it finally reached combat units,
late in 1941. At the time, British Spitfire Mk V pilots were holding their own
against the Luftwaffe's front line fighter, the Bf109. The sudden appearance of
the Focke Wulf 190 nearly threw the RAF into panic. Faster, more maneuverable,
and possessing the most devastating armament yet seen in a fighter, the Focke
Wulf was to become Germany's most impressive mass produced prop fighter of World
War II.
Its emergence resulted in the rapid
development of the Spitfire Mk IX. Until then, the RAF attempted to console its
anxious pilots by telling them that the Spitfire could out-turn the Focke Wulf.
This was little comfort to RAF veterans who understood that superior turning
ability is, at best, a defensive tactic. When an A-3 landed in England by
mistake, the British finally got to thoroughly examine its nemesis. Their
initial investigation revealed just how superior this fighter was, and it did
little for the morale of their leading engineers. The Focke Wulf, from a
technical and design standpoint, was far and away the most advanced aircraft in
the world. Adjustment of engine rpm, throttle setting, and propeller pitch was
handled automatically, as was trim. Control harmony was the best of its day. The
190's wide track landing gear made landing and ground handling far easier than
the Spitfires narrow track gear. All of this was built into a trim, sleek
package, making the 190 not only an aerodynamically efficient machine, but one
that was difficult to hit.
Though the FW-190A-3 was the third variant, it was the first to achieve a high level of reliability and production. Earlier versions were plagued with an engine that liked to catch fire with some regularity, making it a requirement to have someone standing by with a fire extinguisher every time the engine was started. It was also saddled with the less than sparkling MG/FF cannon, that was drum fed and had a tendency to jam under high G loads. Since it was mounted in the wings, there was little the pilot could do but curse.
An increase it power, capability and armament came with the next version, but that is another story.
| THE KIT |
This kit is much what we have come to expect from
Hasegawa. Solid engineering and many interchangeable sections to do other
variants. Nearly all the sprues are marked FW-190 A-3/4 so you can bet on there
being ano ther version. Though some
have thought that the A-1/2 could also be done with this kit, this isn't the
case as there are some significant differences in the earlier versions that are
not provided in the kit. However, it would only take an additional sprue
to handle the changes.
ther version. Though some
have thought that the A-1/2 could also be done with this kit, this isn't the
case as there are some significant differences in the earlier versions that are
not provided in the kit. However, it would only take an additional sprue
to handle the changes.
I was somewhat surprised to find sink areas and some flash on the kit, especially as it is a brand new molding, but these things happen and it is nothing that some filler and trimming won't take care of. There are a lot of parts not used on this one. For instance, there are different lower gear doors, lower wing gun access panels, upper wing panels, cockpit armor plate, tail planes (why I'm not sure as they look the same), wheels and under fuselage bits like drop tank and bomb with bomb rack that are not appropriate to the A-3 version.
The kit has separate ailerons, which in itself is odd, but should improve the look in this area. The kit comes with sprue guards over the hinges to keep them from being damaged. A separate canopy and windscreen are supplied as are clear formation lights. Wheel well detail is excellent as is the detail on the landing gear legs, which include the lower door mount framework.
Markings are provided for three planes
| CONSTRUCTION |
Step one this time to to prepaint as much stuff as I could while on the sprues. Tom Cleaver has been doing this for a while, and I thought I'd give it shot to see if it can improve building time. Cockpit stuff was painted RLM 66, lower wing and outer gear doors in RLM 65 along with the ailerons and tail planes. The wheel wells, gear door insides and landing gear legs got the RLM 02 treatment. All using Testors Model Master enamels.
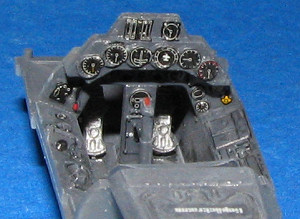 I used
the kit decals for the instrument panels and rather than cut away the detail,
laid them right atop the raised detailing. A zap of Solvaset and it worked
beautifully. I had the center instrument panel decal slip while drying,
unfortunately, but since 190 cockpits are so small, few will really notice it. I
also installed an aftermarket harness in there. It would be nice if the folks
who do these kits at least offer a decal for the harness as a plain seat just
looks a trifle odd. One thing about prepainting parts on the tree is that they
need to be painted again once removed and the mold lines/sprue attachment bits
are cleaned up. It didn't seem any quicker, just different. I also installed a
set of photo etched seat belts from one of the many sets strewn around the
workbench.
I used
the kit decals for the instrument panels and rather than cut away the detail,
laid them right atop the raised detailing. A zap of Solvaset and it worked
beautifully. I had the center instrument panel decal slip while drying,
unfortunately, but since 190 cockpits are so small, few will really notice it. I
also installed an aftermarket harness in there. It would be nice if the folks
who do these kits at least offer a decal for the harness as a plain seat just
looks a trifle odd. One thing about prepainting parts on the tree is that they
need to be painted again once removed and the mold lines/sprue attachment bits
are cleaned up. It didn't seem any quicker, just different. I also installed a
set of photo etched seat belts from one of the many sets strewn around the
workbench.
Once the cockpit bits were assembled, they were installed in the fuselage halves along with the tail gear, which has to be glued in at this time. I hate to say it, but I found the fit of the cockpit in the fuselage halves to be a bit dodgy. For some reason, the forward section of the interior didn't want to match up to the alignment tabs on the inside of the fuselage. I'm not sure why, but there it is. There was also some difficulty in getting the cockpit anti-glare section to fit together snugly. I glued in the tail wheel at this time after prepainting it. I installed the A-3 type upper fin and filled the sink area in it and the fuselage halves at this time. The forward cooling grille sections fit well as did the engine mount.
Speaking of the engine, there really is little reason
to do a lot of detailing here as it will be nigh invisible once the cooling fan
is in place. I did paint the engine steel and the gear cover in dark grey, but
that was about it. With the fuselage halves together, I decided to try something
I've never done. I glued the upper wings to the wing roots and then glued the
lower wing section in  place. It seems to have worked OK, but not as simple a job
as I'd have thought. I had some trouble right at the center of the wings where
the wheel well section joins in. Probably due to all the bracing in there and
the lack of a positive join section for some rather flimsy plastic. However, the
upper wings look great! I did need filler on the upper fuselage.
place. It seems to have worked OK, but not as simple a job
as I'd have thought. I had some trouble right at the center of the wings where
the wheel well section joins in. Probably due to all the bracing in there and
the lack of a positive join section for some rather flimsy plastic. However, the
upper wings look great! I did need filler on the upper fuselage.
It was at this time that I realize I'd stupidly put in the cooling vent sections backwards. Having glued the devil out of them, it was not surprising that all my efforts to easily remove them came to naught. Well I sure wasn't going to be able to build the kit like this so I hacked them out as much as I could. No luck as they came away in pieces. Now what to do. I wrote to Hasegawa to request new bits, explaining how I'd been stupid and requesting the small sprue on which they fit. As always, I offered to pay for them. Many weeks later, the parts came and I had to do a lot of carving and filing to get the remains of the old parts out so the new ones would fit in. Thankfully, I have a goodly selection of dental scrapers that come in very handy for things like this. I was able to get the parts in the right way this time and continued with the build.
The engine was glued in place and the upper cowl attached. Hasegawa does the main cowling in a multiple of sections. This is to allow for the use of sand filters for upcoming kits. It also means that the cowling requires a lot of fussing and fiddling to get to fit. I wasn't very good at having this happen and my cowling isn't the best. I recommend fitting the side bits first and getting them properly squared away before attaching the top and front pieces. I tried to do it all at once to get things lined up and it didn't work well for me. The cowling isn't symmetrical on mine so the front ring does not fit as it should. It is the price one pays for the 'multiple variants' deal.
I then attached the gun sight and masked off the transparencies as well as the wheel wells, engine opening, and cockpit section.
| COLORS & MARKINGS |
One thing about the vast majority of early FW-190s is
that they are in RLM 74/75/76, though you could do an A-1 in the RLM 71/02/65
scheme as there is evidence of at least a few being done in these colors. Early
190 aftermarket decals are not exactly spilling off the shelves (yet), so I
chose an old one in my stash from TGR. It is TGR
48008 and I don't know if it is still available or not . One of the markings
was for Obt. Kurt Goltzsch from 7./JG 2 out of Theville France in 1942. Like
most German planes on the Channel front, it has a yellow rudder and lower
cowling section. These were sprayed white then yellow. I did the underside in
RLM 76 then masked. The upper surface was in RLM 74/75 that was hand sprayed in
a fairly tight pattern. According to the sheet, mottling was not very heavy so I
put it on rather lightly. I misted RLM 76 over some areas to fade things out
even more. For all the colors, I used Testors Model Master enamels thinned with
lacquer thinner so it would dry quickly. The prop and spinner were painted RLM
70.
. One of the markings
was for Obt. Kurt Goltzsch from 7./JG 2 out of Theville France in 1942. Like
most German planes on the Channel front, it has a yellow rudder and lower
cowling section. These were sprayed white then yellow. I did the underside in
RLM 76 then masked. The upper surface was in RLM 74/75 that was hand sprayed in
a fairly tight pattern. According to the sheet, mottling was not very heavy so I
put it on rather lightly. I misted RLM 76 over some areas to fade things out
even more. For all the colors, I used Testors Model Master enamels thinned with
lacquer thinner so it would dry quickly. The prop and spinner were painted RLM
70.
I then returned to the work bench to attach the main gear prior to applying a gloss coat and the decals. The mounting of the main gear is quite positive and with little slop so getting the proper angle shouldn't be too much of a problem. Especially after attaching the retraction struts as that limits the wiggle even more. I was less than thrilled with how loose the wheel attachments are. The axle is actually a decreasing cone instead of a straight shaft. Means a lot of wiggle room when it comes to the wheels.
With that on, the model was given a coat or two of clear gloss acrylic (Future/Kleer), and the decals were applied. The TGR sheet offers a set of data markings, but there is no data sheet or even an upper camo sheet included. Perhaps these were lost or never included, but they would be helpful. In any event, the markings went on well and the decal for the large black area behind the exhaust helped to mask a multiple of evils! Without a proper guide for the TGR decals, I ended up using the stencils from the Hasegawa sheet. They worked well without any problems, even when dabbed with Solvaset.
| FINAL CONSTRUCTION |
 With the decals on I added the final bits. This
included the gear doors, which are two parts per leg and fit quite well, and the
inner gear doors. Thanks to not paying attention, I forgot to drill the holes in
the wheel well piece for the retraction arms before putting in the wheel well.
You need to pay close attention to the instructions with this one as there are
little snippets of info that are quite easily overlooked if one is not focused
on the job. The prop was pressed into place and then the kit was given a coat of
clear matte to seal in the decals and bring things back to the 'norm' for
camouflaged WWII fighters.
With the decals on I added the final bits. This
included the gear doors, which are two parts per leg and fit quite well, and the
inner gear doors. Thanks to not paying attention, I forgot to drill the holes in
the wheel well piece for the retraction arms before putting in the wheel well.
You need to pay close attention to the instructions with this one as there are
little snippets of info that are quite easily overlooked if one is not focused
on the job. The prop was pressed into place and then the kit was given a coat of
clear matte to seal in the decals and bring things back to the 'norm' for
camouflaged WWII fighters.
I also drilled out the gun barrels, painted them gun metal and stuck them in place. The pitot tube was glued in as were the small clear lenses at the tips of the wings. These had the inside portion painted red or green. The head armor was then glued into the canopy section using clear paint. Makes it easy to fix mistakes and doesn't fog the clear. I also used clear paint to attach the canopy section. I was then off to take pictures. I didn't realize it until just a bit ago, but I forgot to paint the inside of the exhaust stacks black. That has since been taken care of.
| CONCLUSIONS |
Well, it is hard to really say bad things about new Hasegawa kit. They are fiddly, that is for sure, what with the need to have a bunch of parts so that all the different variants can b
 e
done. I have no complaints about accuracy, but then I don't measure kits against
plans. I'd have to say, that sticking the Hasegawa and the Tamiya 190A-3 next to
each other, I notice that there isn't that much to choose between them. The
Hasegawa kit, being about 10 years newer does have a bit better detailing, and
Tamiya did screw up and mold the inner doors closed, but that is about it. The
Tamiya kit was easier to build, I do remember that. It seems that with Hasegawa
kits, the first one is used to make all sorts of errors and then I remember them
for the subsequent builds of that particular kit. It has happened with all their
109s and F-4s and other kits I've done recently!
e
done. I have no complaints about accuracy, but then I don't measure kits against
plans. I'd have to say, that sticking the Hasegawa and the Tamiya 190A-3 next to
each other, I notice that there isn't that much to choose between them. The
Hasegawa kit, being about 10 years newer does have a bit better detailing, and
Tamiya did screw up and mold the inner doors closed, but that is about it. The
Tamiya kit was easier to build, I do remember that. It seems that with Hasegawa
kits, the first one is used to make all sorts of errors and then I remember them
for the subsequent builds of that particular kit. It has happened with all their
109s and F-4s and other kits I've done recently!
June 2006 Kit courtesy of my wallet. Thanks to
Three Guys Replicas (no longer in business) for the decal
sheet, and to HLJ for advice on getting the
replacement parts. If you would like your product reviewed fairly and quickly, please
contact
me or see other details in the
Note to
Contributors.
#1417 in a series