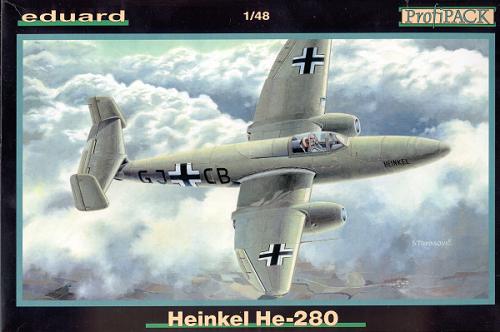
Eduard 1/48 He-280
|
KIT # |
8049 |
|
PRICE: |
$39.98 |
|
DECALS: |
Three aircraft, all prototypes |
|
REVIEW: |
|
|
NOTES: |
Profi-Pak version |
|
HISTORY |

The Heinkel 280 was the world's first jet fighter prototype. The others such as the He-178 and Gloster Whittle were only proof of concept aircraft. The He-280 was designed with room for operational equipment such as guns and radios that the earlier jets didn't have. As with all the early jets, the biggest problem was suitable power plants. This being the case, the first He-280 started out life as a glider with shapes where the engines would go. The 280 was designed with Heinkel's own engine, the HeS 8a in mind. Unfortunately, his engine design was too advanced and suffered numerous failures. As a result, most of the 280 prototypes were redesigned for the larger Junkers Jumo 004 as used in the Me-262. Interestingly enough, the 262 was initially designed for Heinkel engines as well.
Though flying before the Messerschmitt Me-262, the 280 was not accepted for production. It was said that the design wasn't advanced enough, though in reality, Heinkel was never in consideration for the fighter design as it was felt that his strong suit was in multi-engined aircraft. As a result, Heinkel's 280 joined the He-100 and He-112 as fighters that were superior to what was currently being used, but not built thanks to politics!
An interesting side note. The He-280 was one of the first aircraft equipped with an ejection seat. It was used when the first prototype was used to test the airframe with pulse-jet engines and the aircraft went out of control. This is the first recorded use of an ejection seat to save a pilot.
|
THE KIT |
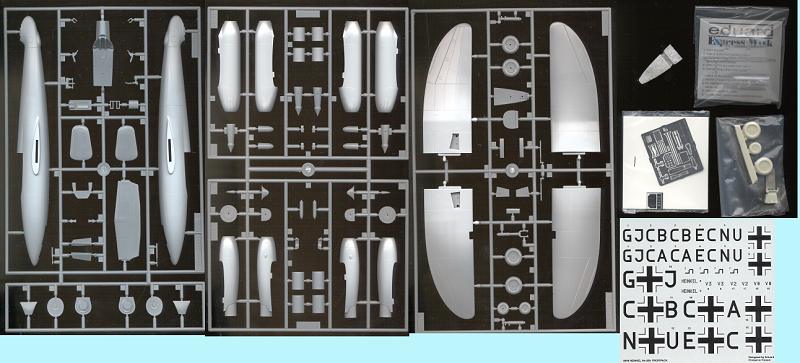
Upon opening the box, one's first impression is of how much this looks like a Hasegawa kit. The sprue gates are small, the parts finely detailed and the overall finish of the parts is superb. There are enough parts to build either a HeS 08a or Jumo 004b engined aircraft. There is also a fret of etched metal for belts and a few other bits. In addition there are two canopy options; open or closed. The canopy comes with masking material precut as well as masks for the wheel hubs. There is a large weight for the nose and resin wheels and seat are also included. The decals are by Propagteam and from past experience, they are superbly done, though very thin and a bit difficult to use because of their thinness.
Just what parts in this kit make it worth the $10 extra dollars for the Profipack version? Well, it is the extra sprue for the Jumo 004 engined version as well as the resin wheels and photo-etched fret and the extra markings on the decal sheet. Naturally, I want to do a Heinkel engined aircraft, so I guess I could have saved myself the extra bucks for this one. Hope the Jumo engines fit a Monogram 262!
|
CONSTRUCTION |
Quite typically for me, the first thing I did was look for subassemblies to glue together. First thing I did was to cut out the notches in the underside of the wing for the Heinkel HeS 8a engines. I can always use the Jumos on an Me-262 as they are nicer that what comes with the Monogram kit. Then the wings were glued together. Fit is quite good, though the trailing edges are thick. One of these days, Eduard will learn how to do full control surfaces on the upper wing like many of the best companies do, but for now, some filler and sanding will fix things up OK.

Next the resin bits were removed from their blocks. The resin tires are 'flattened' though detail-wise, don't seem to be an improvement over the plastic ones in the kit, as you can see in the image to the right. The ejection seat is an improvement over the styrene one, but my copy had a lot of flash and required quite a bit of clean-up of mold lines as well. Fortunately, Eduard's slightly greenish resin is a lot more dense than the typical tan stuff I'm used to dealing with so can take some rather rough handling without breaking.
Other things done were the gluing together of the engine intakes and the removal of the pedestal on the interior floor. The nose wheel well was also glued into the fuselage at this time.
Next, the cockpit was started by installing the rudder bar, etched rudder pedals, right and left consoles as well as the etched left console and controls. Make sure that before installing any of these that you remove the bump on the cockpit floor that the plastic seat was to sit on if you use the resin seat.

The engines were next. First the intakes had to be assembled. When those were done, the insides were puttied and when dry sanded by rolling a piece of sandpaper around a paintbrush handle. Next it and the intake cone were painted RLM 02 grey. You will find that this is the predominant color of this aircraft! Once those were dry the intake and exhaust cones were attached to the compressor faces and installed in the engine nacelles. The nacelles were then glued together. Once dry it was time to do something about the seams that are quite visible, especially in the intake. Those seams were puttied and then very carefully sanded. Then tissue was placed in the intake to protect the aluminum painted blades and the intakes painted RLM 02.

Now the instructions would have you install the engines after the wings were in place, but my experience with this type of setup is not that great so I installed the engines on the wings first. Once the holes have been properly enlarged, the engines fit quite well, though I did use some filler.
Next the interior was installed in the fuselage and the halves were then glued together. I found the front where the weight goes didn't want to close very well. I'd suggest trimming the nose weight to assure a proper fit. Once dry, filled and sanded, the tail plane was installed. To keep it level without having the wings installed, an emery board was placed where the wings go and used as a level. Once the horizontal stabilizer was dry the rudders were glued on the end. Like the horizontal stab, these needed the attachment tabs slightly sanded down to get an optimum fit.

Mating the wings to the fuselage was next. Dry fitting showed that the wings set too high on the top. A bit of thinning down of the attachment tab took care of that. First one wing was glued in place. Fit was OK, but not super. By the time it had dried at the proper angle, there was a small gap on the top. This was true of the other wing as well. After a day's drying time, this gap was filled with putty and sanded down flush. There were also a few gaps at the bottom, mostly caused by my trimming process.
I now had a pretty complete airframe and was soon zooming it around the room (practice, you know). Since the whole airframe was to be painted RLM 02 green-grey, the landing gear were installed at this time. A note on the landing gear. There will have to be a slight modification made to the long strut that attaches to the main gear. Basically it needs to be shortened just a bit and the attachment point to the main gear needs to be almost completely removed for it to fit. Don't forget to sand an angle to the smaller, inboard piece where it meets the main strut. The etched bits fit very well. The gear struts were pre-painted and then the oleos covered with Bare Metal Foil. These were then masked when the airframe was painted.
|
PAINT & DECALS |


Speaking of painting, at this time the cockpit was masked as well as the landing gear and the kit given an overall coat of Aeromaster RLM 02 enamel. Next all the panel lines were roughly outlined in dark green. Once this was dry, the canopy and landing light were installed in the kit and masked using the provided masks. I must be frank and tell you that while the Eduard masks work well, I had hoped that the main canopy mask would have been a single large piece. What Eduard provides is just the outline and you have to fill in the big section yourself. Other masks provide a large bit and I think Eduard could do the same. I didn't use their wheel masks as the wheels are simple enough to do without needing the extra step of masking. In fact, the canopy is equally easy to mask using whatever masking material you normally use.
Once the paint had dried, the few glitches were repaired and then the airframe was resprayed with RLM 02, however not as heavily as the first application. This allowed the painted panel lines to be barely visible under the upper coat. It is an effect that I like as it isn't too heavy like other methods and not as fake looking as filled panel lines. While the effect isn't that apparent in the photos, it is noticeable when viewing the actual model. As soon as that coat was dry, several coats of Future were applied to get ready for the decals.


Next some of the other bits and pieces were installed. These included the inner canopy rails (a real pain to install), the gear doors and wheels. The decals were then applied. These are not Propagteam but from a Polish company. However, like the aforementioned, they require very careful handling to get on properly. Another bit of info is that the decals are larger than what is shown in the decal placement guide. I believe the decals are the proper size. Finally the control surface hinges were outlined with a Rapidograph drafting pen. The airframe was then sprayed with another coat of Future to seal the decals. At this time I debated on putting on a flat coat. Normally prototypes are a bit glossy to help increase the speed of the aircraft. Looking at the reference, I noticed that the non-glider He-280s showed almost no glare or shine at all. Based on that I oversprayed the model with the usual matte finish of Future and Tamiya Flat Base. While looking through the reference I noticed that the engine cowlings for the version I was building are not exactly the same as that provided in the kit. Oh well, not much I could do about it now!!
Once everything had dried, the masking was removed and any touchups needed were made. Finally, the canopy was added. It fits very well in the closed position, but is really too thick to be displayed open. What a quandry! Nevertheless, I stretched open the canopy, hoping not to crack it, and placed it in the open position.
|
CONCLUSIONS |

I am really pleased with this kit and the results I got from it. It isn't needlessly fiddly and all the parts fit quite well. This Eduard kit is proof that they are well on their way to being an equal of the better mainstream companies. I highly recommend this kit to all but the bare beginner. It would be an excellent introduction to mixed media kits for those who have never tried one before.
If you would like your product reviewed fairly and fairly quickly, please contact the editor or see other details in the Note to Contributors.
|
REFERENCES |
Jet Planes of the Third Reich, Smith and Creek, Monogram Aviation Publications, 1982 (OOP)
Copyright ModelingMadness.com. All rights reserved. No reproduction in part or in whole without express permission from the editor.