Revell AG 1/32 He-162A
| KIT #: | 04723 |
| PRICE: | $30.00 MSRP |
| DECALS: | Three options |
| REVIEWER: | Scott Van Aken |
| NOTES: | Contact-Resine detail set and Fritz decals used. |
| HISTORY |
The time is early 1944. Things are not going as well for the Luftwaffe as hoped. One thing that is going well is the turbojet program. The Me-262 is nearly operational and has no match anywhere in the skies. However, the Me-262 is a big plane and it is hoped that a smaller jet can be built to augment the 262 and drive the Allies out of the skies. Aluminum is a problem, so much of the airframe will have to be built of wood or steel. To stir the masses, it will be called the Volksjager or People's Fighter.
 The requirement went out and in September of 1944, Heinkel was
chosen to develop the Volksjager. Working near miracles, the first prototype
flew in December of 1944, a mere three months after getting the go-ahead. The
plane wasn't perfect. There were some QA problems with the wooden bonding
and an aerodynamic fix in terms of drooped wingtips was added to
make the plane more stable. This upgraded version was also fully armed and made its first
flight in late January of 1945.
The requirement went out and in September of 1944, Heinkel was
chosen to develop the Volksjager. Working near miracles, the first prototype
flew in December of 1944, a mere three months after getting the go-ahead. The
plane wasn't perfect. There were some QA problems with the wooden bonding
and an aerodynamic fix in terms of drooped wingtips was added to
make the plane more stable. This upgraded version was also fully armed and made its first
flight in late January of 1945.
Production got underway at a rapid pace for this late in the war and JG 1 received their first He-162s in late April of 1945. Unfortunately for them (perhaps I should say fortunately) for them, the war was almost over and few operational sorties were undertaken. This was mostly due to a lack of fuel and perhaps the pilots should be grateful. Most He-162s were rather shoddily constructed and one test flown after the war shed an aileron, killing the pilot. Of the 112 aircraft completed, several have survived in various museums.
| THE KIT |
 Tom Cleaver
did a
preview of this kit so I'll refer you to that for a look at what comes
in the box. It is not unusual that it takes me a while to building kits far
after their original release dates. I've had this 162 kit for about a year
(yes it has been that long since it was brought out), and in that time
there have been a lot of aftermarket bits provided for it, some of them
rather recent.
Tom Cleaver
did a
preview of this kit so I'll refer you to that for a look at what comes
in the box. It is not unusual that it takes me a while to building kits far
after their original release dates. I've had this 162 kit for about a year
(yes it has been that long since it was brought out), and in that time
there have been a lot of aftermarket bits provided for it, some of them
rather recent.
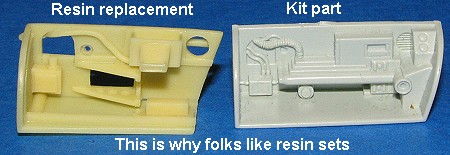 While I enjoy and actually prefer
doing my models pretty close to box stock, the opportunity presented itself
in the form of the Contact Resine cockpit set and this alone almost relegated the
kit to a permanent home on the shelf of doom.
While I enjoy and actually prefer
doing my models pretty close to box stock, the opportunity presented itself
in the form of the Contact Resine cockpit set and this alone almost relegated the
kit to a permanent home on the shelf of doom.
| CONSTRUCTION |
 Since I am using a few aftermarket
bits on this one, including one that has replacement control surfaces, the
first thing I did was to glue together the wings, tail planes and
fin/rudders. Then, using a microsaw, I started cutting on the control
surfaces. Basically, I sawed through the areas were the 'gaps' are normally
found and the started sawing on the hinge lines. You don't have to cut all
the way through these; just enough to where you can start to wiggle them
back and forth. Once you wiggle them enough, they'll pop right off. Then
the
Since I am using a few aftermarket
bits on this one, including one that has replacement control surfaces, the
first thing I did was to glue together the wings, tail planes and
fin/rudders. Then, using a microsaw, I started cutting on the control
surfaces. Basically, I sawed through the areas were the 'gaps' are normally
found and the started sawing on the hinge lines. You don't have to cut all
the way through these; just enough to where you can start to wiggle them
back and forth. Once you wiggle them enough, they'll pop right off. Then
the
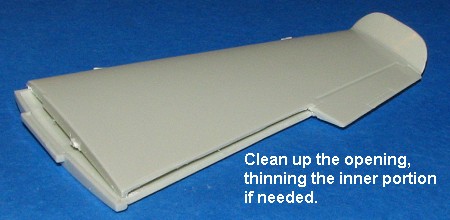 surfaces
need to be cleaned up. During this you should be test fitting the
replacement control surface. One thing I found is that you need to trim
back the thickness of the exposed flying surface 'lips' where the control
surface fits. I have a small motor tool that I used for this and it made
quick work of things. This was done on all the control surfaces, with the
most difficult ones being the rudders. This is because they are small and
because there is a 'step' that needs to be properly worked around.
surfaces
need to be cleaned up. During this you should be test fitting the
replacement control surface. One thing I found is that you need to trim
back the thickness of the exposed flying surface 'lips' where the control
surface fits. I have a small motor tool that I used for this and it made
quick work of things. This was done on all the control surfaces, with the
most difficult ones being the rudders. This is because they are small and
because there is a 'step' that needs to be properly worked around.
 With all those done and the control
surfaces test fitted to ensure no problems, the various flight surfaces
were sanded down and any filler needed applied. These were then set aside
while I worked on the interior.
With all those done and the control
surfaces test fitted to ensure no problems, the various flight surfaces
were sanded down and any filler needed applied. These were then set aside
while I worked on the interior.
The Contact Resine' instructions are really quite good as they are mostly photos with a few captions. Fitting the side panels and the rear bulkhead was not a problem. I did have some difficulty attaching the cannon in the open cannon bay and didn't get it high enough as I later found out. There is no solid attachment point that I could find.
These parts and some others were then sprayed with RLM 02 using Testors Model Master enamels. I did some detail painting in the interior and then gave it a wash and some dry-brushing. No need to get really grungy on these planes as they saw very little service and most had a lot less than 10 flight hours on them before the end of the war.
I next attached the forward bulkhead and then glued on the nose wheel well. I did this by attaching one side then put the fuselage halves together to get it into its final position. I then looked into detailing the seat as it needed some bits put on it that were not part of the kit or upgrade. The gun bay was also built up and installed in the left fuselage half. Interest was lost in the kit and it sat, unloved, in its dingy box for several years.
 When I did get back to it, I found the build to go
fairly smoothly. I had to finish building and painting the seat and during this
time I installed the nose gear assembly. The main gear well was also built up to
a certain extent, though I did leave the main legs out until after painting.
This was then glued into one of the fuselage halves. I then attached the
instrument panel/rudder pedal assembly. Then I had to find room for 25 grams of
weight. Some fit in the nose gear area, but most of it had to fit behind the
cockpit. I actually put in 30 grams just to be sure. Then the fuselage halves
were closed and though some clamping was needed, everything went fairly
smoothly.
When I did get back to it, I found the build to go
fairly smoothly. I had to finish building and painting the seat and during this
time I installed the nose gear assembly. The main gear well was also built up to
a certain extent, though I did leave the main legs out until after painting.
This was then glued into one of the fuselage halves. I then attached the
instrument panel/rudder pedal assembly. Then I had to find room for 25 grams of
weight. Some fit in the nose gear area, but most of it had to fit behind the
cockpit. I actually put in 30 grams just to be sure. Then the fuselage halves
were closed and though some clamping was needed, everything went fairly
smoothly.
Once all the seams had been taken care of, I attached the rudders to the already built up tailplane. This was then attached to the fuselage with a bit of clamping required for a good fit while the cement dried. Next up were the wings, which fit very well. Once in place the flaps were attached and I also attached the elevators. Atop the fuselage, the engine assembly was glued in place. I was doing the engine covers closed and this was a fairly tricky deal as the kit is not really designed for this. All the attachment areas are butt joins with no positive locators to keep the covers straight. I masked off the wheel wells and cockpit in preparation for painting.
| COLORS & MARKINGS |
 He-162s were not provided with complex camouflage schemes. Normally they were
a single upper color with the undersides in RLM 76. You will find models with
components such as tailplanes and wings in different colors from each other, but
it is unknown if those are actual schemes or just supposition.
He-162s were not provided with complex camouflage schemes. Normally they were
a single upper color with the undersides in RLM 76. You will find models with
components such as tailplanes and wings in different colors from each other, but
it is unknown if those are actual schemes or just supposition.
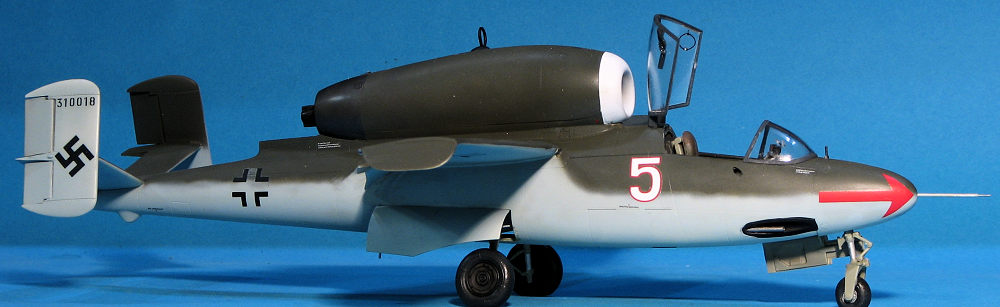
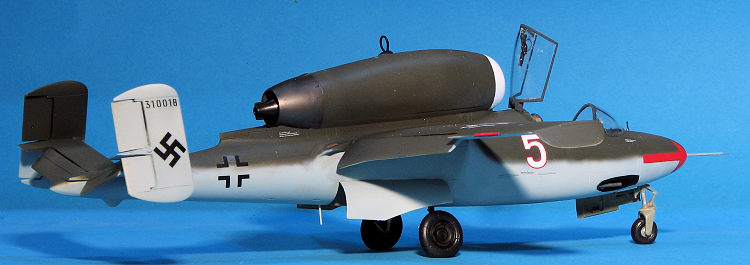
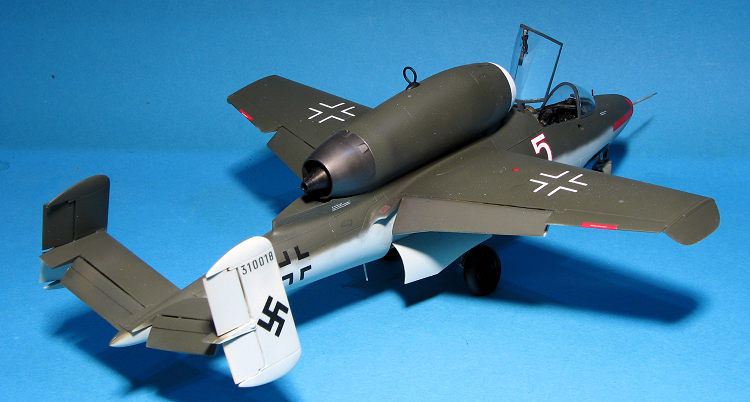
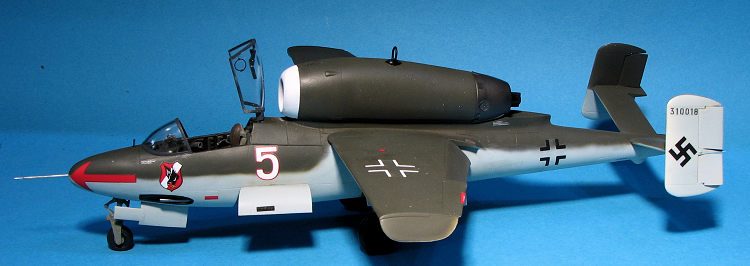
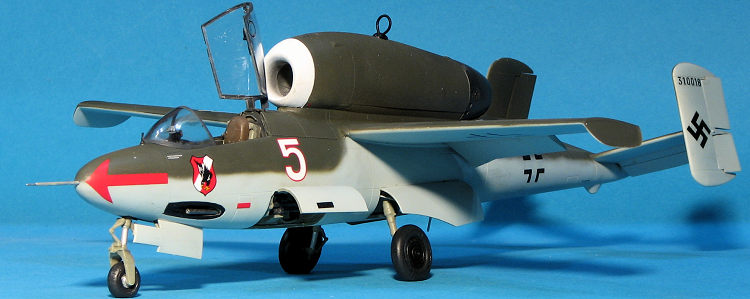
The decal sheet I am using is by Fritz Decals from 2005. It provides seven schemes with most of the upper colors being RLM 71. There is one with two shades, but the secondary shade is only on the engine cowling pieces. Most options also have a different color for the engine intake. I chose White 5, from 1./JG 1 as flown by Staffelkapitan Hptm. Heinz Kunneke. This aircraft had the RLM 71 upper surfaces with a white engine intake. Why RLM 71 and not some late war fighter color? Well, consider this. Heinkel built bombers so would have that shade in stock. The canopy frames on all options are RLM 66.
For the main paints, I picked Mr.Color lacquers. These dry quite hard quite quickly and also dry semi-gloss. The front of the engine was painted with Tamiya white and the rear portion of it got a coat of Alclad II steel. It took me a while to get all the colors in place
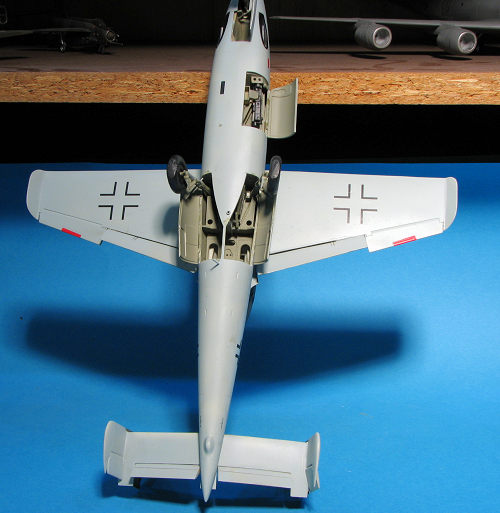
Once that was done, I installed the main landing gear legs, finished building the nose gear by installing the wheel and did the same for the main gear once they were solidly in place. Note that the resin wheels needed to be drilled out a little to fit on the axles. The gear doors do not have any sort of positive locators and so were fairly tricky to get placed just right. Nose gear door not so much as the main gear.
 Up on its legs, I took the opportunity to attach the
windscreen and several of the smaller antennas. I left the nose probe, canopy
and gun bay door off until after decals and clear matte. However, I did drill
out the gun barrels. The decals went on well, but required a fairly strong
setting solution to snuggle into the few panel lines. The decals are Cartograf
printed, but not as thin as some others I've used. A lot of stencils are
provided and I installed quite a few of them.
Up on its legs, I took the opportunity to attach the
windscreen and several of the smaller antennas. I left the nose probe, canopy
and gun bay door off until after decals and clear matte. However, I did drill
out the gun barrels. The decals went on well, but required a fairly strong
setting solution to snuggle into the few panel lines. The decals are Cartograf
printed, but not as thin as some others I've used. A lot of stencils are
provided and I installed quite a few of them.
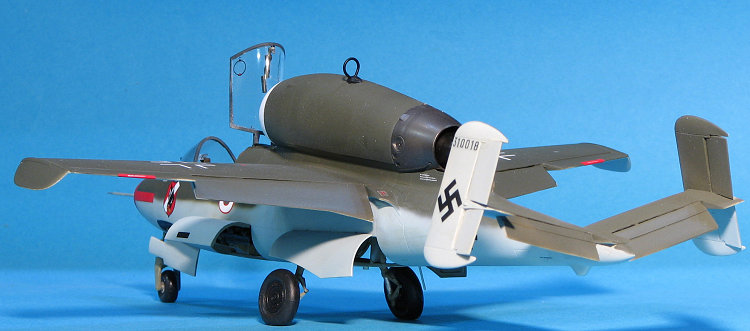
With the decals in place, I gave the kit an overall coat of Tamiya matte clear. Then on to the last few items. That included attaching the gun bay door, cementing the canopy open, and installing the nose probe. On the canopy the kit includes a longish handle that attaches to the forward part for the pilot to pull it down. There is also a brace included if you don't want the canopy fully open.
| CONCLUSIONS |
It is nice to get a shelf of doom kit finished, even if it took several years to do so. The kit itself is very nice and were I ever to do another, I would not include a lot of aftermarket. As nice as the Contact Resine set is, it is the set that caused the kit to be incomplete for such a long period of time. I'm simply not good at adding all that stuff. The basic kit itself has been generally unavailable for many years so perhaps Revell will consider a reissue.
19 June 2020
Copyright ModelingMadness.com. All rights reserved.
My thanks to Contact-Resine', and Fritz Decals for supplying the detail parts and decals.
If you would like your product reviewed fairly and fairly quickly, please contact the editor or see other details in the Note to Contributors.