|
KIT: |
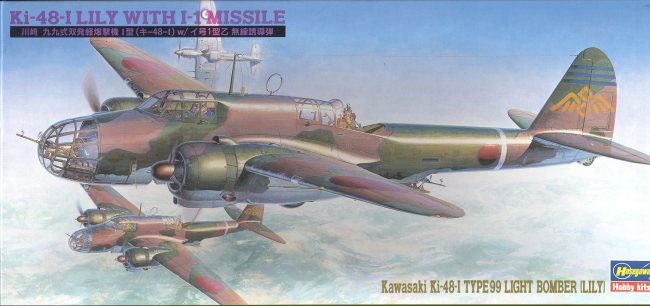
Hasegawa 1/48 Ki-48 'Lily' |
|
KIT # |
NP1X |
|
PRICE: |
$19.99 |
|
DECALS: |
See Review |
|
REVIEW & |
|
|
NOTES: |
with I-1 Missile |

|
HISTORY |
The appearance of the almost untouchable Tupelov SB-2 bomber during the Sino-Japanese conflict of 1937 took the Japanese army completely by surprise. Here was a fast light bomber that was almost immune to interception by the then new Ki-27 fighters. In December of that year, the JAAF instructed Kawasaki to build a similar aircraft that had to have twin engines, a maximum speed of 300 mph, a bomb load of 400kg and to be able to operate in very cold climates (such as near the Siberian border).
Design began soon after and much of what was learned in designing the Ki-45 was put into the aircraft. The use of a mid-wing allowed a full bomb bay so stores wouldn't have to be carried externally. Due to delays similar as to what was experienced by the Ki-45 (these two planes were being developed practically side by side), the first prototype didn't fly until July 1939. With the exception of severe tail flutter, the aircraft easily met all performance requirements. Raising the horizontal stabilizers and strengthening the rear fuselage took care of the flutter problems.
 First combat with the Ki-48 was with the 45th
Sentai in China in the fall of 1940. With the outbreak of the war in the
Pacific, the Ki-48 was the JAAF's most important light bomber outside the
Chinese front and was operated in Burma, Malaya, and against the US in the Philippines. It was eventually deployed to New Guinea and Netherlands East
Indies.
When having to go against Allied fighter opposition, it did not fare too well. It was too slow, too lightly armored, too weakly defended and had a too-small bomb load to be really effective. Some of this was rectified in an improved version, the Ki-48-II, which had improved armor and defensive armament. It also had improved engines and twice the bomb load of the Ki-48-I. Externally, the aircraft are almost identical, the only clue is the shorter carb intake of the -II. Despite these improvements, the bomb load was still too small and it was still too slow. Those not destroyed were used in taiatari suicide attacks, most of them expended during the Okinawa invasion.
In 1944 a few Ki-48-IIb airframes were used as test beds for the I-GO-1 air to ground missile and for the Ne-0 Turbojet. Of the 1,977 built, none survived the war.
|
THE KIT |
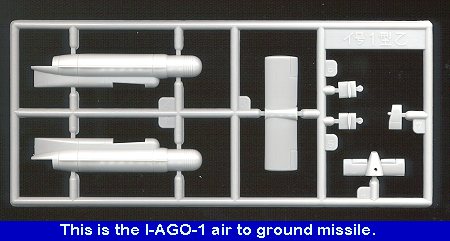 New this kit isn't, however it still holds up very well against
more modern models. According to my database, I built one of these kits back in February
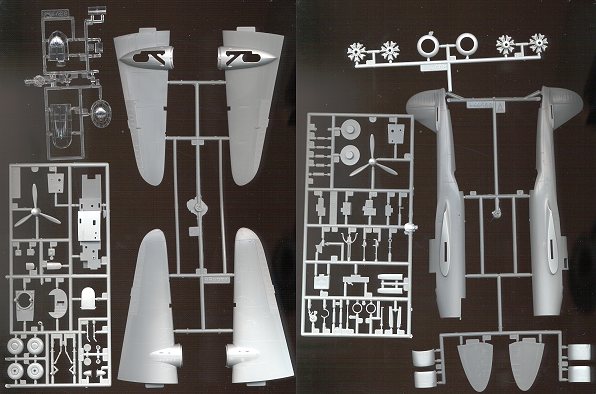
of 1984. Despite the many years, the mold is still nice a crisp. The panel lines
are finely engraved and the clear bits are like crystal. In fact, the only
change is that this has a different decal sheet from that older kit and, as
proclaimed on the box top, it includes an I-GO-1 missile.
Now this is particularly misleading. I bought the kit as I wanted a Japanese missile carrier. I was rather dismayed to find that not only did the kit variant, a Ki-48-I, not carry the missile, but that there is no indication or hint of how to mount the missile. There are no extra bits other than the seven parts to the missile itself. The box top may as well have said 'Ki-48-I with Sidewinders' and had two missiles tossed in the bag! Well, enough grousing on this and on to the rest of the kit.
Despite the crispness of the mold, over the years, some flash has crept into it, most noticeably on this kit on a few clear bits. There were also some broken parts thanks to Hasegawa's continuing insistence on putting all it's sprues in one bag. I do wish that they would spend the tiny bit extra and limit the number of sprues in one bag! As it typical with older kits, the back sides of the sprues are rife with ejector pin marks. Most are unobtrusive and will disappear when the kit is built, but others like those on the landing gear will need to be fixed. Thankfully, this aircraft has no landing gear doors so that isn't a problem!
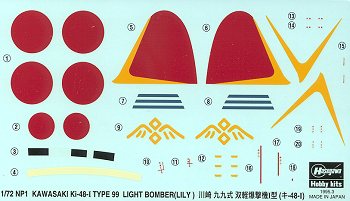 Instructions are quite adequate and give
a 9 step construction sequence along with the usual Gunze color callouts. All
the color names are in generic terms with no FS numbers, but not really a
problem if you have access to Gunze paints. The decal sheet is very nicely done and is done in house so all the usual warnings about using setting solution on
them apply. The reds are not as bright as on older kits and since there is darn
little in the way of aftermarket stuff for it, the kit decals will have to be
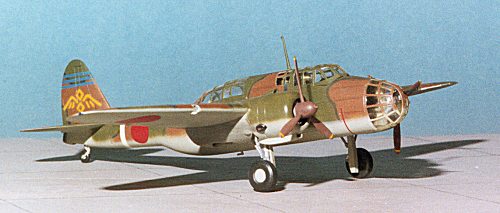
used. You get two paint schemes for this one. First is a brown and green
segmented camo scheme for a Ki-48 of the 8th Sentai. The other has a bright red
tail and is in overall grey from the 75th Sentai. Hasegawa has provided the
yellow part of the tail marking separately as well in case you want to paint on
the red and not use the decal. That is much appreciated. Both aircraft are of
the early variant and used in China before the outbreak of the Pacific War. This
means no yellow IFF band on the leading edge of the wings.
Overall a very nice old friend from Hasegawa. If you have any interest in the aircraft this is the only kit made, and fortunately, it is well done.
|
CONSTRUCTION |
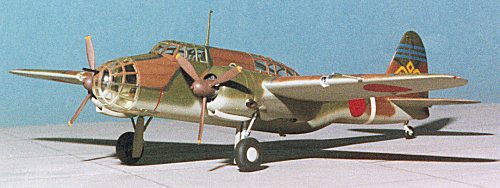 Hate to sound like a broken record, but construction started
with the interior. This kit has obviously been molded a bunch of times as there
was some flash on most of the parts and even around the ejector pin marks, which
shows that the mold has had a lot of use. Unfortunately, some of the ejector pin
marks cannot be removed without trashing the detail under them, so it is hoped
that these won't be too visible.
Looking at the colors the parts were to be painted, I assembled as much of the interior bits that were to be the same color as possible. This included the seats, control stick and a few other bits. Then the interior parts were painted Nakajima Interior Green, a paint in the Aeromaster Acrylic line. Why not Aotake, well, that is a good question. As you know, Japanese color schemes have not been too well documented, unlike the Luftwaffe counterparts. It was assumed that everything was aotake and I also painted a lot of kits this color for the interior.
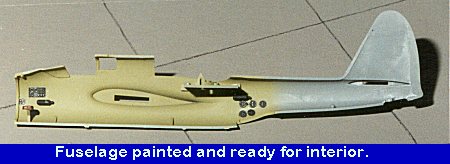 Over
the years, things have changed. It seems that the Army used a color called
'bamboo' for a lot of their interiors. This primer paint is a greenish yellow
(or yellowish green, take your pick). The Nakajima Interior Green is pretty
close to this bamboo color so that is what I used for both interior and exterior
primed surfaces. Then various other panels that are supposed to be flat black
were painted that color and then glued in place. There are a number of oxygen
bottles that are installed in various spots in the interior. These are also
painted flat black as per kit instructions as I have no info to the contrary as
to their color. The seats and seat backs were painted leather to simulate the
seat cushions.
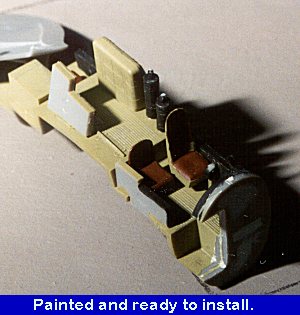 Then the interior was dry brushed with aluminum to
bring out details. Finally, the front of the interior with the instrument panel
on one side was glued in place. It became obvious that the back wall of this
would be visible through the large nose transparency, so the resulting join area
where the cabin floor intersects the bulkhead was filled (several times) and
sanded smooth along with some ejector pin marks.
While all this was going on, the wings were assembled. The wheel wells are not up to current standards, consisting of just a plate that is glued to the bottom wing section for the landing gear to glue into. Once that section was glued in and the well areas painted, the top and bottom wings were glued together. Fit is very good, though some filler is needed where the engine nacelle stubs glue to each other. Then the engine mounting plates were glued to the front of the nacelle stubs. It seems that the engines just butt glue to these mounts, not exactly a '90s solution!
The engine cowlings are a three piece affair consisting of two sides and a front. Not the most elegant method of doing this, but the easiest. After gluing the three parts together and letting them dry, they were given a good sanding to clean them up. Be careful when gluing these as they are handed. During this process, the engines, which consist of a front and rear section of cylinders, was painted flat black, heavily dry brushed with steel and glued together. Then the prop shaft were glued to a backing plate. When dry these were inserted in from the back of the engines and a cap glued on the back to keep them at the right length.
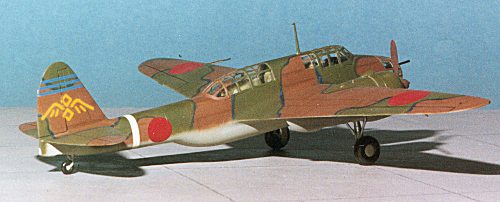 Once the interior bits were
touched up, the interior was installed and the fuselage halves glued
together. The ventral gunners door was glued in place at this time as well. I
figured it wouldn't be much use having it down while the aircraft was on the
ground! The front of the fuselage did not fit too well and there was a gap at
the top of the nose that needed filler as well as a few other places, but
nothing major.
The fuselage was cleaned up and when all the sanding was done, the horizontal stabilizers were glued in place. These fit very well indeed. Next, the wings were glued on. The left one fit much better than the right one. There were a few gaps at the wing root that needed filled, but again, nothing major.
Then I decided to mask the clear bits
before gluing them on. This kit has a particularly intensive greenhouse which
means MUCH masking is needed. There are also lots of compound curves. For this I
decided to try the Tamiya masking tape. I was pleasantly surprised. The tape is
transparent enough to see where to trim the tape. While not as sharp an edge as
one gets 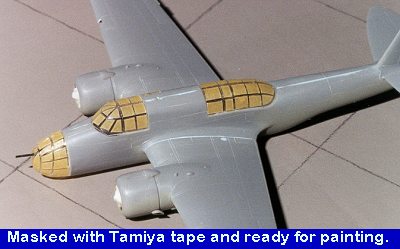 with Scotch tape, it appears that it will stick better and come off
without a ton of residue. We shall see. It took several hours to mask. Some
sanding was needed for the upper fuselage greenhouses to get them to fit better.
They were glued on using non-fogging superglue. The fit of the nose transparency
was not the best either.
It was then that I noticed that I had forgotten to install the intakes on the engines. DOH! There is a small upper and a longer lower intake. There is also an exhaust pipe to be glued in place. The upper ones needed some cleanup, but fit well. The lower ones did not fit well and some filler was needed along the side and to fill the sink hole in each one of them. After that was cleaned up, the engines were filled with tissue and it was off to the paint shop.
|
PAINT & DECALS |
Initial painting was the canopy area. It was painted the
interior color. Then the underside was painted in Aeromaster Army light grey.
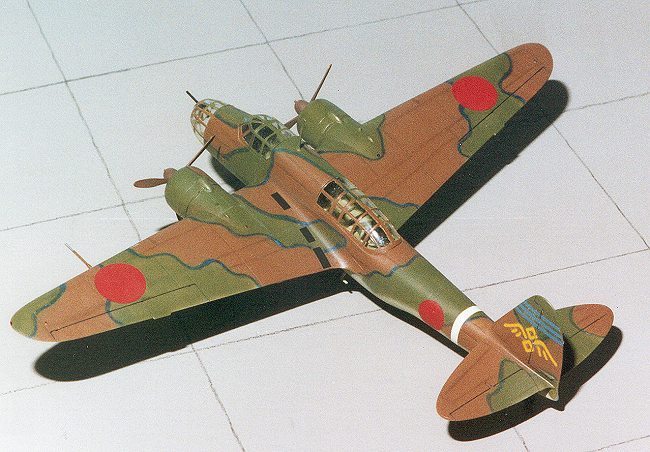
The upper colors are to be in the segmented scheme of green and brown. There is
supposed to be a thin blue line between the colors, but the odds of me being
able to do this with any success are nearly impossible. What I did, was to paint
the green part of the segmented scheme first, using Aeromaster Kawasaki Army
Green. This was done freehand to get a 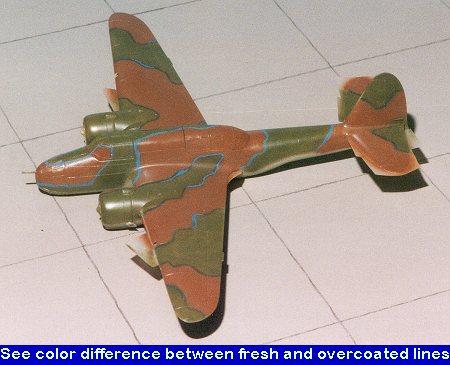 general feel for the colors. It also took
several days/sessions to do as this kind of closeup work it tiring. Once the
Army Green was painted on, then the brown was added. The brown was more of an
auburn color than what I had thought it would be. This sent me scurrying for
references to see if this was a normal color or not for this aircraft. The usual
correspondence via the great folks at the Japanese site of
http://www.j-aircraft.com put me
on the right track.
Once the kit was painted, I had to find some way of doing the blue lines in between the upper colors. Masking was one option, but to do that would be quite tedious. Another option was to brush paint the line. Not a bad idea and probably a good one for some, but not for me as I'd invariably mess it up. A third idea was to use a wide drafting pen, but finding a tip of the size needed was an exercise in futility; they just don't seem to make them that large. It was then that I hit on the idea of using a pastel pencil. This would give me the width I needed as well as being pretty simple.
I chose a blue that seemed to be a pleasing color. It was really quite bright and looked neat. After penciling a few lines, I sealed it in by spraying a clear over it. What that did was to change the color of the blue to a much darker shade. As much as I would have liked the brighter blue, the darker one seemed to be more like what was on the box top. The rest was applied and the entire aircraft sealed.
 Looking back on the exercise, I
think I was on the right track. However, the next time, I'll make the lines a
lot thinner. I'll also mask between upper surface camouflage colors as the
dividing line on the box art is actually quite sharp. That is not to say that
there weren't schemes like mine, as it still looks quite presentable. Once all
this was done, some more pastels were used to duplicate the exhaust and the
entire airframe was oversprayed with a gloss clear to be ready for the decals.
One has no choice with this aircraft other than to use the kit decals. The decals are of a reasonable thickness and are pretty opaque. I had no trouble with the underlying colors showing through on any but the white fuselage stripe. The yellow tail markings had no bleed through. Problem is, that you can't use a setting solution on them or they permanently wrinkle. The result was that I had some silvering on the tail markings. I do know that the Ki-48 isn't going to make any decal makers rich so you just have to suffer through with what the kit provides.
|
CONSTRUCTION |
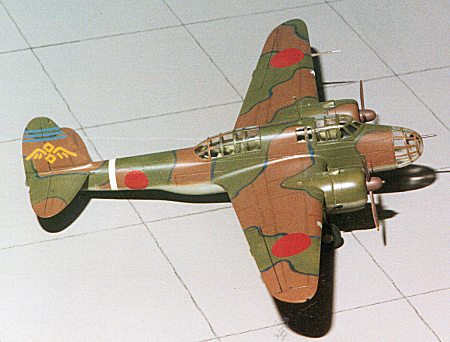 Next thing was to put on the landing gear. I found that the
braces to the main gear didn't seem to want to fit properly. They ended up
attaching closer to the wheel than the instructions showed. The main gear doors
also seemed to fit lower than what was shown on the instructions. The rest of
the bits fit without any real trauma.
Next, the propellers were painted that dark brown propeller color and when dry the decal warning striped were applied. THe props were then glued on to the shafts. Final bits were the pitot tube, antenna mast and the landing lights. These lights had lots of flash so require some careful cleaning before installation.
The kit was then sprayed with an overall semi-matte and the masking removed. The Tamiya tape comes off cleaner than most masking materials I have used and left very little residue. What I did notice was a lot of dust on the inside of the canopies. Though I thoroughly cleaned the insides of them prior to gluing, the stuff still crept in from somewhere! Final touch-up painting was done on the gun and the formation lights. Clear red and blue were used for them.
You are probably wondering about the missile. I didn't build it and will save it to add to my slowly growing WW2 missile collection.
|
CONCLUSIONS |
Taking all things into consideration, this isn't a bad kit at all. First it is the only kit out there of the Ki-48. Secondly, the molds have held up quite well for a kit this old. The only thing I would like are some aftermarket decals, but that won't happen. I can recommend this kit to those modelers who have intermediate skills. Beginners should look to the newer kits were fit is better.
|
REFERENCES |
Japanese Aircraft of the Pacific War by Rene J Francillon,
Putnams, 1979
Camouflage and Markings of the I.J.A. Bombers, Model Art
# 533, 1999
Review copy courtesy of me and my wallet!
If you would like your product reviewed fairly and quickly by a site that has over 900 visits a day, please contact me or see other details in the Note to Contributors.