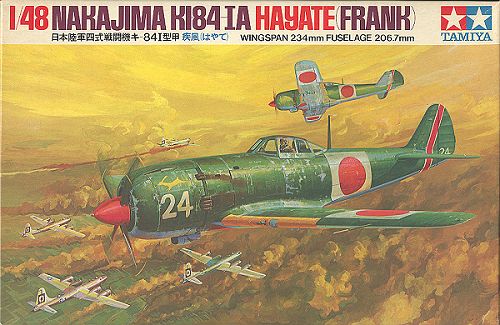
Tamiya 1/50 Ki-84 Frank
|
KIT # |
MA 113 |
|
PRICE: |
@$10.00 |
|
DECALS: |
4 schemes: See writeup |
|
REVIEW BY: |
|
|
NOTES: |
|
HISTORY |
The Ki-84 was undoubtedly the finest Japanese Army fighter of the war. Based loosely on the Ki-44 interceptor, the Ki-84 had a bigger engine, more armor plating, greater firepower, and greater range. It was also a super aircraft to fly having regained the maneuverability lost in the Ki-44. Unfortunately, the aircraft was not put into full production until mid-1944, by which time quality control was a big problem. This was due to the bombing of factories by B-29s operating from China and later the Marianas islands. In addition, most of the skilled labor was in the army or otherwise in the field.
|
THE KIT |
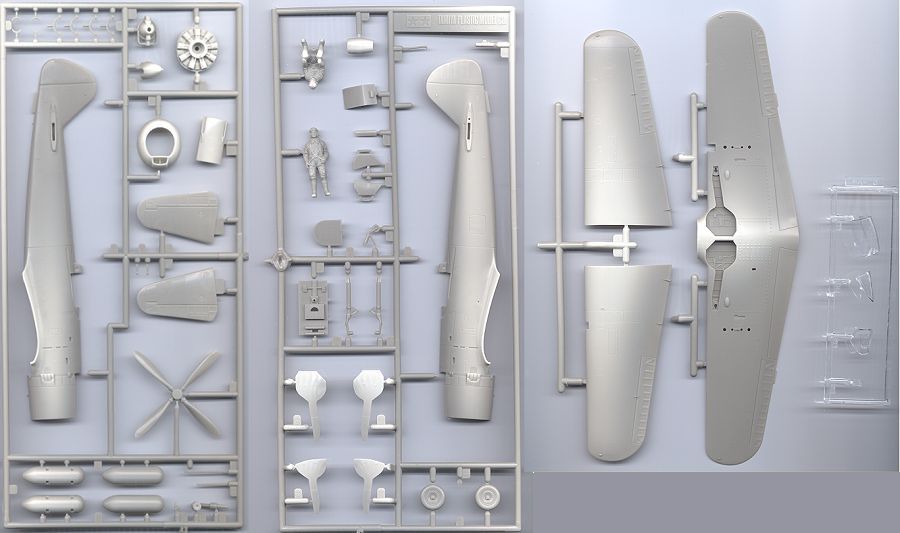
As you can see from the image, it is molded in light grey plastic, has options for underwing fuel tanks (for which the holes are pre-drilled), and a three piece canopy. There is also a sitting and standing pilot figure. Detail is engraved and raised and really, quite well done for a kit of its age. Probably the weakest part of the kit is the very sparsely detailed cockpit. While the decal instrument panel is much better than the Otaki kit's, it seems that this area was basically guess work. Tamiya has also provided gear doors for both on ground and in flight, though without a display stand, I doubt if many will choose the latter option. As a note, though marketed as 1/48, it is actually 1/50 scale.
|
CONSTRUCTION |
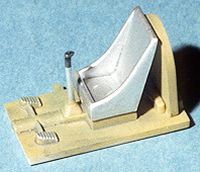 Not wanting to buck tradition, I started with the cockpit. Frankly, having but four parts, it wasn't much of a challenge. The interior was painted Nakajima Interior Green, had details picked out in red, black, and aluminum, then washed with dirty thinner and finally dry-brushed with light green. It was then glued in the right side of the fuselage. Though the Tamiya Frank is better than the Otaki version in many ways, the interior isn't one of them. Then the tail wheel was glued in place and the left fuselage half glued in place. Once dry, the seams were sanded and some filler used on the sink marks.
Meanwhile, the wing was glued together. Typical for my luck, the left upper wing half was pretty badly warped and had one of the flap actuator nubs broken of. Fixing the warp wasn't that difficult, but I'll have to glue on a piece of scrap to replace the flap actuator nub. Once dry, the wings were glued to the fuselage. It is a bit of a loose fit and I needed filler all around the wing/fuselage joins.
 Next the engine was painted flat black and drybrushed with steel. The crankcase was painted aluminum as was the assembly that fits on it. Some of the pipes on this assembly were painted Burnt Iron just to add some color. Fitting the upper engine cover was next. This is really a poor fit and one just has to make the best of it. When fitting it, it's a good idea to test fit the cowling front at lot to make sure it won't be too bad. When it comes to the front cowling, you just have to grin and bear it. The fit is not good as the cowling is way too wide to fit the allotted space. It isn't just a matter of the fuselage being out of round, either as it fits very well at the top and bottom. It was glued in place and filed down to fit. Another glitch was that the ends of the gun troughs on the cowling front do not exactly match those on the upper insert. On my kit, I got one to match and then filled and filed to get the other to match. A lot of work, I know, but the end result seems OK. The real test will be when the primer is applied!
After all this is smoothed out, I went back and added a few other bits to the airframe. This included attaching the tailplanes, the headrest pad, putting the instrument panel decal in place, and attaching the gunsight. The oil cooler radiator was also put in place under the engine. In addition, I installed the drop tank attachment points. This one will not have the tanks installed but have the racks empty. Just to add something for people to talk about! Back into the cockpit I went and painted the upper cockpit area flat black with a leather headrest, as stated in the instructions. When that dried, some of the paint was scraped away for the front and rear of the canopy to be installed. All the clear bits were then masked with Scotch Transparent tape and the sliding center tacked into place with white glue. The radio mast was glued into place and it was then on to the paint shop.
|
PAINT & DECALS |
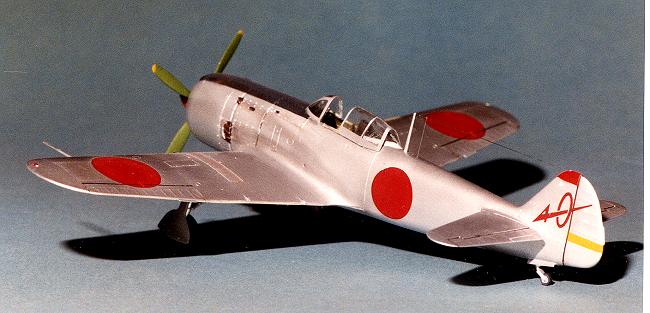
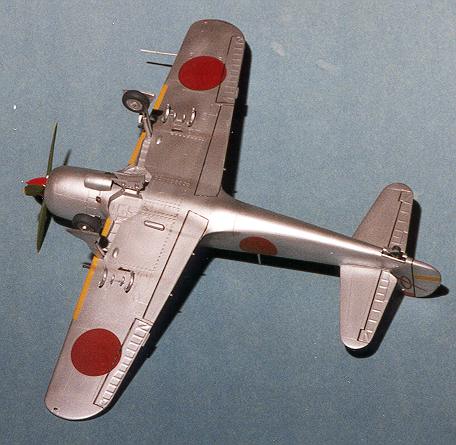 The scheme for this particular kit was to be an overall metal one. I had picked up some Floquil Old Silver to try on this kit, but first the yellow ID bands on the wing leading edge needed to be painted. The area was first painted gloss white using Model Master Enamels, then when dry, over painted with Aeromaster ID Yellow Acrylic. When all that was dry, it was masked off and the entire airframe was painted with Floquil Old Silver and left to dry.
This paint really took an age to dry. It was tacky for well over two weeks after
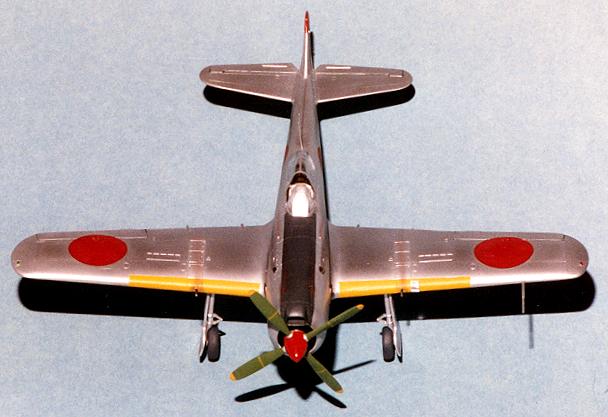
the initial coats were sprayed on. Later the airframe had the panel lines outlined in dark grey and then the silver was misted on to almost cover the panel lines. A few sections were painted in aluminum to break up the solid color. The prop hub was painted red and the prop itself a medium green that is peculiar to Ki-84s. The yellow tips were painted yellow and the stripes were Scalemaster decal stripes. The anti-glare panel was painted blue-black, the tip of the tail red, and a stripe on the rudder was painted yellow. Naturally, I am leaving out a lot of the back and forth repainting that is normal for me as I always goof a bit on paint schemes the first time around.
The scheme for this particular kit was to be an overall metal one. I had picked up some Floquil Old Silver to try on this kit, but first the yellow ID bands on the wing leading edge needed to be painted. The area was first painted gloss white using Model Master Enamels, then when dry, over painted with Aeromaster ID Yellow Acrylic. When all that was dry, it was masked off and the entire airframe was painted with Floquil Old Silver and left to dry.
This paint really took an age to dry. It was tacky for well over two weeks after
the initial coats were sprayed on. Later the airframe had the panel lines outlined in dark grey and then the silver was misted on to almost cover the panel lines. A few sections were painted in aluminum to break up the solid color. The prop hub was painted red and the prop itself a medium green that is peculiar to Ki-84s. The yellow tips were painted yellow and the stripes were Scalemaster decal stripes. The anti-glare panel was painted blue-black, the tip of the tail red, and a stripe on the rudder was painted yellow. Naturally, I am leaving out a lot of the back and forth repainting that is normal for me as I always goof a bit on paint schemes the first time around.
It was then back to the modeling room for the attachment of more bits. This involved the main landing gear. First the oleos were covered in Bare Metal Foil and then the gear legs attached. Tamiya offers keying for the gear that assures positive contact and proper angle. The wheels were also installed at this time. Once that was done, the pitot tube was installed in the wing and it was time to plunk on the decals.
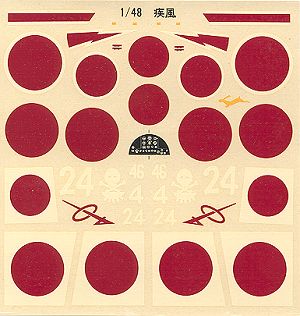 The kit decals provide four different markings options. The first is overall green with a blue underside from the 502nd Temporary Interception Corps with white 'bandages' behind the Hinomarus and a gazelle on the cowling. Next is a bare metal aircraft from the 104th Air Group in Manchuria. The third scheme is from the 58th Special Attach group in green over blue-grey. Finally, another green over blue-grey aircraft of the 2nd Squadron of the 11th Air Fleet in the Philippines in 1944 .
I decided to use the kit decals and do the 104th Air Group version. There are only the standard borderless Hinomarus and tail markings for this scheme, but I ran into problems. Since the kit is well over 20 years old, the decals had become a bit brittle and I had several of the wing Hinomarus break while applying them. Nothing major, as the Champ setting solution softened them up nicely, but a hassle that I would rather not have had.
Once the decals were put on, it was time to finish up the kit. This meant that the gear covers were installed and then the kit was treated to the pastels treatment. This didn't work too well on the metal finish as pastels need a rough surface to stick to. Next, the prop was glued in place, the spinner attached, and the canopy unmasked. Once all the leftover stickum was taken off the canopy, the radio antenna was made from clear stretched sprue. Interestingly, there are several different antenna arrangements for the Ki-84. Some are very complex and others simple. I had to take the instruction's work on which was which as these antenna are nearly invisible in photographs. This particular aircraft was blessed with a very simple 'mast to tail with one lead in' arrangement. Once that was done, the kit was complete.
|
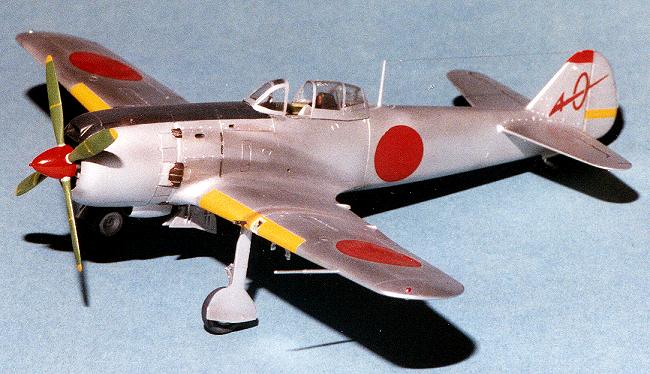
CONCLUSIONS |
Well, this was really an eye-opener. I haven't made a old kit like this for a while. Frankly, I was impressed by the kit, especially considering its age. The only thing that really needed improvement to bring it up to modern standards was the interior. Of the three Frank kits I have built, this was the worst interior of the three. Had I bought a more recent boxing of the kit I'm sure that the decals wouldn't have been such a problem.
Overall, I can recommend this kit to all but the bare beginner. Is it better than the new Hasegawa kit? No. But if you have the Tamiya kit in your collection, go ahead and build it. It will look just great on the shelf.
|
REFERENCES |
Japanese Aircraft of the Pacific War, Rene J. Francillon
FAOW (Famous Aircraft Of the World) #19, New Series: Ki-84
If you would like your product reviewed fairly and fairly quickly, please contact the editor or see other details in the Note to Contributors.
Back to Reviews Page 2015