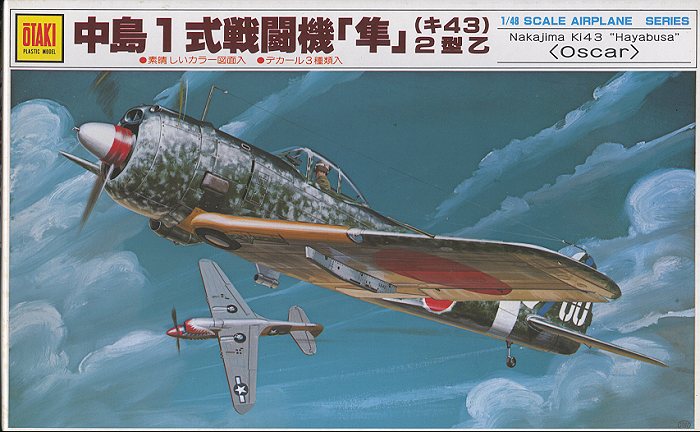
Otaki 1/48 Ki-43-II 'Oscar'
|
KIT # |
2 |
|
PRICE: |
$7.50 |
|
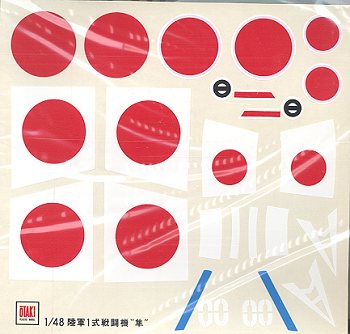
DECALS: |
One aircraft |
|
REVIEW : |
|
|
NOTES: |
Now sold under Arii brand |
|
HISTORY |
Nakajima's Ki-43 Hayabusa was a turning point aircraft for the JAAF. Prior to this aircraft, the thinking of the time was for a lightweight aircraft that was capable of being superior in a dogfight. The mount of the time was the Ki-27, a very small, low-winged monoplane with fixed landing gear. The Ki-27 was very maneuverable and able to dogfight successfully with biplane fighters.
Most pilots disliked the Hayabusa upon first meeting. Here was a (relatively) large aircraft, that was a bit heavy and had retractable landing gear. Sure, it was faster than the Ki-27 by quite a bit, but it could not out-dogfight it. Reluctantly, pilots had no choice but to start flying their new mount. As they flew it, they began to appreciate the qualities of the aircraft and the extra speed that it provided. All they had to do was to take advantage of the pluses of the aircraft and develop new tactics.
 The Ki-43 quickly
entered service and by late 1942/early 1943 had completely replaced the older
Ki-27 in all theaters of operation. Where it was mostly seen was in the CBI
(China/Burma/India) operating area and in New Guinea and the Philippines, areas
where the Army had jurisdiction.
The Ki-43 quickly
entered service and by late 1942/early 1943 had completely replaced the older
Ki-27 in all theaters of operation. Where it was mostly seen was in the CBI
(China/Burma/India) operating area and in New Guinea and the Philippines, areas
where the Army had jurisdiction.
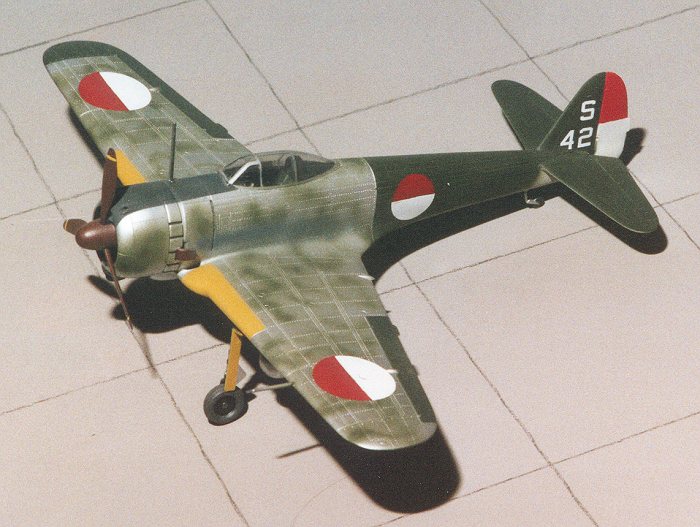
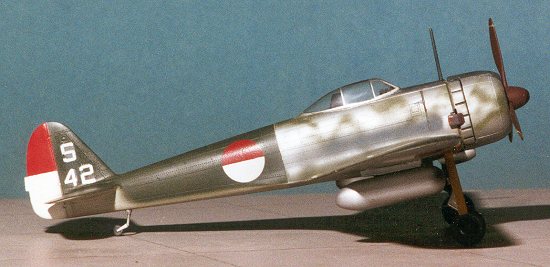
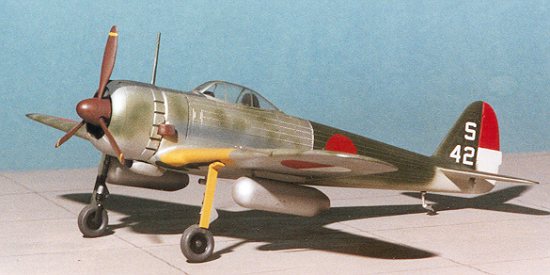
The Oscar, as the Allies code named it, was operational throughout the war, being used as training and suicide aircraft late in the war. After the way, those aircraft still remaining were used by the countries in which they were left. Both the French and Indonesians used the Ki-43 for a few years. Those in Indonesia were often pieced together from planes found on the scrap pile. This model was painted to represent one of those planes from a photograph in an old Aircam book.
|
THE KIT |
What you get in the box is several sprues of
medium grey plastic, a small sprue of clear and a nice decal sheet. The kit has
a full cockpit with some detail on the side walls and floor. It includes an
instrument panel, control stick, seat, rear bulkhead and a pilot for the
seat. Considering the age of the kit, the detailing and amount of 'stuff'
in the cockpit is quite remarkable. These kits were among the best on the market
when they initially appeared and stayed that way for many years.
The wheel wells are very shallow with no detail. Your
choice of underwing stores is limited to a pair of generic drop tanks. Frankly,
the Oscar looks terrible with things under its wings! The engine is comprised of
two banks of cylinders along with separate pushrods.
The
markings are for three aircraft; one from the Akeno fighter training school in
overall natural metal with white bands behind the Hinomarus, one from the 63rd
Sentai with dark green upper surfaces and another in natural metal with green
mottling from the 25th Sentai. There really are not many
parts to the plane at all and it is a quick build.
 The Otaki kit is one of the oldest
1/48 kits of this plane around, and still can be built into a nice model.
However, its accuracy must be questioned. Though it doesn't say, it is probably
supposed to be a late Ki-43-II. However it has some shape problems, particularly
the wings. These seem to be too broad and of not quite the proper shape for a
Ki-43. The exhaust are also incorrectly shaped and the underfuselage fuel cooler
wasn't used until the Ki-43-III. If you are not concerned about such things, it
will still build into an aircraft that cannot be mistaken for anything other
than an Oscar.
The Otaki kit is one of the oldest
1/48 kits of this plane around, and still can be built into a nice model.
However, its accuracy must be questioned. Though it doesn't say, it is probably
supposed to be a late Ki-43-II. However it has some shape problems, particularly
the wings. These seem to be too broad and of not quite the proper shape for a
Ki-43. The exhaust are also incorrectly shaped and the underfuselage fuel cooler
wasn't used until the Ki-43-III. If you are not concerned about such things, it
will still build into an aircraft that cannot be mistaken for anything other
than an Oscar.
|
CONSTRUCTION |
The rest of it went together extremely well and it is almost
embarrassing to have to write this much about kit construction!!
 Construction is
actually quite anti-climatic as kits go. The small number of parts means that
there are few places for the kit to have errors. Probably the biggest problem,
other than cleaning up the mold marks from the parts, is the infamous
wing/fuselage joint. It is here that I used the most filler on the kit, most of
it on the underside. I also had some trouble getting the canopy to fit will.
This part needed some sanding to get it to properly conform.
Construction is
actually quite anti-climatic as kits go. The small number of parts means that
there are few places for the kit to have errors. Probably the biggest problem,
other than cleaning up the mold marks from the parts, is the infamous
wing/fuselage joint. It is here that I used the most filler on the kit, most of
it on the underside. I also had some trouble getting the canopy to fit will.
This part needed some sanding to get it to properly conform.
|
PAINT & DECALS |
From my reading, it seems like all Oscars were produced in natural metal and
painting was often left to those units in the field. However, it also seems like
the upper color of overall green was factory applied in the later batches of
aircraft. It seems now that there was no underside color to Oscars and they were
left in bare metal. Well, I painted some of my parts with underside army grey
and it is too late to change that.
Now that everything was masked off, the rest of the airframe was
painted aluminum Metallizer. But wait, what about the anti-glare panel? I had
forgotten that and had to very carefully mask the Metallizer to paint it.
The
blue-black for the anti-glare was mixed using Gunze Acrylics, which is what I
used for all the other colors. Now for the markings. No one did
an early Indonesian Air Force sheet and still doesn't. However, they were simple
to make. I had a set of decals from IPMS Spruce Goose from their 1983 convention
(at least, I think that is where they came from). They give Hinomarus and
separate white circles in various sizes. It was just a matter of matching them
up. I put a full white circle down and then cut a Hinomaru in half for the rest
of it. Easy. The tail letters came from a number/letter sheet of some sort.
Since I didn't gloss coat the kit, I had some silvering problems with the
letters and numbers. The red on the upper half of the rudder was from a solid
red decal sheet with the red part cut to fit. Prop was painted 'rust' with the
yellow bands coming from a yellow stripes sheet. Exhaust stains
were airbrushed on using flat black and light grey. I was brave back then.
Nowadays I don't use an airbrush for that, but pastels. The kit has survived
many moves and the only parts that have broken off are the antenna and the tail
wheel!
 Now this is the part that was the
reason for building the kit back then in 1984. I really liked the idea of an
airplane made up of spare parts. Sort of like that Johnny Cash song about
stealing parts from his auto assembly line job and putting them together to make
a car. Where I probably went wrong is by making the various bits look too clean!
Now this is the part that was the
reason for building the kit back then in 1984. I really liked the idea of an
airplane made up of spare parts. Sort of like that Johnny Cash song about
stealing parts from his auto assembly line job and putting them together to make
a car. Where I probably went wrong is by making the various bits look too clean!
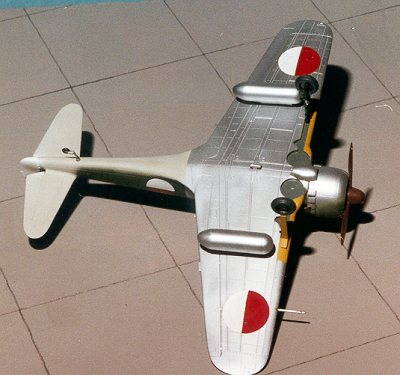 Anyway, on to the painting part. First thing I did
was to paint the rudder, landing gear covers, and leading edges of the
wings with white. Then the rudder was masked off and the leading edge and gear
covers were painted yellow for the IFF stripes. Then those were masked. I then
did the green/grey parts. This is because I was using Metallizer and had not
learned the secret to being able to successfully mask it. That took care of the
aft fuselage, ailerons, and one wing tip. Those were then masked off. Strangely,
I left the underside of the ailerons natural metal (they should have been silver
dope) which was more correct than painting them grey (at least, I think it is. I
get so confused about this).
Anyway, on to the painting part. First thing I did
was to paint the rudder, landing gear covers, and leading edges of the
wings with white. Then the rudder was masked off and the leading edge and gear
covers were painted yellow for the IFF stripes. Then those were masked. I then
did the green/grey parts. This is because I was using Metallizer and had not
learned the secret to being able to successfully mask it. That took care of the
aft fuselage, ailerons, and one wing tip. Those were then masked off. Strangely,
I left the underside of the ailerons natural metal (they should have been silver
dope) which was more correct than painting them grey (at least, I think it is. I
get so confused about this).
|
CONCLUSIONS |
What can I say but that it looks neat (at least to me). The kit really is very
easy to build and a nice job can be done by even the newest modeler. Today you
have the nice, but more expensive Fine Molds Oscar to build instead of this one,
but for a quick build with no fuss, any of the old Otaki kits is hard to beat.
August 2000
Review kit courtesy of me and my wallet! Copyright ModelingMadness.com. All rights reserved. No reproduction in part or in whole without express permission from the editor. If you would like your product reviewed fairly and quickly, please contact
the editor or see other details in the Note to
Contributors.