Hasegawa 1/72 'Shidenkai no Maki' N1K2-J Shiden-Kai
| KIT #: | 64720 |
| PRICE: | 3200 yen (about $27.00) at www.hlj.com (4000 yen) SRP |
| DECALS: | One option |
| REVIEWER: | Scott Van Aken |
| NOTES: | Part of a three kit combo |
| HISTORY |
The Kawanishi N1K Kyōfū (強風 "strong wind", Allied reporting name "Rex") was an Imperial Japanese Navy floatplane fighter. The Kawanishi N1K-J Shiden (紫電 "Violet Lightning") was an Imperial Japanese Navy Air Service land-based version of the N1K. Assigned the Allied codename "George", the N1K-J was considered by both its pilots and opponents to be one of the finest land-based fighters flown by the Japanese during World War II.
 The N1K possessed a heavy armament and, unusual for a Japanese fighter, could
absorb considerable battle damage. The N1K-J evenly matched the F6F Hellcat and
was a better match than the A6M Zero for such aircraft as the F4U Corsair and
P-51 Mustang. Despite such capability, it was produced too late and in
insufficient numbers to affect the outcome of the war.
The N1K possessed a heavy armament and, unusual for a Japanese fighter, could
absorb considerable battle damage. The N1K-J evenly matched the F6F Hellcat and
was a better match than the A6M Zero for such aircraft as the F4U Corsair and
P-51 Mustang. Despite such capability, it was produced too late and in
insufficient numbers to affect the outcome of the war.
The N1K1 entered service in early 1944 and proved highly effective against American fighters. The Kawanishi was among the few Japanese fighters that could stand up to the best enemy types, including Hellcats and Corsairs. In the hands of aces, the Shiden could even outfly its American opponents. In February 1945, Lieutenant Kaneyoshi Muto, flying a N1K2-J as part of a group of at least ten expert Japanese fighters, faced seven U.S. Navy Hellcats of VF-82 in the sky over Japan. His group shot down four Hellcats with no loss to themselves. After the action, reporters fabricated a story in which Muto was the sole airman facing 12 enemy aircraft.
They were, however, mechanically unreliable. The engine was difficult to
maintain and, like the complicated undercarriage, plagued by frequent failures.
N1K1-J aircraft were used very effectively over
 Formosa, the Philippines and
later, Okinawa. Before production was switched to the improved N1K2-J, 1,007
aircraft were produced, including prototypes.
Formosa, the Philippines and
later, Okinawa. Before production was switched to the improved N1K2-J, 1,007
aircraft were produced, including prototypes.
Problems resulted in very few N1K2-J aircraft being produced, but the Shiden-Kai proved to be one of the best "dogfighters" fielded by either side. Along with high speed, the fighters were very agile with a roll rate of 82°/sec at 386 km/h (240 mph). Their weaponry comprising four 20 mm cannons in the wings was highly effective. As a bomber interceptor, the N1K2-J was less successful, hampered by a poor rate of climb and reduced engine performance at high altitude.
Surprisingly, four aircraft are still extant. Three in the US and one, pulled from the waters of the Bungo Straight and not restored, is in Japan. This latter airframe was one used by the 343 Kokutai, the elite unit of aces.
| THE KIT |
Hasegawa originally produced the Shiden-kai back in 1978 and it fits into what was then state of the art in terms of model kits. It has engraved panel lines, a shallow but somewhat detailed wheel well molded into the lower wing and a rather basic cockpit with a generic seat that is supposed to be filled with a pilot figure. Often we forget that models used to be designed to have a pilot or crew in the seats so those seats were shaped to fit the figures.
 The engine is nicely molded with a forward cylinder
band on a blank plate and an ignition ring to add around the gear housing. A
single piece four blade prop and a spinner with a backing plate fits on
the front. Tail planes are a single molding and the tail gear is molded onto a
fuselage half as is the radio mast.
The engine is nicely molded with a forward cylinder
band on a blank plate and an ignition ring to add around the gear housing. A
single piece four blade prop and a spinner with a backing plate fits on
the front. Tail planes are a single molding and the tail gear is molded onto a
fuselage half as is the radio mast.
This particular boxing shows the age of the molds as there is some flash on many parts and a lot on some. The wings were particularly flashy and a lot of it shows around the gun barrels. It has a very clear, one piece canopy with nicely done frames that are pretty much flush with the 'glass' pieces, which means masking will require a bit of skill. The main gear doors will need to be cut apart for gear down and there is a single drop tank with braces. This item was pretty much standard stuff for the George.
Since this is part of the Shidenkai no Maki set, the instructions lean towards the characters in that manga and so there are little helpful tips being provided either by the pilot of the plane or the mechanic. Decals are very nicely done and should one decide to do a standard plane, there are aftermarket decals out there, the ones by KoPro being especially nice.
| CONSTRUCTION |
 I then glued the fuselage halves together, breaking off the radio mast in
the process. The usual filler was needed on this and on the wing once I got
the upper and lower halves cemented in place. The instrument panel was
painted matte black and the decal attached. With that done, it was glued in
place through the bottom of the fuselage opening. I added a set of Eduard
IJN belts to the seat just to give it some interest and then glued the
interior in place.
I then glued the fuselage halves together, breaking off the radio mast in
the process. The usual filler was needed on this and on the wing once I got
the upper and lower halves cemented in place. The instrument panel was
painted matte black and the decal attached. With that done, it was glued in
place through the bottom of the fuselage opening. I added a set of Eduard
IJN belts to the seat just to give it some interest and then glued the
interior in place. | COLORS & MARKINGS |
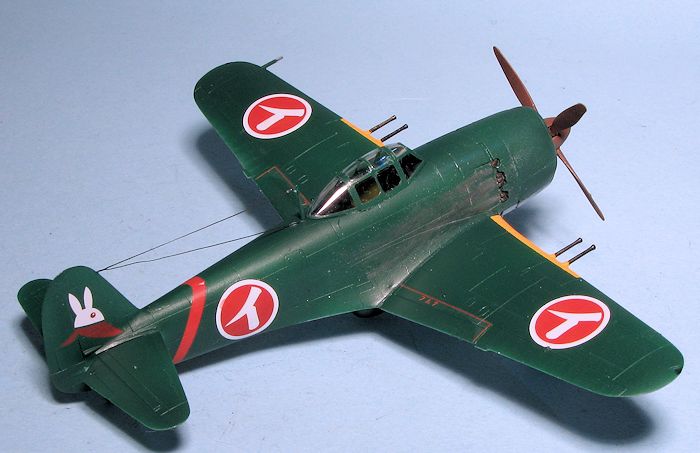
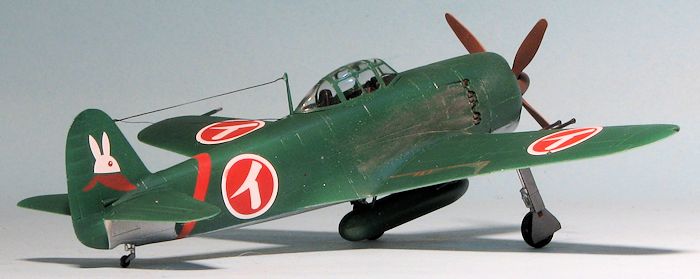
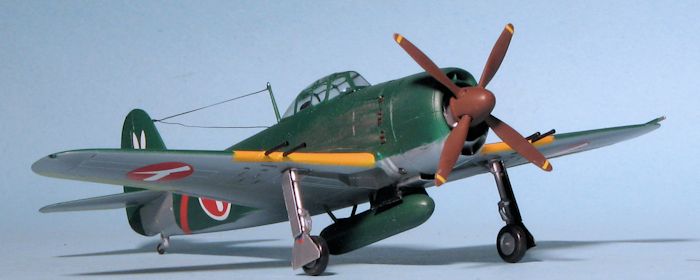
First items to paint were the yellow wing leading edge bands. These were first painted gloss white followed by the yellow. I also painted the underside of the elevators and ailerons with a green grey to simulate the dope used on these as the underside will be unpainted.
 When all that had cured, I did a masking session and
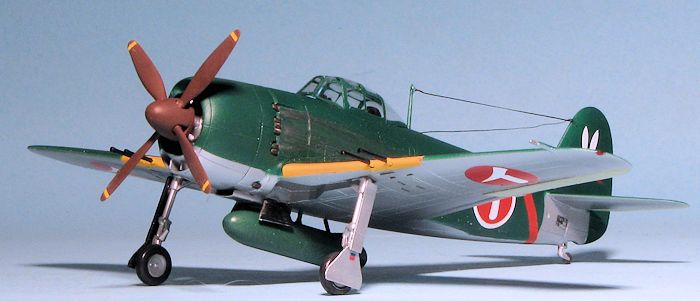
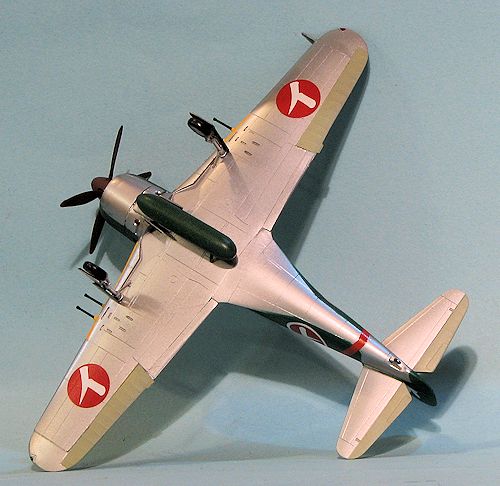
painted the underside of the airframe with Alclad II Aluminum. I also painted
the inside of the gear doors with gloss black and the drop tank and supports
with Mitsubishi green as recommended in the instructions. The upper surfaces
were painted with Colourcoats Kawanishi Green. When dry, the landing gear were
installed and the upper surfaces sprayed gloss clear acrylic in preparation for
the decals.
When all that had cured, I did a masking session and
painted the underside of the airframe with Alclad II Aluminum. I also painted
the inside of the gear doors with gloss black and the drop tank and supports
with Mitsubishi green as recommended in the instructions. The upper surfaces
were painted with Colourcoats Kawanishi Green. When dry, the landing gear were
installed and the upper surfaces sprayed gloss clear acrylic in preparation for
the decals.
The decals gave me no problems at all, being as good as Hasegawa has ever had in their kits. You get optional fin markings and fuselage bands, but I used those recommended. There are also some additional stencils that are not shown in the markings guide.
Once those were in place, there was not a whole lot left, but to come were some of the more difficult parts of the build. By this, I mean the landing gear doors. They were cut apart as shown, but did not want to stick on very well. I ended up drilling the upper gear doors a bit more. As to the small inner ones, I installed those and then when it came time to glue on the drop tank, found it wouldn't fit between them. I removed these doors, glued on the drop tank and reassembled the inner doors. The only thing left was the prop. It is quite loose on the shaft so I glued it solid.
Everything was given a matte clear where things were green. When that dried, I did touchup-painting, made my usual mess out of installing EZ-line and did some pastel exhaust. Overall build time for this one was a bit over a week so it won't be one of those that drags on forever.
| CONCLUSIONS |
 I find it
somewhat interesting that even though I find the George a relatively boring
subject, this is the fifth one I've built in this scale. One was the Tamiya mid
wing version, another the KoPro/Aoshima kit and now three Hasegawa kits. I do
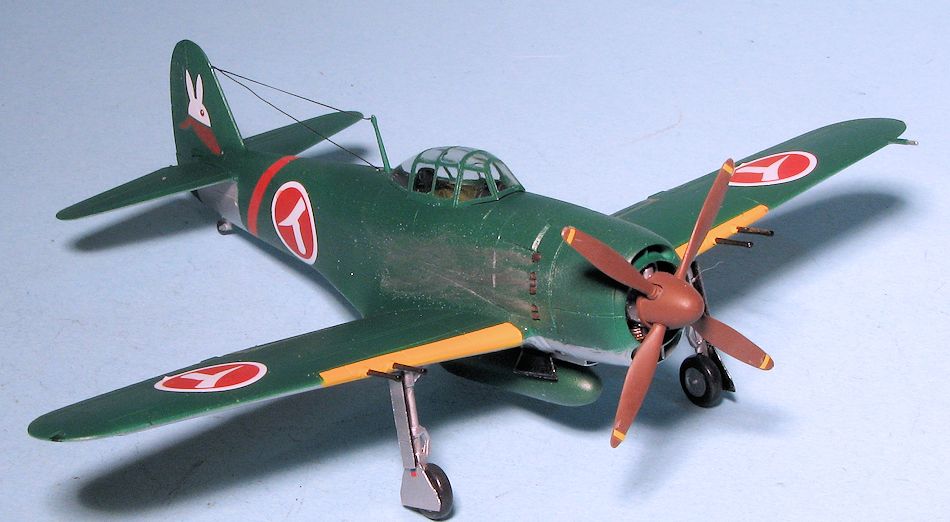
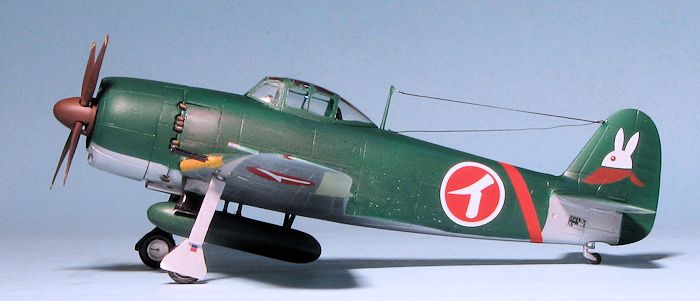
have to say that it was the bunny markings on the fin that drew me to building
this one and while it won't have a ton of 'wow' factor, it is a nice kit and
makes into a nice replica, even with the manga markings!
I find it
somewhat interesting that even though I find the George a relatively boring
subject, this is the fifth one I've built in this scale. One was the Tamiya mid
wing version, another the KoPro/Aoshima kit and now three Hasegawa kits. I do
have to say that it was the bunny markings on the fin that drew me to building
this one and while it won't have a ton of 'wow' factor, it is a nice kit and
makes into a nice replica, even with the manga markings!
| REFERENCES |
http://en.wikipedia.org/wiki/Kawanishi_N1K2-J
May 2015
Thanks to www.hlj.com for the review kit. You can find this kit at this link.
If you would like your product reviewed fairly and fairly quickly, please contact the editor or see other details in the Note to Contributors.