Fine Molds 1/72 Kyushu Q1W1 'Lorna'
| KIT #: | FP 27 |
| PRICE: | $2600 yen |
| DECALS: | Two options |
| REVIEWER: | Scott Van Aken |
| NOTES: |
2017 release |
| HISTORY |
 The Kyūshū Q1W Tokai (東海 "Eastern Sea"), was a
land-based anti-submarine patrol bomber aircraft developed for the Imperial
Japanese Navy in World War II. The Allied reporting name was Lorna. Although
similar in appearance to the German Junkers Ju 88 medium bomber, the Q1W was a
much smaller aircraft with significantly different design details. In a book I
recently read on Japanese ASW and Patrol aircraft, it stated that the designer
was heavily influenced by the Ju-88. This aircraft was rather well covered
within the pages.
The Kyūshū Q1W Tokai (東海 "Eastern Sea"), was a
land-based anti-submarine patrol bomber aircraft developed for the Imperial
Japanese Navy in World War II. The Allied reporting name was Lorna. Although
similar in appearance to the German Junkers Ju 88 medium bomber, the Q1W was a
much smaller aircraft with significantly different design details. In a book I
recently read on Japanese ASW and Patrol aircraft, it stated that the designer
was heavily influenced by the Ju-88. This aircraft was rather well covered
within the pages.
The Imperial Japanese Navy ordered development of the Kyūshū Q1W as the Navy Experimental 17-Shi Patrol Plane in September 1942, and the first test flight took place in September 1943. It entered service in January 1945. The Q1W carried two low-power engines, allowing for long periods of low-speed flight, and was the first purpose-designed anti-submarine warfare aircraft in the world.
The type was generally outfitted with either a sea search radar system or the KMX, which was a magnetic anomaly detector system. The last US submarine lost was to Q1W using these two systems.
| THE KIT |
This kit is from 2017 so it is a pretty recent tooling. FM kits have gotten better and better as the years have gone by. This one looks just as good as any Hasegawa kit in this scale and like those kits, offers a fair cockpit with decals for the instruments. Since this kit can be built as the radar equipped or KMX equipped plane, you need to make a choice right from the start as to which set of black boxes to install. This requires opening a couple of holes in the cockpit floor. The rest of the interior looks like it builds up rather quickly and while no seat harness is provided, Fine Molds does offer them in their Detail Up line.
 Throughout the build you will be asked to open or
make holes in the wings or fuselage depending on the variant you are building.
Most of the time, these are flashed over, but in the case of the bombs and
racks, you have to do some measuring. The positioning is provided so a bit of
extra thought is required for these. Before trapping the cockpit in the fuselage
halves, one has to decide if the rear gun will be posed ready to fire or stowed.
Throughout the build you will be asked to open or
make holes in the wings or fuselage depending on the variant you are building.
Most of the time, these are flashed over, but in the case of the bombs and
racks, you have to do some measuring. The positioning is provided so a bit of
extra thought is required for these. Before trapping the cockpit in the fuselage
halves, one has to decide if the rear gun will be posed ready to fire or stowed.
Main gear wells are separate and installed in the lower wings before joining them. the engines are simply a front face, which is fine for this scale. When attaching the canopy, there are upper hatches that can be posed open or closed. The rear of the canopy section is open for the gun. On the lower wing are separate flap hinges to be attached. Main gear is nicely done and looks like it can be installed after painting, which will help.
For things under wings you have a pair of fuel tanks and a pair of depth charges. The last steps will have you attaing the props and if chosen, all the various radar antennas.
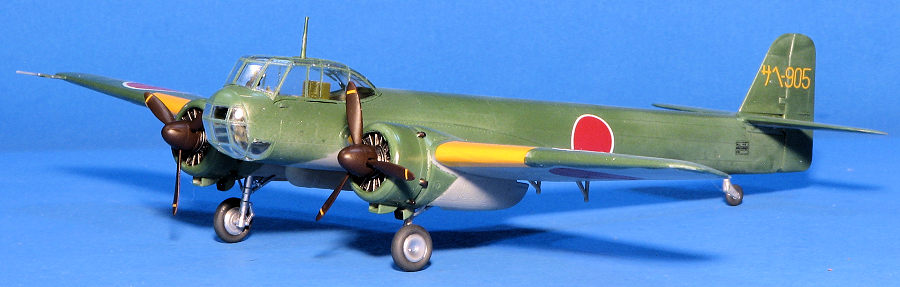
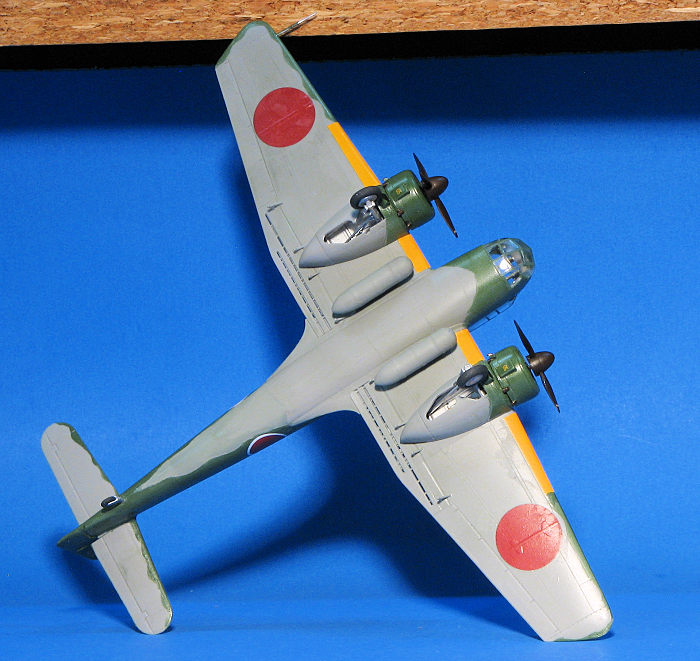
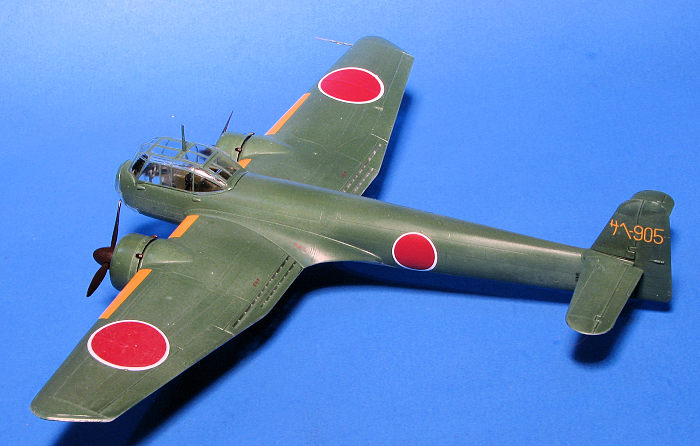
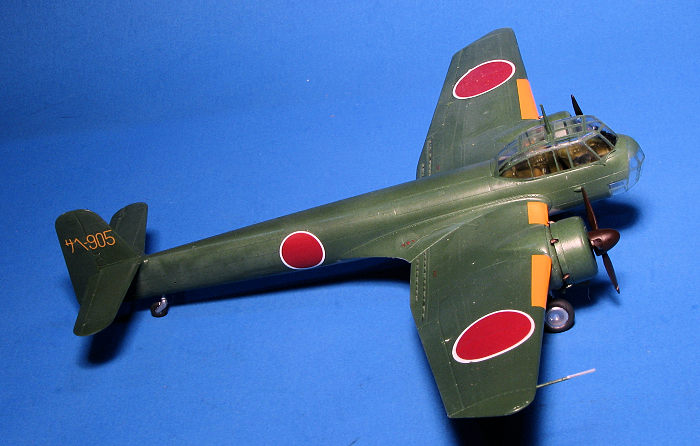
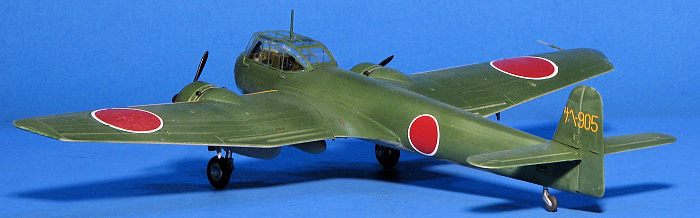
Instructions are well written in Japanese with minimal information in English (mostly colors), using the usual Gunze paint references. The colors for both options are Nakajima green uppers and Mitsubishi grey on the underside with yellow wing leading edges. The box art plane is the one carrying the radar and was based in Shanghai in 1945 with the 901st Kokutai. The other is the KMX plane with the Saeki Kokutai. The first option is the more colorful of the two, but also the one with more stuff hanging on the airframe. Decals are nicely printed and include the yellow wing markings.
| CONSTRUCTION |
This one had been sitting in the stash for a number of years and on a whim, I decided to go ahead and start building it. The first thing to do is decide which of the two versions to build as there are cockpit parts which are are for the two versions. I decided on the KMX version as I figured most folks wouldn't do it. As with all kits of this type, there are holes to open, again depending on the variant and so I dealt with those before starting any building.
 It is important to be sure
that all the sprue attachment points are removed as leaving any can cause fit
issues. I built up the interior as shown in the instructions and generally, the
fit is good. There are decals for the instrument panel. The interior is shown as
Mitsubishi interior green and for that I used Mission Models acrylic. It took
more than one brush painted coat to get proper coverage. The seat cushions are
navy blue and I used Vallejo for those. I found that fitting the instrument
panel was a bit fussy, but was successful in getting that done. When installing
that and the interior, it is wise to glue one side, then tape the other fuselage
half to ensure that everything fits well. Once that was done, the other half was
glued in place.
It is important to be sure
that all the sprue attachment points are removed as leaving any can cause fit
issues. I built up the interior as shown in the instructions and generally, the
fit is good. There are decals for the instrument panel. The interior is shown as
Mitsubishi interior green and for that I used Mission Models acrylic. It took
more than one brush painted coat to get proper coverage. The seat cushions are
navy blue and I used Vallejo for those. I found that fitting the instrument
panel was a bit fussy, but was successful in getting that done. When installing
that and the interior, it is wise to glue one side, then tape the other fuselage
half to ensure that everything fits well. Once that was done, the other half was
glued in place.
I discovered that filler was needed on much of the fuselage seam as it doesn't fit exactly flush and there is a depression where the halves meet on the top. As usual, I used super glue to fill these as it doesn't shrink and takes rescribing well. Next were the wing halves and before joining them, I installed the gear wells and opened the holes for the fuel tanks. Back at the fuselage, the fin and tailplanes were attached. I found that the wings were a good fit on both sides, though the left side was a tighter fit.
I then painted the engines and attached them to their mounts. There is a prop shaft that fits through the engine, but I discovered that one was missing so that will need to be replaced with a piece of rod so that prop won't turn. During all this, I cleaned up the sprue attachment points and masked the clear parts using Eduard CX 500 masks.
| COLORS & MARKINGS |
Thanks to a lack of aftermarket for this kit, one is pretty well reduced to using the kit decals. Both options are a dark green upper with either light grey or silver undersides. I used AK Interactive acrylics for both the green and grey color. This went on with little issue. Note that the green wraps around the wings and tailplanes with a wavy demarcation line.
 With the colors on, a coat
of clear gloss was applied. Decals worked without any issues. They are thin, but
not too thin so no problems with tearing or folding as can happen with thinner
decals. Since they are Japanese printed decals, I used Mr. Mark Softer to help
them snuggle down and to prevent silvering. Once dry, the airframe was given a
coat of Tamiya clear matte, thinned with 100 proof vodka. Vodka makes an
excellent acrylic thinner as it is a bit 'greasy' and not as high an alcohol
percentage as isopropyl so does not over flatten the paint.
With the colors on, a coat
of clear gloss was applied. Decals worked without any issues. They are thin, but
not too thin so no problems with tearing or folding as can happen with thinner
decals. Since they are Japanese printed decals, I used Mr. Mark Softer to help
them snuggle down and to prevent silvering. Once dry, the airframe was given a
coat of Tamiya clear matte, thinned with 100 proof vodka. Vodka makes an
excellent acrylic thinner as it is a bit 'greasy' and not as high an alcohol
percentage as isopropyl so does not over flatten the paint.
With the decals on and overcoated, I added all the final bits after removing the masks. I made a new prop shaft out of plastic rod before attaching the props. The engine assemblies fit so tightly that they were not glued on.
| CONCLUSIONS |
As with most Fine Molds kits, the engineering is very good. I dare say pretty close to Tamiya. I'm not sure why it took me so long to actually build this one as I've had it for quite a while, but there you go. Well worth picking up and building if you want to do something other than the usual 109s, Mustangs, and Spitfires.
| REFERENCES |
https://en.wikipedia.org/wiki/Kyushu_Q1W
25 July 2025
If you would like your product reviewed fairly and fairly quickly, please contact the editor or see other details in the Note to Contributors.
Back to the Main Page Back to the Review Index Page Back to the Previews Index Page