| KIT #: | 09821 |
| PRICE: | $2400 yen SRP |
| DECALS: | Two options |
| REVIEWER: | Scott Van Aken |
| NOTES: | 2008 Limited Edition. |
| HISTORY |
The A6M was a nasty surprise to Allied airmen when it was first met during the early months of WWII in the Pacific. Despite being forewarned about this new fighter by Clair Chennault in 1941, US brass chose to ignore his analysis, hence the big surprise. Eventually tactics were developed that helped to mollify the advantages of the Zero, but it remained a viable threat through 1942 and into 1943.
However, Mitsubishi was unable to come up with a viable replacement
until very late in the war and even then the A7M was never flown much beyond the
prototype stage. This meant a const ant battle to improve what they had. Adding
equipment and pilot safety features to the plane only made it slower and less
nimble. One final attempt was the A6M8.
ant battle to improve what they had. Adding
equipment and pilot safety features to the plane only made it slower and less
nimble. One final attempt was the A6M8.
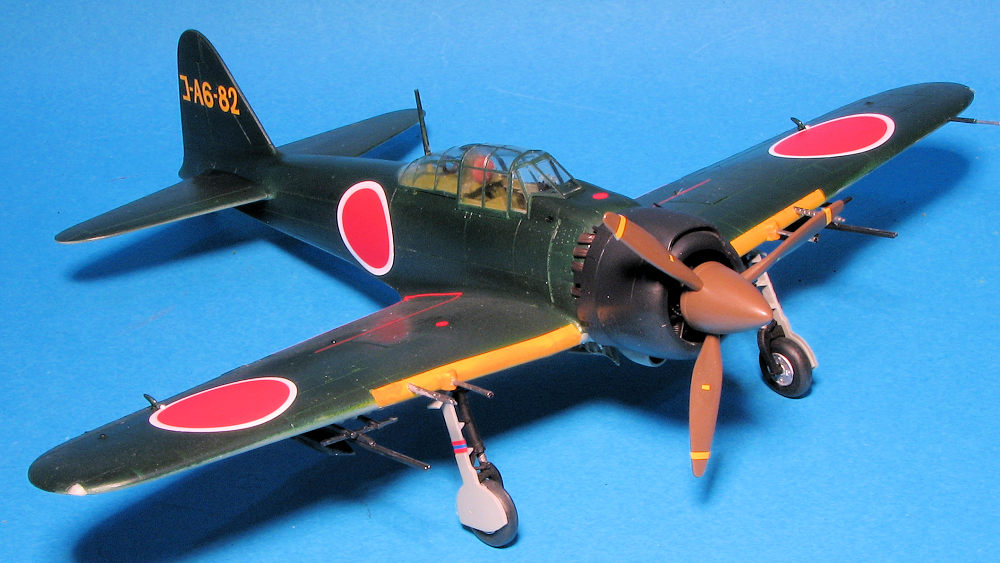
Similar to the A6M6 (which was the first Zero variant with self sealing fuel tanks) but with the Sakae (now out of production) replaced by the Mitsubishi Kinsei 62 engine with 1,163 kW (1,560 hp), 60% more powerful than the engine of the A6M2. This resulted in an extensively modified cowling and nose for the aircraft. The carburetor intake was much larger, a long duct like that on the Nakajima B6N Tenzan was added, and a large spinner—like that on the Yokosuka D4Y Suisei with the Kinsei 62—was mounted. The larger cowling meant deletion of the fuselage-mounted machine gun, but armament was otherwise unchanged from the Model 52 Hei (2 x 20 mm cannon; 2 x 13 mm/.51 in MG). In addition, the Model 64 was modified to carry two 150 l (40 US gal) drop tanks on either wing in order to permit the mounting of a 250 kg (550 lb) bomb on the underside of the fuselage. Two prototypes were completed in April 1945 but the chaotic situation of Japanese industry and the end of the war obstructed the start of the ambitious program of production for 6,300 machines, none being completed.
| THE KIT |
This kit comes in a fairly full box. There are different sprues for this variant which includes a new lower wing, new wing fuel tanks, rocket racks and various size rockets, new engine and cowling, main gear well, spinner and prop to rattle off the most obvious ones.
The cockpit is the same as we've seen in Hasegawa 1/48
A6Ms since this molding first hit the streets. That is to say it is very good
and the only thing it really needs is a seat belt/harness. There are raised
details for the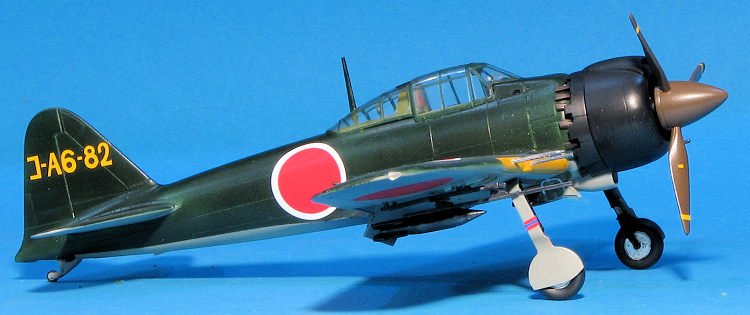 instruments and decals to fit over them. Note that this
version has no cowl machine guns so you'll have to fill the holes for the
breeches. There are various other holes that need to be opened in the fuselage,
including one for a small window. Though this has a new cowling, it is in two
halves so you'll need to deal with a seam. There is a one-piece prop that goes
with this with the larger spinner so no individual blades.
instruments and decals to fit over them. Note that this
version has no cowl machine guns so you'll have to fill the holes for the
breeches. There are various other holes that need to be opened in the fuselage,
including one for a small window. Though this has a new cowling, it is in two
halves so you'll need to deal with a seam. There is a one-piece prop that goes
with this with the larger spinner so no individual blades.
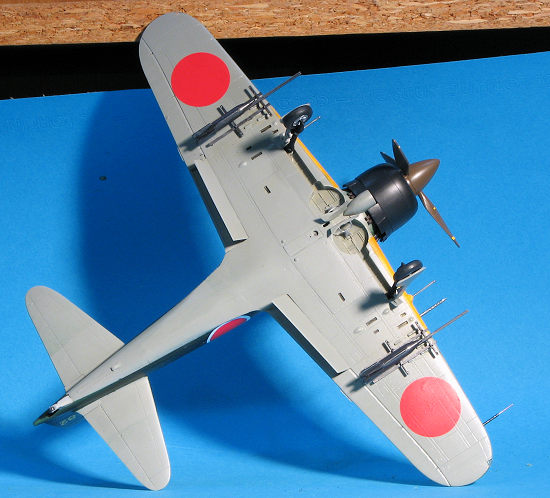
The wing is the biggest change. It is the one that has the reinforcements on the underside and is able to take either wing fuel tanks or various rocket options. The open framework can handle (on each side) one large rocket, two small rockets or four small rockets. Like the other versions, there are separate (lowered) flaps. No tail hook or center fuselage fuel tank so there are inserts for those. The canopy is in three pieces so you can pose it open though I think the sliding portion may be a tad thick.
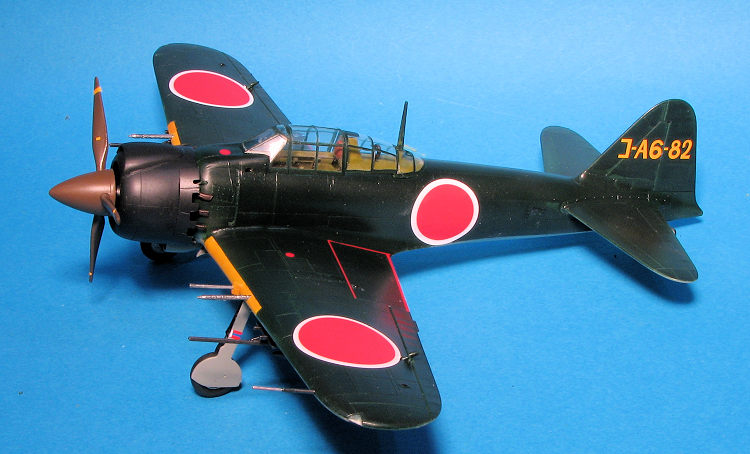
Instructions are standard stuff with Gunze paint references. Both markings options are green over light grey with leading edge ID markings. These latter items will need to be painted on as the area is fairly convoluted and a decal just wouldn't do it justice. Markings are for one of the prototypes as shown on the box art. The other is with the Yokosuka Naval Flying Group, which I think was as much a training command as it was an operational one. I'm not sure how many of these were made, but I'm betting not all that many. Decals are nicely printed and as good as most aftermarket sheets. The one set of roundels has separate white backgrounds. These respond well to most setting solutions.
| CONSTRUCTION |
 I started this one by painting all the interior colors as well as some of
the other shades while parts were still on the sprue. It does mean that I'll
have to repaint them once the molding seams have been removed, but it does
actually make things a bit easier to do so at this stage. I also looked
through the instructions to see what holes needed to be filled or opened up.
There are some on the wing that need to be filled and a small window on the
fuselage that needs to be opened.
I started this one by painting all the interior colors as well as some of
the other shades while parts were still on the sprue. It does mean that I'll
have to repaint them once the molding seams have been removed, but it does
actually make things a bit easier to do so at this stage. I also looked
through the instructions to see what holes needed to be filled or opened up.
There are some on the wing that need to be filled and a small window on the
fuselage that needs to be opened.
 Meanwhile,
I built up the wing. There is an insert that fits where the centerline fuel
tank normally fits. There is also an insert for the wheel wells that is
different on this variant. Fit of this was fairly good. Then I closed up the
fuselage and added the upper forward fuselage insert. I've never gotten this
to fit well on any A6M kit and had to do a bit of filler and sanding.
Tailplanes were inserted and this was followed by the wing. The fit here is
fairly good, but again, there is a gap at the rear fuselage/wing join that
needed filler.
Meanwhile,
I built up the wing. There is an insert that fits where the centerline fuel
tank normally fits. There is also an insert for the wheel wells that is
different on this variant. Fit of this was fairly good. Then I closed up the
fuselage and added the upper forward fuselage insert. I've never gotten this
to fit well on any A6M kit and had to do a bit of filler and sanding.
Tailplanes were inserted and this was followed by the wing. The fit here is
fairly good, but again, there is a gap at the rear fuselage/wing join that
needed filler. | COLORS & MARKINGS |
 With the
airframe painted, I returned to the bench to add the landing gear. This is
to keep it off the 'ground' while applying decals. I glued on the flaps and
then glosscoated the airframe. I then started applying the kit decals. There
are two options but one is a whiffer. So I chose the second prototype.
Decals went on without a hitch though I think the hinomarus are too bright.
With the
airframe painted, I returned to the bench to add the landing gear. This is
to keep it off the 'ground' while applying decals. I glued on the flaps and
then glosscoated the airframe. I then started applying the kit decals. There
are two options but one is a whiffer. So I chose the second prototype.
Decals went on without a hitch though I think the hinomarus are too bright.
| CONCLUSIONS |
So it was nice to revisit the Hasegawa Zeros. I generally enjoy building them and aside from needing some decent belts, the kits stand up quite well right out of the box. This one is a bit unusual due to that large engine, but it was very much the last of the breed and worthy of any proper A6M collection.
| REFERENCES |
https://en.wikipedia.org/wiki/Mitsubishi_A6M_Zero#A6M8_Type_0_Model_64
12 October 2018 Copyright
ModelingMadness.com. All rights reserved. If you would like your product reviewed fairly and fairly quickly, please
contact
the editor or see other details in the
Note to
Contributors.
Back to the Main Page
Back to the Review
Index Page
Back to the Previews Index Page