| KIT #: | 61103 |
| PRICE: | $57.00 MSRP |
| DECALS: | Three options |
| REVIEWER: | Scott Van Aken |
| NOTES: | Includes canopy mask and four standing pilot figures. |
| HISTORY |
 We all know that the Zero was the most potent
aircraft in the Pacific at the start of the Pacific war. So much so that it
was feared by Allied pilots as being impossible to defeat. Once tactics
changed from dogfighting to hit and run, it was discovered that the Zero was
not the terror of the skies, and actually was pretty easy to bring down,
thanks to its lack of armor protection for the pilot, engine and fuel
systems.
We all know that the Zero was the most potent
aircraft in the Pacific at the start of the Pacific war. So much so that it
was feared by Allied pilots as being impossible to defeat. Once tactics
changed from dogfighting to hit and run, it was discovered that the Zero was
not the terror of the skies, and actually was pretty easy to bring down,
thanks to its lack of armor protection for the pilot, engine and fuel
systems. The A6M5 was a modest update of the A6M3 Model 22, with nonfolding wing tips and thicker skinning to permit faster diving speeds, plus an improved exhaust system (four pipes on each side) that provided an increment of thrust. Improved roll-rate of the clipped-wing A6M3 was now built in.
Sub-variants included:
The A6M5 could travel at 540 km/h and reach a height of 8000 meters in nine minutes, 57 seconds. Other variants are the night fighter A6M5d-S (modified for night combat, armed with one 20 mm type 99 cannon, inclined back to the pilot's cockpit) and A6M5-K "Zero-Reisen"(model l22) tandem trainer version, also manufactured by Mitsubishi.
| THE KIT |
 Tamiya's
new A6M5 kit has provided a lot of buzz amongst modelers of late. Not so
much because it was developed, but because of the initial release price of the kit
back in 2003. However, thanks to the strength of the US dollar, it is
now far less expensive and well worth picking up if you want an early
A6M5.
Tamiya's
new A6M5 kit has provided a lot of buzz amongst modelers of late. Not so
much because it was developed, but because of the initial release price of the kit
back in 2003. However, thanks to the strength of the US dollar, it is
now far less expensive and well worth picking up if you want an early
A6M5.
 The cockpit is superbly detailed with decals for the various instrument
sections. The engine is equally detailed and should look great
once painted. A pilot figure is also provided for the cockpit if you
wish and if
not, you can install the harness decal. I wish all companies provided
decal harnesses as they look better than nothing.
The cockpit is superbly detailed with decals for the various instrument
sections. The engine is equally detailed and should look great
once painted. A pilot figure is also provided for the cockpit if you
wish and if
not, you can install the harness decal. I wish all companies provided
decal harnesses as they look better than nothing. | CONSTRUCTION |
 During all this, the engine was constructed. I did not assemble it into
the cowling nor did I attach the exhaust as this can all be added to the
airframe after everything in painted. For that reason, I did not build
up the landing gear until after painting as well. The fuselage halves
were joined along with a small brace for the forward fuselage. This kit
has more inserts than a porn star and included in that list are a panel
on the port tail section as well as the upper and side after forward
fuselage. These latter parts did not fit as well as I'd hoped.
Eventually these were all in place and the cockpit inserted from the
underside. It is a fairly tight fit so don't be surprised if you have to
give it a bit more pressure than you feel you should.
During all this, the engine was constructed. I did not assemble it into
the cowling nor did I attach the exhaust as this can all be added to the
airframe after everything in painted. For that reason, I did not build
up the landing gear until after painting as well. The fuselage halves
were joined along with a small brace for the forward fuselage. This kit
has more inserts than a porn star and included in that list are a panel
on the port tail section as well as the upper and side after forward
fuselage. These latter parts did not fit as well as I'd hoped.
Eventually these were all in place and the cockpit inserted from the
underside. It is a fairly tight fit so don't be surprised if you have to
give it a bit more pressure than you feel you should. | COLORS & MARKINGS |
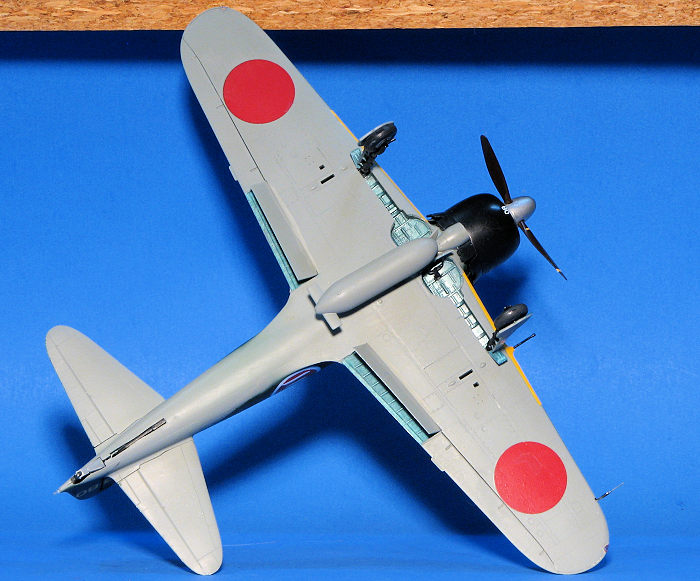
 I used
kit decals for the common markings including the wing leading edge ID
bands. This was, in hindsight, a bit of a mistake as the decal didn't
cover the leading edge cannon fairings all that well. For the rest of
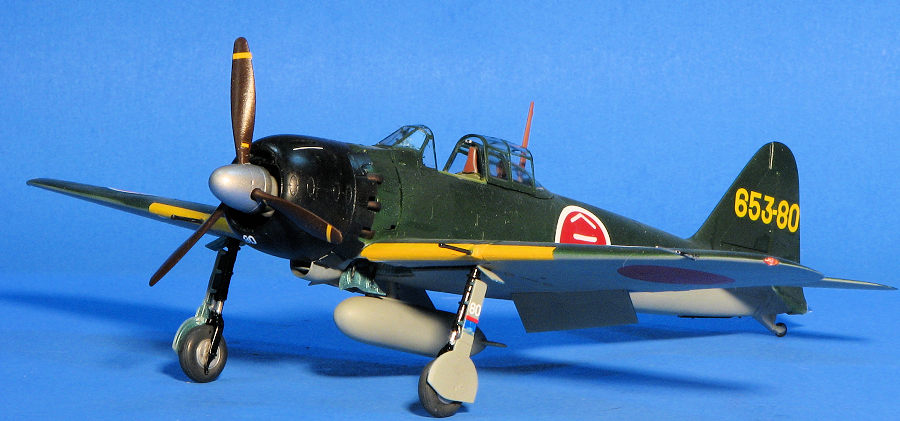
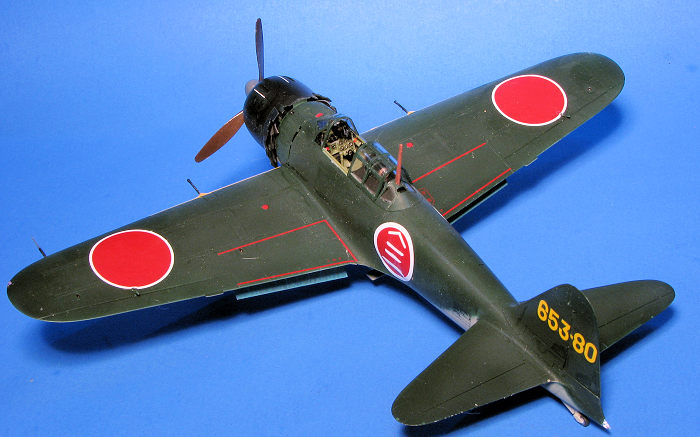
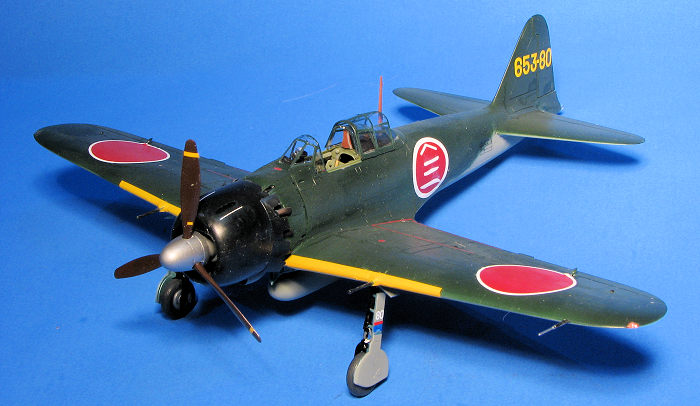
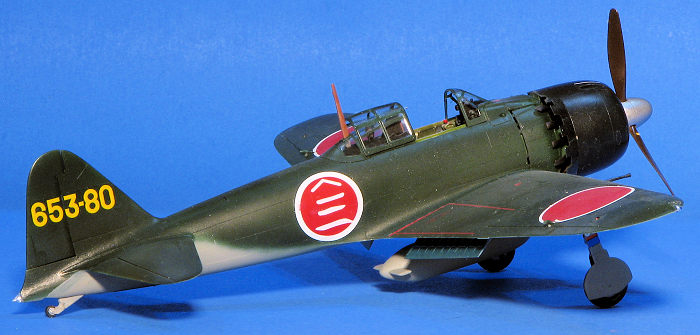
the markings I used Life-Like 48-064 which has an A6M5 otsu flown by PO
2/C Sadao Sanno of the 653rd Ku during carrier landing practice during
September 1944. As was usual for the time, a washable white markings was
painted in the fuselage roundel to identify the trainee from the bridge.
The Life-Like decals went on without any issue.
I used
kit decals for the common markings including the wing leading edge ID
bands. This was, in hindsight, a bit of a mistake as the decal didn't
cover the leading edge cannon fairings all that well. For the rest of
the markings I used Life-Like 48-064 which has an A6M5 otsu flown by PO
2/C Sadao Sanno of the 653rd Ku during carrier landing practice during
September 1944. As was usual for the time, a washable white markings was
painted in the fuselage roundel to identify the trainee from the bridge.
The Life-Like decals went on without any issue. | CONCLUSIONS |
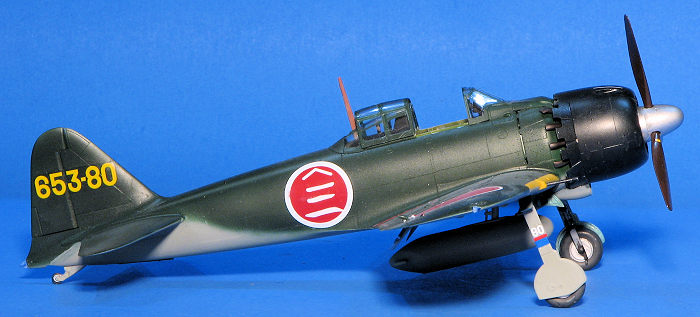
Overall, this is a very nice, but somewhat pricey kit. I'm not sure if it is all that much better than the Hasegawa version, but it does have features that I like and it certainly goes together well.
| REFERENCES |
17 January 2025
Copyright ModelingMadness.com. All rights reserved. No reproduction in part or in whole without express permission from the editor.
If you would like your product reviewed fairly and quickly, please contact the editor or see other details in the Note to Contributors.