|
HISTORY |
Hasegawa 1/48 A6M2-N 'Rufe'
|
KIT # |
9322 |
|
PRICE: |
$24.95 |
|
DECALS: |
Two aircraft of 802nd Flying Group |
|
REVIEW : |
|
|
NOTES: |
1999 release. |
|
HISTORY |
The history of the A6M Zero-Sen has been well documented in
other reviews. The floatplane fighter version, Allied code-named 'Rufe' was
developed by Nakajima in response to a request by the Japanese Navy for a float
fighter based on the A6M2. This was mainly due to the Japanese inability to
quickly build runways. There was no Japanese equivalent of the Seabees to do
this. Therefore the need for defending fighters that could take off from and
land on the water to defend any newly acquired ocean-front property. Like their
seaplane buddies, many 'Rufe' units operated from a tender.
Where enemy fighter
opposition was light or weak, the 'Rufe' did well. Even against more advanced
types, 'Rufe' pilots were able to score well and a few 'Rufe' pilots became
aces. This particular boxing is dedicated to the pilots of the 802nd FG. The
only information I have been able to find on the unit is that they were aboard
the Akitsushima as their tender.
 While
a new fighter specifically designed for this purpose, the Kawanishi N1K1 'Rex'
was being developed, it would be years before it was operational. Undertaking
the job of converting the A6M2, Nakajima had a prototype flying in less than a
year from initial development, first flying on 7 December 1941. There were
327 'Rufes' built and they saw action in nearly all theaters of the war in the
Pacific, being used right up until the end of the war. The first deployment of
the type was to a sleepy little bug-infested island in the Southwest Pacific
called Tulagi, across a strait from a larger, even more inhospitable place that
no one ever heard of called Guadalcanal.
While
a new fighter specifically designed for this purpose, the Kawanishi N1K1 'Rex'
was being developed, it would be years before it was operational. Undertaking
the job of converting the A6M2, Nakajima had a prototype flying in less than a
year from initial development, first flying on 7 December 1941. There were
327 'Rufes' built and they saw action in nearly all theaters of the war in the
Pacific, being used right up until the end of the war. The first deployment of
the type was to a sleepy little bug-infested island in the Southwest Pacific
called Tulagi, across a strait from a larger, even more inhospitable place that
no one ever heard of called Guadalcanal.
|
THE KIT |
Many of the sprues
for the 'Rufe' are common to the earlier A6M2 kits that Hasegawa has produced.
However, about half of the kit is new, consisting of a new fuselage (the 'Rufe'
had a larger rudder), new lower wing, center float and stabilizing wing floats.
There is also a nice beaching trolley for you to display your new kit upon. Most
of the trolley is on the sprue with the new lower wing while the wheels are on
the s The rest of the kit is up to the same standards as the rest of
Hasegawa's A6M line and you will have quite a few spares, especially landing
gear parts.
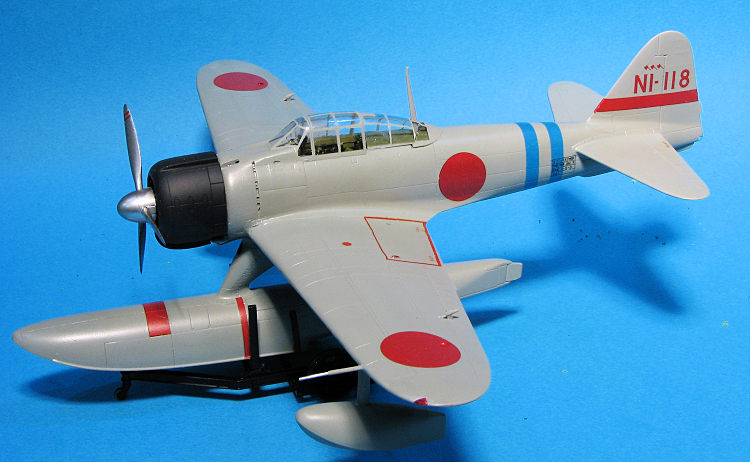
As one expects from Hasegawa, the molding is superb with the
usual finely engraved panel lines and flash free parts. Buying an aftermarket
cockpit for this kit is like gilding the lily as everything one expects is in
there, similar to the Ki-84 and other newer kits. The decal sheet is quite good
and provides markings for two aircraft. One is is the overall grey scheme as
flown by Lt.JG Keizo Yamasaki and has three kill markings in the form of
hatchets on the tail. The the other in dark black-green over grey that was used
later in the war. The instruction sheet is also typical of Hasegawa in that it
is superbly done with no doubt as to what part goes where. This sheet is
'old school' with the off white whites and a long soak time to get the decals
fro the sheet.
CONSTRUCTION I decided to build this one as I was pleased with how quickly
the recent A6M8 built up. I'd had this kit since it was released and figured I
should at least give it a go. As often happens with kits, I started with the
cockpit. The parts were painted on the sprue then assembled and touched up. It
takes a while to properly install all the instrument decals and I used a set of
Eduard color belts for this one, which look a lot better
While I was fussing with the interior, I assembled the engine,
wings and fuselage halves. I was rather surprised at the fairly poor fit of the
fuselage halves and the wings. The fuselage in particular did not want to match
up perfectly without small 'steps' along the half length. Not sure why this was
the case and it isn't a catastrophe as it is easily sanded/filled away, but it
was unexpected.
I had to use plastic card to fill the gaps at the wing roots and get the wings
properly level with each other. Having built other early A6Ms without this
issue, I have to assume it is something I did, though I don't know what.
Anyway, that did suck out some of the enthusiasm for the project
and it was put on a slow track for construction as the box inched close to the
shelf of doom. However, it did not make it that far and I spent some time
building up the floats. I put 20 grams of weight in the main float tip so that
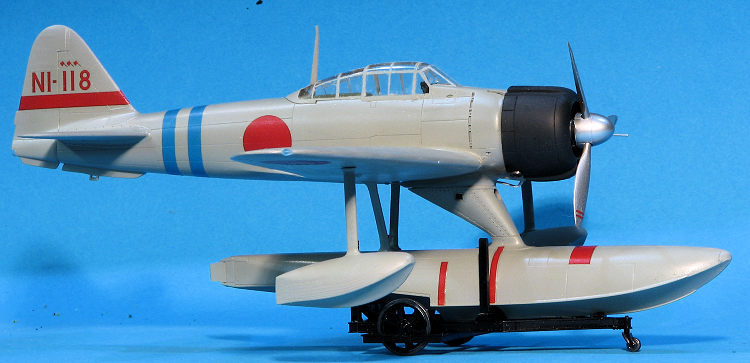
it would sit properly and I built up the beaching dolly.
The engine was painted and installed in the cowling after I
painted the latter item the obligatory blue-black. The fit is not as positive as
I'd like, but eventually I got it in where it looks good. I had painted the prop
with 'prop color' then realized it was supposed to be bare metal so repainted it
with Alclad II aluminum along with the spinner parts.
COLORS & MARKINGS This particular scheme is overall IJN Grey and for this I used
AK Interactive acrylic paint. The paint was not thinned and used straight from
the bottle. Once dry, the airframe was given a clear coat using Testors spray
can lacquer clear. I was not that jazzed about how it covered so will not be
going that route again. What works great on car bodies does not always work well
on planes.
Meanwhile, I d As is often stated by modelers too lazy
to weather (like me), the airframe was kept clean. Actually, operating from the
water pretty well negated grit and grime and they had to be washed with some
frequency to prevent salt water corrosion.
Once the masking was removed, the engine
was attached along with the prop and a couple of smaller items (pitot tube and
wing floats) were attached. I popped off the rear transparency (which had been
tacked in place) and installed the radio mast. A bit of exhaust stain was all
the weathering I did on it. CONCLUSIONS It is a real poser as to why I had such an issue with the
wings. I'm going to put another early A6M on the bench in the near future and
see if this was just an aberration. Anyway, the end result is a very nice
looking model and one that I think every fan of the type needs to build. The kit
has been Limited Editioned a couple of times since the first boxing so should be
fairly easy to find. REFERENCES Japanese Aircraft of the Pacific War, by Rene J
Francillon Camouflage and Markings of IJN Fighters, Model Art #510 30 November 2018 Copyright ModelingMadness.com. All rights reserved. Review kit courtesy of me If you would like your product reviewed fairly and fairly quickly, please contact
the editor or see other details in the Note to
Contributors.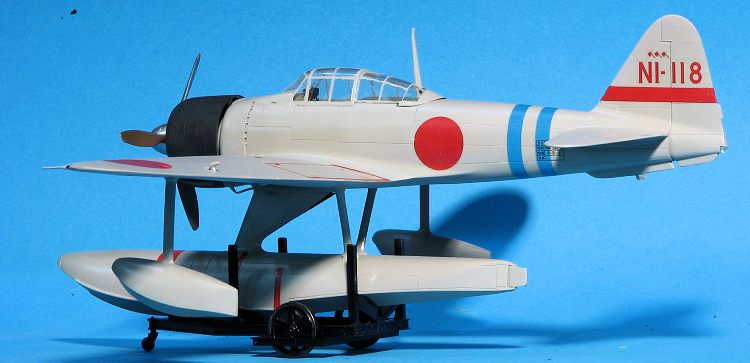 prues for the floats, bombs and racks. The third new sprue is for the main
float. You'll need 16 grams in this float to keep it from 'tail sitting'.
prues for the floats, bombs and racks. The third new sprue is for the main
float. You'll need 16 grams in this float to keep it from 'tail sitting'.
 than the tape I used in
the A6M8, but I didn't have the set at that time. Next Zero, I'll probably use a
resin seat or drill out the holes in it.
than the tape I used in
the A6M8, but I didn't have the set at that time. Next Zero, I'll probably use a
resin seat or drill out the holes in it.
 With all that weight in the main float, attaching it was a bit
of a challenge. The support struts were a bit on the wiggly side and to be
honest, this kit could have benefitted from some tab/slots for these items. I
then masked the canopy using an Eduard canopy mask set designed for the Hasegawa
A6M5. It really makes no difference what model Zero you get masks for as the
windscreen/canopy were the same in all of the variants. It was fairly time
consuming to attach these but it does take the guesswork out of finding the
frame lines when doing this the 'old' way. Of course, I did not need the wheel
masks and in fact, have a goodly number of spares from that area as the Rufe
didn't need them.
With all that weight in the main float, attaching it was a bit
of a challenge. The support struts were a bit on the wiggly side and to be
honest, this kit could have benefitted from some tab/slots for these items. I
then masked the canopy using an Eduard canopy mask set designed for the Hasegawa
A6M5. It really makes no difference what model Zero you get masks for as the
windscreen/canopy were the same in all of the variants. It was fairly time
consuming to attach these but it does take the guesswork out of finding the
frame lines when doing this the 'old' way. Of course, I did not need the wheel
masks and in fact, have a goodly number of spares from that area as the Rufe
didn't need them.
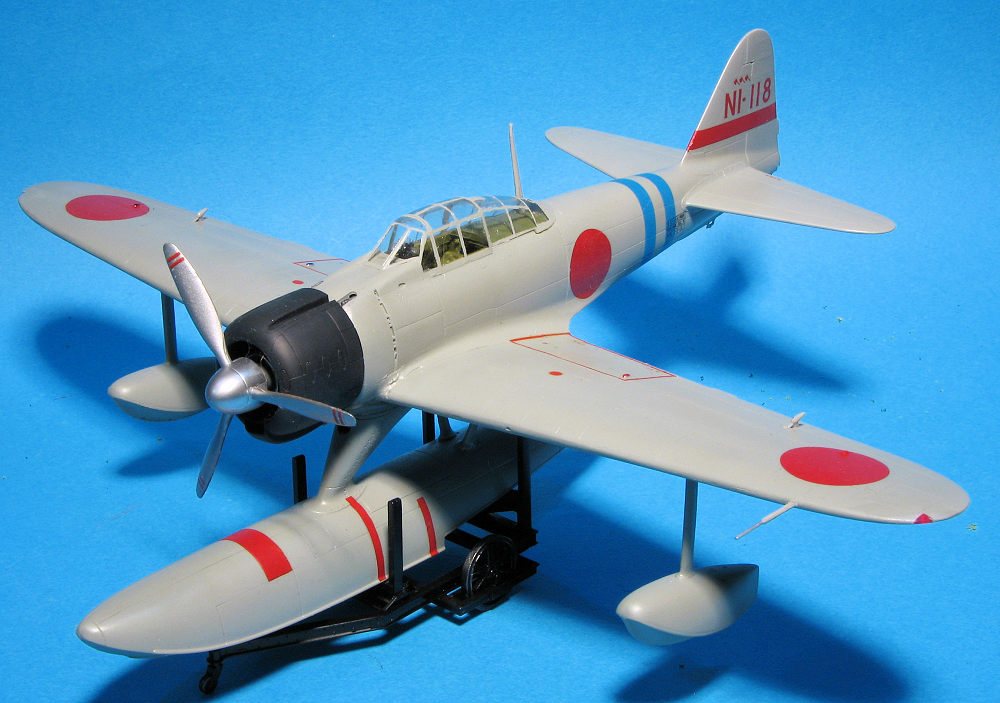
 The grey option was for the plane with the kill markings on the
fin and I used the kit decals. These are old school Hasegawa decals, but since I
wasn't using any white markings, their off white color was not an issue. These
decals really need hot water as soaking them in cold water means a 10-15 minute
wait for them to come loose. But loose they get and I used Mr Mark Softer to get
them to snuggle down.
The grey option was for the plane with the kill markings on the
fin and I used the kit decals. These are old school Hasegawa decals, but since I
wasn't using any white markings, their off white color was not an issue. These
decals really need hot water as soaking them in cold water means a 10-15 minute
wait for them to come loose. But loose they get and I used Mr Mark Softer to get
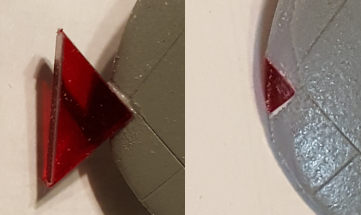
them to snuggle down. 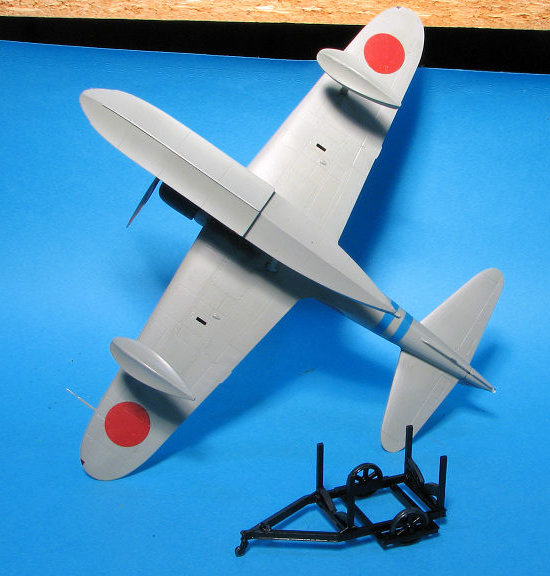 ecided to
try a set of Pacific Monograph wing tip lights. These are pre cut and simply pop
out of the carrier. I smoothed out the mounting area and glued them in using
standard cement. Once dry, it was about 5 minutes of trimming and sanding to get
things to looking right. Much easier than cutting tooth brush handles and no
worries about little Hasegawa clear thingies shooting off into another
dimension. The tips were masked and the airframe areas which were sanded were
rapinted. Then the overall airframe was given a coat of clear semi-matte.
ecided to
try a set of Pacific Monograph wing tip lights. These are pre cut and simply pop
out of the carrier. I smoothed out the mounting area and glued them in using
standard cement. Once dry, it was about 5 minutes of trimming and sanding to get
things to looking right. Much easier than cutting tooth brush handles and no
worries about little Hasegawa clear thingies shooting off into another
dimension. The tips were masked and the airframe areas which were sanded were
rapinted. Then the overall airframe was given a coat of clear semi-matte.