| HISTORY |
Hasegawa 1/72 Ki-46-III
| KIT #: | 51206 |
| PRICE: | $15.95 from www.greatmodels.com |
| DECALS: | Three options |
| REVIEWER: | Scott Van Aken |
| NOTES: | 2000 boxing |
| HISTORY |
On 12 December 1937, the Imperial Japanese Army Air Force issued a specification to Mitsubishi for a long-range strategic reconnaissance aircraft to replace the Mitsubishi Ki-15. The specification demanded an endurance of six hours and sufficient speed to evade interception by any fighter in existence or development, but otherwise did not constrain the design.
 The resulting design was a twin-engined,
low-winged monoplane with a retractable tailwheel undercarriage. It had a
small diameter oval fuselage which accommodated a crew of two, with pilot
and observer situated in individual cockpits separated by a large fuel tank.
Further fuel tanks were situated in the thin wings both inboard and outboard
of the engines, giving a total fuel capacity of 1,490 L (328 imperial
gallons). The engines, two Mitsubishi Ha-26, were housed in close fitting
cowlings developed by the Aeronautical Research Institute of the Tokyo
Imperial University to reduce drag and improve pilot view.
The resulting design was a twin-engined,
low-winged monoplane with a retractable tailwheel undercarriage. It had a
small diameter oval fuselage which accommodated a crew of two, with pilot
and observer situated in individual cockpits separated by a large fuel tank.
Further fuel tanks were situated in the thin wings both inboard and outboard
of the engines, giving a total fuel capacity of 1,490 L (328 imperial
gallons). The engines, two Mitsubishi Ha-26, were housed in close fitting
cowlings developed by the Aeronautical Research Institute of the Tokyo
Imperial University to reduce drag and improve pilot view.
The first prototype aircraft, with the designation Ki-46, flew in November 1939 from the Mitsubishi factory at Kakamigahara, Gifu, north of Nagoya. Tests showed that the Ki-46 was underpowered, and slower than required, only reaching 540 km/h (336 mph) rather than the specified 600 km/h (373 mph). Otherwise, the aircraft tests were successful. As the type was still faster than the Army's latest fighter, the Nakajima Ki-43, as well as the Navy's new A6M2, an initial production batch was ordered as the Army Type 100 Command Reconnaissance Plane Model 1 (Ki-41-I).
To solve the performance problems, Mitsubishi fitted Ha-102 engines, which were Ha-26s fitted with a two stage supercharger, while increasing fuel capacity and reducing empty weight to give the Ki-46-II, flying in March 1941. This met the speed requirements of the original specification, and was ordered into full-scale production, with deliveries starting in July.
 Although at first the Ki-46 proved almost immune
from interception, the Imperial Japanese Army Air Force realised that
improved Allied fighters such as the Supermarine Spitfire and P-38 Lightning
could challenge this superiority, and in July 1942, it instructed Mitsubishi
to produce a further improved version, the Ki-46-III. This had more
powerful, fuel-injected Mitsubishi Ha-112 engines, and a redesigned nose,
with a fuel tank ahead of the pilot and a new canopy, smoothly faired from
the extreme nose of the aircraft, eliminating the "step" of the earlier
versions. The single defensive machine gun of the earlier aircraft was also
omitted. The new version first flew in December 1942, demonstrating
significantly higher speed (630 km/h (391 mph) at 6,000 m (19,700 ft). The
performance of the Ki-46-III, proved superior to that of the aircraft
intended to replace it (the Tachikawa Ki-70), which did not enter
production.
Although at first the Ki-46 proved almost immune
from interception, the Imperial Japanese Army Air Force realised that
improved Allied fighters such as the Supermarine Spitfire and P-38 Lightning
could challenge this superiority, and in July 1942, it instructed Mitsubishi
to produce a further improved version, the Ki-46-III. This had more
powerful, fuel-injected Mitsubishi Ha-112 engines, and a redesigned nose,
with a fuel tank ahead of the pilot and a new canopy, smoothly faired from
the extreme nose of the aircraft, eliminating the "step" of the earlier
versions. The single defensive machine gun of the earlier aircraft was also
omitted. The new version first flew in December 1942, demonstrating
significantly higher speed (630 km/h (391 mph) at 6,000 m (19,700 ft). The
performance of the Ki-46-III, proved superior to that of the aircraft
intended to replace it (the Tachikawa Ki-70), which did not enter
production.
In an attempt to yet further improve the altiude performance of the Ki-46, two prototypes were fitted with exhaust driven turbosupercharged Ha-112-II-Ru engines, flying in February 1944, but only two prototypes of this version were built.
Mitsubishi factories made a total of 1,742 examples of all versions (34 units Ki-46-I, 1093 units Ki-46-II, 613 units Ki-46-III, 4 units Ki-46-IV)during 1941-44.
| THE KIT |
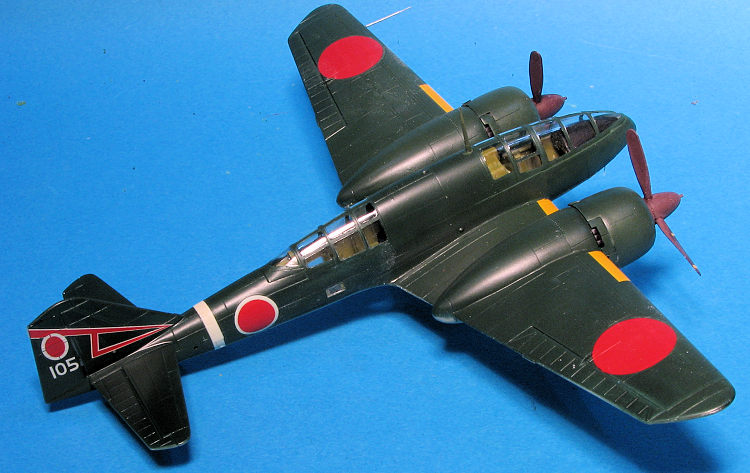
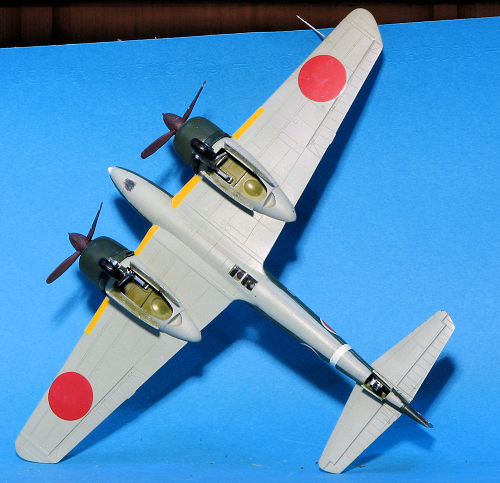
This is one of a series of Japanese twin engine aircraft that Hasegawa released at the turn of the century. In common with those kits, this one has fine engraved panel lines, fairly good interior detailing and uses decals for the instrument panels.
 The interior
has a long floor piece with the pilot's seat and control stick in the front
followed by a fuel tank, camera, camera operator's seat and a rear bulkhead. As
there were several versions of the Ki-46, Hasegawa has molded the nose sections
separate to take these into consideration. There is a nicely done engine
assembly and one piece cowlings. A large greenhouse covers the crew area with a
blended canopy in the front and a larger aft section. There is only one real
option and that is a large drop tank,
which in my opinion, does nothing for the looks of the aircraft. Unlike some
other companies, the holes for this are not pre-drilled so it can be left off
without any problems.
The interior
has a long floor piece with the pilot's seat and control stick in the front
followed by a fuel tank, camera, camera operator's seat and a rear bulkhead. As
there were several versions of the Ki-46, Hasegawa has molded the nose sections
separate to take these into consideration. There is a nicely done engine
assembly and one piece cowlings. A large greenhouse covers the crew area with a
blended canopy in the front and a larger aft section. There is only one real
option and that is a large drop tank,
which in my opinion, does nothing for the looks of the aircraft. Unlike some
other companies, the holes for this are not pre-drilled so it can be left off
without any problems.
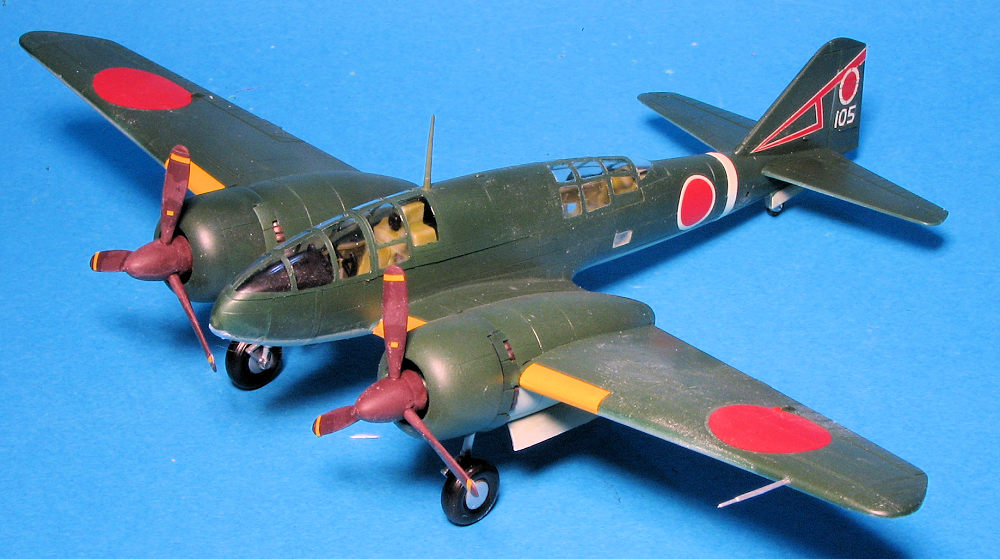
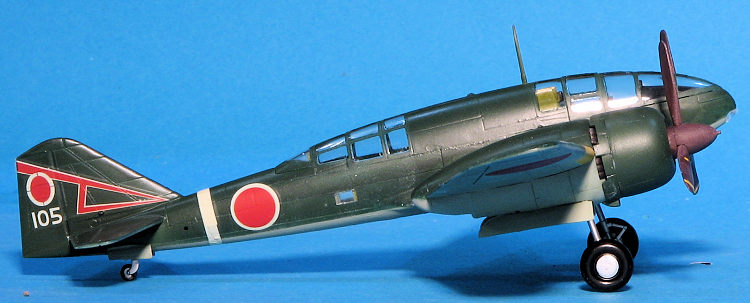
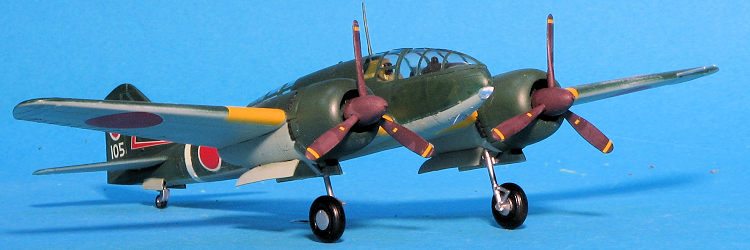
Instructions are typical for Hasegawa with well drawn construction sequences and Gunze paint references. Markings are supplied for three aircraft. First is a 15th Flight Regiment plane as shown on the box art It is painted a brownish upper surface color that you will have to mix with a green-grey underside. Similarly colored is a 6th Air Wing Headquarters Reconnaissance Squadron plane, while the third is Army Green on the upper surface and this one is from the 19th Company Independent Flight. All have yellow wing leading edge ID bands which are supplied on the sheet.
| CONStTRUCTION |
First thing I did was
to spray paint all the inside parts as well as the gear wells and inner gear
doors with AK Interactive's Mitsubishi interior green. Then I assembled the
interior, painting bits as I went. There is a fairly large hole in the center of
the interior floor which I have to guess is for the canon on other versions.
There is nothing to fill the hole and I only hope it is not visible through the
transparencies. I then built up the separate nose, which has the instrument
panel, and attached the decal before gluing it to the rest of the fuselage. The
placement of the interior in the fuselage halves is very positive. Do not glue
any other part of the interior other than the mounting lugs or you'll have a gap
when you join the wings. This is experience talking on this.
Next I assembled the wings and attached the upper and lower engine nacelles. Fit is quite good. Be sure not to sand down the very aft step on the upper and lower nacelles or you'll have a gap to fill. I was tempted to do so but realized what was going on when I test fit them. Once that was done, I attached the wings to the fuselage and then the stabs. The rear wing fuselage join needed a bit of filler as there was a small step.
Now is when you need to deviate from the instructions. Rather than assembling the engines and nacelles then attaching them, the cowlings and cowl flaps need to be painted and when dry, the engine bits attached and these assemblies set aside until the end of the build. Masking around these when on the airframe will simply be a pain. Same goes for the next step. Ensure that the underside of the airframe is painted prior to working on the landing gear or you'll find it difficult to have to deal with masking them. I installed the lower windows, masked them and then filled all the wells with silly putty. The underside was then painted.
Moving to the upper side, I masked the two large canopy sections and attached them. My fears about the large blank area on the cockpit floor being easily visible were unfounded. I then painted the upper surface.
| COLORS & MARKINGS |
 ear after removing all the Silly
Putty from the wells. These were easy to assemble and fit just fine. I
removed the masking and did the usual touch up before giving the airframe a
gloss clear coat in preparation for the decals.
ear after removing all the Silly
Putty from the wells. These were easy to assemble and fit just fine. I
removed the masking and did the usual touch up before giving the airframe a
gloss clear coat in preparation for the decals.
| CONCLUSIONS |
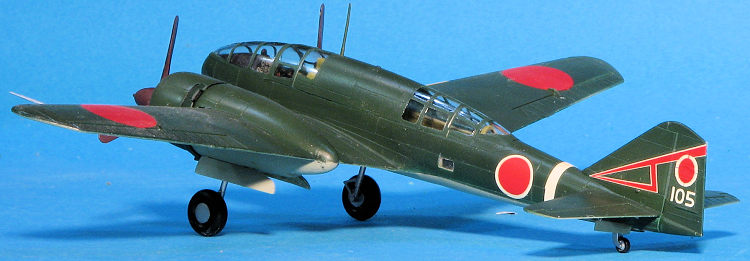
First off, apologies for the dusty prints on the model. I handled this after sanding some resin and should have washed my hands first. In all, it is a very nice kit of an important WWII Japanese type. It builds very well and has a nice markings selection to go along with it.
| REFERENCES |
http://en.wikipedia.org/wiki/Mitsubishi_Ki-46
July 2019
Copyright ModelingMadness.com. All rights reserved.
If you would like your product reviewed fairly and quickly, please contact the editor or see other details in the Note to Contributors.