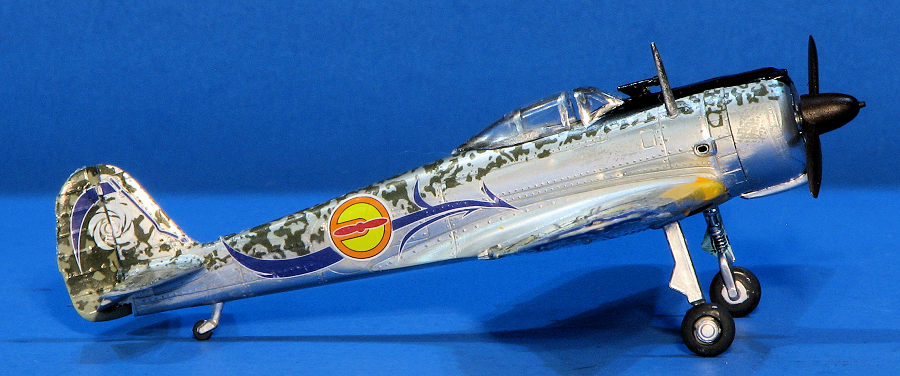
LS 1/72 Ki-43-I 'Oscar'
| KIT #: | A101 (B1) |
| PRICE: | 200 yen when new |
| DECALS: | Just insignia |
| REVIEWER: | Scott Van Aken |
| NOTES: | 1980 release |

| HISTORY |
 The Ki-43 Hayabusa was the Japanese Army Air Forces' equivalent of the
Navy's A6M Zero. It as the first fighter with retractable landing gear in the
service and was built with maneuverability and range as its main requirements.
Its armament was pathetic with twin 7.7mm machine guns and it had almost no
armor protection for either the pilot or fuel systems. Against an inferior
enemy, like the Chinese, the plane was a terror. Against a better equipped
adversary, it didn't fare quite as well.
The initial aircraft were in squadron service when the Pacific war broke out and they were quickly sent to Southeast Asia where they participated in the fight against the Allies in Burma and southern China. They were also found in the Dutch East Indies and New Guinea. While they were quite successful against Allied aircraft and their inexperienced pilots, by mid 1943 when better planes were available for the Allies, the Ki-43 began to show its deficiencies.
However, many JAAF aces flew the Ki-43 and it was modified throughout the war, though it never was able to reach parity with Allied types. It was decided to code name these planes in the 1942/43 time period as most Allied pilots didn't know what Japanese planes were called. Interestingly, all these planes were given 'hill-billy' US names like Zeke, Claude, Topsy, Pete and so forth. Never a Tom. or John, or David. The Ki-43 was code named Oscar, though throughout the war, like most Japanese fighters, it was simply referred to as a Zero.
| THE KIT |
 LS
originally released this kit in 1963. Though subsequent boxings state it is
1/72, on the original release it is 1/75. This fits in with many of its other
aircraft releases about that time, which were all 1/75 and a few years later
magically became 1/72.
This one is quite typical of a 60's kit. First off, the place for the decals is molded onto the wings and fuselage. In terms of overall detail it has both somewhat soft engraved panel lines and rivets. There are some sink areas to deal with, but overall, the kit doesn't look half bad.
There is no cockpit, just some pegs on which to place a pilot figure. All of the control surfaces are separate and other than the rudder, are designed to move. There is no engine as the oil cooler pretty much blocks any engine that might be there. There also is no boxed in main gear well and the main gear doors are molded onto the gear strut. The wheel is held on by a cap that fits on the axle. This is to allow the wheels to turn. I built their Ki-46 decades ago and this feature works quite well. Another working feature is a sliding canopy. On the underside there are four holes. Two are for bombs and i'm not sure what the other two on the fuselage centerline are for, but I suspect it is for a display stand (which is not included nor shown in the instructions.
Instructions are all on one side of a sheet of paper. This includes the exploded view you see above as well as four construction steps. There is a fairly long written section delineating what color each part should be painted. The lone decal sheet (not shown) only includes insignia so you are on your own when it comes to any unique markings. I should also mention that a small tube of glue is also included. In with the bagged kit are instructions in Japanese. The English ones were separate in the box.
| CONSTRUCTION |
 I wanted to keep as many of the working features of the kit as I could, so I did
a bunch of test fitting to ensure all would work as I hoped. It was apparent
early that I couldn't have a spinning prop as I wanted to attach cowling fairly
early in the build so I could smooth it in with the fuselage. Therefore, my
first construction step was to glue the prop shaft to the engine front. There is
no interior, so all of that area was painted Nakajima interior green and the
fuselage halves glued together, trapping the rudder. I should mention that while
there was little flash, I did have to do a little trimming to ensure that all
the control surfaces were free to move.
I then glued together the horizontal stabilizers and also the wings. When gluing the wings, I trapped the ailerons in place. Then some time was spent filling in the various holes on the underside of the fuselage as I wasn't using the bombs. To fill the bomb holes, I simply pressed in the pegs on the bombs then cut away the bombs. On the fuselage I had to deal with quite a few sink areas.
After dealing with those, I attached the wings and the tailplanes. Fit is not very good on either so I had to use filler to fill gaps and smooth things out. This wiped out quite a bit of detail, but it couldn't be helped. The elevators can be left off until after the tailplanes are done. There is a ferrule that attaches the two sides and after putting the ferrule in place, I was able to fairly easily get the elevators to fit, though it took a little bit of bending to get them in place. Unfortunately, seemed to have gotten some glue or paint on the inner join as they will move, but it is a struggle so I left them lowered. Now I had a fairly complete airframe.
| COLORS & MARKINGS |
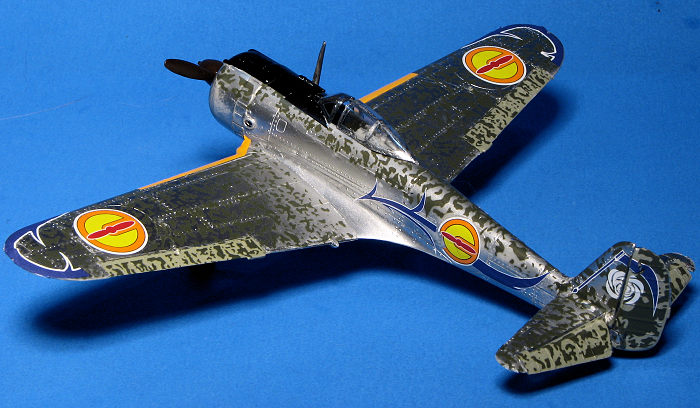
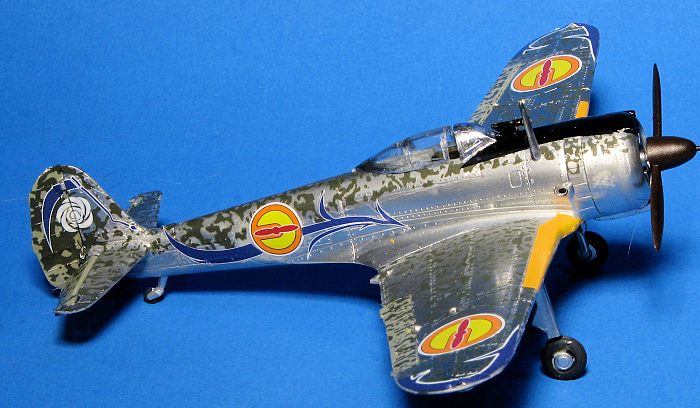
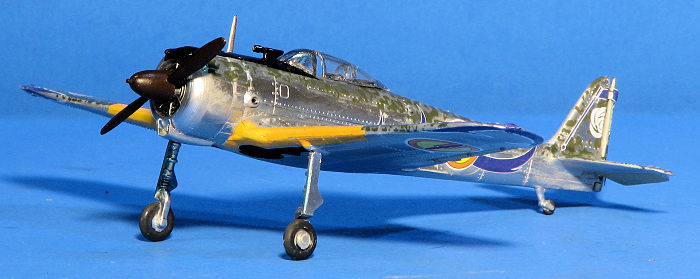
I had bought this kit to use for one of the Magnificent Kotobuki schemes previewed a bit earlier. This meant a bare metal airplane. I had bought some Mr Color chrome silver paint. This is, I believe, a lacquer and appears to be airbrush ready in the bottle though I thinned it a tad with some Mr Color thinner. It sprays beautifully and dries to the touch within minutes. It is also very bright so I think I should have gotten something a bit duller, but this is an anime scheme so I left it as it was. One thing it does do is show up every single scratch left from sanding. So much that I resanded the filled areas in hopes of getting it a bit smoother. Sort of worked. In the future, I'll spray on a dark gloss color to help fill in some of the scratches.
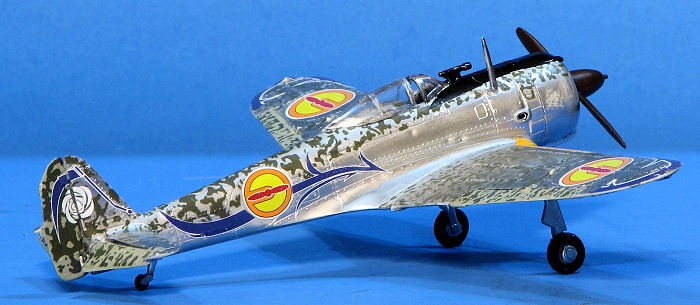 I then brush painted all the control surfaces with Tamiya grey-green as
these were left in the fabric primer when the airframe wasn't otherwise painted.
Took a couple of coats, but fortunately, the shiny undersurface shows where my
brush missed. I then glued on the main landing gear. With that completed, It was
time for decals.
For this I used set #3 of the Artbox decals that I got for aircraft from the Magnificent Kotobuki. I was concerned that they would not fit the kit and my concerns were justified as they are too large. However, nothing that a bit of trimming cannot fix. Applying all the decals was actually quite time consuming. The sheet has excellent glue, but some of the markings are a bit brittle and I had them break during application. Interestingly, the yellow wing ID markings appeared to be too small to completely fit. Fortunately, I have a bottle of Testors Model Master RLM 04 which is almost a perfect match so used that to cover up the leading edges.
The kit had the hole for the antenna filled in so I drilled that out to attach that item. Wheels were next and they were very loose on the axle in addition to being too thin. Finally, I brush painted the clear parts as masking them would not have been easy due to their size. These bits were attached, a bit of additional painting was done for the anti-glare panel and that was it.
| CONCLUSIONS |
Let's be honest. This is not a great kit by any stretch. It is an ancient tooling, a scale that is too small for aftermarket and not going to win any contests. However, at the time, it was all I could find for the decal sheet. Fortunately, as of this writing, Fujimi will be reissuing their -I kit in 2025 and supposedly Arma Hobby will do a new tool, so things are looking up.
13 December 2024
Copyright ModelingMadness.com. All rights
reserved. No reproduction in part or in whole without express permission from
the editor. If you would like your product reviewed fairly and fairly quickly, please contact the editor
or see other details in the
Note to
Contributors. Back to the Main Page
Back to the Review
Index Page
Back to the Previews Index Page