Hasegawa 1/48 Ki-43-I '64th Flight Regiment'
| KIT #: | 07303 |
| PRICE: | $20.70 on sale (44.99 SRP ) |
| DECALS: | Three options |
| REVIEWER: | Scott Van Aken |
| NOTES: | 2012 boxing |
| HISTORY |
The Ki-43 Hayabusa was the Japanese Army Air Forces' equivalent of the Navy's A6M Zero. It as the first fighter with retractable landing gear in the service and was built with maneuverability and range as its main requirements. Its armament was pathetic with twin 7.7mm machine guns and it had almost no armor protection for either the pilot or fuel systems. Against an inferior enemy, like the Chinese, the plane was a terror. Against a better equipped adversary, it didn't fare quite as well.
 The initial aircraft were in squadron service when the Pacific
war broke out and they were quickly sent to Southeast Asia where they
participated in the fight against the Allies in Burma and southern China. They
were also found in the Dutch East Indies and New Guinea. While they were quite
successful against Allied aircraft and their inexperienced pilots, by mid 1943
when better planes were available for the Allies, the Ki-43 began to show its
deficiencies.
The initial aircraft were in squadron service when the Pacific
war broke out and they were quickly sent to Southeast Asia where they
participated in the fight against the Allies in Burma and southern China. They
were also found in the Dutch East Indies and New Guinea. While they were quite
successful against Allied aircraft and their inexperienced pilots, by mid 1943
when better planes were available for the Allies, the Ki-43 began to show its
deficiencies.
However, many JAAF aces flew the Ki-43 and it was modified throughout the war, though it never was able to reach parity with Allied types. It was decided to code name these planes in the 1942/43 time period as most Allied pilots didn't know what Japanese planes were called. Interestingly, all these planes were given 'hill-billy' US names like Zeke, Claude, Topsy, Pete and so forth. Never a Tom. or John, or David. The Ki-43 was code named Oscar, though throughout the war, like most Japanese fighters, it was simply referred to as a Zero!
| THE KIT |
This
is one of Hasegawa's staple kits along with the newer tooled A6M, J2M, Ki-44 and
Ki-84. All of these were done within a few years of each other and as such are
quite similar in their look and detail level.
The first thing you see is that the wing tips are separate. This is to allow the
later model Ki-43s with their longer wings to be done using one sprue for the
wings. This means that the tips of the ailerons will have to be filled and
sanded as the tips cut through them. I would seem to me that offering separate
ailerons would have eliminated this need, but Hasegawa chose this method.
Thankfully, the only 'plug ins' are the prop and the tail wheel. This makes for
a much sturdier construction. The aft part of the prop spinner is an interesting
construct as it comes in two parts, trapping the prop between them. The forward
part is a separate piece. This should help with painting if you have a two color
spinner.
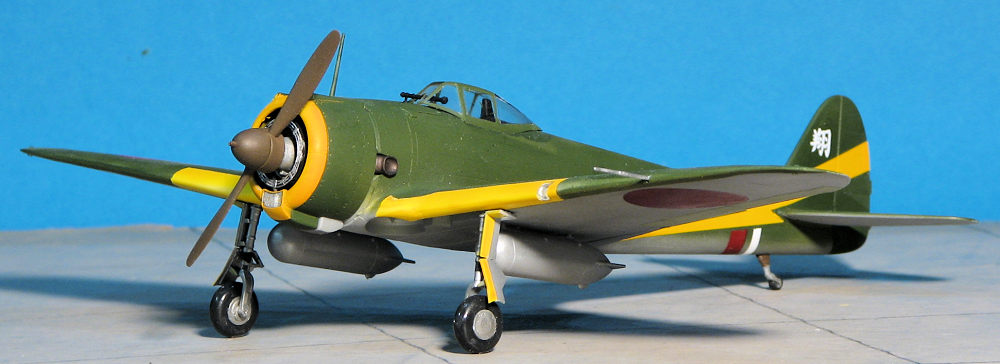
The tires are already flattened and not bulged. You also get a pair of drop
tanks should you wish them. The canopy can be displayed open, which is quite
nice. Also separate are the underfuselage 'butterfly' maneuvering flaps. These
slid back to increase the area of the wing and therefore increase
maneuverability. However, I must mention that looking at several dozen images of
Oscars on the ground, I did not once see these deployed.
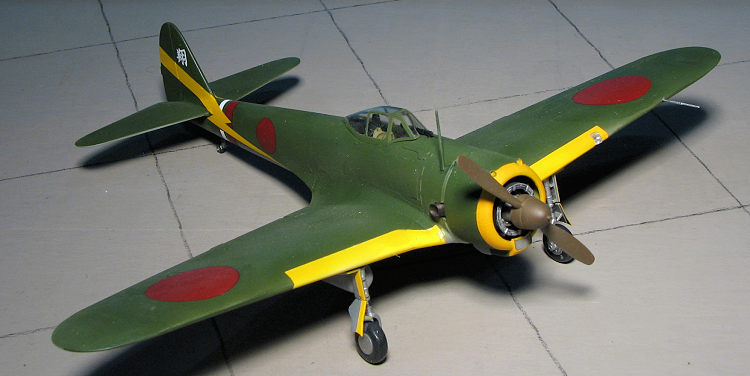
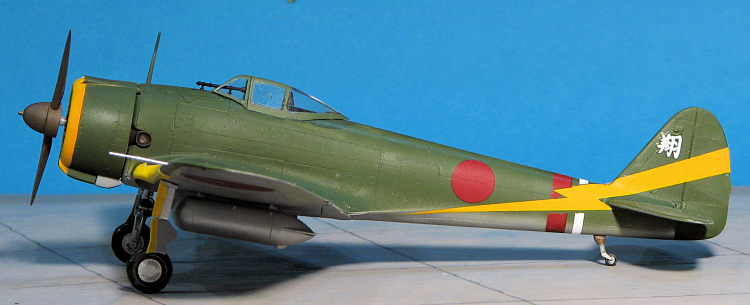
Instructions are typically excellent and give Gunze Paint matches. There
are decals for three aircraft of the 64th Sentai, all from the early 1942 time
frame and all in Nakajima Dark Green uppers with Grey Green undersides. They are
all listed by who flew the plane and they differ only in the tail arrow and the
stripes that were applied to the fuselage. The decals themselves are very nicely
done and are the more modern ones where the white is actually white. 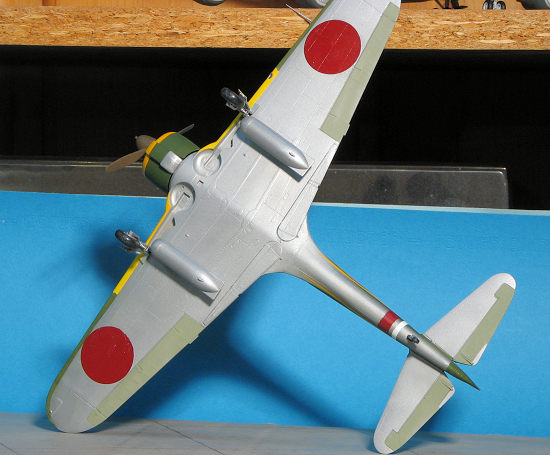 Like the Ki-84 and newer mold A6M,
the detailing is just superb. For most builders, aftermarket is really not
required. Unlike the Ki-84, you don't have a lot of
separate knobs and buttons in the cockpit. I recall that there were as many as
15-20 parts to the Frank cockpit and this one only has 9 and that includes the
sidewalls.
Like the Ki-84 and newer mold A6M,
the detailing is just superb. For most builders, aftermarket is really not
required. Unlike the Ki-84, you don't have a lot of
separate knobs and buttons in the cockpit. I recall that there were as many as
15-20 parts to the Frank cockpit and this one only has 9 and that includes the
sidewalls.
| CONSTRUCTION |
I just cannot seem to keep away from doing Ki-43 kits. I just like the
multiplicity of unit markings and paint schemes that are available. It had been
a while since I'd done a -I so though this would be a good one to use.
 As I
usually do, I prepainted a lot of the parts on the sprues. Specifically the
interior bits using what's left of my Aeromaster Nakajima Interior Green
acrylic. I thin this with alcohol (100 proof vodka seems to work well) and have
no real issues with coverage or stick on bare plastic. The engine and landing
gear were painted aluminum using Alclad II.
As I
usually do, I prepainted a lot of the parts on the sprues. Specifically the
interior bits using what's left of my Aeromaster Nakajima Interior Green
acrylic. I thin this with alcohol (100 proof vodka seems to work well) and have
no real issues with coverage or stick on bare plastic. The engine and landing
gear were painted aluminum using Alclad II.
To add a bit to the interior, I installed a set of Japanese Army seat belts to the kit's seat. The fuselage was then closed up after the sidewall pieces were installed and a polycap installed to hold the tail gear. I then assembled the wing tips and opened the holes in the lower wing for the drop tanks. Then the interior was installed and any seam work was dealt with. At this time I also sanded down the combat flaps until they were as thin as I could get them without issues. I also had to grind away a bit at the well section so they wouldn't stick out too far. These were then glued in and the wings assembled. After seam work, the wing tips were attached. The wings and tailplanes were then glued to the fuselage. I painted the area around the cockpit black, masked the clear bits and installed them.
| COLORS & MARKINGS |
 It was at this time that I started painting. I painted the airframe overall
dull aluminum using Alclad II. This looked OK, but a bit too dull so I
sprayed some standard aluminum over it to shine it up just a tad. I then
painted the wing leading edges white then yellow using Tamiya paints. This
was masked. The lower surfaces of the tailplanes were masked and the upper
surfaces painted Nakajima Army Green using some of my dwindling Aeromaster
acrylics. I made sure this was also a bit on the underside of the leading
edge of the wings. A bit more masking was done and the aluminum was re-done
where needed. Sounds simple, but for me, this was several weeks. I then
installed the main gear legs. I'm less than jazzed about the two piece main
gear, but understand why it was done.
It was at this time that I started painting. I painted the airframe overall
dull aluminum using Alclad II. This looked OK, but a bit too dull so I
sprayed some standard aluminum over it to shine it up just a tad. I then
painted the wing leading edges white then yellow using Tamiya paints. This
was masked. The lower surfaces of the tailplanes were masked and the upper
surfaces painted Nakajima Army Green using some of my dwindling Aeromaster
acrylics. I made sure this was also a bit on the underside of the leading
edge of the wings. A bit more masking was done and the aluminum was re-done
where needed. Sounds simple, but for me, this was several weeks. I then
installed the main gear legs. I'm less than jazzed about the two piece main
gear, but understand why it was done. 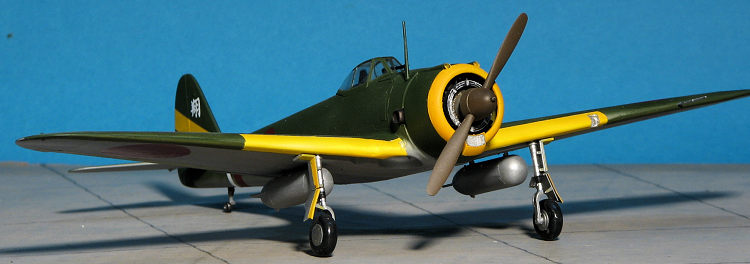 cut-outs for the tail
bolts that had to be properly aligned.
cut-outs for the tail
bolts that had to be properly aligned. | CONCLUSIONS |
I dare say that there are few 1/48 Japanese WWII fans who have not build
this kit in one of its various guises either from Hasegawa or from Nichimo. For
some reason, Fine Molds has not done the early -I,
but to their credit they do the -III which Hasegawa only does in a pricey
limited edition due to the resin parts in the kit. I know I'll do more of these
as I have at least a half dozen still on the shelves and enough decals to keep
me going for a long time. The kits are well engineered. Those in a hurry can
have them done in a week or so. The rest of us will plug away at them at a
slower pace. This one took about a month from start to finish. By the way, the
base boxing of this kit is continuously in production so it is pretty much
always available.
5 March 2021 Copyright ModelingMadness.com. All rights reserved.
If you would like your product reviewed fairly and fairly quickly, please contact the editor or see other details in the
Note to
Contributors.