Hasegawa 1/48 Ki-27 'Nate'
| KIT #: | U 1 |
| PRICE: | $ |
| DECALS: | Two options |
| REVIEWER: | Scott Van Aken |
| NOTES: | One of the old Mania kits. |
| HISTORY |
The IJAAF's first monoplane fighter was the Ki-27. Developed in the mid 1930s at the same time when Supermarine was developing the Spitfire and Messerschmitt the 109, Nakajima's design was a bit less advanced than its European equivalents. This was due to a differing philosophy that was held by the Japanese that the ability to dogfight was of paramount importance. While this held them in good stead during the early days of WWII, it was one that doomed thousands of Japan's pilots.
The main reason was that to get the
sort of handling that the pilots demanded, certain things like armor
plating and fuel protection were eliminated to reduce weight. This even
resulted in the Ki-27 having fixed landing gear as high speed was not
considered important enough. However, moving from
 the biplane Ki-10 to the
monoplane Ki-27 did provide a considerable increase in velocity from what
has been the norm.
the biplane Ki-10 to the
monoplane Ki-27 did provide a considerable increase in velocity from what
has been the norm.
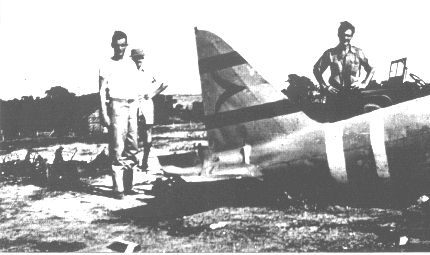
The Ki-27 saw a great deal of action in Japan's wars prior to the Pacific War. In both China and against the Soviets in Manchuria, the Ki-27 bore the brunt of the action in the air. Many Japanese pilots were able to score impressive numbers of victories and soon became household names in the homeland. It was towards the end of the Manchurian war, when the Russian I-16 was introduced that the Japanese had trouble. The I-16 was faster and some had better armament than the Ki-27s rifle calibre machine guns. This was brought even closer to home when the Pacific War started and they were up against more heavily armed British and US aircraft in China and Southeast Asia.
Eventually the aircraft were replaced by the Ki-43 (which still carried over several of the Ki-27s faults in terms of light construction and weak armament). The Ki-27 was then relegated to homeland defense, areas like Formosa and Manchuria which had become 'backwaters', and to advanced fighter training schools. Only one airframe is known to exist and it was pulled out of the Inland Sea back in the late 1990s.
| THE KIT |
 Hasegawa's
Ki-27kit is actually one of the old Mania molds. When Mania went out of
business in the 1970s, Hasegawa purchased their stock and in it were
included some 1/48 kits including a N1K2-J 'George', an F4U-4
Corsair, and this Ki-27. Unlike the mainstream kits of the day, these Mania
kits have engraved panel lines as well as excellent detailing, especially
when you consider that the engineering is 30 years old.
Hasegawa's
Ki-27kit is actually one of the old Mania molds. When Mania went out of
business in the 1970s, Hasegawa purchased their stock and in it were
included some 1/48 kits including a N1K2-J 'George', an F4U-4
Corsair, and this Ki-27. Unlike the mainstream kits of the day, these Mania
kits have engraved panel lines as well as excellent detailing, especially
when you consider that the engineering is 30 years old.
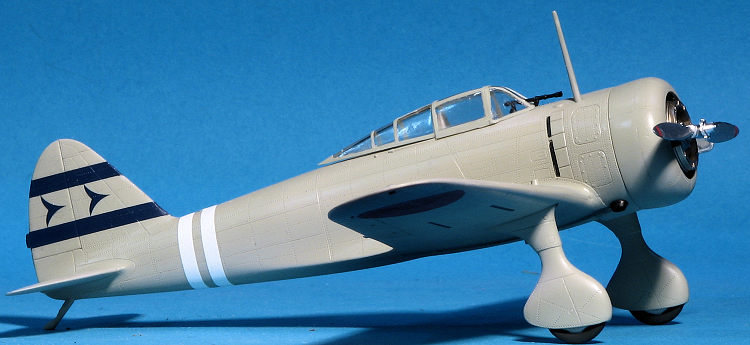
The kit itself is molded in Hasegawa's somewhat hard light grey plastic. Since this is basically a pretty simple kit, there are not a ton of parts. You do get a complete cockpit with control stick, seat, rudder pedals, fire bottle and there is sidewall detail. The four part engine looks quite nice and some painting will enhance the detail given there. As for options, one is a bit limited. Basically, the only options are the use of the two fuel tanks under the wing and whether to use the early or the later canopy. While the canopy is a single piece, many pilots chose to fly without the sliding portion attached so to be properly accurate with some schemes, the canopy will need to be cut.
I should also mention that the
mounting holes for the fuel tanks are already made so eliminating those
will require the holes to be filled. One other thing is that when the Ki-27
was on the ground, the upper portion of the struts popped up through the
upper wing. This has been shown properly on the kit so
 don't go cutting
away the nubs that you see! Another interesting addition are two small
exhaust-looking things that are shown extending from the starboard flap. I
believe these are for providing a smoke screen. The reference shows them in the drawings and
they could also be under the port side. The vast majority of the
photographs in the reference do not show these so it may be a good idea to
leave them off and fill in the holes.
don't go cutting
away the nubs that you see! Another interesting addition are two small
exhaust-looking things that are shown extending from the starboard flap. I
believe these are for providing a smoke screen. The reference shows them in the drawings and
they could also be under the port side. The vast majority of the
photographs in the reference do not show these so it may be a good idea to
leave them off and fill in the holes.
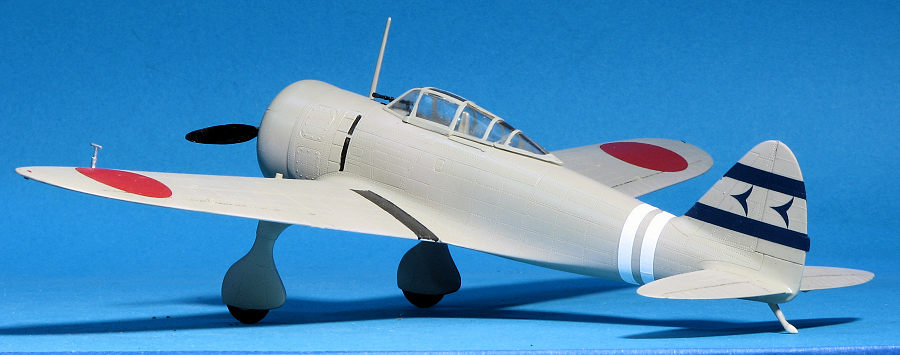
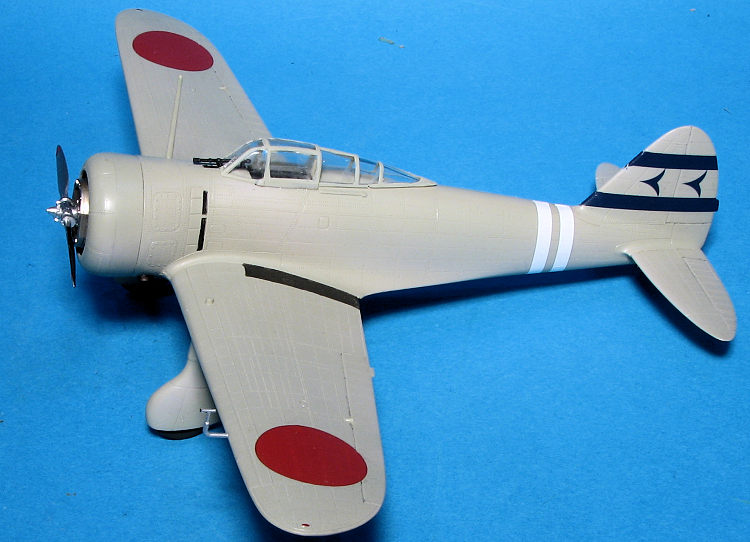
My kit is an older boxing and the instructions are in Japanese. They are typical of what Hasegawa produced in the 70's in that the sheet is skinny with 6 construction steps. Smaller subassembly instructions are along the right margin. Color info is given but I can't decipher what is what. A full color print of the two decal options is given. The first is the box art plane from the 84th Dokuritsu Chutai in China during 1940. This plane has the older canopy with the sliding portion removed. THe other is from the 3 Chutai 13 Sentai in Japan during 1942 while on home defense duties. Both aircraft are in overall Nakajima Grey. The decals are most typical of what Hasegawa produced until just recently. They are well printed, thick and the colors are off. The red is too bright and the white is ivory. Despite being decades old, I'm sure they will still work just fine. Most modelers will want to replace them with aftermarket decals if they can find some.
| CONSTRUCTION |
This is one of my many 'rescue' kits. The previous owner had removed a bunch of parts from the sprues and the tail skid pieces had come adrift from the fuselage. The tip of one side was also missing. In addition, several of the engine pushrod pieces were gone and others were badly bent. However, everything else was there.
 I've had a Hasegawa Nate on my shelves for many years,
but for whatever reason, only ever built the 1/72 version. As usual, a whim came
over me and I grabbed this one (instead of the newer and unbroken one). After
cleaning the box up (much dust and spiders), I started building the interior.
There are aftermarket sets and I recommend one of those as the interior does not
build up quite as well as one would hope. But then again, this is a kit from the
early 70's if not older. There was some concern about the color as the
instructions are in Japanese and I couldn't cross the paint reference to
anything. It was recommended on J-Aircraft that I use a medium/dark grey, like
gunship grey. I didn't have any mixed up, but I did have some RAF Ocean Grey, so
used that and it looks OK. I picked out some bits in black, painted the other
bits with colors I recognized and crammed all this into the fuselage, closing
the halves. Fit is not the greatest, but adequate.
I've had a Hasegawa Nate on my shelves for many years,
but for whatever reason, only ever built the 1/72 version. As usual, a whim came
over me and I grabbed this one (instead of the newer and unbroken one). After
cleaning the box up (much dust and spiders), I started building the interior.
There are aftermarket sets and I recommend one of those as the interior does not
build up quite as well as one would hope. But then again, this is a kit from the
early 70's if not older. There was some concern about the color as the
instructions are in Japanese and I couldn't cross the paint reference to
anything. It was recommended on J-Aircraft that I use a medium/dark grey, like
gunship grey. I didn't have any mixed up, but I did have some RAF Ocean Grey, so
used that and it looks OK. I picked out some bits in black, painted the other
bits with colors I recognized and crammed all this into the fuselage, closing
the halves. Fit is not the greatest, but adequate.
For the wings, I did not want the camera or the drop tanks or the smoke generator nozzles. Those were all filled with super glue and filed flush. After that, they were attached to the fuselage. Fit fore and aft was not the best so filler was used. Then a session with a rivet tool replaced the lost rivets. The missing piece of the tail skid was replaced with several sections of thin card and sanded to shape. I used super glue to help stiffen things up a bit as it was pretty flimsy.
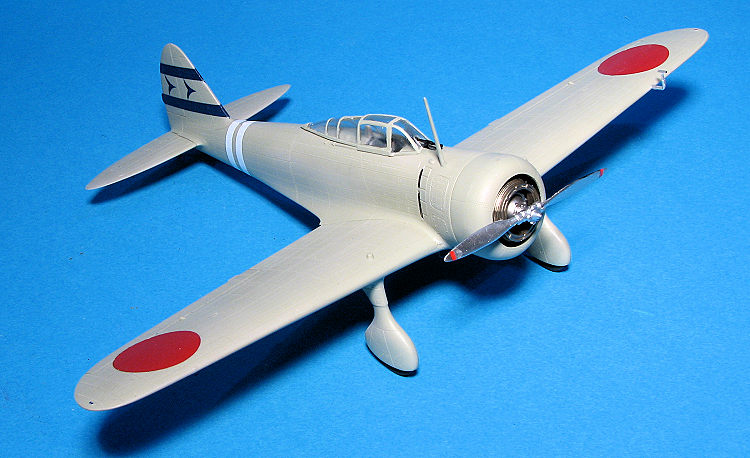
Tailplanes were next and no big issue. Moving to the
front, I started assembling the engine. The missing pushrod housings were
replaced by drilling holes and inserting appropriate sized wire. No need to
smooth out the upper sections as they won't be seen. I then painted it steel and
inserted it into the two cowling sections. There is no positive alignment guide
for the engine, so I simply got it to where it fit without being out of
alignment. It was here that I ran across something odd. You see, the engine has
a prop shaft attached to it. So does the prop. Instructions show a hole in the
engine t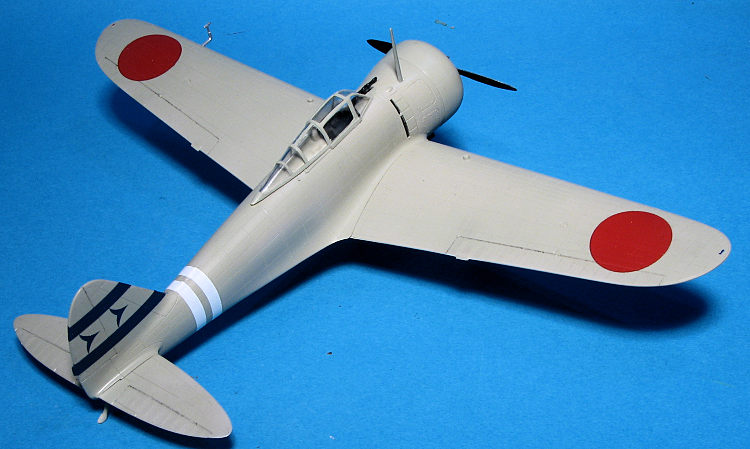 hrough which one inserts the prop, which means that either the built in
shaft on the engine will need to be removed and drilled out, or the one on the
prop. I chose the former and after using several sizes of drill bits (ultimately
a #44 bit is the same size as the shaft on the prop), that task was accomplished
and the rest of the engine built up.
hrough which one inserts the prop, which means that either the built in
shaft on the engine will need to be removed and drilled out, or the one on the
prop. I chose the former and after using several sizes of drill bits (ultimately
a #44 bit is the same size as the shaft on the prop), that task was accomplished
and the rest of the engine built up.
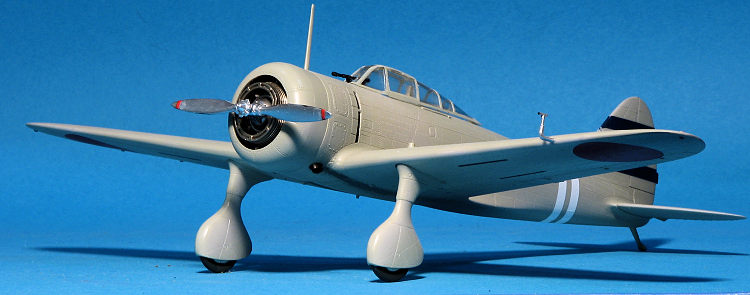
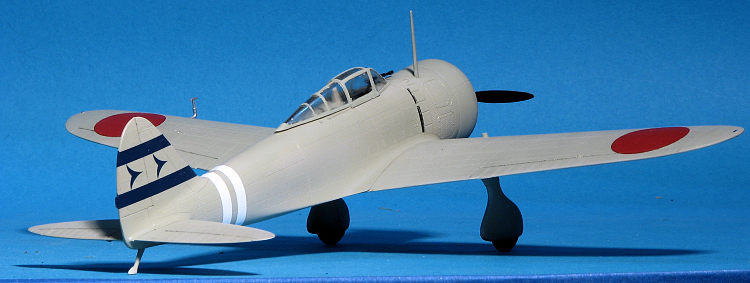
With all that drying, I assembled the landing gear. I had initially thought to use a set of resin gear that had the lower wheel fairings removed, but after getting most of the bits off the pour stubs, changed my mind. The fit of the gear is best described as loose, but once dry, it is properly stable. Horizontal stabilizers were attached and the canopy was masked. You are provided two, but one wants the one with all the clear areas in the back. Mine had a crack in it that couldn't be repaired so I just decided to live with it. The interior and engine front was masked and tape put inside the canopy before painting.
| COLORS & MARKINGS |
 sheet had no Japanese hinomarus. A George sheet
supplied the needed insignia. In spite of its age, I used a few of the kit
decals for the prop stripes and the under wing markings. The reason I did
not use the kit insignia is that they are far too bright. The airframe was
then provided a semi-matte clear.
sheet had no Japanese hinomarus. A George sheet
supplied the needed insignia. In spite of its age, I used a few of the kit
decals for the prop stripes and the under wing markings. The reason I did
not use the kit insignia is that they are far too bright. The airframe was
then provided a semi-matte clear. | CONCLUSIONS |
 This is such a nice kit that it is
quite doubtful that you'll be seeing a more modern replacement. The kit has
been reissued several times and even the older boxings are easy to find for
around $10 or less. There are detail sets available for it if you wish to
enhance it even more and thanks to its relatively simple construction, it is
something that even a relative newbie should be able to build. If it has a down
side (aside from the not-drilled engine), it would be the dodgy fit of the
cockpit bits. There are aftermarket markings out there for it so give it a go if
you have never built one.
This is such a nice kit that it is
quite doubtful that you'll be seeing a more modern replacement. The kit has
been reissued several times and even the older boxings are easy to find for
around $10 or less. There are detail sets available for it if you wish to
enhance it even more and thanks to its relatively simple construction, it is
something that even a relative newbie should be able to build. If it has a down
side (aside from the not-drilled engine), it would be the dodgy fit of the
cockpit bits. There are aftermarket markings out there for it so give it a go if
you have never built one.
| REFERENCES |
Nakajima Ki-27 'Nate', by Wieliczko & Szeremeta, Kagero, 2004.
21 April 2017
Copyright ModelingMadness.com. All rights reserved.
If you would like your product reviewed fairly and fairly quickly, please contact the editor or see other details in the Note to Contributors.
Back to the Main Page Back to the Review Index Page Back to the Previews Index Page