ICM 1/72 Ki-27 'Nate'
| KIT #: | 72201 |
| PRICE: | $2.00 'started' |
| DECALS: | Four options |
| REVIEWER: | Scott Van Aken |
| NOTES: |
| HISTORY |
The IJAAF's first monoplane fighter was the Ki-27. Developed in the mid 1930s at the same time when Supermarine was developing the Spitfire and Messerschmitt the 109, Nakajima's design was a bit less advanced than its European equivalents. This was due to a differing philosophy that was held by the Japanese that the ability to dogfight was of paramount importance. While this held them in good stead during the early days of WWII, it was one that doomed thousands of Japan's pilots.
The main reason was that to get the sort of handling that the pilots demanded,
certain things like armor plating and fuel protection were eliminated to reduce
weight. This even resulted in the Ki-27 having fixed landi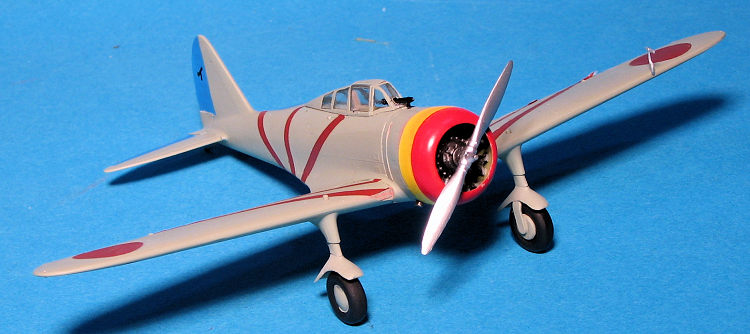 ng gear as high speed
was not considered important enough. However, moving from the biplane Ki-10 to
the monoplane Ki-27 did provide a considerable increase in velocity from what
has been the norm.
ng gear as high speed
was not considered important enough. However, moving from the biplane Ki-10 to
the monoplane Ki-27 did provide a considerable increase in velocity from what
has been the norm.
The Ki-27 saw a great deal of action in Japan's wars prior to the Pacific War. In both China and against the Soviets in Manchuria, the Ki-27 bore the brunt of the action in the air. Many Japanese pilots were able to score impressive numbers of victories and soon became household names in the homeland. It was towards the end of the Manchurian war, when the Russian I-16 was introduced that the Japanese had trouble. The I-16 was faster and some had better armament than the Ki-27s rifle calibre machine guns. This was brought even closer to home when the Pacific War started and they were up against more heavily armed British and US aircraft in China and Southeast Asia.
Eventually the aircraft were replaced by the Ki-43 (which still carried over several of the Ki-27s faults in terms of light construction and weak armament). The Ki-27 was then relegated to homeland defense, areas like Formosa and Manchuria which had become 'backwaters', and to advanced fighter training schools. Only one airframe is known to exist and it was pulled out of the Inland Sea back in the late 1990s.
| THE KIT |
 . The instrument panel is attached prior to assembling the fuselage
halves. The kit's engine is nicely done and is a 6 part assembly, including
exhaust. One is provided with a firewall and four piece engine bearer.
. The instrument panel is attached prior to assembling the fuselage
halves. The kit's engine is nicely done and is a 6 part assembly, including
exhaust. One is provided with a firewall and four piece engine bearer.| CONSTRUCTION |
 Back when there was a local hobby shop, there was
a sale table. Some of these kits were ones from a collection where the previous
owner had started the kit and, for whatever reason, did not finish it. This is
one of those kits. It came in a zip bag with instructions and decals. The prior
owner had painted the interior fuselage and cockpit floor. The wings, minus the
ailerons, were glued together and the interior floor installed. The engine
bearers and firewall had been assembled and the spatted landing gear was gone.
Most of the parts had been cut free of the sprues.
Back when there was a local hobby shop, there was
a sale table. Some of these kits were ones from a collection where the previous
owner had started the kit and, for whatever reason, did not finish it. This is
one of those kits. It came in a zip bag with instructions and decals. The prior
owner had painted the interior fuselage and cockpit floor. The wings, minus the
ailerons, were glued together and the interior floor installed. The engine
bearers and firewall had been assembled and the spatted landing gear was gone.
Most of the parts had been cut free of the sprues.
First thing I did was to clean up the wing's mold seams. Then I attached the ailerons. These don't fit well and you'll need to trim both the ailerons and attachment points. I also repainted the interior, engine bearer assy, and the seat a proper yellowish green Nakajima interior green. The control stick had the actuating arm portion broken so I glued it along with the rudder pedals onto the interior floor. All these interior items are quite flimsy.
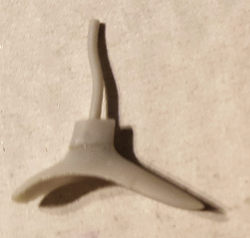 While I was fussing with that, I glued the
fuselage halves together. I also glued the upper part of each main gear
together. This has squiggly
shaft sticking up from it. This will fit into the hole in the upper portion of
the main gear fairing that is molded with the lower wing. The upper portion fits
through a hole in the upper wing half. These holes had to be enlarged to get
this assembly to fit. I also glued the engine assembly together in preparation
for painting it. I used steel for this with a bit of dry brushing. It was then
attached to the engine bearer and when dry, I attempted to glue it in place. No
joy so I left off the bearer and got it installed.
While I was fussing with that, I glued the
fuselage halves together. I also glued the upper part of each main gear
together. This has squiggly
shaft sticking up from it. This will fit into the hole in the upper portion of
the main gear fairing that is molded with the lower wing. The upper portion fits
through a hole in the upper wing half. These holes had to be enlarged to get
this assembly to fit. I also glued the engine assembly together in preparation
for painting it. I used steel for this with a bit of dry brushing. It was then
attached to the engine bearer and when dry, I attempted to glue it in place. No
joy so I left off the bearer and got it installed.
At this time, I tried to attach the wing assembly, which included the lower machine guns. No way was it going to fit so I removed the guns (which you won't really see anyway). I also had to do some carving at the front upper part of the forward wing to get it to fit into the fuselage. Back at the front, getting the cowling pieces to fit well was also a struggle. Eventually, I got all the pieces in place, but did have to sand on the top of the engine all the way around to get it to fit.
At the back, the elevators, rudder and end cap were installed. I did have to do a bit of carving to get any semblance of fit out of the end cap as the area where the tail skid fit was far too narrow. I then filled the cockpit and the engine area with tissue in preparation for painting.
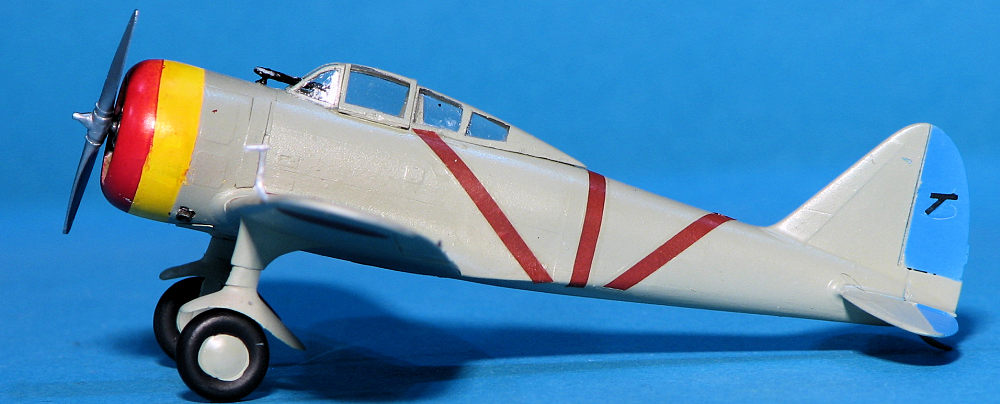
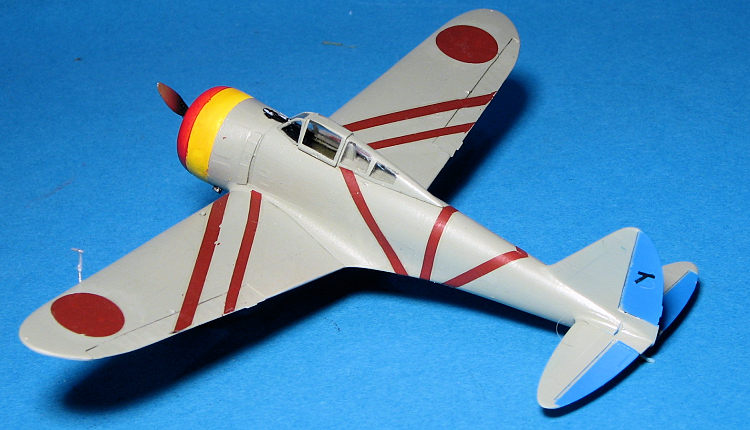
| COLORS & MARKINGS |
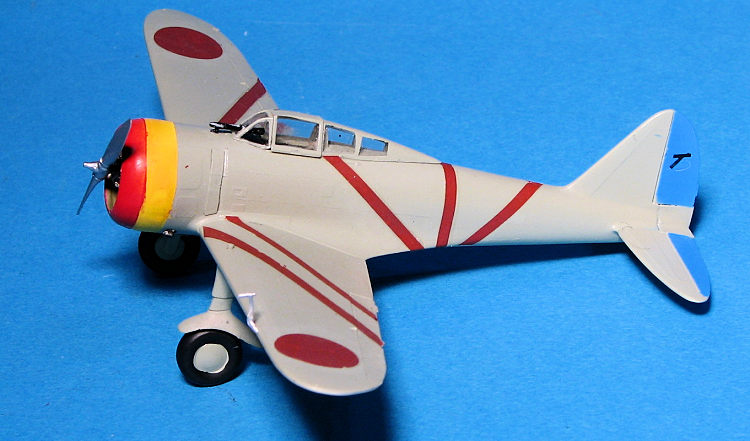
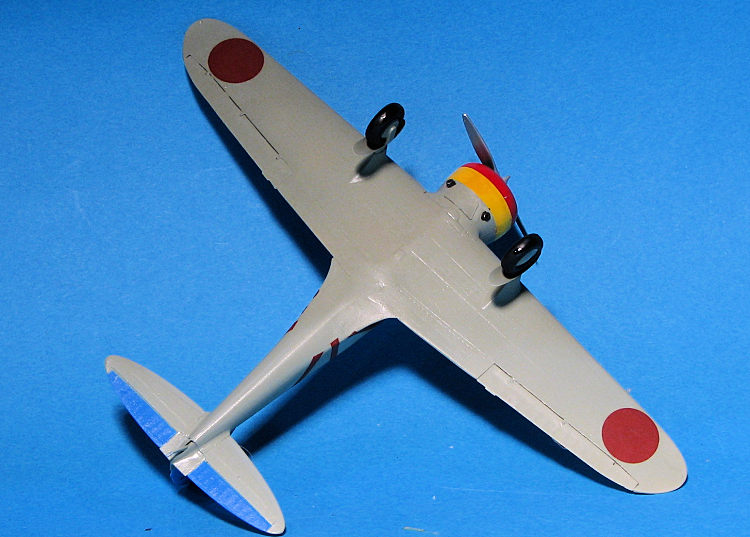 All four
markings options were for overall green grey paint. The option for this
version that didn't have wheel pants required the rudder and elevators to be
blue (I used X-17 Sky Blue from the Tamiya line). The cowling was red on the
front and yellow just behind it. Again, Tamiya paints, though to be honest, the
red does not match the red in the decals. I then removed the tissue from the
cockpit and masked the clear parts. Thanks to a stress line in the canopy, I
broke it in half while masking. It was then glued together and glued in place.
All four
markings options were for overall green grey paint. The option for this
version that didn't have wheel pants required the rudder and elevators to be
blue (I used X-17 Sky Blue from the Tamiya line). The cowling was red on the
front and yellow just behind it. Again, Tamiya paints, though to be honest, the
red does not match the red in the decals. I then removed the tissue from the
cockpit and masked the clear parts. Thanks to a stress line in the canopy, I
broke it in half while masking. It was then glued together and glued in place.
I started with a decal from the kit sheet that I wasn't going to use. It quickly broke apart when trying to remove it from the sheet. The rest of the sheet had a couple of coats of Microscale decal film brushed on. This took care of the breakage issue for the most part, but the stripes still proved to be a bit fragile. The fuselage ones are a bit too long as well. Eventually I got all the decals on and gave the kit a coat of Tamiya matte clear.
The last steps were attaching the wheels, prop and gun sight once the masking was removed.
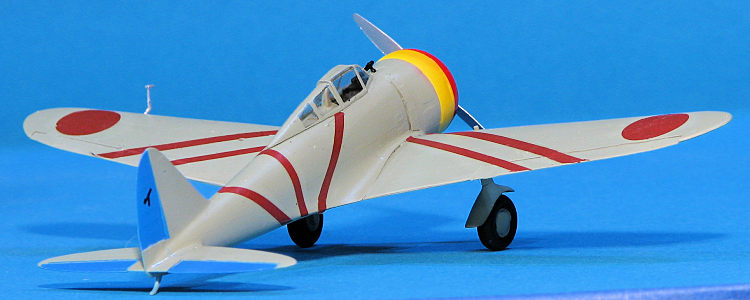
| CONCLUSIONS |
 This is the
third 1/72 Ki-27 I've done. The RS kit was a bit too fussy and relied on photo
etch for detail, but looked great when done and had good decals. The Hasegawa
kit was a pretty easy build all the way around. This one falls in third due to
the fairly poor fit and the issues with decals. Nonetheless, it is done and is
on the display shelf. Now I can start something else!
This is the
third 1/72 Ki-27 I've done. The RS kit was a bit too fussy and relied on photo
etch for detail, but looked great when done and had good decals. The Hasegawa
kit was a pretty easy build all the way around. This one falls in third due to
the fairly poor fit and the issues with decals. Nonetheless, it is done and is
on the display shelf. Now I can start something else!
| REFERENCES |
Nakajima Ki-27 'Nate', by Wieliczko & Szeremeta, Kagero, 2004.
August 2020
Copyright ModelingMadness.com. All rights reserved.
Project courtesy of my wallet.
Thanks to
for the preview kit. You can find this kit at your favorite hobby shop
or on-line retailer. If you would like your product reviewed fairly and
fairly quickly, please
contact
the editor
or see other details in the
Note to
Contributors.
Back to the Main Page
Back to the Review
Index Page
Back to the Previews Index Page