
Hasegawa 1/72 Ki-61 'Tony'
| KIT #: | 64720 |
| PRICE: | 4000 yen SRP |
| DECALS: | One option |
| REVIEWER: | Scott Van Aken |
| NOTES: | Part of a three kit 'Shidenkai no Maki' boxed set |
| HISTORY |
The Kawasaki Ki-61
Hien (飛燕, "flying swallow")
is a Japanese World War II fighter aircraft used by the Imperial Japanese Army
Air Force. The first encounter reports claimed Ki-61s were Messerschmitt Bf
109s: further reports claimed that the new aircraft was an Italian design, which
led to the Allied reporting
 name of "Tony", assigned by the United States War
Department. As an interesting aside, the officer in charge of providing names to
Japanese planes generally chose 'hill-billy' names (Zeke, Alf, Nell) in an
attempt to further denigrate the Japanese in the eyes of the American soldier
and public in general. The Japanese Army designation was "Army Type 3 Fighter"
(三式戦闘機). It was the only mass-produced Japanese fighter of the war to use a
liquid-cooled inline V engine. Over 3,000 Ki-61s were produced. Initial
prototypes saw action over Yokohama during the Halsey-Doolittle Raid on 18.
April 1942, and continued to fly combat missions throughout the war. As usual,
many planes were made unserviceable by a supply situation that bordered on
non-existent.
name of "Tony", assigned by the United States War
Department. As an interesting aside, the officer in charge of providing names to
Japanese planes generally chose 'hill-billy' names (Zeke, Alf, Nell) in an
attempt to further denigrate the Japanese in the eyes of the American soldier
and public in general. The Japanese Army designation was "Army Type 3 Fighter"
(三式戦闘機). It was the only mass-produced Japanese fighter of the war to use a
liquid-cooled inline V engine. Over 3,000 Ki-61s were produced. Initial
prototypes saw action over Yokohama during the Halsey-Doolittle Raid on 18.
April 1942, and continued to fly combat missions throughout the war. As usual,
many planes were made unserviceable by a supply situation that bordered on
non-existent.
| THE KIT |
This is one of Hasegawa's early engraved panel line kits. As such, it is somewhat light on detail, especially in the cockpit. In fact, the cockpit consists of three parts; a floor with molded in seat, a seat back and an instrument panel (with decal). No rudder pedals, no control stick. A pilot figure is supplied for the seat and one standing on the ground is also included.
 Before joining the fuselage halves, one installs a blanking
plate above the ventral radiator section and attaches the prop onto the prop
shaft. Once closed, a forward ventral radiator piece is installed. Wings consist
of a complete lower section with the two upper pieces containing the control
surfaces and the wing tips. Tail planes are one piece with the rudder molded
onto one fuselage half. There is no wheel well detail. Gear is nicely done and
the gear doors will need to be cut. The wheels are very plain, but then so were
the real ones. Aftermarket are available (or have been in the past).
Before joining the fuselage halves, one installs a blanking
plate above the ventral radiator section and attaches the prop onto the prop
shaft. Once closed, a forward ventral radiator piece is installed. Wings consist
of a complete lower section with the two upper pieces containing the control
surfaces and the wing tips. Tail planes are one piece with the rudder molded
onto one fuselage half. There is no wheel well detail. Gear is nicely done and
the gear doors will need to be cut. The wheels are very plain, but then so were
the real ones. Aftermarket are available (or have been in the past).
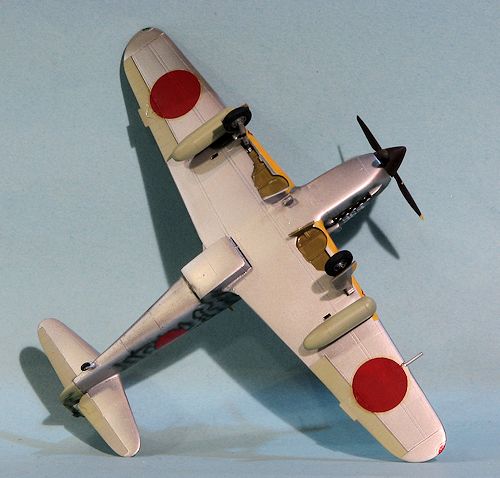
For under the wings are two fuel tanks. The small pylons are molded into the lower wing. The spinner has no backing plate and attaches over the prop. Exhaust can be installed after the model has been painted. The supercharger intake is also a separate piece.
This particular build came from the Shidenkai no Maki boxing and so includes the markings from the aircraft featured in that particular manga. I'll be using aftermarket decals on this kit so the kit markings are of no real consequence, though they are very nicely done and will be used on another project.
| CONSTRUCTION |
Step one was the attach the seat back to the cockpit floor. I
also glued the wing sections together. Hasegawa has the sprue attachment points
on the gluing surfaces. While this keeps the exterior surface
 free from sprue
stubs, in my opinion, it makes it more difficult to get a clean mating surface
as I invariably sand away a bit too much. This results in areas needing filler
that may not have if using the 'old' method. Such was the case with the wings
and later the fuselage. I also took this time to assemble the drop tanks.
free from sprue
stubs, in my opinion, it makes it more difficult to get a clean mating surface
as I invariably sand away a bit too much. This results in areas needing filler
that may not have if using the 'old' method. Such was the case with the wings
and later the fuselage. I also took this time to assemble the drop tanks.
The interior of Kawasaki planes is a brownish green and Hasegawa suggests an equal mix of RLM 79 and olive green. I used ColourCoats' Ameiro as it looked the part, though it may be a bit too light. This was also applied to the instrument panel. I then attached the instrument decal when the paint had dried. The instrument panel and interior were glued into one fuselage half and during this procedure, I also glued in the radiator blanking plate and the prop shaft. The two halves were then cemented together.
During this time, I glued on the front of the radiator and the
proceeded to apply filler. I generally use water thin super glue for filler.
This is hit with accelerator immediately after application, wiped down and then
sanded right away. This method has several pluses. One is that super glue does
not shrink so no '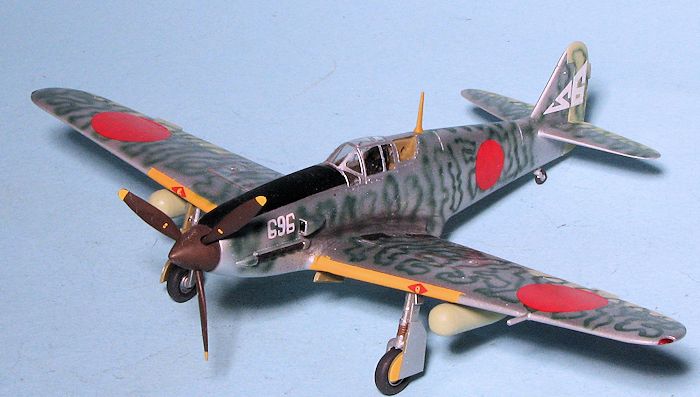 ghost seams' later on after it is painted. Secondly, it can be
scribed without chipping and finally, it allows one to get the seams done quite
quickly as one does not have to wait for the filler to dry when using
accelerator. While I still have tube filler, I don't use it all that often.
ghost seams' later on after it is painted. Secondly, it can be
scribed without chipping and finally, it allows one to get the seams done quite
quickly as one does not have to wait for the filler to dry when using
accelerator. While I still have tube filler, I don't use it all that often.
With the seams filled and panel lines rescribed, the wings were attached. There are gaps on the upper wing root to deal with. Once done, the tailplanes were installed. These are keyed. The supercharger intake was next. This was followed by masking the canopy and painting the inside of the gear doors with the same shade used on the interior. The canopy was then glued on and it seemed like a nice time to consider paint.
| COLORS & MARKINGS |
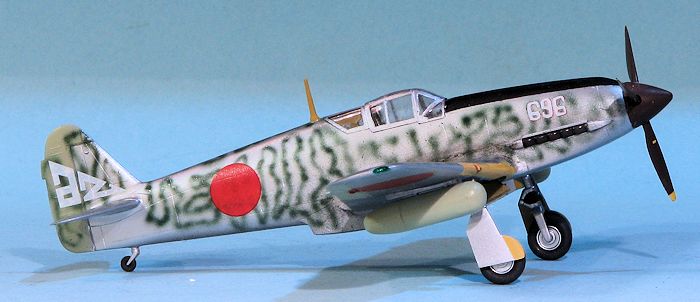
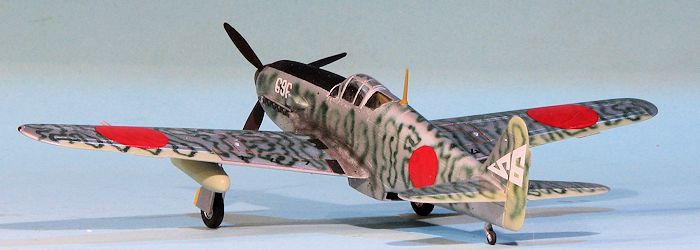
 Aside from a sheet of tail markings, the only 1/72 Ki-61
decals that I have is an option on Empire City Decals sheet #6. This airplane is
overall unpainted metal with a green mirror-wave pattern over the fuselage and
wings. Unfortunately, Empire City Decals seems to be no more as their web site
is no longer there.
Aside from a sheet of tail markings, the only 1/72 Ki-61
decals that I have is an option on Empire City Decals sheet #6. This airplane is
overall unpainted metal with a green mirror-wave pattern over the fuselage and
wings. Unfortunately, Empire City Decals seems to be no more as their web site
is no longer there.
I first primered the airframe with Tamiya extra fine grey primer. This was followed by an application of Alclad II Aluminum. This was followed by several sessions of masking, one for the wing leading edges, one for the control surfaces (which are in IJAAF green-grey), and one for the nose anti-glare panel. I also painted the drop tanks with the green-grey. I then glued on the main gear legs.
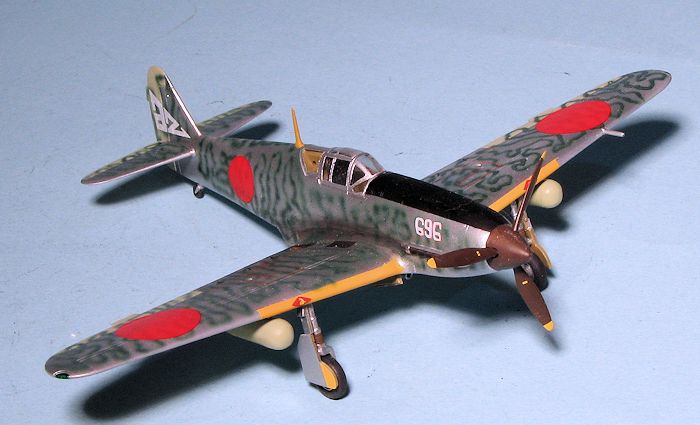
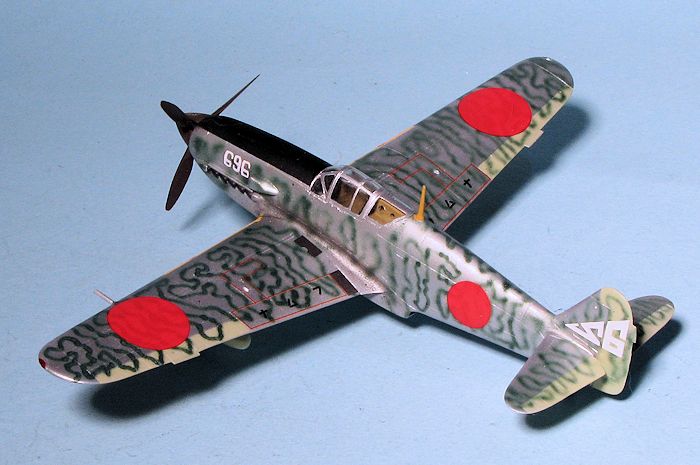
The camo scheme for this one is large wavy squiggles over all
of the upper surfaces, including the control surfaces. For this I used some
thinned IJAAF green enamel. Normally I would put on the insignia first and paint
around them, but the instructions show the hinomaru applied over the camo. The
sheet decals are not totally opaque and one can barely see the underlying camo.
I used Microsol and that worked just great. Though probably overpainted in
reality, I also added wing walk and a few stencils from the kit decals.
The last things to be added were the prop and spinner, the lower wing oil cooler, and the drop tanks. The gear doors were cut and glued in place. Pastels were used for exhaust stains and last but not least, the masking was removed. TA-DAAAH!
| CONCLUSIONS |
After quite some time, I finally have a Ki-61 to add to my Ki collection. Though certainly lacking in the cockpit detail area, the rest of the model looks the part and thanks to its rather simple construction, is one that I would have no problem recommending to modelers of any skill level.
| REFERENCES |
http://en.wikipedia.org/wiki/Kawasaki_Ki-61
July 2015 Thanks to
www.hlj.com for providing the review kit. If you would like your product reviewed fairly and fairly quickly, please
contact
the editor or see other details in the
Note to
Contributors.