
Fujimi 1/72 Ki-43-I Hayabusa
| KIT #: | 722474 (C-1) |
| PRICE: | 1080 yen on discount (1200 yen SRP) |
| DECALS: | One option |
| REVIEWER: | Scott Van Aken |
| NOTES: | 2014 release |
| HISTORY |
The Ki-43 was designed by Hideo Itokawa, who would later become famous as a pioneer of Japanese rocketry. The Ki-43 prototype was produced in response to a December 1937 specification for a successor to the popular fixed-gear Nakajima Ki-27 Nate. The specification called for a top speed of 500 km/h (311 mph), a climb rate of 5,000 m (16,400 ft) in five minutes and a range of 800 km (500 mi). Maneuverability was to be at least as good as that of Ki-27.
When first flown in early January 1939, the Ki-43 prototype was a
disappointment. Japanese test pilots complained that it was less maneuverable
than the Ki-27 Nate and not much faster. In order to solve these problems,
Nakajima produced a series of progressively modified prototypes through 1939 and
1940. These changes involved a major weight saving program, a slimmer fuselage
with the tail surfaces moved further aft and a new canopy. Crucially, the 11th
prototype introduced the unique differential "butterfly" maneuvering Fowler
flaps, which dramatically improved performance in tight turns. The 13th
prototype 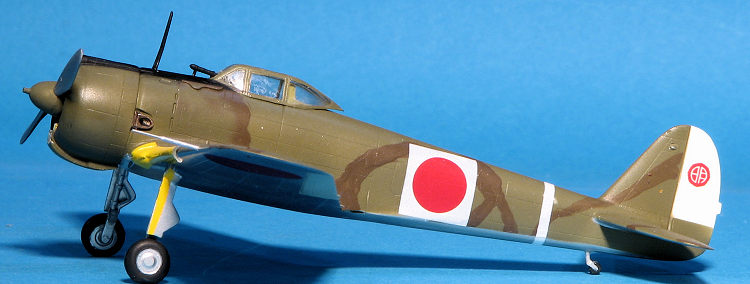 combined all these changes, and tests of this aircraft resulted in an
instruction for Nakajima to place the Ki-43 into production, the Ki-27 jigs
being transferred to the Mansyu factory at Harbin in Japanese
occupied Manchukuo.
combined all these changes, and tests of this aircraft resulted in an
instruction for Nakajima to place the Ki-43 into production, the Ki-27 jigs
being transferred to the Mansyu factory at Harbin in Japanese
occupied Manchukuo.
The Ki-43 (Oscar) was initially produced in November 1939, given the designation Ki-43-I. Deliveries from Nakajima's Ota factory commenced in February 1941. In addition to outstanding maneuverability, the Ki-43-I had an impressive rate of climb due to its light weight. Power was provided by the Nakajima Ha-25 engine turning a two-bladed, two-position variable-pitch metal propeller. Top speed was 495 km/h (308 mph) at 4,000 m (13,160 ft). The Ki-43 was equipped with two synchronized cowling machine guns in various configurations, with either two 7.7 mm (.303 in) Type 89 machine guns, one 12.7 mm (.50 in) Ho-103 machine gun and one 7.7 mm (.303 in) gun, or two 12.7 mm (.50 in) Ho-103 guns; the aircraft was given various sub-designations to reflect these differences. The configuration that appears to have been most prevalent at the outset of the war was the first configuration with two 7.7 mm (.303 in) Type 89 machine guns, while as the war progressed the heavier combinations gained popularity and the version with the heaviest armament was sometimes given the designation Ki-43-Ic. The Ho-103 was often loaded with explosive ammunition to increase target effect; its penetrative effect against later Allied aircraft armor appears to have been marginal.
| THE KIT |
I ordered this kit thinking it was a -II. It was all based on the camo scheme of the box art, but when it arrived, I found it to be the earlier variant. This one is boxed 'Kato captain Fighter', because the lone markings option is for Kato's plane with the 50th Sentai. The kit is superbly done with fine engraved panel line detailing. This kit was released in 2014 so is very much up to modern standards for the scale. I had thought that Fujimi was not doing new tool aircraft kits as it seemed they had stopped after a huge input in the 1990s. Apparently that is not the case and I'm glad, though building it made me wonder about that.
 The kit provides a properly curved floor with molded
in rudder pedals onto which you put a control stick and two part seat assembly.
There is a nicely done instrument pane with raised details and a decal to place
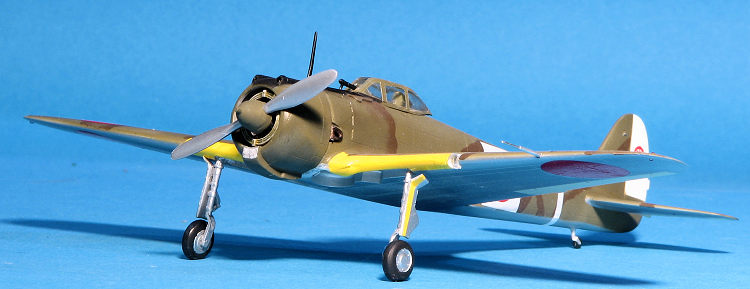
atop them. This is no inner sidewall detailing. The engine consists of a front
half row of cylinders onto which you place the prominent oil cooler that was
typical of the early 'Oscar'. There is no pushrod detailing on the engine.
The kit provides a properly curved floor with molded
in rudder pedals onto which you put a control stick and two part seat assembly.
There is a nicely done instrument pane with raised details and a decal to place
atop them. This is no inner sidewall detailing. The engine consists of a front
half row of cylinders onto which you place the prominent oil cooler that was
typical of the early 'Oscar'. There is no pushrod detailing on the engine.
Wings are a single lower piece with separate upper halves. Of you want to use the drop tanks you'll need to open holes in the lower wing. Closing the fuselage traps the engine and interior pieces and you have a full forward colwing to attack along with small exhaust pipes and machine gun housings. Landing gear is well done and the main gear doors are molded in the lowered position so some work will be needed if you plan on building this one gear up. The tires are flat on the bottom which is a nice touch. You are provided a one piece canopy into which you will need to drill a hole for the telescopic sight.
Instructions are well done with the usual Gunze paint references. There is only one markings option and that is for the box art plane in Nakajima Army Green over what is shown as Grey-Green though it also may have been unpainted metal. I should take this opportunity to mention that Nakajima cockpit color is very close to RAF interior green for those who don't want to add another color to the paint rack. Decals are very nicely printed.
| CONSTRUCTION |
 I had expected this to be a quick build. While it was not
complex, I ran into a few issues that I hadn't expected. First is that this is
not a new tool kit. I suspect it is from the time when Fujimi was doing a mass
of 1/72 Japanese aircraft back in the 1980s and early 1990s. The kit has a bit
of flash that in some cases, I found tedious to remove from small parts. This
especially goes from the seat mount. It is very fragile and I'm not surprised
that I broke it removing it from the sprue. I glued it back together laying upon
a section of wax paper and attached the seat at this time. Not the greatest fit.
It was then attached to the floor piece along with the seat and control stick,
itself rather thin. This and the rest of the interior was painted with some
Nakajima Interior Green that I have left over from a stash of Aeromaster
acrylics.
I had expected this to be a quick build. While it was not
complex, I ran into a few issues that I hadn't expected. First is that this is
not a new tool kit. I suspect it is from the time when Fujimi was doing a mass
of 1/72 Japanese aircraft back in the 1980s and early 1990s. The kit has a bit
of flash that in some cases, I found tedious to remove from small parts. This
especially goes from the seat mount. It is very fragile and I'm not surprised
that I broke it removing it from the sprue. I glued it back together laying upon
a section of wax paper and attached the seat at this time. Not the greatest fit.
It was then attached to the floor piece along with the seat and control stick,
itself rather thin. This and the rest of the interior was painted with some
Nakajima Interior Green that I have left over from a stash of Aeromaster
acrylics.
I then painted the engine and the annular oil cooler. The
prop shaft was installed along with the back of the spinner Note that the
annular
cooler is not a great fit. The instrument panel had the decal installed and all
the previous bits were strapped in the fuselage halves. It was then I noticed
that the annular cooler was not w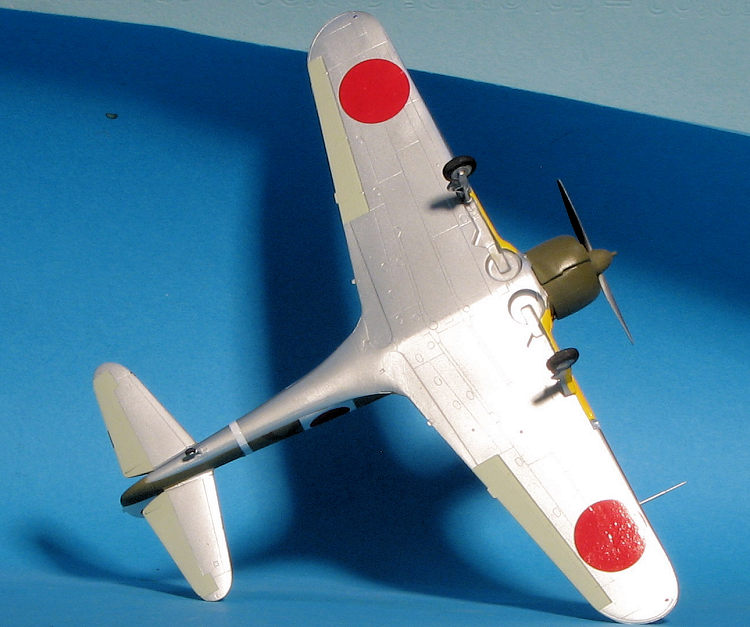 ell centered, but there is only one way to glue it
on. The forward cowling piece was attached and the usual filler/sanding done to
get a good match. The upper gun pieces are not a great fit and need to be glued
on at this time to get proper alignment.
ell centered, but there is only one way to glue it
on. The forward cowling piece was attached and the usual filler/sanding done to
get a good match. The upper gun pieces are not a great fit and need to be glued
on at this time to get proper alignment.
To me, Oscars look terrible with external tanks so I left them off and did not open the holes in the wings. I decided to try fitting the upper wing halves to the fuselage first, then the lower section. This seemed to work fairly well, though the rear wing/fuselage join is not the best and needs work as did the area in the forward section. The tailplanes were then attached and I had a complete airframe. The next step before painting was to drill out the hole in the front of the windscreen. I cracked the windscreen doing this and should have simply cut off the rear of the gun sight.
Canopy was masked and after painting the area under it, it was attached with a clear cement that Kevin Dolin suggested. It is Japanese and since everything is in Japanese on the tube, I've not a clue what it is called. This stuff not only fills gaps, but is quite strong.
| COLORS & MARKINGS |
 the wings and
tail.
the wings and
tail. | CONCLUSIONS |
Once again, a simple looking kit takes longer to build than originally anticipated. Guess this is becoming the new norm for me, but I'm glad I finished it. I would say this has a bit more detail than the Hasegawa kit, even though the variant is not the same. I'm not familiar with the other Oscar kits in this scale, though I'm thinking that RS has done one. As with other builds, the end result looks nice and I'll add it to the IJAAF collection on my display shelf.
| REFERENCES |
https://en.wikipedia.org/wiki/Nakajima_Ki-43
20 July 2018 Copyright ModelingMadness.com. All rights reserved If you would like your product reviewed fairly and fairly quickly, please contact the editor
or see other details in the
Note to
Contributors. Back to the Main Page
Back to the Review
Index Page
Back to the Previews Index Page