| KIT #: | 09082 |
| PRICE: | 2200 yen SRP |
| DECALS: | Two options |
| REVIEWER: | Scott Van Aken |
| NOTES: | 2001 release. Base boxing for the -II. |
| HISTORY |
The Ki-43 is to the Japanese Army what the A6M was to the Japanese Navy during
WWII. It was the first modern, low winged, retractable landing gear fighter of
either service. Both were designed with maneuverability as the major factor in
their design. The result was that the aircraft were lacking in other areas that
were considered just as important to other powers. They did not have adequate
armor protection, and the Ki-43 ini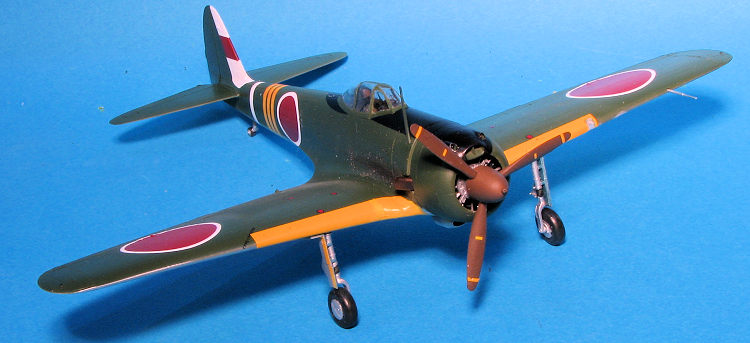 tially had rather weak armament of twin
7.7mm machine
guns, even compared to the A6M which also had two 20mm cannon. The Ki-43 also
had very good range, but this was a result of the lightweight airframe
construction and lack of heavy things like armor plating and self-sealing fuel
tanks.
tially had rather weak armament of twin
7.7mm machine
guns, even compared to the A6M which also had two 20mm cannon. The Ki-43 also
had very good range, but this was a result of the lightweight airframe
construction and lack of heavy things like armor plating and self-sealing fuel
tanks.
In the beginning the Army did not like the Ki-43 as it was not as maneuverable as the lighter and smaller fixed undercarriage Ki-27. However, it did have much superior range and the war in China required a longer ranged fighter. Despite not being considered maneuverable enough, Allied pilots who attempted to dogfight with the Ki-43 soon found themselves in trouble. Fortunately, the lack of heavy armament of the Oscar often saved the foolish Allied pilots. Despite the known shortcomings of the Ki-43, the type was continually modified and produced even after the type was obsolescent. Not surprising is that the Oscar shot down more Allied planes than any other Japanese fighter. Many were expended in suicide attacks near the end of the war.
| THE KIT |
This is the base boxings for the Ki-43-II. The fuselage and cockpit are pretty
much the same as in the -I and later -III boxings. Like the other kits, this one
uses little plastic hold downs for the prop and tail wheel. Something I wish
Hasegawa did not include are the deployed 'combat flaps' which were designed to
improve mane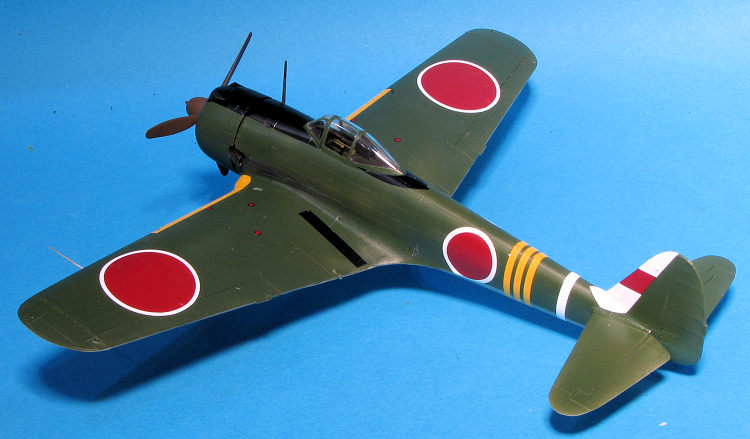 uverability by increasing the wing area when deployed.
Unfortunately, I've yet to find more than one photo of these deployed on the
ground, meaning that to do this plane in its 'normal' ground condition, you have
to grind the extant parts paper thin to fit the opening.
uverability by increasing the wing area when deployed.
Unfortunately, I've yet to find more than one photo of these deployed on the
ground, meaning that to do this plane in its 'normal' ground condition, you have
to grind the extant parts paper thin to fit the opening.
There are wing pylons to hold fuel tanks if you want to do so, but again, there are not a ton of photos of these in place. You are provided the option to do the early or late -II and these differ mainly in the exhaust. The early version has the exhaust port pointing outward while the later has it aimed towards the back. There are different cowl flap pieces to go with each of these option. A separate canopy and windscreen are provided so you can model this open. I suggest some sort of seat belt to help spice up the cockpit.
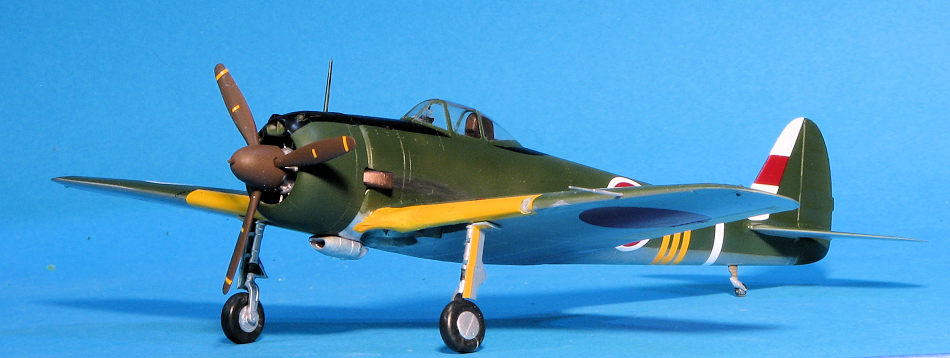
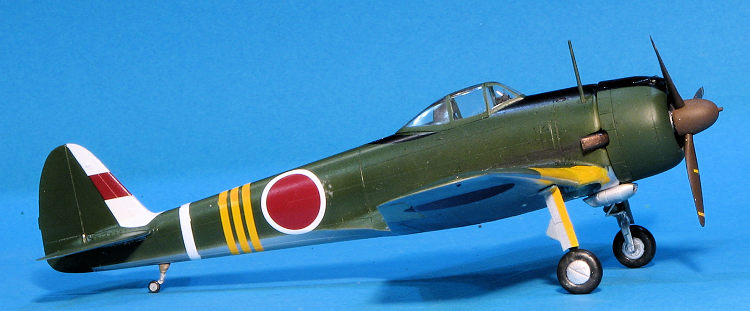
Instructions provide the usual Gunze paint references and you have two markings options. Both aircraft are from the 54th Sentai; one from the 2nd and one from the 3rd Chutai. The only major difference is in the color of the tail markings. Both are in natural metal with with rather heavy mottling. The mottling is rather heavily worn along areas that get a lot of wear from the pilot, maintenance personnel and from the effects of wind friction such as the leading edge of flight surfaces and the cowling. The box art version has the yellow IFF wing markings and the other does not. These wing markings are provided on the decal sheet, but from my lack of success with these decals on previous kits, I'd recommend painting them on. Of course, there are lots of aftermarket schemes for these planes and I will be using some for this build.
| CONSTRUCTION |
With this kit, I started by gluing the wing tip halves to the
corresponding wing sections. I'd had a few issues with steps between them in the
past and this pretty much guaranteed those would not happen. I then removed the
combat flaps from the sprues and ground them down paper thin. I did have a bit
of a problem with heat build up from using a motor tool, but this was the first
time I'd used a motor tool to do this and it is a learning experie nce. I do this
as you almost never find images of the plane on the ground with the flaps
deployed and why Hasegawa does not provide the option to model these closed is a
mystery. The problem with a motor tool is that one can over do it (as in getting
the plastic too hot).
nce. I do this
as you almost never find images of the plane on the ground with the flaps
deployed and why Hasegawa does not provide the option to model these closed is a
mystery. The problem with a motor tool is that one can over do it (as in getting
the plastic too hot).
I then painted all the interior parts with Nakajima interior green. This was quickly assembled and I used some Eduard seat belts to add some interest. The decal for the instruments matched them perfectly. This was then trapped between the fuselage halves as was the poly cap for the tail gear.
The wings were then assembled opening the hole for the oil cooler prior to attaching them to the fuselage. I did not use the pylons on this build. Wings fit fairly well as did the tailplanes when they were installed. During this process I built up the engine, again, installing a polycap to hold the prop shaft. This was then installed in the cowling. I left it off until near the end of the build. The landing gear were then built up. Frankly, I don't like how Hasegawa does these and while I understand their reasoning for the design, would prefer them to be a single piece. The canopy and windscreen were then masked. The gun sight and head rest were then installed and this area painted. I then installed the windscreen and canopy in preparation for the paint shop.
| COLORS & MARKINGS |
All of the color schemes on the sheet I was using were dark
green over aluminum. I started by trying the Vallejo acrylic aluminum once
again, hoping I'd have better results. I did not. It is patchy and did not spray
well, reinforcing my dislike for it. However, it does stick to bare plastic well
and was easy to mask. I had to do so to pa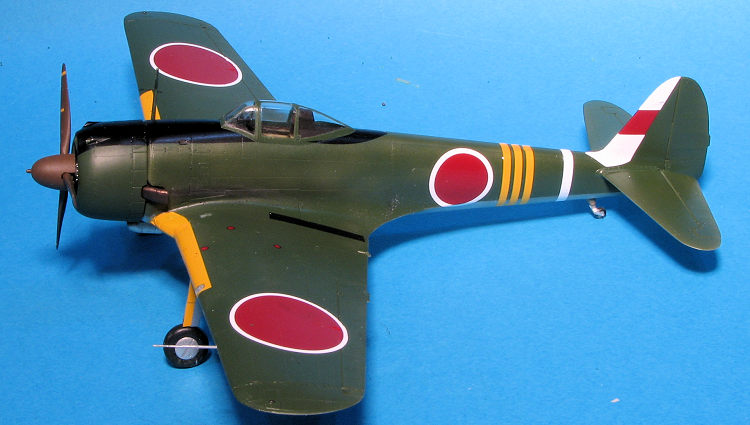 int the lower surfaces of the control
surfaces in grey-green primer. I then added some more masking and painted all
the upper surface areas with Nakajima IJAAF Green. This included the entire
engine cowling.
int the lower surfaces of the control
surfaces in grey-green primer. I then added some more masking and painted all
the upper surface areas with Nakajima IJAAF Green. This included the entire
engine cowling.
With that done, the airframe was given a coat of gloss clear in preparation for the MYK decals. After reading over the instructions for these several times, it appeared that these could be applied just like any other water slide decals as lone as one did not cut into the clear surrounding the marking. I started with the common areas, like the black around the cockpit. For this build, I chose the aircraft of Major Aizawa Torshiro based in Rangoon during February 1944.
Eventually I got them all in place and waited the required 24
hours before removing the clear from atop them. I used Tamiya tape and started
with the roundels. To my surprise, this actually worked well as the clear came
away from the marking with no issues. However, I did not think things through.
You see, if you overlap the decals as you do on the leading edge ID bands and
the fuselage bands, you will tear the decal that is overlapping the lower one.
This means you have to put on one side of a fuselage band, wait a day, remove
the clear and then apply the other side. Not only will this prolong the decal
application process, but if you are like
 me and have
trouble getting bands to be straight, will make that a most daunting task.
Eventually, I patched things up with paint, but I'll put this down as a lesson
learned.
me and have
trouble getting bands to be straight, will make that a most daunting task.
Eventually, I patched things up with paint, but I'll put this down as a lesson
learned.
With all those bits on and patched up, I continued to add other parts. This included the landing gear, exhaust (which I drilled out a ways with a motor tool), the engine and prop along with the pitot tube and radio mast. One thing to note is that the landing gear are a fairly loose attachment as are the wheels so one has to take care when installing these. Normally, I'd add a radio wire with EZ-line, but I'd run out of time so left it off.
| CONCLUSIONS |
 This build
was mainly to try out the MYK decals and I have to say they are great. They
apply just like standard water slide and snuggle into panel lines without
needing any setting solution. It was easy to remove the clear from atop them and
I did learn not to apply overlapping markings at the same time. If they have a
down side, they are fairly pricey for what you get and you do need to buy them
soon after release as they tend to sell out rather quickly. It also confirmed my
dislike for Vallejo's Aluminum as this is the second time I've sprayed it and it
did not turn out at all well. Looks fine from 6 feet away, but get close and it
is apparent that it is a fairly splotchy finish. Fortunately it is on the
underside where few will see it. I know others love it. I don't and will leave
it at that.
This build
was mainly to try out the MYK decals and I have to say they are great. They
apply just like standard water slide and snuggle into panel lines without
needing any setting solution. It was easy to remove the clear from atop them and
I did learn not to apply overlapping markings at the same time. If they have a
down side, they are fairly pricey for what you get and you do need to buy them
soon after release as they tend to sell out rather quickly. It also confirmed my
dislike for Vallejo's Aluminum as this is the second time I've sprayed it and it
did not turn out at all well. Looks fine from 6 feet away, but get close and it
is apparent that it is a fairly splotchy finish. Fortunately it is on the
underside where few will see it. I know others love it. I don't and will leave
it at that.
The Hasegawa Oscar is a known quality and for those not as busy doing other things as I, will be fairly quick builds. I've done quite a few of these over the years and really like them. Heck, I recently bought two more. I'm sure that eventually some one will do a more modern version, but until then, this is the best around in this scale. To those who might spot a glitch or two, keep it to yourself. I probably know about it already.
19 April 2019
Copyright ModelingMadness.com. All rights reserved.
Thanks to me for picking up the kit and decals. If you would like your product reviewed fairly and
fairly quickly, please
contact
the editor or see other details in the
Note to
Contributors. Back to the Main Page
Back to the Review
Index Page
Back to the Previews Index Page