Hasegawa 1/32 Ki-44-IIkai 'Tojo'
| KIT #: | 08880 (St 30) |
| PRICE: | $68.00 |
| DECALS: | Three options |
| REVIEWER: | Scott Van Aken |
| NOTES: | Base Boxing |
| HISTORY |
The Nakajima Ki-44 Shōki (鍾馗) ("Demon Queller") was a single-engine fighter aircraft used by the Imperial Japanese Army Air Force in World War II, first flying in August 1940 and entering service in 1942. The Allied codename was "Tojo"; the Japanese Army designation was "Type 2 Single-Seat Fighter" (二式単座戦闘機).
 In contrast to its predecessor, the nimble Ki-43, the Ki-44
was designed for speed and climbing ability and was used to intercept
high-flying B-29 Superfortress bombers. With its poor visibility on the ground,
weak armament, and high landing speed, it was generally disliked by pilots.
In contrast to its predecessor, the nimble Ki-43, the Ki-44
was designed for speed and climbing ability and was used to intercept
high-flying B-29 Superfortress bombers. With its poor visibility on the ground,
weak armament, and high landing speed, it was generally disliked by pilots.
The pre-production Ki-44 aircraft and two of the prototypes were turned over to the Army for service trials on 15 September 1941. The type commenced operations with one experimental unit, the 47th Chutai (Independent Air Company) ("Kawasemi Buntai", Kingfisher Unit) sent to Saigon, Indochina in December 1941 with nine aircraft under the command of Major Toshio Sakagawa.
The unit later became the 47th Sentai, when flying home defense in Japan. More aircraft were later sent to China, and others were used in defense of oil wells in Sumatra, Indonesia, the China-Burma-India theater of operations, Philippines, Japanese metropolitan defense, mainly concentrated around Japan's large industrial cities and even kamikaze operations in the last stages of the war.
The 2c version "Tojos", armed with heavy cannon, were used against B-29s by one special kamikaze unit (a company of four aircraft minimum) of the 47th Sentai, which specialized in bomber collision tactics, the Shinten unit ("Shinten Seiku Tai"(Sky Shadow) 47th Sentai (Air Regiment) based at Narimasu airfield), during the defense of Tokyo.
 The Nakajima Ki-44 at one point equipped 12
sentais of the Japanese Army
Air Force (the 9th, 22nd, 23rd, 29th, 47th, 59th, 64th, 70th, 85th, 87th, 104th
and 246th Air Regiments) which saw action before their (partial) replacement
with Ki-84 Hayates for
the final battles of the war. The Manchoukouan Air force also received some
examples of these aircraft during wartime.
The Nakajima Ki-44 at one point equipped 12
sentais of the Japanese Army
Air Force (the 9th, 22nd, 23rd, 29th, 47th, 59th, 64th, 70th, 85th, 87th, 104th
and 246th Air Regiments) which saw action before their (partial) replacement
with Ki-84 Hayates for
the final battles of the war. The Manchoukouan Air force also received some
examples of these aircraft during wartime.
After World War II, the Nationalist Chinese 18th Squadron of the 12th Fighter Group was equipped with Ki-44s formerly of the 9th Sentai, which had disbanded in Nanking, and of the 29th Sentai, which had disbanded at Formosa and they participated in the Chinese Civil War. The People's Liberation Army Air Force managed to get hold of aircraft formerly belonging to 22nd and 85th Sentai, who had disbanded in Chosen, the Japanese name for Korea during their imperial rule (1910-1945) over that country. These aircraft were flown by Japanese nationalist pilots, who used them until the last two Ki-44s finally retired in the early 1950s.
| THE KIT |
This kit was released in 2009 and continued their program of upscaling their 1/48 kits. Many of us are glad they did as some of these subjects are only available from Hasegawa in this scale.
You'd expect this kit to be state of the art and you'd be correct. The first thing that caught my eye is that Hasegawa provides a pilot for this aircraft. You get two heads, one with and one without an oxygen mask. These planes were high altitude interceptors so this would be normal equipment. The kit has a very well done cockpit and though I'm sure you can get a bit more detail from a resin replacement, for most modelers, this is more than adequate. One has a choice of detailing the raised instruments or using a decal. I noticed that there are color options for the instrument panel, either a green or matte black. This is also true of the wheel wells and inner gear doors.
 Some modifications in terms of removing some attachment
points or opening holes is required for this variant in terms of weapons, drop
tanks or adding a fuel cooler. The model can also be built with the flaps up
and closed, a more normal position when on the ground. Again, some modification
of the parts is needed to do this. The rest of the kit has big parts and good
detail.
Some modifications in terms of removing some attachment
points or opening holes is required for this variant in terms of weapons, drop
tanks or adding a fuel cooler. The model can also be built with the flaps up
and closed, a more normal position when on the ground. Again, some modification
of the parts is needed to do this. The rest of the kit has big parts and good
detail.
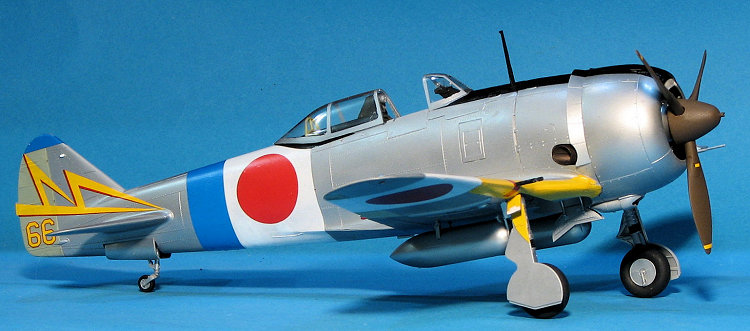
Instructions are usual Hasegawa standards with well drawn construction sequences, the usual notes where needed to do modifications and Gunze paint references. All three markings options are unpainted metal with green-grey fabric control surfaces and black anti-glare panels. These panels and the wind yellow ID bands are provided as decals, though you may wish to paint them in place. Markings are for two 'aces' of the 70th Sentai. One in the box art plane of W.O. Makoto Ogawa while the other is a similarly marked plane of Capt. Yoshio Yoshida. The third option is for Capt. Teiichi Hatano of the 47th Sentai. This and the first option have white 'Bandages' around the wing and fuselage. Again, these are provided as decals, though one may wish to paint these in place. The colorful decal sheet is superbly printed and being a 'new era' sheet should work as well as any aftermarket version.
| CONSTRUCTION |
 With a kit like this there are a
lot of subassemblies so those of us who like to fuss around with several parts
of the kit rather than stick by a straight step by step will always finding
something to do while the glue or paint is drying. I usually start by painting
bits while stil on the sprue and I started with the interior pieces. Hasegawa
recommends a khaki green, which doesn't actually bring a shade to mind.
Fortunately, several paint companies make a Nakajima Interior Green which is a
sort of yellowish green shade. I also painted a lot of the separate instruments
with tire black. Hasegawa provided decals for the main instrument panel if you
want to use them as well as for all these instruments. Building up the interior
is fairly time consuming due to all the painting required. It does go together
with no fuss. I added a set of Eduard leather belts to the seat as I don't use
pilot figures.
With a kit like this there are a
lot of subassemblies so those of us who like to fuss around with several parts
of the kit rather than stick by a straight step by step will always finding
something to do while the glue or paint is drying. I usually start by painting
bits while stil on the sprue and I started with the interior pieces. Hasegawa
recommends a khaki green, which doesn't actually bring a shade to mind.
Fortunately, several paint companies make a Nakajima Interior Green which is a
sort of yellowish green shade. I also painted a lot of the separate instruments
with tire black. Hasegawa provided decals for the main instrument panel if you
want to use them as well as for all these instruments. Building up the interior
is fairly time consuming due to all the painting required. It does go together
with no fuss. I added a set of Eduard leather belts to the seat as I don't use
pilot figures.
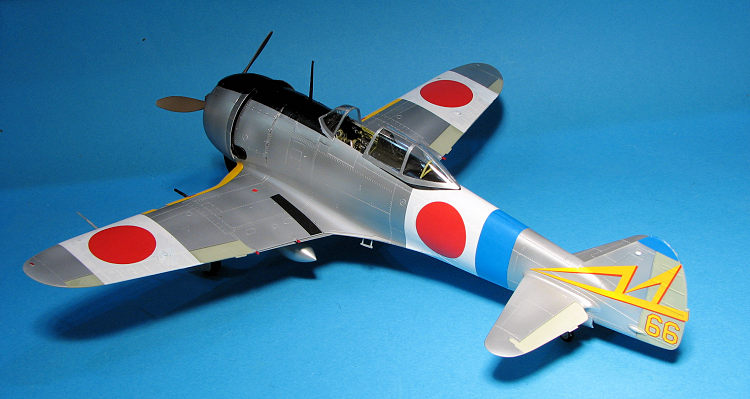
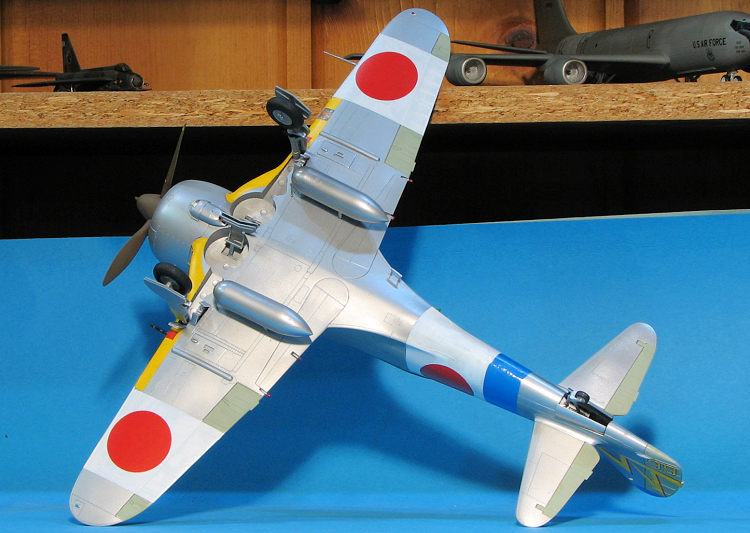
Meanwhile I assembled the tailplanes and the wings. The wings have inserts for the rear well wall and a very stout wing spar assembly that is a bit tricky to get into place. While working on the wings, I sanded off all the stubs on the 'butterfly' flaps and glued them into the recesses. They are not quite flush, but still look a lot better than deployed on the ground.
 Another subassembly is the drop
tanks. These actually have quite a few parts to each one and one does have to
take care to ensure everything is properly aligned. The kit also provides some
wing racks, but nothing to put on them so I did not open the holes for these as
I did the tanks and the step. I also decided to leave off the fuel cooler as not
all planes had this feature.
Another subassembly is the drop
tanks. These actually have quite a few parts to each one and one does have to
take care to ensure everything is properly aligned. The kit also provides some
wing racks, but nothing to put on them so I did not open the holes for these as
I did the tanks and the step. I also decided to leave off the fuel cooler as not
all planes had this feature.
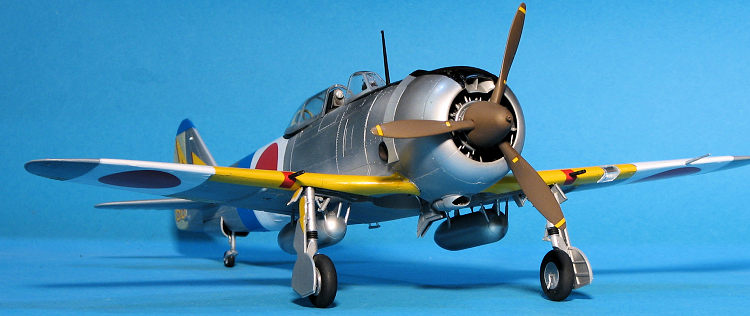
The interior was installed in a fuselage half and the halves closed. I glued on the roll bar assembly at this time. Next the engine was built up and when done, that was set aside. The wings were assembled and when dry, glued to the lower fuselage. Fit is very good. Tailplanes were next and they also fit well. One can model the cowling with the cowl flaps open or closed. I chose the open option and attached them. I also attached the upper intake on the inside of the cowling. The interior was painted with Nakajima interior green. At this point, I had a fairly complete airframe. On the underside, I glued in the small doors and the little retraction mechanism that sticks out when the gear is down. The cockpit was stuffed with tissue and it was time for painting.
| COLORS & MARKINGS |
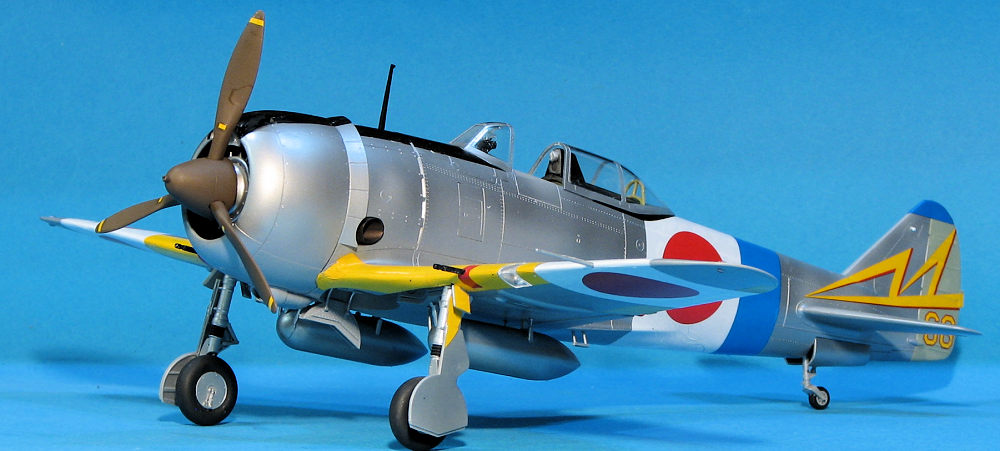
In this case, it was overall aluminum. I should mention that Hasegawa waffles on the wheel well colors suggesting either Aotake or unpainted aluminum for the wells. I used Alclad II after I sprayed on a coat of Tamiya grey primer to check for glitches. Then the areas around all the control surfaces were masked and those were painted Tamiya grey-green. The instructions show matt aluminum, but I learned several years back that for the most part, control surfaces were attached unpainted so would be like this on an unpainted airframe. During this time I painted the assembled prop with brown primer, using Xtracolor for this.
Back on the bench, the
landing gear legs and the tail gear were glued in place. I decided to use the
option from the decal sheet for the 47t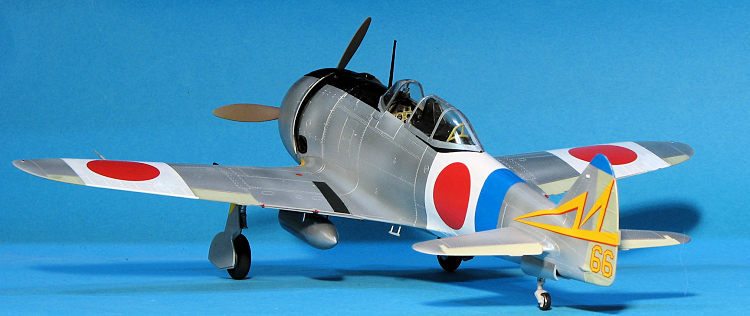 h
Sentai in 1944. I also decided to use the decals for the ID panels and
anti-glare panels. I keep telling myself not to do this, but did it anyway. I
can never get these things to work perfectly and had to do some patching and
overpainting to get things to look nice. I also did not paint the white wing and
fuselage bands. The decals are quite thin and fairly easily damaged, requiring
touch up there as well. The fuselage bands are too short leaving a fairly large
gap on the underside. I placed them exactly where the instructions showed, but
perhaps they should have gone farther back so they'd close up. I used Tamiya X-7
and it seemed to be a fairly good match for the blue. Hasegawa does provide the
Hinomarus as separate items so next time, it will be paint for all this.
h
Sentai in 1944. I also decided to use the decals for the ID panels and
anti-glare panels. I keep telling myself not to do this, but did it anyway. I
can never get these things to work perfectly and had to do some patching and
overpainting to get things to look nice. I also did not paint the white wing and
fuselage bands. The decals are quite thin and fairly easily damaged, requiring
touch up there as well. The fuselage bands are too short leaving a fairly large
gap on the underside. I placed them exactly where the instructions showed, but
perhaps they should have gone farther back so they'd close up. I used Tamiya X-7
and it seemed to be a fairly good match for the blue. Hasegawa does provide the
Hinomarus as separate items so next time, it will be paint for all this.
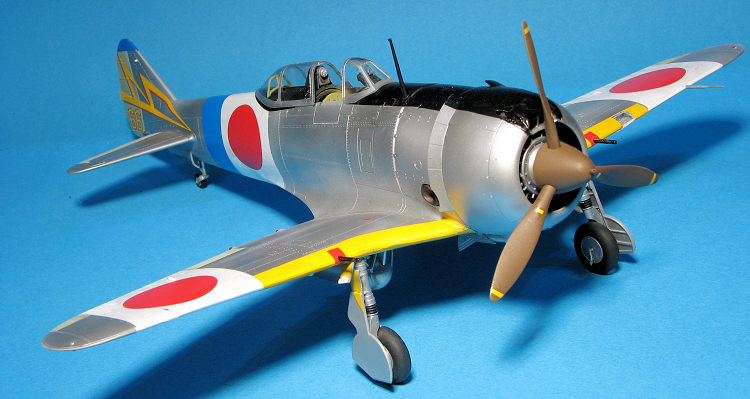
The rest of the build comprised of getting all the fiddly bits attached. This included the main and tail gear doors, landing light and lens, radio mast, windscreen and canopy, engine, exhaust, cowling, prop, wing guns, step, and pitot tube. The holes for the drop tanks proved to be too far apart so I had to do some trimming to get the tanks to fit. A bit of touch up painting and the formation lights finished the build.
| CONCLUSIONS |
This was a very satisfying build. Nearly all the build issues I had (decals and breaking the tail wheel) were sef induced. It was also a 1/32 kit that went from start to finish without it spending time on the shelf of doom. I was surprised at the lack of aftermarket decals for this plane in this scale, but there it is. It has motivated me to perhaps do another in the near future. Since this is the base boxing, it gets reissued from time to time and can be found without too much trouble.
31 July 2020
Copyright ModelingMadness.com. All rights reserved.
If you would like your product reviewed fairly and fairly quickly, please contact the editor or see other details in the Note to Contributors.
Back to the Main Page Back to the Review Index Page Back to the Previews Index Page