Fujimi 1/72 E16A1 'Paul'
|
KIT # |
C-14 |
|
PRICE: |
$39.98 MSRP |
|
DECALS: |
One aircraft |
|
REVIEW : |
|
|
NOTES: |
|
|
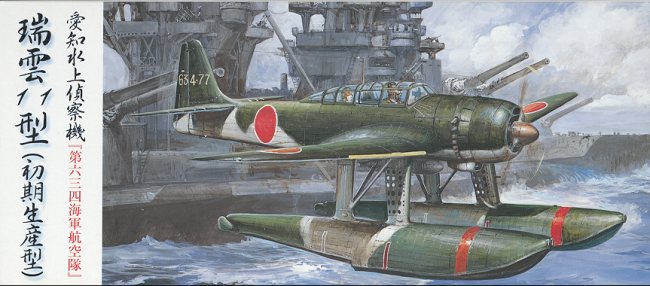
BACKGROUND |
For a peek in the box and a brief history, please visit the preview
|
CONSTRUCTION |
This is a very straight-forward 1/72 kit. Typical of small scale Fujimi kits, there is not really that much in the way of detail for the cockpit section. Basically just seats, stick and instrument panel. There is a radio for the radio operator and he also has a machine gun. I started by gluing all of the interior bits into the floor section and then painting that a rather dark interior green color. Maybe it was aotake, but from all the reading I've done over the last few years, it seems as if more Japanese planes had a specific interior color than not.
 Once the interior and the sidewalls were painted, the various bits were picked out in
different colors and then dry-brushed to bring out what little detail there was.
The rear gun is only supposed to be mounted with the back canopy open (which is
provided in the kit as an option), but I wanted mine closed. This meant cutting
off the gun mount and cementing the gun in a position that seemed logical. The
DF loop was glued in place and the extra hole on the upper deck was filled in.
Then the fuselage was glued. No real major fit problems, but not perfect so keep
the filler handy for those small seams that will need taken care of.
Once the interior and the sidewalls were painted, the various bits were picked out in
different colors and then dry-brushed to bring out what little detail there was.
The rear gun is only supposed to be mounted with the back canopy open (which is
provided in the kit as an option), but I wanted mine closed. This meant cutting
off the gun mount and cementing the gun in a position that seemed logical. The
DF loop was glued in place and the extra hole on the upper deck was filled in.
Then the fuselage was glued. No real major fit problems, but not perfect so keep
the filler handy for those small seams that will need taken care of.
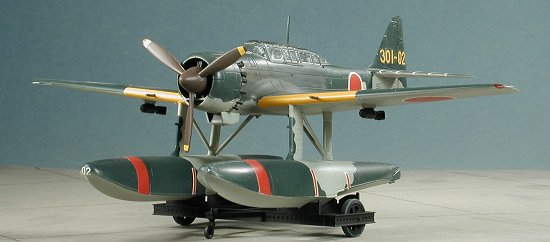
I next did the floats. These had weight added to the nose of them to keep it from sitting back when it was complete (it turned out to be barely enough). There is also a beaching trolley that was constructed at this time. There is a huge seam that runs all around the circumference of this trolley. It is also indented and has a number of lightening holes punctuating it. You'd have to be really dedicated to fill that as it will be incredibly time consuming to do it. I left it as it was. Back at the floats, after the seam was filled and sanded, the two vertical support braces were glued in place. These are handed so be sure to follow the instructions when building them.
Meanwhile, I went to work on the nose of the plane. There is a ring on which you have to glue 16 teeny exhaust stacks (8 on each side). I don't know what masochist designed this, but I'd have been much happier with it as a single construct. Naturally, I lost one of them. This is then glued to the front of the fuselage and the engine/cowling piece is attached. The fit of this isn't the best, but filling the seam is nearly impossible thanks to the position of it and those miserable little exhaust stacks!
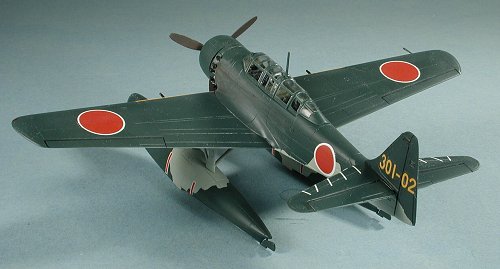
 The wings were simple by comparison. Though the box art shows a centerline
bomb (after all, this is a dive bomber floatplane), one is not included in the
kit. Two small outer wing racks are and the holes for them are already drilled
out on the kit. Fit of the wings is ok until you come to the underside. For some
reason, Fujimi decided to have the lower wing seam half through the ailerons.
This means (you guessed it) a nice long seam that needs filled. What's more,
you'll probably trash some of the surrounding actuating covers during the
sanding. Fujimi ≠ quality engineering.
The wings were simple by comparison. Though the box art shows a centerline
bomb (after all, this is a dive bomber floatplane), one is not included in the
kit. Two small outer wing racks are and the holes for them are already drilled
out on the kit. Fit of the wings is ok until you come to the underside. For some
reason, Fujimi decided to have the lower wing seam half through the ailerons.
This means (you guessed it) a nice long seam that needs filled. What's more,
you'll probably trash some of the surrounding actuating covers during the
sanding. Fujimi ≠ quality engineering.
Wing roots are very large and fitting the wing to the fuselage wasn't that much of a problem. Just a touch of filler was needed. I also had no problems with the tail planes nor with the canopy. The greenhouse on the canopy is rather extensive so it took a while to mask all of that. At this point, it was time for some paint.
|
CAMOUFLAGE & MARKINGS |
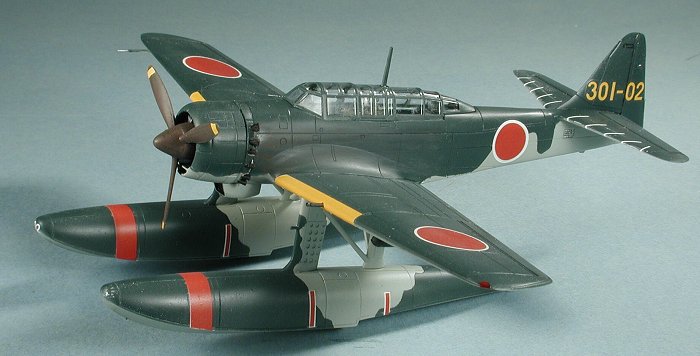
You can paint your 'Paul' any color you want as long as it is dark green over
light grey with yellow wing leading edge ID stripes. Hoping that the decals for
the wing stripes would work, I started by painting the lower fuselage and most
of the floats with IJN grey 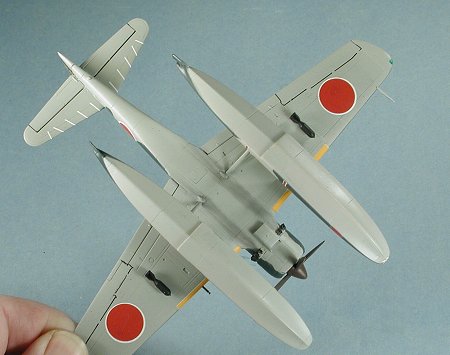 using up some more of my Aeromaster acrylics. Once
that was dry, the grey was masked off and the upper surface painted with an IJN
green color, again, using Aeromaster. I chose the Nakajima shades because they
looked more like the box art. I also found that the grey was prone to lifting up
even with Tamiya tape. That meant some touch-up using a brush to take care of
these areas. Fortunately for me, the paint matched rather well.
using up some more of my Aeromaster acrylics. Once
that was dry, the grey was masked off and the upper surface painted with an IJN
green color, again, using Aeromaster. I chose the Nakajima shades because they
looked more like the box art. I also found that the grey was prone to lifting up
even with Tamiya tape. That meant some touch-up using a brush to take care of
these areas. Fortunately for me, the paint matched rather well.
|
CONSTRUCTION CONTINUES |
In order to get to the decal stage, I had to do a touch more construction. In
this case, it meant attaching the floats and their support struts. It was a
painless procedure, though I found that aligning the floats wasn't the cake walk
that I thought it was going to be. After much fiddling, I got them where I
thought they were aligned. When dry, the join areas were touched up and the
entire kit given a couple of coats of clear acrylic gloss in preparation for
decals. With no real aftermarket options, I had little choice but to use the kit
decals. Most of these are two-parters because the red and yellow decals are
pretty transparent. The white undersides are pretty opaque so it was a good
choice. First, all the markings were applied in white. I found that the markings
were in general, a bit larger than what it showed in the instructions and on the
box art. This required some trimming on the yellow leading edge markings. The
float decals were also not precise. The large red stripes on the forward section
of the float are straight while that area has slight compound curvature to it.
Stripes are also too long. The smaller rear float stripes are angled at the
bottom to allegedly fit the lower float profile, but are angled way too acutely
to fit. These are not disasters and can be trimmed to fit. 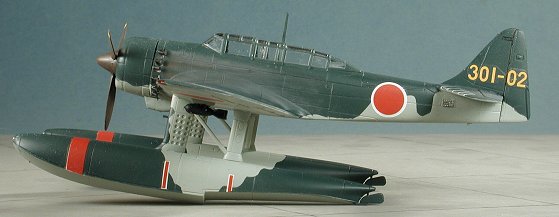 The wing leading edge markings are a bit of a problem as the yellow
decal is
exactly the same width as the white. Unfortunately, since they both cover a
curved surface, the yellow ends up being a touch too narrow to completely cover
the white decal underneath. I didn't find out about it until after the upper
decal had fully dried so put the strip of white on the lower side. The decals
fit rather well on their own as I used rather warm water. They also reacted
favorably to mild setting solutions. One thing that can't be hidden is that the
decals are a bit on the thick side so having them layered means they stand proud
of the surface. I also totally hosed on on the leading edge of the float. Oh
well. With the decals on, the kit was given a coat of clear matte acrylic and
left to dry.
The wing leading edge markings are a bit of a problem as the yellow
decal is
exactly the same width as the white. Unfortunately, since they both cover a
curved surface, the yellow ends up being a touch too narrow to completely cover
the white decal underneath. I didn't find out about it until after the upper
decal had fully dried so put the strip of white on the lower side. The decals
fit rather well on their own as I used rather warm water. They also reacted
favorably to mild setting solutions. One thing that can't be hidden is that the
decals are a bit on the thick side so having them layered means they stand proud
of the surface. I also totally hosed on on the leading edge of the float. Oh
well. With the decals on, the kit was given a coat of clear matte acrylic and
left to dry.
|
FINAL BITS |
 Final bits included finishing the beaching dolly and painting it black. I
also removed the masking and did some touch up painting which included the
position lights. Somehow, I'd lost another exhaust so had no choice but to try
to cobble up something from scrap plastic. It isn't pretty, but beats having a
couple of holes where they shouldn't be. The radio mast was also attached at
this time and painted. A bit of pastel was used for the exhaust, the prop stuck
in the front of the engine using clear paint and that was it!
Final bits included finishing the beaching dolly and painting it black. I
also removed the masking and did some touch up painting which included the
position lights. Somehow, I'd lost another exhaust so had no choice but to try
to cobble up something from scrap plastic. It isn't pretty, but beats having a
couple of holes where they shouldn't be. The radio mast was also attached at
this time and painted. A bit of pastel was used for the exhaust, the prop stuck
in the front of the engine using clear paint and that was it!
|
CONCLUSIONS |
I really liked building this kit. It fit quite well for the most part, has decent detail and gave me no real headaches (other than those stupid individual exhaust). Probably the only hassle with it is its general unavailability in the US, mostly thanks to the very high price asked for them (courtesy of the importer). If bought retail in the US, these kits are not a good value for the money, however, there are other options available to most of us. Aside from price, this is a kit that I can recommend to anyone who like Japanese planes, or just wants something a bit different from the usual P-51/109/Spit.
|
REFERENCES |
 Japanese Aircraft of the Pacific War, by Rene J
Francillon, 1979 (2nd Edition), Putnam
Japanese Aircraft of the Pacific War, by Rene J
Francillon, 1979 (2nd Edition), Putnam
#1258 in a series
January 2003
Copyright ModelingMadness.com. All rights reserved.
Review kit courtesy of me and my wallet!
If you would like your product reviewed fairly and fairly quickly, please contact the editor or see other details in the Note to Contributors.