|
KIT: |
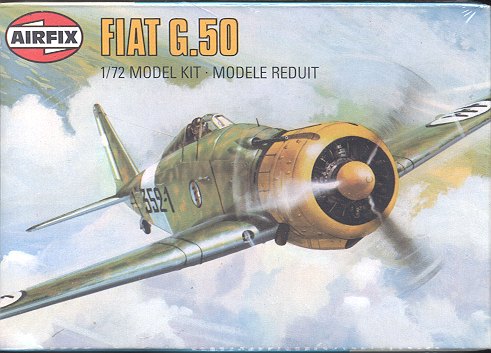
Airfix 1/72 Fiat G.50 |
|
KIT # |
1046 |
|
PRICE: |
$2.50 in the mid '70's |
|
DECALS: |
One aircraft |
|
REVIEW & |
|
|
NOTES: |
|
HISTORY |
The G.50 was Italy's first all-metal, single-seat fighter. It was designed to a 1936 specification that also resulted in the Macchi MC.200, Reggianne Re.2000 and several other aircraft. Typical of Italy at the time, rather than settle on just one design, it eventually chose the G.50 and the other two mentioned for full production. Initial production was 245 aircraft, but Italian pilots didn't like the fully enclosed cockpit of the aircraft, and after 45 were produced, a modified and semi-open cockpit was chosen for the rest of the production aircraft. The type was also exported to Finland, 35 examples being sent in 1939.
The G.50 was a very nice aircraft to fly, but was woefully underpowered and under-armed. The 840 hp Fiat A.74 engine just did not give the kind of performance that a more powerful engine would have provided. The two 7.7mm machine guns would have been fine during WWI, but against modern aircraft it would have taken a lucky shot to bring down an enemy aircraft. It wasn't until later in the war with the importing of German engines and guns that Italian fighters would finally have the power and punch to match their superb airframes.
 The G.50bis was the
most commonly used variant. This aircraft had more fuel capacity, a redesigned
vertical tail of greater height and new, stronger undercarriage. The type was
use in action throughout the early war years and though supplanted by more
modern types, was still to be found in areas of Italian influence later in the
war. Attempts at modernizing the plane with newer engines and weapons were not
successful. A variant was even developed with carrier arresting equipment for
two aircraft carriers, the Sparviero and Aquila that were being
converted from merchantmen. These ships were never completed.
The G.50bis was the
most commonly used variant. This aircraft had more fuel capacity, a redesigned
vertical tail of greater height and new, stronger undercarriage. The type was
use in action throughout the early war years and though supplanted by more
modern types, was still to be found in areas of Italian influence later in the
war. Attempts at modernizing the plane with newer engines and weapons were not
successful. A variant was even developed with carrier arresting equipment for
two aircraft carriers, the Sparviero and Aquila that were being
converted from merchantmen. These ships were never completed.
|
THE KIT |
For many, many years, the Airfix G.50 was all that was available to those that wanted to model the kit in 1/72. Only recently have better kits been released, though these are rather expensive resin kits. Still, the Airfix kit, despite its 1960s heritage, can be built into a very nice model. As one would expect, this particular kit came in the most lovely light blue plastic. Despite years of molding, my example was still pretty clean. Not much at all in the way of rivets and the like. Panel lines are of the raised variety. Control surfaces have a rather nice fabric representation on them that is adequate for the scale.
The kit decals are for an aircraft that participated in the Battle of Britain for a short few months in 1940. The decals were quite matte with lots of carrier film. My example was off register so I did not use them. Instructions were quite plain by today's standards, giving all paint colors in Humbrol numbers; no corresponding color reference, so one had to guess quite a bit!
|
CONSTRUCTION |
 I hope you
don't feel cheated by this construction portion as the Airfix kit is about as
basic as you can get. No interior, just a pilot to fill the hole. I painted the
cockpit area an appropriate-looking green color, though black would have been a
better choice since there is nothing in there! The fuselage was glued together
as were the wings. There is no wheel well detail and the wells are not even
fully boxed in. Once the wings and fuselage were glued together, I sanded off
all of the panel lines until it was nice and smooth.
I hope you
don't feel cheated by this construction portion as the Airfix kit is about as
basic as you can get. No interior, just a pilot to fill the hole. I painted the
cockpit area an appropriate-looking green color, though black would have been a
better choice since there is nothing in there! The fuselage was glued together
as were the wings. There is no wheel well detail and the wells are not even
fully boxed in. Once the wings and fuselage were glued together, I sanded off
all of the panel lines until it was nice and smooth.
Next, the wings and tailplanes were glued in place. The joints were filled and also sanded nice and smooth. Now that I had a pretty complete airframe (builds quickly, doesn't it?), I turned my attention to the undercarriage and engine. The engine shape was painted flat black and drybrushed with aluminum to bring out any detail. The undercarriage was cleaned up and painted aluminum. Turning my attention to the engine cowling, I spent some quality time cleaning this up as it was a bit rough. Then the engine was glued into it after an an appropriately dark color was painted inside the cowling. This was tacked onto the nose of the airframe, the engine and cockpit stuffed with tissue and it was off to the paint shop!
|
PAINT & DECALS |
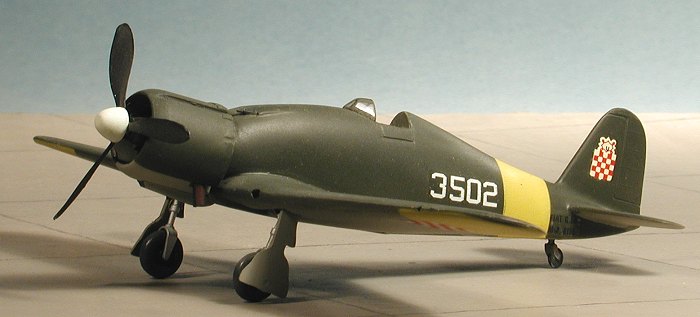
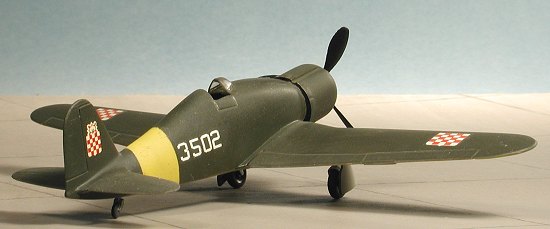
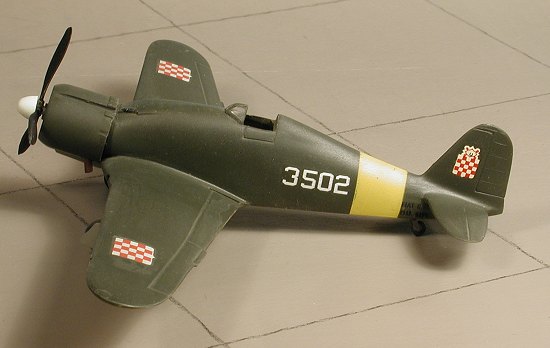
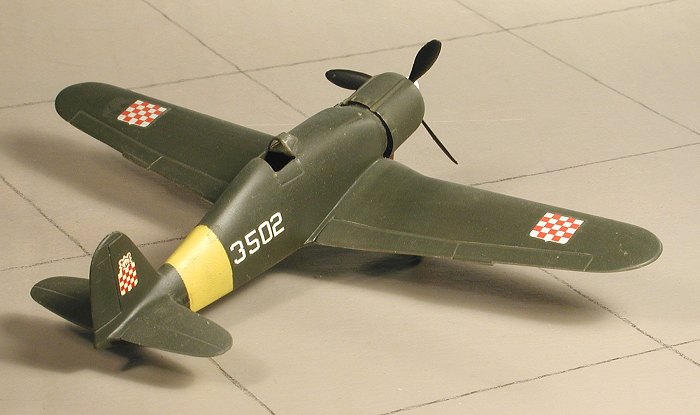
The underside of the cowling, rear fuselage and wing tips were painted white then a pale yellow. These areas were then masked off when dry. The underside of the aircraft and the gear doors were painted RLM 65. When dry, the rest of the aircraft was painted RLM 71. I used Gunze Sangyo acrylics for all these colors.
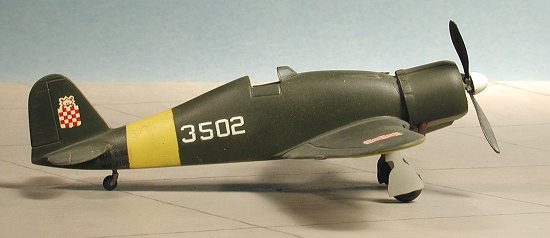 'Wait
a minute', you say, 'this doesn't sound like very Italian colors to me!'. Well,
you are correct. If you recall, the kit decals were basically useless as they
were off register. What I did was to browse through my vast library of books
until I found an interesting profile of a G.50. This one was in Croatian
markings. Apparently a few aircraft were given to Croatian pilots to use against
the Russians by the Germans after Italy's capitulation in 1943. These planes
were quite basically marked with the Croatian shield and a serial number. The
insignia I got from an old ESCI sheet and the numbers from a Microscale sheet
that has just white letters and numbers on it. I had no trouble with the decals
and once they were on and dry, the entire model was given a coat of clear matte
to seal things in.
'Wait
a minute', you say, 'this doesn't sound like very Italian colors to me!'. Well,
you are correct. If you recall, the kit decals were basically useless as they
were off register. What I did was to browse through my vast library of books
until I found an interesting profile of a G.50. This one was in Croatian
markings. Apparently a few aircraft were given to Croatian pilots to use against
the Russians by the Germans after Italy's capitulation in 1943. These planes
were quite basically marked with the Croatian shield and a serial number. The
insignia I got from an old ESCI sheet and the numbers from a Microscale sheet
that has just white letters and numbers on it. I had no trouble with the decals
and once they were on and dry, the entire model was given a coat of clear matte
to seal things in.
|
CONSTRUCTION CONTINUES |
Now that I had a painted aircraft, I glued in the tail wheel and main landing gear. When those had dried, the main wheels were attached and the main gear doors glued in place. The windscreen was glued in an the frames hand painted. For the prop (which is a rather flimsy paddle-bladed affair), it was painted black and the small nose cone, white. The cowling was popped off the nose so that I could install the prop shaft (must have a spinnable prop, you know!). The cowling was then glued back on the kit, with the exhaust pipes installed and painted rust. The machine guns were glued in place with a final spray of flat black to simulate exhaust stains and that was it!
|
CONCLUSIONS |
OK, so it isn't exactly a modern, up-to-date model kit. Sure, most modelers will avoid it like the plague. However, you must remember that most of us started building kits like this. Just because they are old does not mean that they are worthless. All it takes is a bit of time, filler and sandpaper to produce a reasonably nice model. Won't win any contests, but will look nice on your shelves and is something you can give your kid to build. I know that he will have fun with it!
Review kit courtesy of me and my wallet!
April 2001
If you would like your product reviewed fairly and quickly by a site that averages over 2,200 visits a day, please contact me or see other details in the Note to Contributors.