RS Models 1/72 Ambrosini SAI 207
| KIT #: | 92036 |
| PRICE: | $27.95 SRP |
| DECALS: | Three options |
| REVIEWER: | Scott Van Aken |
| NOTES: | Short run kit |
| HISTORY |
The SAI.207 was developed from the Ambrosini SAI.7 racing and sporting monoplane after the light fighter concept had been proven with the Ambrosini SAI.107 prototype. Steffanuti designed the aircraft to have a lightweight structure and light armament to allow lower-powered engines to be used, without unduly reducing performance.
 The first of three prototypes was completed and flown in the
Autumn of 1940 as the sole SAI.107, which was a minimum change fighter
development of the SAI.7, with identical dimensions, apart from length, at
8.02 m (26.31 ft) and the 402.7 kW (540 hp) Isotta-Fraschini Gamma engine.
Weighing only 1,000 kg (2,205 lb) the Sai.107 reached a speed of 563 km/h
(350 mph) in trials held at the Guidonia research establishment and
manoeuvrability proved to be excellent. The SAI.107 was lost, along with pilot
Arturo Ferrarin, in a crash on 18 July 1941.
The first of three prototypes was completed and flown in the
Autumn of 1940 as the sole SAI.107, which was a minimum change fighter
development of the SAI.7, with identical dimensions, apart from length, at
8.02 m (26.31 ft) and the 402.7 kW (540 hp) Isotta-Fraschini Gamma engine.
Weighing only 1,000 kg (2,205 lb) the Sai.107 reached a speed of 563 km/h
(350 mph) in trials held at the Guidonia research establishment and
manoeuvrability proved to be excellent. The SAI.107 was lost, along with pilot
Arturo Ferrarin, in a crash on 18 July 1941.
Two more fighter prototypes were built as SAI.207s, flying for the first time in the Spring of 1941 and 1942.
The SAI.207 was a single-seat, low-wing monoplane with a conventional tail-wheel undercarriage, developed from the Ambrosini SAI.7. Of wooden construction, giving a light structure, power was supplied by 559.3 kW (750 hp) Isotta-Fraschini Delta R.C.40 engine, cooling air entering the engine through a central intake. Armament consisted of two 12.7 mm (0.500 in) Breda-SAFAT machine guns.
In level flight the performance of this aircraft was impressive, achieving a speed of 580 km/h (360 mph) and over 800 km/h (497 mph) in a dive. The Ministero dell' Aeronautica soon placed a production order for 2,000 machines, plus a pre-production batch of 12 aircraft for operational testing. After the mixed results of operational evaluation and the signing of the Armistice, no production aircraft were built.
Flight testing revealed some major shortcomings, most of
which were not rectified before the Armistice in 1943; the low power and high
wing loading resulted in poor climb performance; the light structure prevented
 more powerful cannon from being used as the recoil forces overstressed the
mounting structure; the rear cylinders of the engine overheated during recovery
from a dive; the light structure also led to problems, with the second prototype
wing exploding during a dive recovery due to internal pressure built up, caused
by the lack of internal fairings in the undercarriage bays; the wooden structure
was also badly affected by rain or humidity.
more powerful cannon from being used as the recoil forces overstressed the
mounting structure; the rear cylinders of the engine overheated during recovery
from a dive; the light structure also led to problems, with the second prototype
wing exploding during a dive recovery due to internal pressure built up, caused
by the lack of internal fairings in the undercarriage bays; the wooden structure
was also badly affected by rain or humidity.
The pre-production batch of 12 aircraft served briefly with three squadrons. The first was 83rd Squadriglia, 18 Gruppo, 3 Stormo, led by Guglielmo Specker, one of the Regia Aeronauticas best known "aces", at Cerveteri airfield, near Rome. The aircraft entered service in July 1943, flying a number of combat missions against heavy Allied raids over the Italian capital, but without success. After one month, they were sent to Castiglione del Lago G.Eleuteri airfield (at that time one of the main RA training airbases), where it was planned that 161 and 162nd Squadriglia would take the aircraft into service.
Despite its speed, Italian pilots were not impressed by the type and its service in the summer of 1943 quickly ended. The aircraft of 83rd Squadriglia were returned to SAI-Ambrosini to be refurbished, but the Armistice made it impossible for them to return to their squadron.
| THE KIT |
Companies like RS Models are a real boon to those of us who like to model unusual subjects, but would rather not deal with resin or some of the more crude short run kits to accomplish this. Released in 2008, this kit contains a single sprue of light tan plastic, a clear one-piece canopy, and an Eduard-produced color photo etch fret.
 The photo etch consists of a two-piece instrument panel, the
rather unique Italian harness that contains chains as part of its make-up, a
lower exhaust plate, oleo scissors and some small interior bits. The rest of the
kit is actually quite simple. The wing is a single casting with the wheel wells
integral to the wing. The cockpit is well appointed with a seat, stick, rudder
pedals and the option to use either the p.e. or plastic instrument panel. The
only other options are p.e. or plastic oleo sissors and the ability to use a
tail wheel without the fairing on it, which is provided for two of the three
markings options.
The photo etch consists of a two-piece instrument panel, the
rather unique Italian harness that contains chains as part of its make-up, a
lower exhaust plate, oleo scissors and some small interior bits. The rest of the
kit is actually quite simple. The wing is a single casting with the wheel wells
integral to the wing. The cockpit is well appointed with a seat, stick, rudder
pedals and the option to use either the p.e. or plastic instrument panel. The
only other options are p.e. or plastic oleo sissors and the ability to use a
tail wheel without the fairing on it, which is provided for two of the three
markings options.
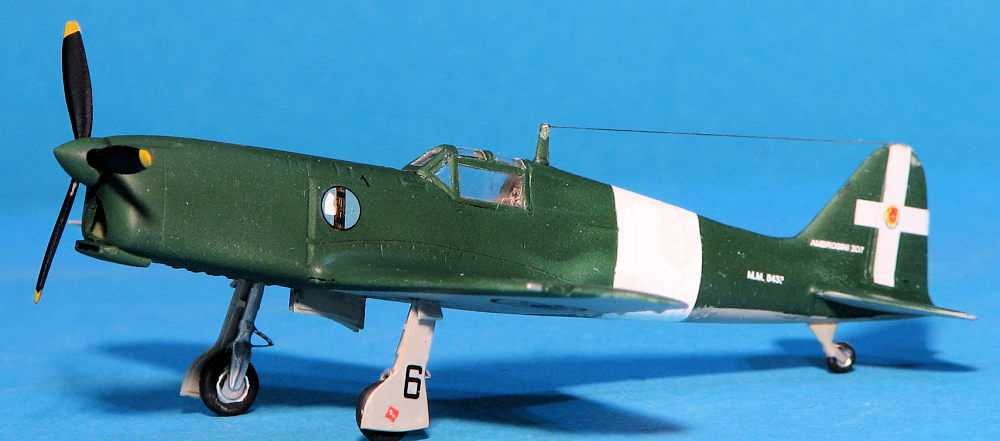
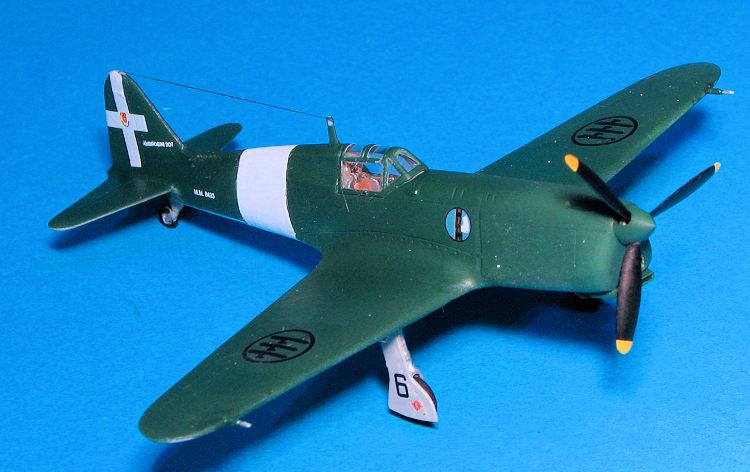
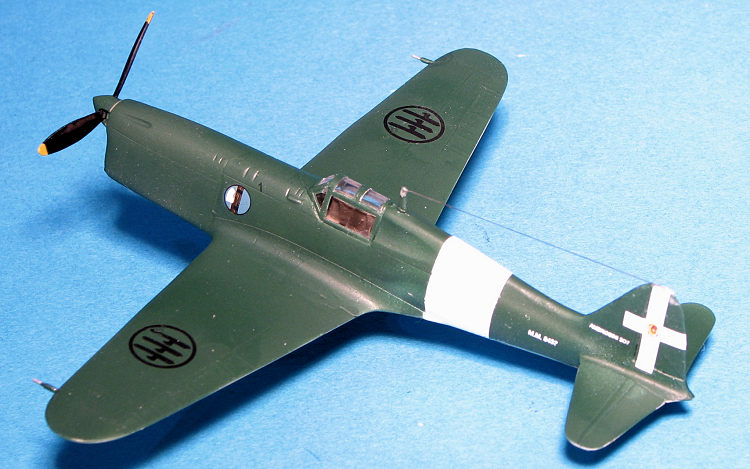
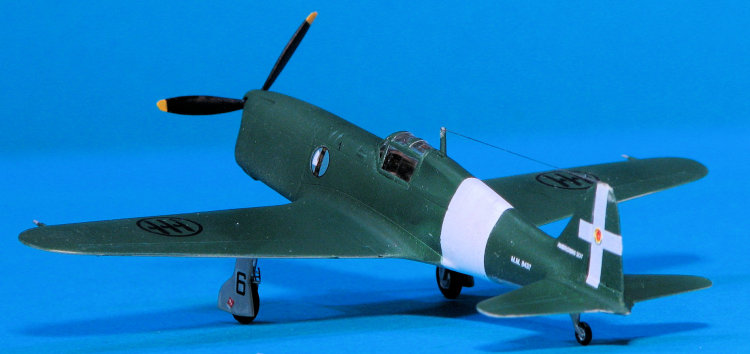
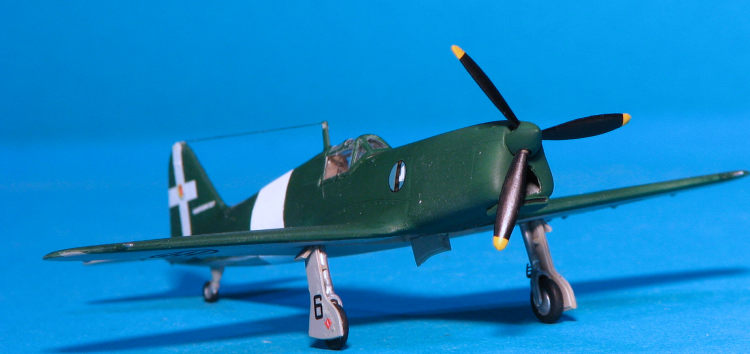
The external detailing on the kit is actually very good. There are ejector towers on several of the pieces that will need attention and there is a tiny amount of flash to be removed, but that will be taken care of in noral part clean-up. Instructions provide generic color information and are nicely drawn. The three options are all for the pre-production planes and are all in dark green over light grey. I noticed that the painting diagram on the back of the box does not show the upper color wrapping under the leading edges of the flight surfaces. Two options are Italian and one is for a plane in German markings that was briefly tested after the armistice. Decals are nicely printed and an addendum sheet is provided with the more correctly done wing insignia.
| CONSTRUCTION |
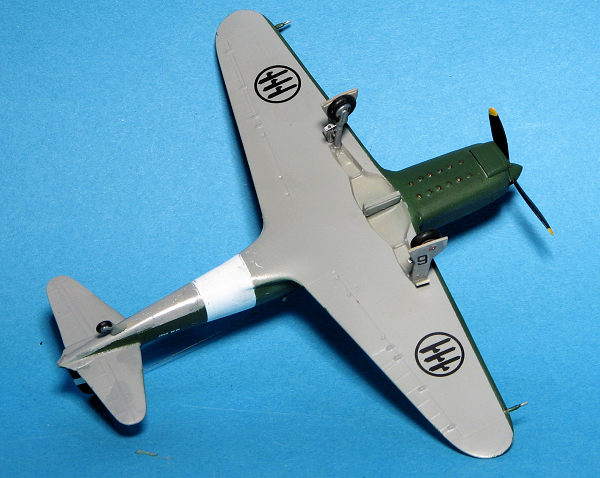
This is a standard modern short run kit and needs to be built as such. I first started with the cockpit as shown in the instructions. In fact, I went with the construction's recommendations throughout. First thing I thought was a bit odd was the requirement for painting the interior and wells with a light grey. I had always thought it was Italian interior green, but I went with the flow.
 Not surprisingly, I found it difficult to install the etched
seat harness. It just seemed to be too large. However, I got most of the bits in
place without too much effort. During the initial build of the interior, I
ensured that it would fit into the fuselage halves, which it did.
Not surprisingly, I found it difficult to install the etched
seat harness. It just seemed to be too large. However, I got most of the bits in
place without too much effort. During the initial build of the interior, I
ensured that it would fit into the fuselage halves, which it did.
The instrument panel was built up and the forward engine bits were trimmed in order to get them to fit. Once that was assured, I glued the fuselage halves together and when dry, then installed the engine bits, instrument panel and the interior. All this took some trimming to get things properly in place.
Next the wing and the horizontal stabs were cleaned up and installed. I had to trim the tabs on the stabs to get them to fit, but the fit was good. Wing, not so much, but with the help of filler, was finally in place. On the underside of the nose, one has a choice of a p.e. lower cowling or the plastic one. I picked the plastic one as the fit was better. Once faired in, the forward intake piece was attached as was the masked canopy.
Following some initial painting, I glued on the main and the tail gear. To get the main wheels in place, I had to use a round file on the inside of the gear forks. This was followed by the gear legs and the completed prop assembly.
| COLORS & MARKINGS |
 this for the underside shade, but instead I used the light grey. Upper was a
dark green. The instructions wanted silver on the underside and did not want
the upper color wrapped around a bit as was the norm for Italian camouflage.
The choice on the underside color is yours, but I had no issues with the Tamiya tape pulling up the Aeromaster paint because I used a primer into
which the paint could properly adhere.
this for the underside shade, but instead I used the light grey. Upper was a
dark green. The instructions wanted silver on the underside and did not want
the upper color wrapped around a bit as was the norm for Italian camouflage.
The choice on the underside color is yours, but I had no issues with the Tamiya tape pulling up the Aeromaster paint because I used a primer into
which the paint could properly adhere. | CONCLUSIONS |
In all, it is a very nicely done kit and though it made no impression at all in the war, is still a kit that deserves to be in any WWII or Italian aircraft collection. Just be ready for the usual fit issues that seem to be so common with short run kits.
| REFERENCES |
http://en.wikipedia.org/wiki/SAI.207
February 2020
Thanks to me for grabbing this one on sale.
If you would like your product reviewed fairly and fairly quickly, please contact the editor or see other details in the Note to Contributors.