Hasegawa 1/48 Macchi C.205 Veltro
|
KIT # |
09133 |
|
PRICE: |
2200 yen |
|
DECALS: |
Two aircraft |
|
REVIEW : |
|
|
NOTES: |
1995 release |
|
HISTORY |
Felt by many to be the finest product of the Italian aviation
industry, the powerful and sleek MC. 205 traces its ancestry back to the rather
stodgy MC.200 Saetta. This plane was developed into the MC.202 Folgore,
thanks to the addition of a German DB.601 engine. Though still hampered by
rifle-calibre machine guns
 that had difficulty bringing down enemy planes, the
202 was well liked and a real improvement over other aircraft in service. Later
these planes had 20mm cannon installed which gave it the firepower it needed,
but the added weight of the guns hampered performance. To quote Tim Allen, what
was needed was "..more power..". This was finally provided by the DB.605 and
resulted in the Macchi C.205 Veltro.
that had difficulty bringing down enemy planes, the
202 was well liked and a real improvement over other aircraft in service. Later
these planes had 20mm cannon installed which gave it the firepower it needed,
but the added weight of the guns hampered performance. To quote Tim Allen, what
was needed was "..more power..". This was finally provided by the DB.605 and
resulted in the Macchi C.205 Veltro.
Other than engine, the 205 was virtually identical to late production 202s. In fact, many 202s were converted to 205 standard with the inclusion of the DB.605 and extra fuselage fuel tank. The Veltro entered production in late 1942. Thanks to the glacial production capabilities of Italian factories, few saw service with the Reggia Aeronautica. However, a few planes were used by the German-backed ANR after the armistice of 1943. In addition, many of 205s were also used by the newly formed co-belligerant air force and went into action against the Luftwaffe. Post-war, the 205 was a major type used initially as a front line fighter and later as a fighter trainer.
|
THE KIT |
The kit is typical of modern Hasegawa kits in that it has engraved panel lines,
a fairly well detailed cockpit and wheel wells, and an opening canopy. It also has the
slight fiddlyness that comes with a kit designed for several variants.
Fortunately, those are confined to the lower cowl, tail wheel section and the
prop. That is why this is such a good kit. No need to have multiple inserts to
mess with.
Decals are designed by Cartograf, so there should be none of the trepidation
of using setting solutions as with standard Hasegawa kit decals. It also means
that the whites are the right color! You have two examples. Both of these
aircraft (one with the 88th and the other with the 360th Squadriglia) are
camouflaged in the 'smoke rings' scheme. CONSTRUCTION
I next attached all the wheel well parts to the lower wing. At the same time,
I attached the upper wings halves to the fuselage wing roots. When dry, the
lower wing was glued in place. Fit is pretty good, but the lower wing has a gap
at the rear fuselage join. With the wing in place and all the seams dealt with,
I attached the lower radiator assembly. The canopy and windscreen were masked
and glued in place. I then glued on the tail wheel doors and filled all the
wells with silly putty in prep for painting. I simply snapped the lower cowling
piece in place as it would be painted yellow and I wanted to remove it after it
was painted. COLORS & MARKINGS
I first sprayed the fuselage band and lower cowling area with Tamiya matte
white. The lower cowling was then painted with Tamiya gloss yellow. The cowling
section was then removed once dry and the fuselage band was masked off. The
undersides were then painted with RLM 76 using Mr.Color lacquer. I then moved to
the upper side and painted it with RLM 75, the lighter of the two greys. The RLM
74 was sprayed on with the demarcations done freehand. This was followed by a
light mottling of the fuselage with the two upper fuselage colors.
The next step was to build up and install the landing gear. Fit of the main gear
legs is fairly loose so you'll need to either use thick cement or keep an eye on
it and adjust them until the gl
After gloss coating the airframe, I started applying the decals. I used Stormo's
new sheet on C.205 aces and chose the plane of Serg Gorrini who is credited with
between 19-24 victories. 14 of those were flying the C.205 making him the top
scoring pilot on this aircraft. The decals are very thin so one needs to be
cautious with the larger ones. On a gloss surface they snuggled right down with
no need for setting solution. No silvering on the clear areas was noticed. CONCLUSIONS
Truth be known, I've had this kit for over 20 years. I only popped the shrink
wrap from it a few weeks ago. The build was pretty much as expected for this preview as I fully plan on building this one using the
superb Stormo Decals I recently reviewed.
October 2020
Copyright ModelingMadness.com. All rights reserved.
Thanks to Stormo Decals for their great sheet. If you would like your product reviewed fairly and fairly quickly, please
contact the editor or see other details in the
Note to
Contributors.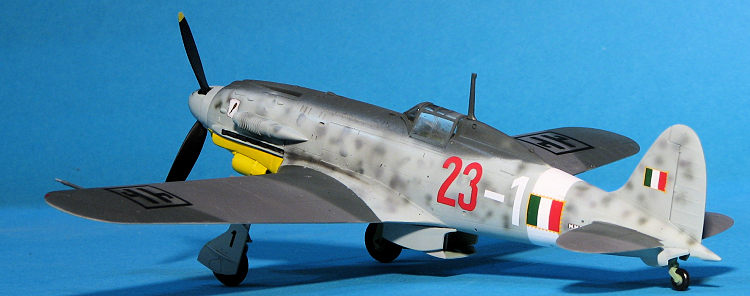 This is a superb kit. Having built the MC.202, I can tell you that it
does fit fairly well. Like the real deal, the 205 kit is virtually
identical to the 202 kit, differing only in the sprues with the new lower
cowling, prop and spinner. The kit itself is representative of a late series
airframe with twin 20mm wing cannon.
This is a superb kit. Having built the MC.202, I can tell you that it
does fit fairly well. Like the real deal, the 205 kit is virtually
identical to the 202 kit, differing only in the sprues with the new lower
cowling, prop and spinner. The kit itself is representative of a late series
airframe with twin 20mm wing cannon.
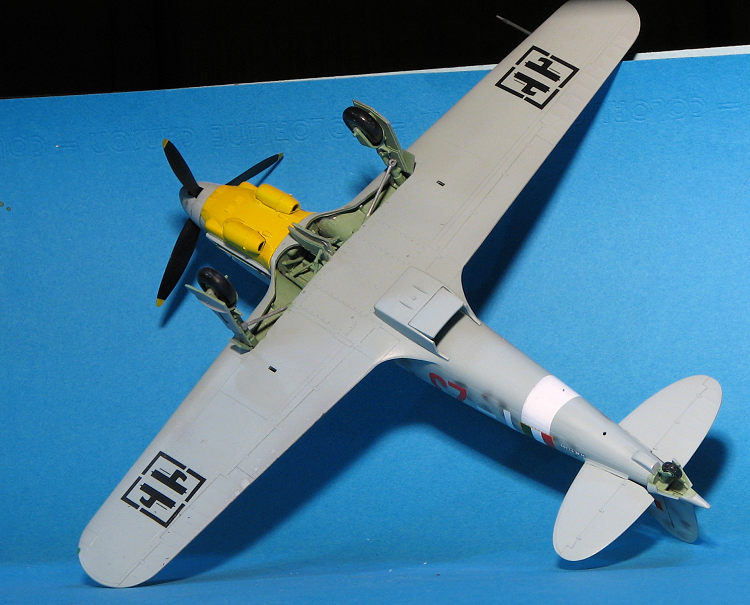
I decided to build this kit so I could use one of the markings options from
the new Stormo decals sheet on C.205 aces. I began by painting everything on
the sprue that would require Italian interior green. This color is also used
on the gear wells, inner gear doors and on the landing gear legs themselves.
For this I used some of the last of a bottle of Aeromaster acrylic paint
that I still have. I'm sad that the bottle is nearing the end as it is great
paint, not being the general watery mess of the 'eye dropper' bottled paint.
Typical of water based acrylics, you can brush paint any areas that were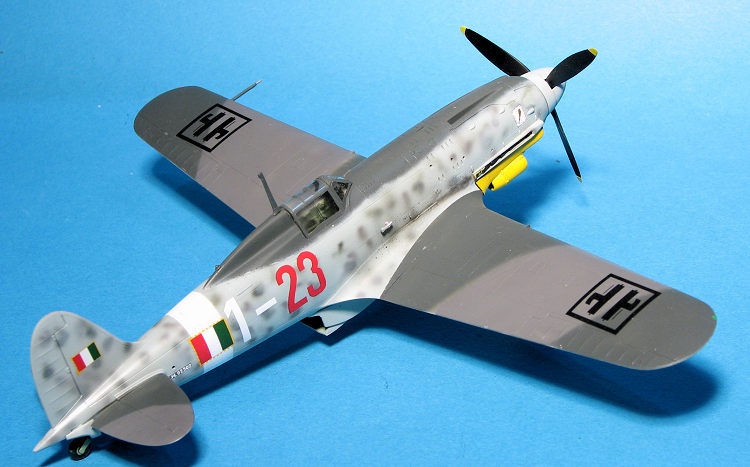 previously sprayed without there being a noticeable change in color that
often happens with enamels.
previously sprayed without there being a noticeable change in color that
often happens with enamels.
With all the interior bits so painted, I then went over them and did what
detail painting was needed. Note that the seat and rudder pedals are
aluminum. When assembling the interior it is a good ideal to trap it inside
the fuselage halves while drying to ensure that the sidewalls are not curved
in too much.
After the interior was dry, it was glued in place and the fuselage halves
joined. Note that you'll have to trim away some of the exhaust opening to
fit the exhaust as the DB605 was a bit longer in this area than the DB601
used in the C.202. At this time the prop shaft was also trapped between the
halves. The upper cowling piece was glued in place and frankly, this does
not fit all that well, being a bit too narrow. Supercharger intake and
tailplanes were attached at this time.
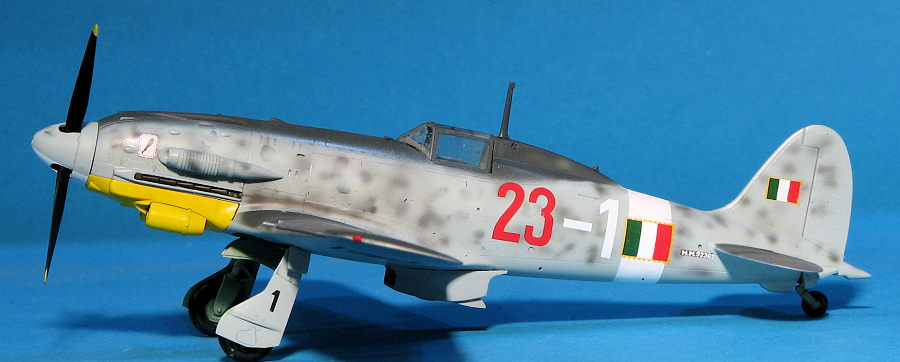
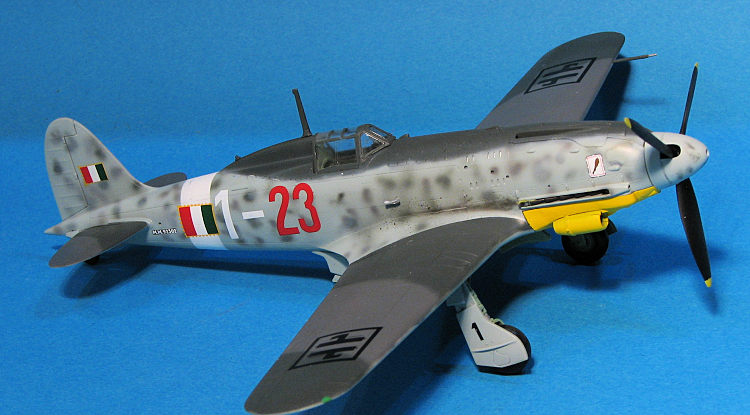
 This particular plane was going to be painted in the final scheme on the
Stormo sheet. As such it was to have a yellow lower cowling, a white fuselage
band, and the rest of the aircraft was painted in RLM 74/75/76 as was often the
case in late builds when the Italian colors had run out. Now the color profile
shows the upper fuselage as being sort of oversprayed with a tan, but the write
up that accompanies the decals says nothing about this so it may well be a
printing glitch.
This particular plane was going to be painted in the final scheme on the
Stormo sheet. As such it was to have a yellow lower cowling, a white fuselage
band, and the rest of the aircraft was painted in RLM 74/75/76 as was often the
case in late builds when the Italian colors had run out. Now the color profile
shows the upper fuselage as being sort of oversprayed with a tan, but the write
up that accompanies the decals says nothing about this so it may well be a
printing glitch.
 ue sets. Getting the retraction struts attached
will take a bit of finesse as the framework in the gear well makes getting them
in place a bit of work. With the gear in place, it was time to apply some
decals.
ue sets. Getting the retraction struts attached
will take a bit of finesse as the framework in the gear well makes getting them
in place a bit of work. With the gear in place, it was time to apply some
decals.