Special Hobby 1/48 Re.2005 'Sagittario'
| KIT #: | SH 48206 |
| PRICE: | $29.16 plus shipping from Czechia |
| DECALS: | Four options |
| REVIEWER: | Scott Van Aken |
| NOTES: | 2021 release |
| HISTORY |
The Reggiane Re.2005 Sagittario (English: Archer, Sagittarius) was an Italian monoplane fighter and fighter-bomber produced for the Regia Aeronautica during the later years of World War II. Along with the Macchi C.202/C.205 and Fiat G.55, the Reggiane Re.2005 was one of the three Serie 5 Italian fighters. The lines of the fuselage were aerodynamically efficient, and the design was intended to exploit the famous Daimler-Benz DB 605 engine. The only drawback was a certain structural weakness in the rear section of the fuselage. Only 48 examples had been delivered before the Armistice, and these fighters took part in the defence of Naples, Rome and Sicily, with the survivors battling above the crumbling ruins of Berlin, in German insignia. British ace and military observer, Group Captain Duncan Smith, DSO DFC, said that "The Re.2005 was altogether a superb, potent aeroplane".
| THE KIT |
Once the fuselage halves are glued together, then the tailplanes and an upper cowling piece can be attached along with the supercharger intake. Next comes the one piece canopy, various small bulges for the upper fuselage, exhaust and the prop assembly. Note that it appears the actual exhaust pieces can be installed after painting. Same goes for the prop assembly. Prop blades are separate on this one.
Turning to the wings the landing gear wells need to be built up and the gear legs, struts, and guns installed before attaching these to the lower wing. Again, the gear legs must be attached during the build up of the gear wells. Construction then turns to the lower radiator bath, wheels, and gear doors, which completes the model.
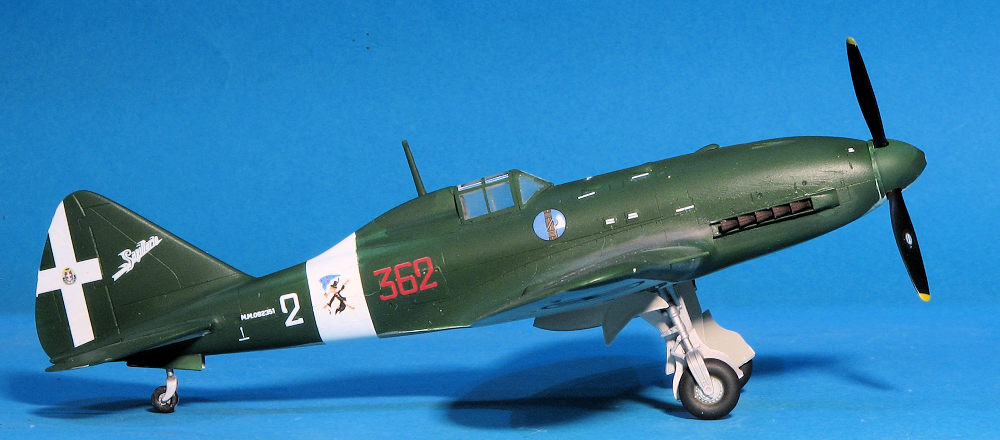
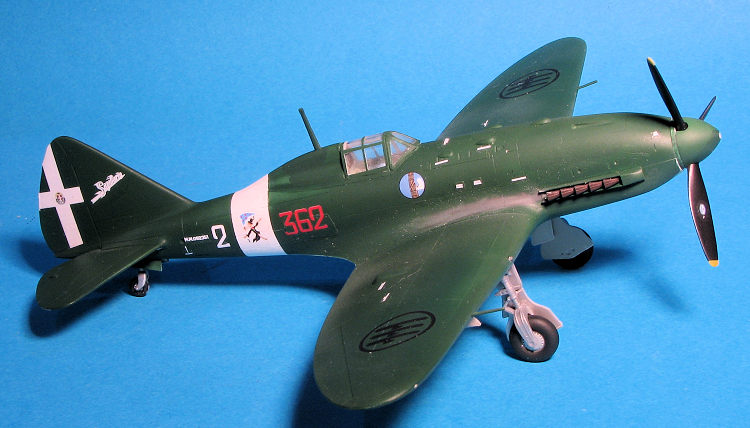
Instructions are a color booklet that provides Gunze and generic color information. There are four markings options, all of which are dark green over light grey. Two are with 362a Squadriglia in June of 1944 with the R.A. One is with the ANR in October of 1943 and the fourth is a German aircraft with JG 77 in October 1943.
| CONSTRUCTION |
 Looking over the instructions, I first decided to paint
everything I could while it was on the sprues. I started with LifeColor Italian
Interior Green, a water based acrylic. The paint sprayed on nicely and dried
quickly. Looking through the instructions again, I noticed that many of the
items I painted interior green (gear wells, inner gear doors) were supposed to
be painted aluminum. Well, no problem. I simply painted over the green with
Alclad II duralumin, which is a bit darker than their standard aluminum.
Looking over the instructions, I first decided to paint
everything I could while it was on the sprues. I started with LifeColor Italian
Interior Green, a water based acrylic. The paint sprayed on nicely and dried
quickly. Looking through the instructions again, I noticed that many of the
items I painted interior green (gear wells, inner gear doors) were supposed to
be painted aluminum. Well, no problem. I simply painted over the green with
Alclad II duralumin, which is a bit darker than their standard aluminum.
I started with a motor tool and sanding drum to remove the aft cockpit alignment section as noted in the instructions. At the same time, I also sanded down many of the small ejector towers in the fuselage halves that I thought would interfere with fit. The first actual gluing was when I glued the wheel halves together. Then I started building up the main gear wells. Each of these wells has 14 pieces, which includes the main gear leg and its ancillary struts. The design of the main gear legs is such that they cannot be added later. Care has to be made to ensure that all the parts fit perfectly or you won't be able to get the wing halves closed when the wells are installed. This is especially true after the leg, gun and other retraction shaft are installed. When you put those three items in place, then immediately attach the other well wall as you may need to open a hole or two a bit wider for these parts to fit through. I can't stress enough how important it is to remove ALL mold seams and sprue nubs if you want a good fit.
Once both wheel wells were completed, they were painted once more with Alclad II duralumin and the guns picked out in Vallejo gunmetal. They then were cemented into the lower wing. Meanwhile, the cockpit was assembled. One has to take care when doing this as some parts are handed. I also found that I had to cut a notch in the left hand seat attachment piece in order to get the seat adjustment handle to fit properly. I also built up the tail wheel assembly minus the one fork and tail wheel, and glued that in place.
 When the cockpit was fully assembled, then came the issue of
installing it. I first tried to glue it to one half of the fuselage then after
the glue had set, attach the other fuselage half. That really didn't work out
too well as I couldn't get everything to fit in place. This was especially true
of the head rest and the side panels. Then I assembled the fuselage halves and
just tacked in the lower part of the side panels. It was a real bear getting the
rear bulkhead in place, but finally it was squirmed into place. Still not with a
good head rest fit and the side panels didn't fit all that well, but it was
close enough. I used super glue and clamps for the side panels. For the head
rest, I also used super glue and accelerator to get it to fit in place. The
upper cowling insert was also a tad too small, so again, remedial action was
needed.
When the cockpit was fully assembled, then came the issue of
installing it. I first tried to glue it to one half of the fuselage then after
the glue had set, attach the other fuselage half. That really didn't work out
too well as I couldn't get everything to fit in place. This was especially true
of the head rest and the side panels. Then I assembled the fuselage halves and
just tacked in the lower part of the side panels. It was a real bear getting the
rear bulkhead in place, but finally it was squirmed into place. Still not with a
good head rest fit and the side panels didn't fit all that well, but it was
close enough. I used super glue and clamps for the side panels. For the head
rest, I also used super glue and accelerator to get it to fit in place. The
upper cowling insert was also a tad too small, so again, remedial action was
needed.
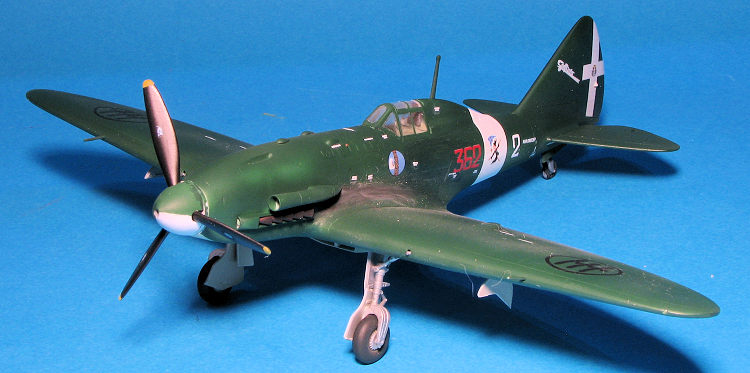
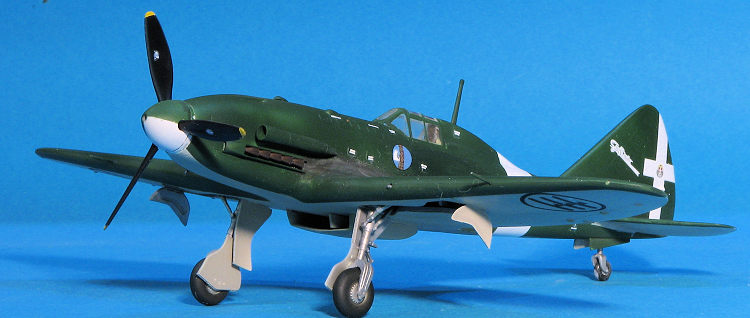
Once done, I attached the lower wing. Fit is fair, though there were steps at the front and rear that needed attention. The upper wing halves were then glued in place. Fit was again, just fair as the leading edges needed some work, though the roots fit almost perfectly. I then glued in the aftermarket resin exhaust housings, which were a perfect fit. The lower radiator was next that that needed a bit of work as well as it didn't fit perfectly on the sides. However, filler, files and various grades of sandpaper took care of that issue.
Next up was the resin intake, which fit quite well once removed from the resin block. Same with the exhaust housings. I then used the Special Hobby masks and did the clear parts. In order to get the canopy to fit, I had to sand down on the headrest area. With the clear bits in place, it was time to consider painting.
| COLORS & MARKINGS |
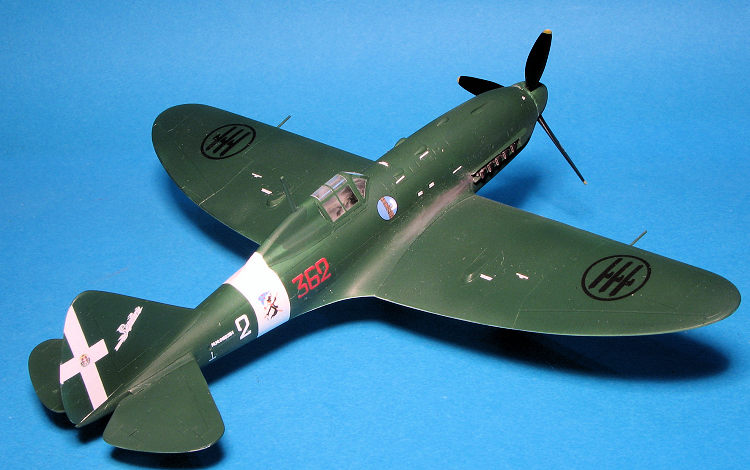
 All of the options are in a very dark green over a light
grey. There is wraparound on the wings and tailplanes to deal with. I used Lifecolor
paint for both shades. Note that later I had to do some brush touchup. The light
grey was too dark when brushed on, though the dark green worked well enough.
All of the options are in a very dark green over a light
grey. There is wraparound on the wings and tailplanes to deal with. I used Lifecolor
paint for both shades. Note that later I had to do some brush touchup. The light
grey was too dark when brushed on, though the dark green worked well enough.
With the paint on, the airframe was provided with some clear gloss (what passes for Future nowadays). I removed the masking from the main gear and attached the wheels and gear doors. Same with the tail gear. For decals, I chose one of the two R.A. schemes. Decals are such that they are ready to come off the backing paper in a few seconds. If you wait too long the glue will dissipate so be advised. I used Microsol setting solution and it worked well enough for most instances. Mr. Mark Softer was used for the tail markings where they wrapped around the fin. There are a considerable number of stencil markings as well, so decalling took a bit of time.
With all that stuff in place, I attached the wheels and gear doors. This was followed by the guns, pitot tubes and a set of CMK resin exhaust that I'd painted with Alclad II. The prop was assembled and glued in place followed by the radio mast. A bit more painting and then a clear matte coat was applied. Finally, the masking was removed and a bit of exhaust stain was added.
| CONCLUSIONS |
 This one went together fairly well as Special Hobby
kits go. The resin bits added some nice additional detail and masks are always
nice to have around. I wasn't that jazzed about the decals as they have a fair
amount of clear around them and I had some silvering issues. I also found that
they were ready to come off the backing within seconds of getting wet and that
the glue dissipated quite rapidly. Still, now that it is done, it is nice to
have this one in my collection.
This one went together fairly well as Special Hobby
kits go. The resin bits added some nice additional detail and masks are always
nice to have around. I wasn't that jazzed about the decals as they have a fair
amount of clear around them and I had some silvering issues. I also found that
they were ready to come off the backing within seconds of getting wet and that
the glue dissipated quite rapidly. Still, now that it is done, it is nice to
have this one in my collection.
| REFERENCE |
https://en.wikipedia.org/wiki/Reggiane_Re.2005_Sagittario
28 January 2022
Copyright ModelingMadness.com. All rights reserved. No reproduction in part or in whole without express permission from the editor.
If you would like your product reviewed fairly and fairly quickly, please contact the editor or see other details in the Note to Contributors.