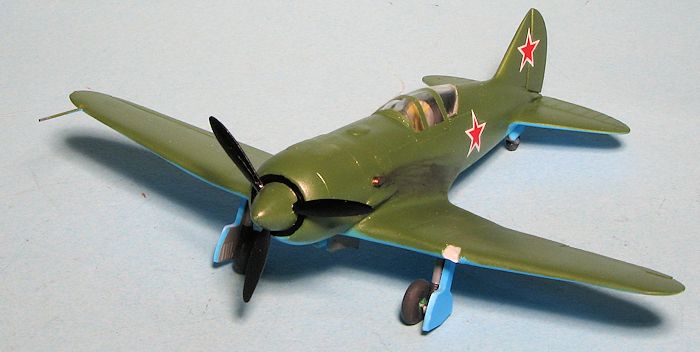
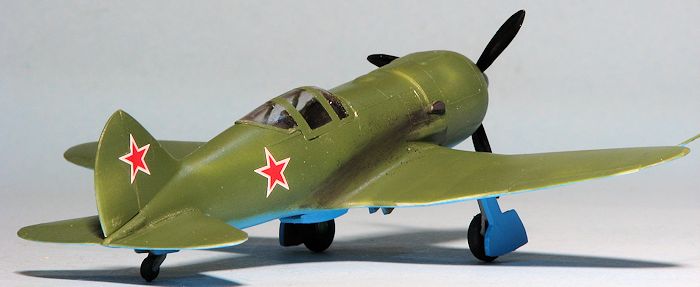
Model Russia 1/72 Polikarpov I-185
| KIT #: | RM 7201 |
| PRICE: | $ |
| DECALS: | Red stars |
| REVIEWER: | Scott Van Aken |
| NOTES: | Short run |
| HISTORY |
The I-185, designed in early 1940, was based on the I-180, which was itself a
development of the I-16, but was virtually a new design. The monocoque fuselage
was similarly built of 'shpon', molded birch plywood, and also had an integral
tailfin, but it was considerably longer than that of the I-180. The two-spar,
all-metal wing was smaller and thinner than the I-180's wing, nearly as thin as
that of the Supermarine Spitfire's wing at 13% at the root and tapered to 8% at
the wing tip. The wing had a NACA-230 profile and was skinned in duralumin.
Pneumatically powered split flaps and leading edge slats were fitted. The outer
wing panels had 3° of
 dihedral. The fabric-covered control surfaces were framed
in duralumin. The protected 540-litre (119 imp gal; 143 US gal) fuel tanks were
mounted between the wing center section spars. The I-185 used a conventional
undercarriage with a retractable tailwheel. The unproven 1,492 kW (2,000 hp)
18-cylinder, two-row Tumansky M-90 radial engine was carried on welded steel
tubes. It was fitted with a ducted spinner to improve cooling with the air
expelled through gills as in the I-180 to provide additional thrust. The
synchronized armament was mounted in the fuselage, two 7.62 mm (0.300 in) ShKAS
machine guns and two 12.7 mm (0.50 in) Berezin UBS machine guns. A 500-kilogram
(1,100 lb) bomb could be carried under overload conditions. The first prototype
was completed in May 1940, but the only available example of the M-90 did not
provide enough power for take-off. The prototype was modified to use another
experimental engine, the 895-kilowatt (1,200 hp) Shvetsov M-81 radial, but this
was not nearly powerful enough for flight tests. The I-185 (M-81) finally took
to the air on January 11, 1941, but it was decided not to waste further
development and await a more powerful engine which was fortunate as the M-81 was
cancelled in May 1941.
dihedral. The fabric-covered control surfaces were framed
in duralumin. The protected 540-litre (119 imp gal; 143 US gal) fuel tanks were
mounted between the wing center section spars. The I-185 used a conventional
undercarriage with a retractable tailwheel. The unproven 1,492 kW (2,000 hp)
18-cylinder, two-row Tumansky M-90 radial engine was carried on welded steel
tubes. It was fitted with a ducted spinner to improve cooling with the air
expelled through gills as in the I-180 to provide additional thrust. The
synchronized armament was mounted in the fuselage, two 7.62 mm (0.300 in) ShKAS
machine guns and two 12.7 mm (0.50 in) Berezin UBS machine guns. A 500-kilogram
(1,100 lb) bomb could be carried under overload conditions. The first prototype
was completed in May 1940, but the only available example of the M-90 did not
provide enough power for take-off. The prototype was modified to use another
experimental engine, the 895-kilowatt (1,200 hp) Shvetsov M-81 radial, but this
was not nearly powerful enough for flight tests. The I-185 (M-81) finally took
to the air on January 11, 1941, but it was decided not to waste further
development and await a more powerful engine which was fortunate as the M-81 was
cancelled in May 1941.
A second prototype was completed at the end of 1940 with a 14-cylinder, 1,268 kW (1,700 hp) Shvetsov M-82A radial engine. The forward fuselage had to be redesigned to accommodate the slimmer engine and the armament was revised to three synchronized 20 mm (0.79 in) ShVAK cannon. The drawings for this engine installation was passed to Lavochkin and Yakovlev where they proved very useful in designing their own fighters using the M-82 engine, notably the Lavochkin La-5. A third prototype was also built that used the larger and heavier Shvetsov M-71 radial engine of 1,492 kW (2,000 hp). The flight tests of both of the latter versions were interrupted by the German invasion in June 1941 and all three prototypes, plus the Polikarpov design bureau, were evacuated to Novosibirsk.
Flight testing resumed in early 1942 and the M-71-powered versions, which now
included the re-engined first prototype, proved to be faster than the
Messerschmitt Bf 109F by 47 km/h (29 mph) at sea level and 20 km/h (12 mph) at
6,000 metres (19,685 ft) with a top speed of 630 km/h (390 mph) at that
altitude. It was recommended for immediate production, even before it began
combat trials in November 1942. All three aircraft were assigned to the 728th
Fighter Aviation Regiment of the 3rd Air Army of the Kalinin Front and were
tightly controlled to prevent the loss of the prototypes. For example, all
sorties had to be flown over S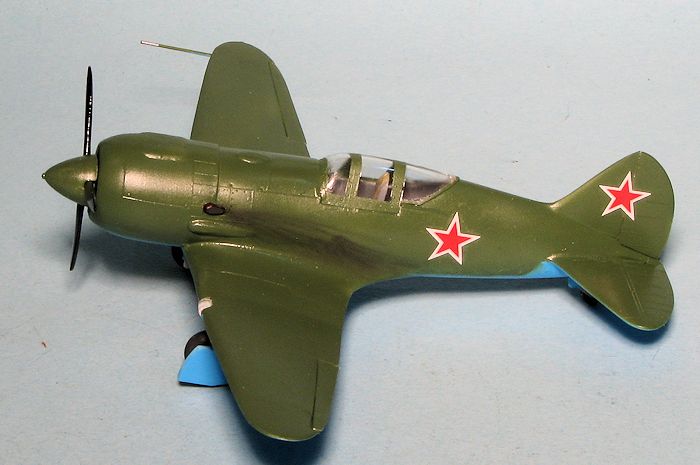 oviet-controlled territory and required the
express permission of the 3rd Air Army staff to fly. Pilots' reports were quite
enthusiastic; the 728th's commander, Captain Vasilyaka wrote: "The I-185
outclasses both Soviet and foreign aircraft in level speed. It performs
aerobatic maneuvers easily, rapidly and vigorously. The I-185 is the best
current fighter from the point of control simplicity, speed, maneuverability
(especially in climb), armament and survivability."
oviet-controlled territory and required the
express permission of the 3rd Air Army staff to fly. Pilots' reports were quite
enthusiastic; the 728th's commander, Captain Vasilyaka wrote: "The I-185
outclasses both Soviet and foreign aircraft in level speed. It performs
aerobatic maneuvers easily, rapidly and vigorously. The I-185 is the best
current fighter from the point of control simplicity, speed, maneuverability
(especially in climb), armament and survivability."
Based on the glowing report by the NII VVS (Naoochno-Issledovatel'skiy Institoot Voyenno-Vozdooshnykh Seel—Air Force Scientific Test Institute) in early 1942 preparations began to put the I-185 (M-71) into production. A 'production standard setter (etalon)' aircraft was built in April 1942 with a redesigned engine cowling. Its gross weight increased by 144 kg (317 lb) over the earlier prototypes, but the reduction in drag from the new cowling was significant and the top speed increased to 650 km/h (400 mph) at 5000 meters. It underwent manufacturer's tests between June and October and was submitted for the State acceptance tests on 18 November. However, flight testing was interrupted by the need to replace the engine between 17 December 1942 and 26 January 1943. The new engine failed the next day and the aircraft crashed on 27 January. Flight tests were ordered to be continued with the original prototypes to validate the range figures, but the first prototype crashed on 5 April, killing the pilot as he attempted a dead-stick landing.
All work to put the I-185 into production was cancelled afterwards, even with the M-82 engine, as they were all required for the La-5 fighter. Another reason cited was that the La-5 used the fuselage of the Lavochkin-Gorbunov-Goudkov LaGG-3 which was already in production in three plants and would involve less disruption of the production lines. Another factor may have been that the La-5 required less duralumin to build, something in short supply at the time.
| THE KIT |
I have had this Model Russia kit for many, many years, but have never
bothered to open it up. I think this is the same kit that has been boxed by
Model Art. The kit came in a header bag (albeit a long one) and is molded in
white plastic. There are two white sprues of plastic and one of clear, the
latter being for the single-piece canopy and the landing lights. Detail is of
the raised panel line type, but since this was basically a
 wooden aircraft, this
won't be much of an issue.
wooden aircraft, this
won't be much of an issue.
The cockpit is a floor and a seat. No control stick, no rudder pedals, no sidewall detail. An instrument panel fits into one fuselage half before closed things up. Landing gear legs are very thick and they seem to be molded in the extended position. Equally thick is the tail wheel assembly and the wheels seem more like balloon type than real wheels.
The wing is in five sections with a central lower piece onto which overlaps the upper wing halves. The wing tips are molded in with the lower wings, something that is a bit different as it will put the seam on the top side. Not much else left aside from a thick one-piece canopy and single piece tail planes. There are separate ailerons and a separate rudder. The kit has flash on several of the parts and I noticed some mold misalignment for the tail gear.
The instructions are basically an exploded view on the back of the box with a set of stars for insignia. The aircraft was green over light blue with no unit markings of any kind. The decal sheet looks to be OK, but I'd have back-up insignia just in case.
| CONSTRUCTION |
I started by removing many of the larger parts from the sprue. All needed
cleaned up and had some flash somewhere on the part. The first thing I did was
glue the seat to the cockpit floor. No control stick makes me feel like this
plane was part of some secret Soviet mind control program where a pilot's brain
waves were used to control the aircraft. A chuck of stretched sprue was used to
simulate the control stick. I then cleaned
 up the wing sections and started
gluing the outer wing panels together. Thanks to the relatively soft plastic,
gluing these bits was easy.
up the wing sections and started
gluing the outer wing panels together. Thanks to the relatively soft plastic,
gluing these bits was easy.
I then painted all of the interior bits, save the instrument panel, in dark gull grey. This included the fuselage interior and the top of the inside of the center wing section. There is no forward bulkhead to the cockpit nor is there anything behind the pilot's seat. I could have made stuff for it, but I wanted to build this one out of the box.
No surprise that the fuselage halves were warped, but nothing major that couldn't be handled with glue and tape. The seat had belts made from tape added and when test fitting, I noticed the seat was way too high when the interior was placed on its side supports. Now when placed under them, things looks more normal. But first the fuselage. I glued the rear section together and let it dry. One has to determine what features are more important as the fuselage halves are not complete mirror images of each other. Where things line up in one place, they are off in another. Eventually the cockpit was installed and the fuselage halves glued together.
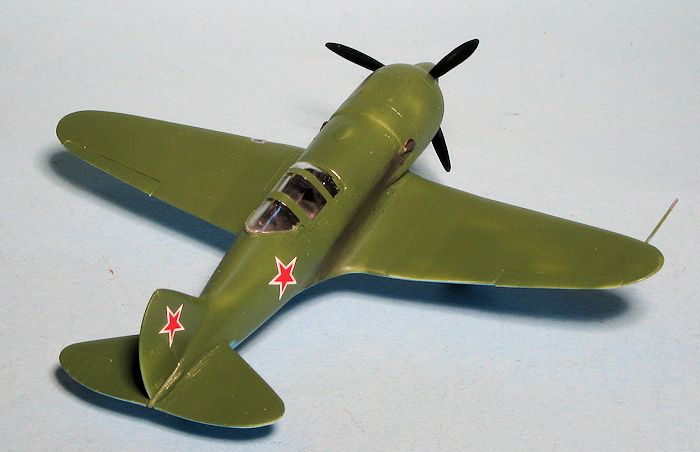
 After the usual sanding and filler, the lower wing
center section as well as the tailplanes and rudder were glued on. I was
expecting a poor fit of the outer wing sections and was not disappointed.
However, it is nothing that filler and sanding cannot cure and so it was done,
despite some rather major gaps and overhangs where supposedly matching mating
surfaces did not correspond with each other.
After the usual sanding and filler, the lower wing
center section as well as the tailplanes and rudder were glued on. I was
expecting a poor fit of the outer wing sections and was not disappointed.
However, it is nothing that filler and sanding cannot cure and so it was done,
despite some rather major gaps and overhangs where supposedly matching mating
surfaces did not correspond with each other.
I then attached the inner gear doors and the tail wheel doors. There is no tail wheel well, as you'd probably expect from what is a semi-crude short run kit. After some trimming of the opening, I got the clear bit to fit fairly well, though there are still some gaps. The canopy was masked and glued in with the gaps filled with clear paint.
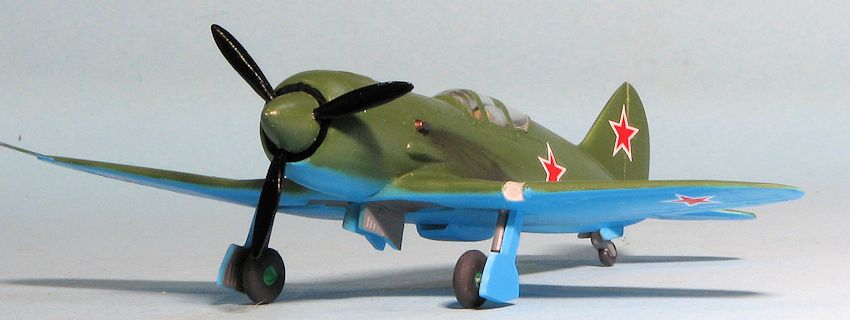
| COLORS & MARKINGS |
For painting, I used some Tamiya Sky Blue for the
underside. This is a rather intense blue and while close to what was actually
used, could stand to be lightened a bit. However, this is not a high buck kit
and since it is a
 bit of a dodgy fit anyway, I couldn't see getting too pedantic
about it. The upper surface was painted with ColourCoats AMT-4 Olive green. I
then gave the airframe a coat of semi-gloss in preparation for the decals.
bit of a dodgy fit anyway, I couldn't see getting too pedantic
about it. The upper surface was painted with ColourCoats AMT-4 Olive green. I
then gave the airframe a coat of semi-gloss in preparation for the decals.
Some time during the build the kit decals disappeared. These have thin black outlines. As luck would have it, I don't have much in the way of spare Soviet star decals in this scale so was left with choosing between a couple of SIGA sheets. One has a relatively broad white outline and the other adds a red outline to that. I chose the white outline ones and while not strictly correct, do look the part. Apparently these planes carried no other markings aside from insignia.
| FINAL CONSTRUCTION |
With the painting and decaling done. I painted the
front of the fuselage black as there is no engine detail. I added the tail wheel
then looked to attach the main gear. Thanks to the quality molding, there were
no wheel axle stubs. I drilled a couple of holes in the gear and inserted short
lengths of paper clip (#65 drill bit works well for these). The mounting holes
were far too small for the thick gear attachment tabs so, using a #49 drill
 bit,
opened the wing holes and glued the gear in place, matching the rake of the gear
doors. With the gear in place, the wheels were glued on.
bit,
opened the wing holes and glued the gear in place, matching the rake of the gear
doors. With the gear in place, the wheels were glued on.
Meanwhile the prop and spinner were glued together and the prop shaft housing attached. Note that the little plastic ring that keeps the prop shaft from falling off is larger in diameter than the hole through which it fits so will need to be reduced in size. This was then attached to the front. It was immediately obvious that having the spinner stick out 1/8 inch from the front of the cowling was bogus. I pulled it out, removed the mounting ferrule and glued the prop/spinner directly to the front of the fuselage. The landing light was glued in after enlarging the opening in the wing for it. I also had to trim a goodly amount from the upper main gear doors to get these to fit properly. I then glued on the exhaust stubs, stretched some sprue for the pitot, removed the masking and for all intents and purposes, I was done.
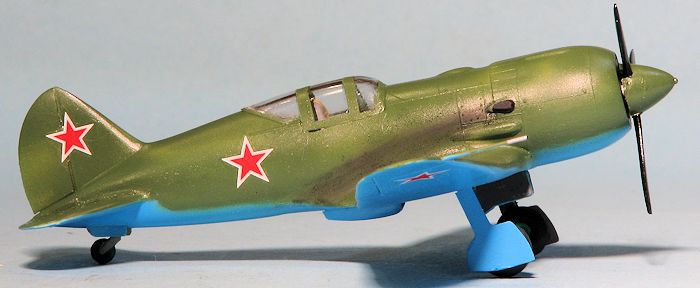
| CONCLUSIONS |
This one is very much an old time short run kit where fit is secondary and one needs to use a lot of those learned procedures from over the years to make it into something presentable. Having said that, if one wants to do a collection of Soviet prototype aircraft, then there is really no other choice aside from kits like this. It isn't impossible to build, it just isn't Tamiya.
| REFERENCES |
http://en.wikipedia.org/wiki/Polikarpov_I-185
April 2014 Thanks to me for the review kit. If you would like your product reviewed fairly and fairly quickly, please contact the editor or see other details in the
Note to
Contributors.