| KIT #: | 72021 |
| PRICE: | $16.00 |
| DECALS: | Three options |
| REVIEWER: | Scott Van Aken |
| NOTES: | Short run with photo etch parts. |
| HISTORY |
The Yakovlev Yak-1 (Russian: Яковлев Як-1) was a World War II Soviet fighter aircraft. Production began in early 1940. It was a single-seat monoplane with a composite structure and wooden wings.
The Yak-1 was manoeuvrable, fast and well armed, and it was easy to maintain and reliable. It formed an excellent basis for subsequent developments from the Yakovlev bureau. It was the founder of a family of aircraft, with some 37,000 being built. As a reward, designer Alexander Yakovlev was awarded the Order of Lenin (Russian: Орден Ленина, Orden Lenina) - the highest decoration bestowed by the Soviet Union - a 100,000 ruble prize, plus a Zis motor car.
 At the time of the German invasion of Soviet Union on 22
June 1941, 425 Yak-1s had been built, although many were en route or still
disassembled. 92 machines were fully operational in the Western Military
Districts, but most were lost in the very first days of the war. The Yak-1 was
designed with the goal of providing direct coverage of the
Il-2
attack planes from enemy fighters. Thus, most of the air combat took place below
4,000 m (13,123 ft), at low altitudes where the Yak-1 performed the best. The
Yak-1 proved to have a significant advantage over its Soviet competitors. A full
circle turn took just 17 seconds in the Yak-1M. The MiG-3, which had the best
high-altitude performance, did poorly at low and medium altitudes, and its light
armament made it unsuitable even for ground attack. The LaGG-3 experienced a
significant degradation in performance (as much as 100 km/h/62 mph on some
aircraft) compared to its prototypes due to the manufacturer's inexperience with
its special wooden construction, which suffered from warping and rotting when
exposed to the elements. The Yak-1's plywood covering also suffered from the
weather, but the steel frame kept the aircraft largely intact.
At the time of the German invasion of Soviet Union on 22
June 1941, 425 Yak-1s had been built, although many were en route or still
disassembled. 92 machines were fully operational in the Western Military
Districts, but most were lost in the very first days of the war. The Yak-1 was
designed with the goal of providing direct coverage of the
Il-2
attack planes from enemy fighters. Thus, most of the air combat took place below
4,000 m (13,123 ft), at low altitudes where the Yak-1 performed the best. The
Yak-1 proved to have a significant advantage over its Soviet competitors. A full
circle turn took just 17 seconds in the Yak-1M. The MiG-3, which had the best
high-altitude performance, did poorly at low and medium altitudes, and its light
armament made it unsuitable even for ground attack. The LaGG-3 experienced a
significant degradation in performance (as much as 100 km/h/62 mph on some
aircraft) compared to its prototypes due to the manufacturer's inexperience with
its special wooden construction, which suffered from warping and rotting when
exposed to the elements. The Yak-1's plywood covering also suffered from the
weather, but the steel frame kept the aircraft largely intact.
The aircraft's major problem early in deployment was fuel leaks caused by failure of spot-welded fuel tanks from vibration. Also troublesome was the fact that the canopy could not be opened under certain conditions in earlier models, potentially trapping the pilot in a falling aircraft. As a result, some pilots had the sliding portion of the canopy removed altogether. The first 1,000 Yak-1s had no radios. Installation of radio equipment became common by spring 1942 and obligatory by August 1942. But Soviet radios were notoriously unreliable and short-ranged, so they were frequently removed to save weight.
Like the Rolls-Royce Merlin float carburetor-equipped engines,
the M-105 could not tolerate negative G forces which starved it of fuel.
Moreover, they suffered breakdowns of magnetos and speed governors
 and emitted
oil from the reduction shaft.
and emitted
oil from the reduction shaft.
The Yak-1 was better than the Bf 109E, but inferior to the Bf 109F - its main opponent - in rate of climb at all altitudes, although it could complete a circle at the same speed (20–21 seconds at 1,000 meters). In comparison, a Bf 109, with its automatic wing slats, had a lower stall speed and was more stable in sharp turns and vertical aerobatic figures. A simulated combat between a Yak (with M-105PF engine) and a Bf 109F revealed that the Messerschmitt had only marginally superior manoeuvrability at 1,000 meters (3,300 ft), though the German fighter could gain substantial advantage over the Yak-1 within four or five nose-to-tail turns. At 3,000 meters (9,800 ft), the capabilities of the two fighters were nearly equal, as combat was essentially reduced to head-on attacks. At altitudes over 5,000 meters (16,400 ft), the Yak was more manoeuvrable. The engine’s nominal speed at low altitudes was lowered to 2,550 rpm, and the superiority of the Bf 109F at these altitudes was reduced.
The Yak-1's armament would be considered too light by Western standards, but was typical of Soviet aircraft, the pilots preferring a few guns grouped on the centerline to improve accuracy and reduce weight. Wing guns were rarely used on Soviet fighters, and when they were used, they were often removed (as they were from US-supplied Bell P-39 Airacobras). Avoiding wing guns reduced weight and demonstrably improved roll rates (the same was true of the Bf 109F). Typical of wartime production fighters, the type was continually improved. Later types (Yak-7/9) were basically the same airframe as the Yak-1.
| THE KIT |
I'm going to go out on a limb and say that this kit is molded by Brengun, but you know otherwise, please let me know. Molding is quite good, but it is a short run kit. I found some flash on parts but really not all that much. It is apparent that there are other boxings by the crossed out bits on the sprue. Indeed, Brengun does at least two more boxings of this same base kit, one of which you may have already seen in the last few weeks.
Typical of the genre, there is an etched fret and while not
shown, there are two small resin sprues for the wheels and radiator. The photo
etch covers things like the instrument panel (and there is an acetate sheet for
instruments), the seat brace, landing gear doors, underwing panels (which takes
up a lot of the fret),
 and a floor brace. Oddly, no belts are included.
In the cockpit the seat is in two pieces and fits atop the p.e. braces that fit against the rear bulkhead. For the floor there are several sections that fit together to form this. Then this piece, the seat piece and the instrument panel piece are fit into a fuselage half, along with several sidewall boxes and the tail gear attachment point before the halves are closed. I should note that there is a lot of framework detail on the inside of the fuselage halves.
With the fuselage together, one then inserts the forward radiator piece into the lower cowling and then it and the upper cowling are attached. Tailplanes need the mounting tabs trimmed back about 75% prior to installation. On the lower wing one installs the fishhook shaped pieces to make up the main gear well and attaches all the p.e. plates to the underside. Once this is done and attached, the three piece lower radiator bath is glued on. At the back, the lower fuselage insert is put into place.
Landing gear is well done and rather complex. Gear doors are
photo etch so they are quite prototypical in their thinness. One thing I don't
like is that the exhaust stacks are separate and very small. However, these can
be attached near the end of the build as they are inserted into separate dimples
on the cowling. Wingtip lights and landing lights are provided on the clear
sprue along with a tail light housing. The cockpit
 clear bits are a windscreen,
canopy and backlight. On the 1942 build, this latter piece has the small quarter
windows we frequently associate with the Yak-1.
clear bits are a windscreen,
canopy and backlight. On the 1942 build, this latter piece has the small quarter
windows we frequently associate with the Yak-1.
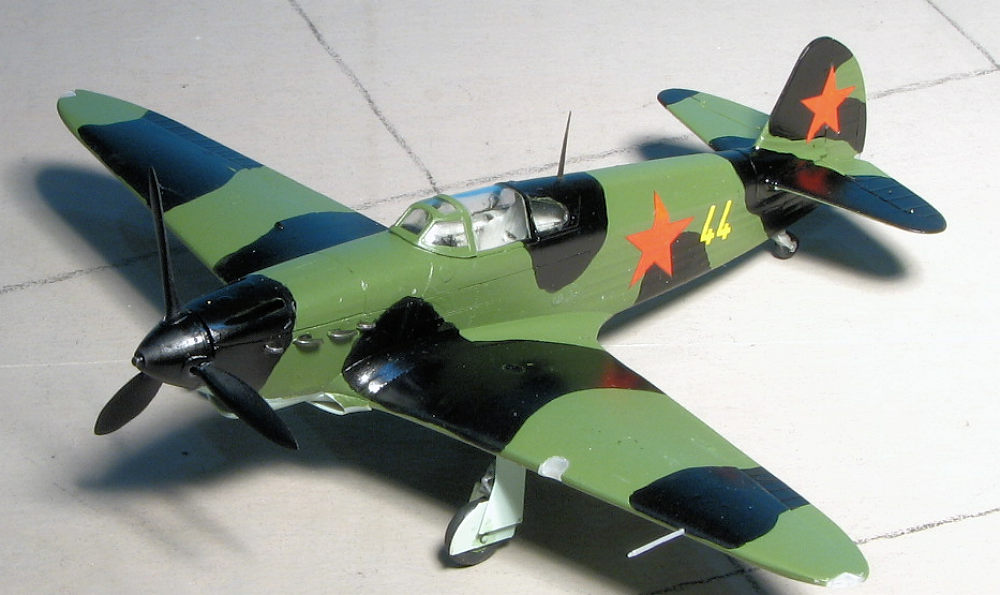
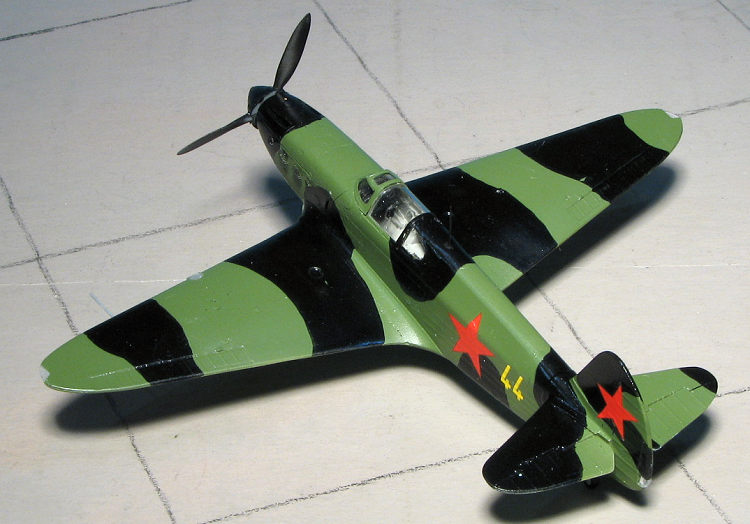
Instructions are well drawn and provide generic color information. Four markings options are provided and the painting guide on the back of the box shows them all in olive green/black over light blue. Patterns are all different and the planes differ only in the tactical number that they wear. The decal sheet is well done and should prove to be quite thin. I should mention that there are aftermarket sheets for the Yak-1 out there in case you want something a bit different.
| CONSTRUCTION |
Make no bones about it, this is a short run kit in all aspects of the term. It relies on resin and photoetch for some detail parts. The molding is fairly good, as one expects from modern short run, but every single part needs more than the usual amount of cleanup thanks to fairly thick mold seams. This includes some fairly fragile bits.
With such in front of me, I knew that this would be a long term build and indeed, it took the better part of two months to complete.
No fancy skipping through the instructions on this one. The kit started me out by working on the interior parts. The instrument panel is three parts with a photo-etch face. The seat attaches to a very flimsy backing framework and there are two very small p.e. parts on which the seat bottom attaches. The floor, as such, has a photo etch framework on which one attaches the section with the forward bulkhead and rudder pedal rails. There is also a cross piece that holds the control stick with several bottles of various sizes attached to the brass framework. I highly recommend attaching the control stick cross piece before attaching the brass framework bit or you'll find out, as I did, that the cross piece sits too high.
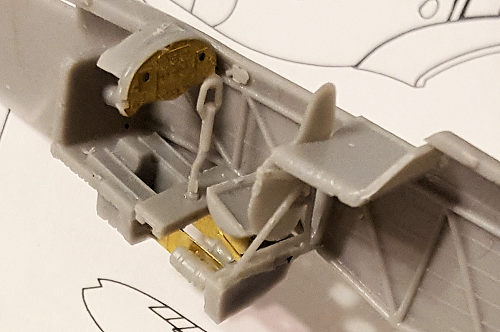 There are
miniscule pieces of some amorphous shape that fit onto the side panels. An
interesting addition are small braces that will eventually hold the tail strut
in place. These small brackets fit into depressions just above the tail wheel
opening. They are at a bit of an angle so you have to have the small part to the
rear. When fitting the fuselage halves together, I found they did not line up
properly with one being ahead of the other. I decided to fit the interior prior
to painting it as I figured there would be fit issues. There were. The
instrument panel assembly is too wide and needed filed down. Also there are no
attachment holes on the left fuselage halve for the seat back frame and those
had to be drilled. I then attached the section behind the seat. The
instructions just said to paint the interior and other inside bits with light
grey. I used FS 16440 light gull grey as I had some already mixed.
There are
miniscule pieces of some amorphous shape that fit onto the side panels. An
interesting addition are small braces that will eventually hold the tail strut
in place. These small brackets fit into depressions just above the tail wheel
opening. They are at a bit of an angle so you have to have the small part to the
rear. When fitting the fuselage halves together, I found they did not line up
properly with one being ahead of the other. I decided to fit the interior prior
to painting it as I figured there would be fit issues. There were. The
instrument panel assembly is too wide and needed filed down. Also there are no
attachment holes on the left fuselage halve for the seat back frame and those
had to be drilled. I then attached the section behind the seat. The
instructions just said to paint the interior and other inside bits with light
grey. I used FS 16440 light gull grey as I had some already mixed.
 Once the
interior had been painted and multiple dry fits showed the halves would close, I
glued the fuselage halves together. I then installed the prop shaft and put a
piece of sprue behind it so it would spin. The lower fuselage is a separate
piece and actually fit fairly well. It was then on to the wings.
Once the
interior had been painted and multiple dry fits showed the halves would close, I
glued the fuselage halves together. I then installed the prop shaft and put a
piece of sprue behind it so it would spin. The lower fuselage is a separate
piece and actually fit fairly well. It was then on to the wings.
There are shaped pieces that fit into the lower wing
for the wheel wells. These take a bit of work to actually get into place. While
there are sunken areas around the lip for these pieces, the piece requires lots
of cement and then clamping to keep from springing out of place. With those in
place, I then dry fit the upper wing halves, finding the wells
 were too tall and wouldn't let
the wing piece fit. Much sanding and test fitting followed and once the wings
were glued on, they were held in place with clamps. The very front near the
fuselage never did close all the way so those were filled with super glue and
later sanded to shape. On the underside there is no metal panel detail. That is
provided by etched inserts. These fit well, however, they end up being just a
tad proud of the surrounding surfaces.
were too tall and wouldn't let
the wing piece fit. Much sanding and test fitting followed and once the wings
were glued on, they were held in place with clamps. The very front near the
fuselage never did close all the way so those were filled with super glue and
later sanded to shape. On the underside there is no metal panel detail. That is
provided by etched inserts. These fit well, however, they end up being just a
tad proud of the surrounding surfaces.
Once that was done, I then attached the tailplanes and glued the wing to the lower fuselage. Fit is fairly good though there were small steps between the wing and fuselage. I also had to sand down the fuselage to wing fairings when test fitting the wing to get any sort of dihedral at all in the wings. Eventually I glued one side to provide the dihedral needed and then glued on the other side, holding it in place with tape until it dried.
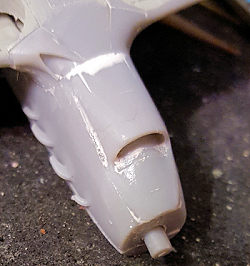 The
lower radiator bath was assembled and I needed to sand down the resin and plasic
radiator piece to get the bath housing to fit flush with the fuselage. On
the lower front cowling, the pieces fit fairly well though I found attaching the
forward radiator piece to be fussy at best. Then the upper and lower cowling
pieces were glued in place after the usual dry fitting and sanding. The upper
piece fit very well. The lower had a step between it and the forward wing piece
that required filler. I also needed filler at the front as the fit just wasn't
that great.
The
lower radiator bath was assembled and I needed to sand down the resin and plasic
radiator piece to get the bath housing to fit flush with the fuselage. On
the lower front cowling, the pieces fit fairly well though I found attaching the
forward radiator piece to be fussy at best. Then the upper and lower cowling
pieces were glued in place after the usual dry fitting and sanding. The upper
piece fit very well. The lower had a step between it and the forward wing piece
that required filler. I also needed filler at the front as the fit just wasn't
that great.
Next were the exhaust stacks. There are four very small stacks on each side that fit into depressions. These were a bit tedious to fit and I was lucky not to lose any of them during the process. I then turned my attention to the clear bits. The three piece cockpit covering is too thick to pose the canopy open. I installed the proper rear piece and found it had a step at the back. That was then filled and sanded smooth. I used this great clear cement from Japan that was recommended by Kevin Dolin and it works very well when it came to holding the transparencies in place. Once those were in place they were masked.
| COLORS & MARKINGS |
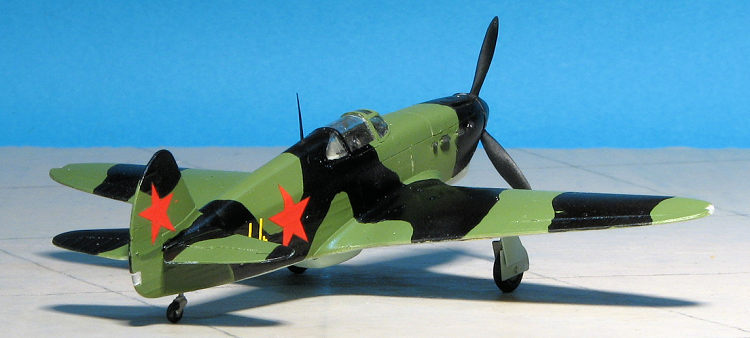
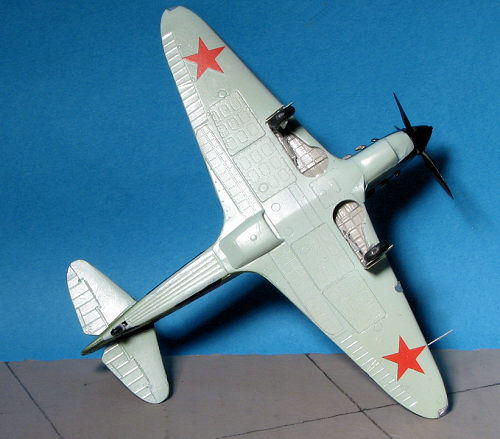
The Yak-1 was basically in black and dark green over light blue or light blue grey. I used Tamiya flat black for the black and White Ensign for the light blue grey and for the AMT-4 green. Underside first, followed by masking and the upper green. I decided to brush paint the black. Not the best choice, I came to find out later.
 With those
on, I turned to the landing gear. The main gear is somewhat complex and of
course, the actual parts look only vaguely like the highly detailed bits shown
in the instructions. The tail gear hole had to be enlarged. I had no issue
getting the main gear in place though was somewhat baffled by exactly how the
retraction mechanism was to fit. The oleos are separate and don't fit very well.
Being tiny doesn't help.
With those
on, I turned to the landing gear. The main gear is somewhat complex and of
course, the actual parts look only vaguely like the highly detailed bits shown
in the instructions. The tail gear hole had to be enlarged. I had no issue
getting the main gear in place though was somewhat baffled by exactly how the
retraction mechanism was to fit. The oleos are separate and don't fit very well.
Being tiny doesn't help.
With the gear in place, I attached the wheels, which needed the axle hole enlarged. Next were the etched gear doors. Note that the detailing should be on the outside of the doors. I got mine wrong, though it doesn't impede their fit. There are additional clear bits for the wing tip lights, tail light and the landing light. The openings are all smaller than the part so some work is needed there. These parts are also Lilliputian.
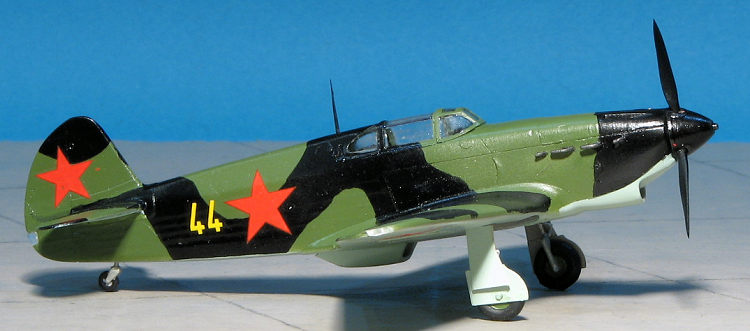
I then installed the etched radio mast and the prop. Unfortunately, the work of putting a brace behind the prop shaft was in vain as that broke away when I tried to push on the prop. For markings, I went with Balkan Models' 'Winglet 2' sheet. This features the Yak-1s of Russian female pilots. I chose the plane of Capt. Ekatrina Budanova from Autumn of 1942 and the fighting around Stalingrad. The decals are superb as are all the Balkan Models sheets I've used in the past.
Once all that was done, an overall semi-matte clear was applied and the masking removed.
| CONCLUSIONS |
This kit took me nearly two months of off and on modeling to complete. I found that while there is a lot of detail provided, some of it was quite indistinct and beyond my abilities to clean up properly. I was also somewhat frustrated by how small some of the parts were. In all, it was not an easy build. However, as most of you know, once a model has been finished, we are generally glad we put in the time to build it. It matters not that it will simply sit on a shelf with its brethren. In this hobby, it is the journey and not the destination that is the most important thing.
| REFERENCES |
I forgot to note the source, but it was probably
Wikipedia.
22 June 2018
Copyright ModelingMadness.com. All rights reserved.
If you would like your product reviewed fairly and fairly quickly, please
contact
the editor or see other details in the
Note to
Contributors. Back to the Main Page
Back to the Review
Index Page
Back to the Previews Index Page