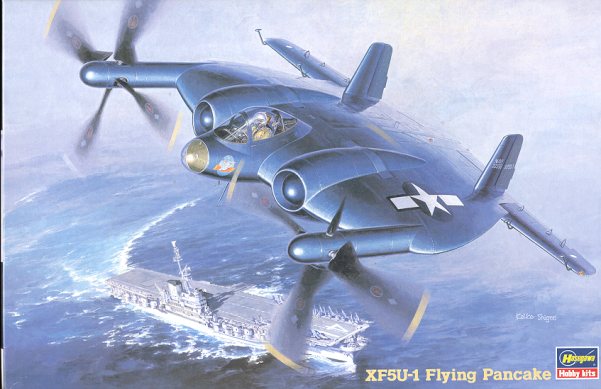
Hasegawa 1/72 XF5U-1
|
KIT # |
51563 (SP63) |
|
PRICE: |
$29.98 |
|
DECALS: |
One aircraft |
|
REVIEW : |
|
|
NOTES: |
` |
|
BACKGROUND |
To read a brief history and take a peek at what is in the box, read the preview.

|
ALTERNATE HISTORY |
It is January, 1953. The cold winds blow out of Siberia and the chill cuts through the thin tents of the men of the VMF(N)-513 at their base just south of the Yalu River, which the Chinese had yet to re-cross after being forced back across it in mid-1952. It has been four months since their squadron was called to do its time near the front lines in support of UN troops and for the first time in his Marine career, Capt. Arthur 'MadDog' Jamison was seriously wondering why he hadn't taken a commission in the Navy so he'd be on a nice, warm aircraft carrier. Coming from a Marine family, it would have been a major blow to his father if he'd made any other choice.
One thing for certain, he was in probably the most interesting aviation unit in the Corps. Of the twenty-four aircraft in the unit, there were four different types. Seven each of F4U-5Ns, F7F-3Ns, F3D-1s and three F5U-1s. He was an F5U pilot. 513 was basically a night fighting squadron. They covered the full range of available aircraft to cover nearly any Chinese type that may be sent in after dark. The other planes were for the usual Mig-15s and La-11s, but the F5U was here for one reason only; Bedcheck Charlie.
These throwbacks to the First World War were Polikarpov Po-2 biplanes with noisy 5 cylinder radial engines. Their sole purpose in life was keep the troops awake and generally make life miserable for the UN troops. They tossed a few small bombs and shot things up with whatever the crews would be carrying. Not enough to do any real damage (unless they got a lucky hit at an ammo or fuel dump), but enough to make them a total pain. The other aircraft were too fast to catch these guys as the Po-2s could stooge around at 35-40 knots and turn on a dime. For the Corsairs and Tigercats to get one was a real feat. For the Skyknights, it was nearly impossible.
 However, the F5U (or
'Flying Cow Pie' as many called it), was a
natural for this mission. It was able to nearly hover in a 20 knot headwind and
could easily turn with the Po-2s. The real trick was to find them. The F5U
didn't carry a standard radar as was the norm with the other planes but an
experimental infrared radar set that homed in on the heat given off by the
intruder. This was thought to be a much better way of locating the planes as
they tended to fly too low for normal radars to get a good lock. However, the
system was really quite experimental and getting it to function long enough to
find the Po-2s was a problem.
However, the F5U (or
'Flying Cow Pie' as many called it), was a
natural for this mission. It was able to nearly hover in a 20 knot headwind and
could easily turn with the Po-2s. The real trick was to find them. The F5U
didn't carry a standard radar as was the norm with the other planes but an
experimental infrared radar set that homed in on the heat given off by the
intruder. This was thought to be a much better way of locating the planes as
they tended to fly too low for normal radars to get a good lock. However, the
system was really quite experimental and getting it to function long enough to
find the Po-2s was a problem.
The Raytheon techs had just installed a new modification to the set in his bird that he was promised would be an improvement and Jamison was anxious to give it a try. He had managed to knock down only two of these pests in the four months he'd been here and was hoping to get at least three more before his tour was over. He had a great deal of faith in the airframe and was really surprised that the no more than the 36 made had been built. However, the Navy wanted to go all jet like the Air Force and only operated the F5U for two cruises before pawning the planes off on the Marines. The Corps didn't know what to do with them so they were given to a reserve unit at Anacostia where the helicopter-like performance was perfect for that short runway. Once the Bedcheck Charlie problem became out of control, several were farmed out to the various night fighter units and that is where he came into the picture.
Around midnight it was his turn to go up and await the nightly rounds of the pests. He climbed up the back of the fuselage and hopped over the canopy into the cockpit. It took a bit of athletic ability and he had fallen off once, much to the amusement of the ground crew. Once he got himself strapped in, he started up the engines and then engaged the props. Gearbox problems had been an early concern as had engine cooling, but both of those had been taken care of and it was the IR radar that was getting all the current attention.
'Mad Dog' slowly taxied out of the revetment and once on the taxiway, increased engine speed. He was airborne in less than a hundred yards. A real trick to this plane was to not give it too much throttle on the ground or the tail would come up too quickly and the props would dig into the dirt. That would generally trash the gearbox and get the pilot a major butt-chewing from the Maintenance Officer and the Ops Officer.
 Once in the air, he
proceeded to his patrol area. The F5U was a
pretty quiet aircraft and able to fly at extremely slow speeds. Thanks to those
huge windmills on either side of him, the control surfaces always had a wind
over them and were extremely responsive. If he had to go fast, the plane was
capable of nearly 300 mph, but speed wasn't its forte.
Once in the air, he
proceeded to his patrol area. The F5U was a
pretty quiet aircraft and able to fly at extremely slow speeds. Thanks to those
huge windmills on either side of him, the control surfaces always had a wind
over them and were extremely responsive. If he had to go fast, the plane was
capable of nearly 300 mph, but speed wasn't its forte.
After a couple of hours of general stooging around, he got a call from the ground that a suspected Charlie was just a few miles from his position. Jamison turned on the IR radar to give it time to warm up. It seemed to reach operating temperature a lot faster than before. The image on his CRT was also much clearer than before. He could see livestock in the fields and the roads where the heat of the day and traffic had not yet cooled them off. Downside of the system was that it only showed what was in a cone of about 15 degrees. It could be manually steered plus or minus 45 degrees, but it took time and in combat it was best just to leave it locked straight ahead.
While he was fiddling with it, ground control let him know that Charlie was about a mile to his right. Jamison turned and started scanning the sky for his intended victim. He did this by moving the control stick in small circles. This caused the aircraft nose to move in this way and effectively increased the diameter of the IR cone. Just off to the left he saw a rather large hot spot. He steadied his F5U on the target and slowly headed towards it.
As he got closer, he noticed that this wasn't the usual image he had gotten before on his scope and called ground control to verify that this was his target. He got a reply that it must be as it wasn't responding to IFF and no UN aircraft other than himself was in the area. As he closed in on the target, it must have spotted him as it flew straight up! A helicopter! It was the first time he had heard of the Chinese using one of these things. This was going to make things interesting. He slowed the plane down to try to match speed with the helo. Every time he got the helo in his sights, he pulled the trigger and watched his bullets miss the helo as it swerved and ducked up and down. Even his attempts as slow flight were unsuccessful as the enemy spotted him and started maneuvering away.
 After about ten minutes of this, he had to think of something
else. He broke contact with the Charlie and made as to go away from him. After a
few miles, he headed for the deck and turned around. Remarkably, his IR set was
still functioning so he was able to keep pretty close to the deck. He switched
frequencies and asked ground control where the helo was located. The reply he
got was that it was headed north from its last known position. Mad Dog started
heading that way and rotating the stick as before.
After about ten minutes of this, he had to think of something
else. He broke contact with the Charlie and made as to go away from him. After a
few miles, he headed for the deck and turned around. Remarkably, his IR set was
still functioning so he was able to keep pretty close to the deck. He switched
frequencies and asked ground control where the helo was located. The reply he
got was that it was headed north from its last known position. Mad Dog started
heading that way and rotating the stick as before.
Soon he spotted the helo at a higher altitude than he was headed for the Yalu just a few miles ahead. Jamison then got underneath the helo where he couldn't be seen and then gunned the engines while he stood the F5U on its tail. Hanging from the props, the helo was right in his cone of fire. By making small elevon and rudder adjustments, he was able to point the nose at the helo. A long burst from his four 20mm cannon was enough to turn the enemy helo into a ball of fire that lit up the whole area around it. He quickly pushed the stick and throttle forward to get out from under the rain of burning debris. As he leveled off, he looked at his scope. Apparently the fireball was too much for the IR detectors and it had effectively blanked the screen. Happy that the set had actually stayed functional for so long and remembering to get the Raytheon techs drunk in gratitude, he turned off the set. As he made his way back to base, Capt. 'Mad Dog' Jamison was happy to have knocked down number three and glad that he was flying one of the most interesting and soon to be most effective Charlie-killers of the war.
|
CONSTRUCTION |
As with most kits, construction begins with the interior. The
seat, control stick, and back plate were glued together. Then this and the side
panels and instrument panel were painted with US Interior Green using a mixture
based on Testors Model Master enamel. The kit decal was applied to the
instrument panel when it was dry. Then various bits were picked out in black
and the interior washed with dirty thinner and later drybrushed. When all that
had dried, the cockpit was glued together and then installed in the lower
fuselage half. There are no really firm attachment points on the bottom so I
constantly test fit the upper fuselage half while this was going on. It is a
good idea to install the instrument panel just prior to gluing the cockpit in
place. This will insure that you get it to fit flush against the anti-glare
panel on the top fuselage half.
While the fuselage was drying, I turned my
attention to the prop hubs. These are a two piece construct. While they fit OK,
you'll find that the prop mount along the join line is offset, unlike the one
molded into the part proper. Next the back portion was attached with the prop
shaft running through it and the hub. A small plastic donut is glued onto the
end of the shaft to hold it in place. You'll have to enlarge all the holes the
shaft fits through. Then the dome is glued to the prop hub. These have a larger
diameter than the hub itself so break out the sandpaper.
Back at the fuselage, the sink marks on the underside that are
so prominent (see preview) were filled. Then the
fins were glued in place. Fit is OK, though you'll have to sand on the fins.
Like a number of the parts, it seems the molds were slightly misaligned causing
upper and lower (or left and right) halves to be offset. This is particularly
prominent in the horizontal stabilizers. These attach with no real problems, but
there is a gap on one side that will have to be filled. Like I mentioned in the
preview, you need to treat this kit like a short run kit or you'll be very
frustrated during construction. Then the prop hub assemblies were glued on.
Naturally, the prop hubs are a different diameter than the fuselage attachment
points. More filler and sanding. At this time, you'll see that the prop hubs are
also not truly centered as the holes are misaligned.
Returning to the cockpit, there is a three part roll-over
assembly that goes behind the seat. You glue two tiny braces to the back of the
seat and the roll over bar fits down between them. Attach all three pieces at
about the same time to get it properly aligned as the kit instructions are a
teeny bit vague on this step.
With the gear in place, the underside antennas were then
attached. You have to clean all of these bits up before use as the molds were
misaligned. Be careful as some of the pieces can get rather thin after cleanup.
Then the elevon mass balances were glued in place. Naturally, I lost one of
them. These are rather prominent pieces so I ended up making one out of
stretched sprue. It looks close, but isn't exactly the same as the other three.
Fortunately the dark blue paint will sort of camouflage the difference. With all
the parts glued on, the canopy was masked and attached with superglue and it was
off to get some painting done. The engine fan
parts were then glued in place and then the upper fuselage was glued on. There
are no alignment pins so you need to be quite careful when doing this. Next the
engine inlets were glued on. Fit here is terrible. It isn't that it doesn't fit
at all, but there are major gaps all around it that will need filler and sanding
and that was done.
The engine fan
parts were then glued in place and then the upper fuselage was glued on. There
are no alignment pins so you need to be quite careful when doing this. Next the
engine inlets were glued on. Fit here is terrible. It isn't that it doesn't fit
at all, but there are major gaps all around it that will need filler and sanding
and that was done. At this time, I felt that I should
glue on the landing gear prior to painting. Planes of this era had gear and
wheel wells painted the same color as the rest of the plane so this would
simplify things quite a bit. The landing gear is a rather complicated looking
arrangement that needs to be constructed all at the same time before the glue
sets to make sure all is properly aligned. I did need to drill out the mounting
holes as they were too small or shallow. The tail gear was missing one of the
axles so attaching one of the wheels there will be interesting.
At this time, I felt that I should
glue on the landing gear prior to painting. Planes of this era had gear and
wheel wells painted the same color as the rest of the plane so this would
simplify things quite a bit. The landing gear is a rather complicated looking
arrangement that needs to be constructed all at the same time before the glue
sets to make sure all is properly aligned. I did need to drill out the mounting
holes as they were too small or shallow. The tail gear was missing one of the
axles so attaching one of the wheels there will be interesting.
|
PAINT & DECALS |
Painting couldn't be simpler. Overall gloss dark sea blue. Everywhere. I used
some of the paint from my dwindling Aeromaster stash for this one and the
coverage is really super. After it had dried, the kit was returned to the
workbench. The oleos were brush painted aluminum as was the pitot head. The
plane was set aside while I worked on the props.
For decals, I turned to the spares box in general and Microscale in particular.
I wanted to do the kit in actual unit markings. Since the plane never really
flew, this is perfectly OK. I did it as a VMF(N)-513 plane from the early 1950s.
This basically meant white code letters and white insignia. I was able to get
all I needed from the spares bin and only used the serial numbers and prop
decals from the kit sheet.
FINAL BITS
Once the decals were on and dry, the last pieces were attached. These were the
wheels, the gear doors and the nose antenna with transparency. The antenna was
painted aluminum to represent the IR detector head as mentioned in the story,
while the background was left in dark blue. With IR, you don't need a shiny
metallic surface as you might with a normal radar set. The clear nose was glued
on with superglue and some touchup painting was done. The last step was to
attach a piece of clear sprue to the two ADF sense antenna posts and the kit was
done. The props are slightly misaligned as are all the parts other than the upper and
lower fuselage half. They also have large ejector mold holes that need to be
filled. Once that was done, they were painted black with yellow tips.
The props are slightly misaligned as are all the parts other than the upper and
lower fuselage half. They also have large ejector mold holes that need to be
filled. Once that was done, they were painted black with yellow tips.
|
CONCLUSIONS |
For a short run kit, it is very nice. For a Hasegawa kit, it leaves a bit to be desired. Since I have treated this as a short run kit, I'm quite pleased with the overall kit. I could have done without the mold mis-alignment of the major sprue, but it wasn't an insurmountable problem. It is up to you if you can justify the cost or if you want to put up with the build problems. One thing for sure, it will be quite unlike anything else on your display shelf!!
November 2001
Copyright ModelingMadness.com. All rights reserved. No reproduction in part or in whole without express permission from the editor.
Review kit courtesy of your editor's kit collection
If you would like your product reviewed fairly and fairly quickly, please contact the editor or see other details in the Note to Contributors.
Back to Reviews Page 2022