Hasegawa 1/48 F4U-4 Corsair
| KIT #: | 1186 (Minicraft boxing) |
| PRICE: | $6.00 or so when new |
| DECALS: | One option |
| REVIEWER: | Scott Van Aken |
| NOTES: | Ultracast wheels, Eduard belts, and Aeromaster 48-254 decals. |
| HISTORY |
The F4U-4 is the ultimate WWII variant of the Corsair. The -4 introduced a more
powerful engine, this time driving a four-bladed prop. It still had many of the
same basic airframe parts as the earlier versions, but several of those were
beefed up so that the Corsair could handle more ordnance. By the time the -4
entered service during the last year of the war, it was pretty obvious that the
days of the specialized naval bomber were numbered. The Corsair was able to
carry a heavier payload than the SB2C Helldiver and it did not need the extra
crewman. Additionally, it was much faster and if it had to defend itself, it was
more than 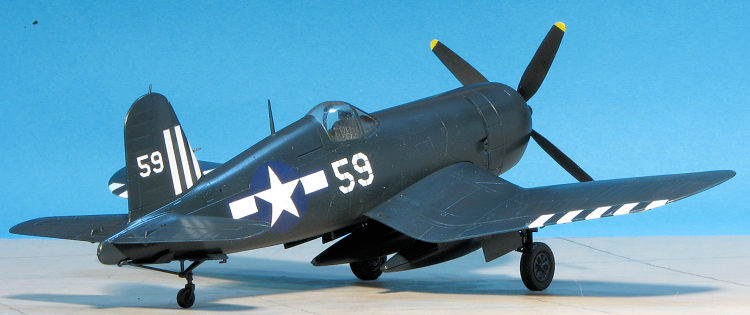 a match for most of the adversaries it had to meet. The Marines loved
the bird. It could carry a wide variety of ordnance, was fast, was rugged, and
able to operate with ease from either rough strips or aircraft carriers.
a match for most of the adversaries it had to meet. The Marines loved
the bird. It could carry a wide variety of ordnance, was fast, was rugged, and
able to operate with ease from either rough strips or aircraft carriers.
Despite the wholesale canceling of contracts that occurred at the end of World War II, the Corsair was one of the few still kept in production, albeit at a much reduced rate. The final -4 rolled off the assembly line in mid 1947, only to be supplanted by even more updated versions. When the Korean War broke out in mid-1950, there were still plenty of F4U-4s in fleet service. They continued to be used with much success in the ground attack mission until the end of the war. Jets may be faster, but the Corsair could carry a respectable load and hang around to suppress enemy troops.
After seeing military service, a number of Corsairs joined the Air Racing circuit and decades later became the prize possessions of a few lucky warbird operators. The last military use of the Corsair was during the 'Soccer War' of 1969 between Honduras and El Salvador. Both countries operated the Corsair against each other, with those of Honduras being credited with a few air to air victories.
| THE KIT |
This is one of several Mania designed kits that were put into Hasegawa's lineup after that company went out of business. In addition to several 1/72 kits, the Ki-27 and the older N1K2-J kits in 1/48 are ex-Mania models. Despite their now being considered geriatric models, these kits hold up extremely well against their more modern counterparts. Detailing is very good, even though it is of the raised panel line variety. This is the Minicraft boxing from the mid 1980s when Minicraft imported Hasegawa kits, supplying their own box and English instructions.
I have only seen this kit molded in blue and though I wish it were in medium or
light grey, it still builds into a great model. The cockpit includes a tub with
raised detail on t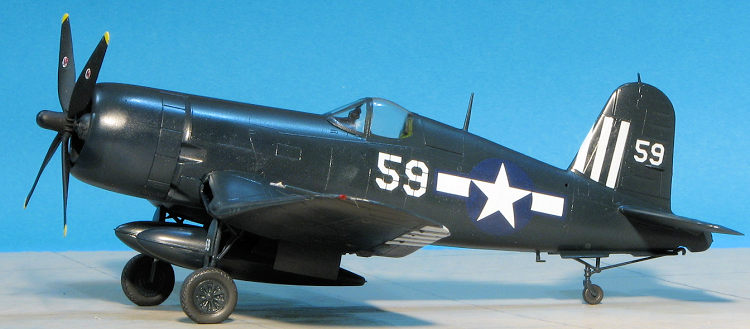 he side consoles and instrument panel. It includes a seat and
stick with an additional seat cushion; rudder pedals of sorts are molded into
the floor. The engine detail is good for its day consisting of the front bank of
cylinders on a backing plate. The pushrods are molded on the front crankcase
housing.
he side consoles and instrument panel. It includes a seat and
stick with an additional seat cushion; rudder pedals of sorts are molded into
the floor. The engine detail is good for its day consisting of the front bank of
cylinders on a backing plate. The pushrods are molded on the front crankcase
housing.
Landing gear detailing is quite good, though again, not up to modern standards. The wheel wells are a bit shallow for the main gear and non-existent for the tail wheel. There is a pilot figure. Kit includes a two-piece canopy that can be displayed open if you desire. Things under wings are limited to two drop tanks. Any bombs will have to come from the spares box. There is no provision for rockets at all, not even holes in the wings for stub launchers.
As befits a kit of this age, there are ejector pin marks on the inside of all the gear door and on the main landing gear. There are also a number on the cockpit floor which will be interesting to try to remove. However the rest of the kit is devoid of flash and the mold seams are quite small.
Instructions are well done and offer generic color references. This is one of those where you get a step by step written build sequence in addition to the diagrams. Markings are for an instrument trainer with large green bands with VMFT-20. The kit decals by this time are toast and I seriously doubt if they would be viable at all. Fortunately, there are a number of good aftermarket sets out there for the -4.
| CONSTRUCTION |
 I have never built this
kit, but others have and really don't complain that much about it. There are
aftermarket cockpits if one is so inclined and while most won't even realize
this, the builder really should replace the wheels as they are of the earlier
design. I have a set of Ultracast late style wheels (US 48190) with a diamond
tread that I'll be using. Though designed for the Tamiya kit, I see no reason
why they would not fit this one.
I have never built this
kit, but others have and really don't complain that much about it. There are
aftermarket cockpits if one is so inclined and while most won't even realize
this, the builder really should replace the wheels as they are of the earlier
design. I have a set of Ultracast late style wheels (US 48190) with a diamond
tread that I'll be using. Though designed for the Tamiya kit, I see no reason
why they would not fit this one.
I started by assembling the interior sans seat as it would be difficult to install aftermarket seat belts with it in place. The interior was painted Interior green with the side consoles and instrument panel painted black. Once the belts were installed, the interior was set aside while I worked on a few other bits. This included assembling the drop tanks. As is so often seen in kits which have tanks that display a major lip around the tanks, the sprue attachment point went onto the lip. This is on the side where you cannot simply sand it flat. I use a low speed motor tool to gently shave that down, though you can get the same result with a flat file that has a nice, sharp corner.
With the tanks done, those were painted gloss dark sea blue, using Model Master enamel, the color I used for just about all of the parts. I then went to work on the engine. This was painted and I then removed the pushrod assembly. I guess the plastic was old or something but I managed to break about half of them when cutting it free of the sprue. This added a frustration level that had the kit just sit for about a week. When I got back to it, I gathered up the snapped off rods and made the missing ones out of stretched sprue. This was then painted and attached to the engine. I then trapped the cockpit, instrument panel and engine in the fuselage halves and glued the halves together. This was followed by the forward cowling piece. I also drilled out the exhaust.
 Building the
wing was easy as it is a lower part and two upper wing halves. The oil coolers
are not the tightest fit so it is best to not attach the upper wing halves until
you are sure they are dry. I then masked and installed the windscreen with the
canopy in the closed position. Tailplanes were glued in place and then the wing.
There were some steps in the wing and in the forward cowling that needed filler.
I decided to try this water based 'perfect plastic putty' that everyone is
clamoring over. Well, it works well on the thin seams but really does not work
well when trying to fair in steps. It has a tendency to chunk and not provide a
smooth transition. It also chunks when re-engraving panel lines. It does dry
quickly, but I see no real improvement other than being water based over other
one step fillers. I'll stick with super glue for the difficult parts.
Building the
wing was easy as it is a lower part and two upper wing halves. The oil coolers
are not the tightest fit so it is best to not attach the upper wing halves until
you are sure they are dry. I then masked and installed the windscreen with the
canopy in the closed position. Tailplanes were glued in place and then the wing.
There were some steps in the wing and in the forward cowling that needed filler.
I decided to try this water based 'perfect plastic putty' that everyone is
clamoring over. Well, it works well on the thin seams but really does not work
well when trying to fair in steps. It has a tendency to chunk and not provide a
smooth transition. It also chunks when re-engraving panel lines. It does dry
quickly, but I see no real improvement other than being water based over other
one step fillers. I'll stick with super glue for the difficult parts.
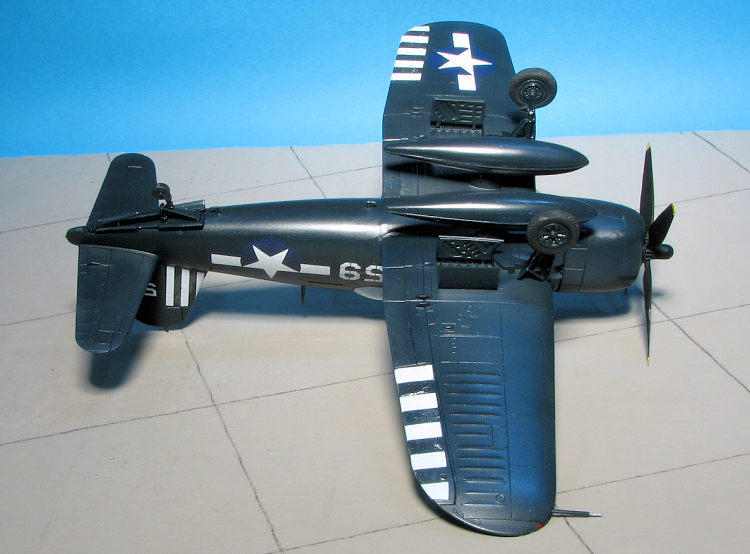
With the seams and drilling done, filled in the oil coolers and engine with Silly Putty and painted everything with the aforementioned gloss sea blue. This included the gear and doors while still on the sprue. When it was all dry, I started assembling the landing gear. The small support struts broke easily, just like the pushrods, even when using a razor blade saw. The rear gear support piece was missing from my kit. With the gear and doors all attached (I lost one of the little triangular fairings that fit on the tail gear doors), I filled in the forward antenna slot and gave the result a final spray of blue.
| COLORS & MARKINGS |
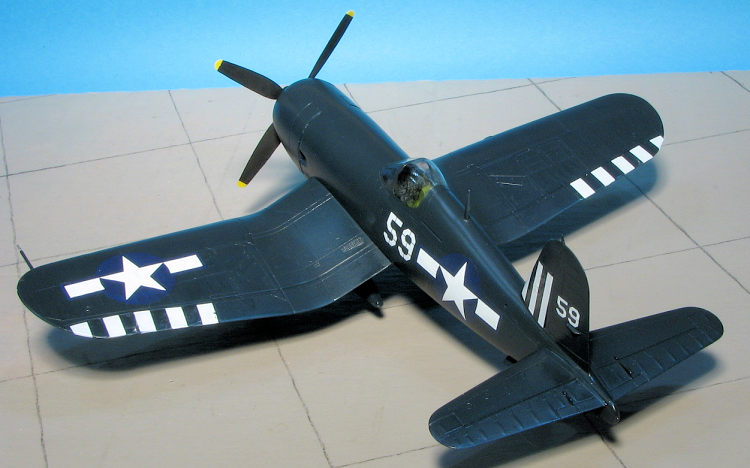
 With that all
dry, I went to the decals. The kit ones were iffy at best, so I used an old
Aeromaster sheet, #48-254, that had several late war -4s. It was really hard to
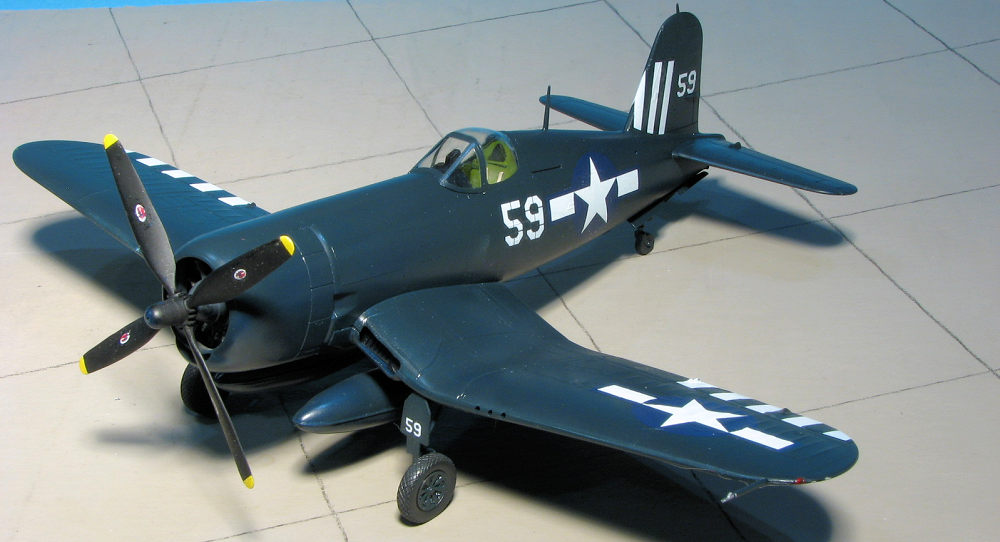
choose which scheme, but I settled on the one for VF-89 aboard the USS Antietam
in July of 1945. Despite their age, the decals went on without too much issue. I
did use the prop markings from the kit sheet and while they worked, they showed
signs of breaking up. I'm sure the kit ones would have been a disaster.
With that all
dry, I went to the decals. The kit ones were iffy at best, so I used an old
Aeromaster sheet, #48-254, that had several late war -4s. It was really hard to
choose which scheme, but I settled on the one for VF-89 aboard the USS Antietam
in July of 1945. Despite their age, the decals went on without too much issue. I
did use the prop markings from the kit sheet and while they worked, they showed
signs of breaking up. I'm sure the kit ones would have been a disaster.
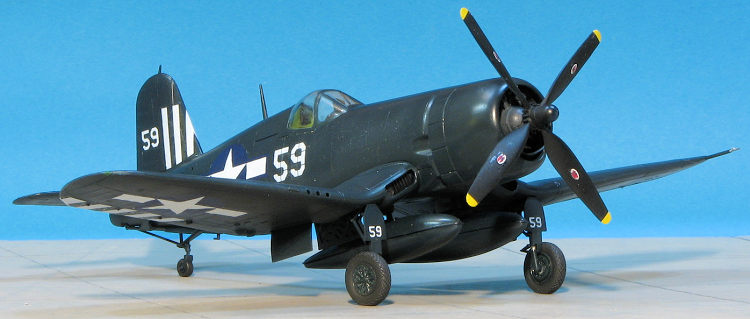
With the decals in place, I
attached the drop tanks, put a couple of gear doors back on, and installed a
pair of Ultracast resin wheels. The kit ones are OK but I had these so used
them. A coat of semi-gloss clear sealed everything in place and for the last
step, I removed the masking. No exhaust stains, no shading, just a
straight-forward build.
| CONCLUSIONS |
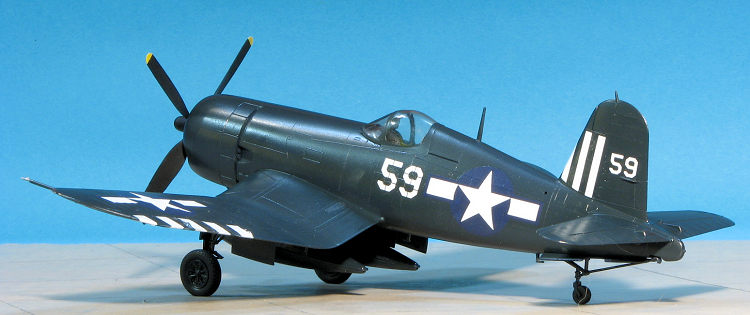 Yes, it does
have raised panel lines. So what. It makes into a nice model for one's shelf and
if you are so inclined, you can put in a lot of aftermarket parts. Perhaps the
Hobby Boss kit is better, and I know those who like the Academy version, but I
had this one and it has been around since the early/mid 1980s so I chose to
build it. I liked it so much I ordered a more recent release. Oh yes, as always
happens, I had a seam split, but did not notice it until I was done with the
photos.
Yes, it does
have raised panel lines. So what. It makes into a nice model for one's shelf and
if you are so inclined, you can put in a lot of aftermarket parts. Perhaps the
Hobby Boss kit is better, and I know those who like the Academy version, but I
had this one and it has been around since the early/mid 1980s so I chose to
build it. I liked it so much I ordered a more recent release. Oh yes, as always
happens, I had a seam split, but did not notice it until I was done with the
photos.
| REFERENCES |
4 May 2018
Copyright ModelingMadness.com. All rights reserved.
If you would like your product reviewed fairly and fairly quickly, please contact the editor or see other details in the Note to Contributors.
Back to the Main Page Back to the Review Index Page Back to the Previews Index Page