| KIT #: | 8434 |
| PRICE: | $25.00 |
| DECALS: | One option |
| REVIEWER: | Scott Van Aken |
| NOTES: | Aeromaster 48-251 decals |
| HISTORY |
The Grumman F6F Hellcat was a carrier-based fighter aircraft
developed to replace the earlier F4F Wildcat in United States Navy service.
Although the F6F bore a family resemblance to the Wildcat, it was a completely
new design powered by a 2,000 hp Pratt & Whitney R-2800. Some tagged it as the
"Wildcat's
 big brother". The Hellcat and the Vought F4U Corsair were the primary
USN fighters during the second half of World War II.
big brother". The Hellcat and the Vought F4U Corsair were the primary
USN fighters during the second half of World War II.
The Hellcat was the first US Navy fighter for which the design took into account lessons from combat with the Japanese Zero (Editor's note: this may well be urban legend stuff as the Hellcat was almost fully developed before the US was able to get its hands on a Zero or even fight them. Heck, the first prototype flew in June 1942 only six months into the war and before the Aleutian Islands Zero was recovered. What was true was the the aircraft was up-engined as it was discovered that the initial power plant did not provide the performance needed.) . The Hellcat proved to be the most successful aircraft in naval history, destroying 5,271 aircraft while in service with the U.S. Navy and U.S. Marine Corps (5,163 in the Pacific and eight more during the invasion of Southern France, plus 52 with the Royal Navy's Fleet Air Arm during World War II.) Postwar, the Hellcat aircraft was systematically phased out of front line service, but remained in service as late as 1954 as a night-fighter in composite squadrons.
| THE KIT |
I'm generally bringing up the rear when it comes to buying the latest and greatest. So it is with the Eduard Hellcat, a kit that has been out at least a year if not more. My patient waiting enabled me to grab a 'weekend' edition kit at less than the retail of the standard kit and still get just about all that was part of that package, save the photo etch. No big deal to me as it is one more thing to slow down the build, if you know what I mean.
Anyway, looking over the sprues, I was quite pleasantly
surprised by the total lack of flash on the sprues. These molds must have
cranked out tens of thousands of these kits already, yet everything looked as if
it was a first pressing. There are bits that are not used in this boxing,
including bombs and bomb racks, some gun inserts with solid blast tubes and an
instrument panel with a bla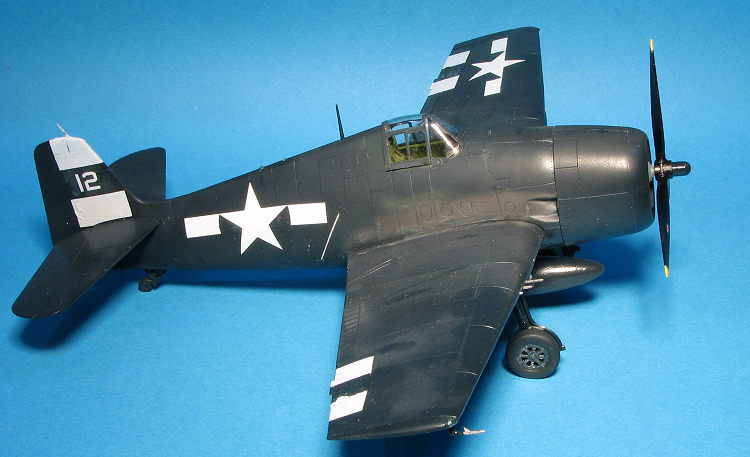 nk face on it (undoubtedly for the p.e. instrument
panel). The kit does include two types of rockets, with one type having a bulged
warhead as you see used by the British. There is also a drop tank and aside from
the elevators, all the control surfaces are separate. This includes the flaps,
but don't think you can display them down as you cannot. Same for all the other
control surfaces, they are meant to be used in the neutral position. In case you
are wondering why not provide the option to have the able to be posed, I wonder
at this myself as aside from having a proper gap around them, this is little
better than having them molded in place. Nonetheless, there it is. The parts
diagram shows a second set of engine cowlings, but that area on the sprue is
blank.
nk face on it (undoubtedly for the p.e. instrument
panel). The kit does include two types of rockets, with one type having a bulged
warhead as you see used by the British. There is also a drop tank and aside from
the elevators, all the control surfaces are separate. This includes the flaps,
but don't think you can display them down as you cannot. Same for all the other
control surfaces, they are meant to be used in the neutral position. In case you
are wondering why not provide the option to have the able to be posed, I wonder
at this myself as aside from having a proper gap around them, this is little
better than having them molded in place. Nonetheless, there it is. The parts
diagram shows a second set of engine cowlings, but that area on the sprue is
blank.
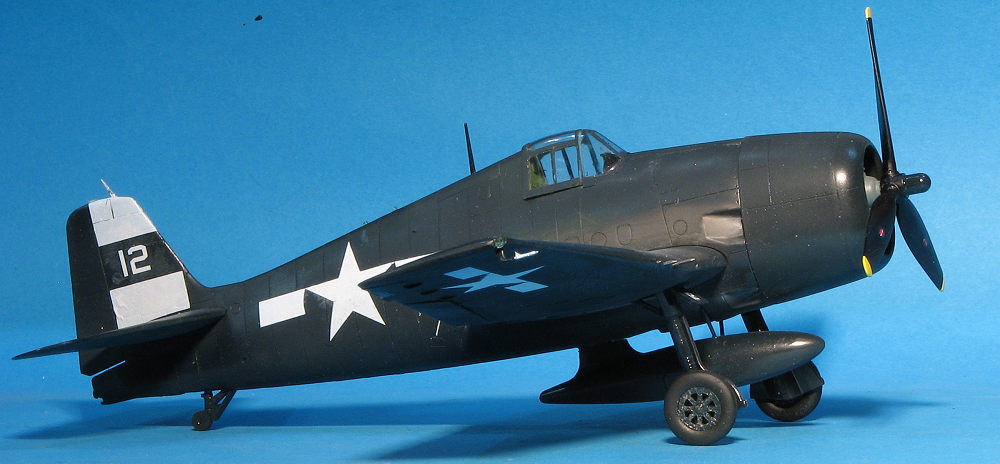
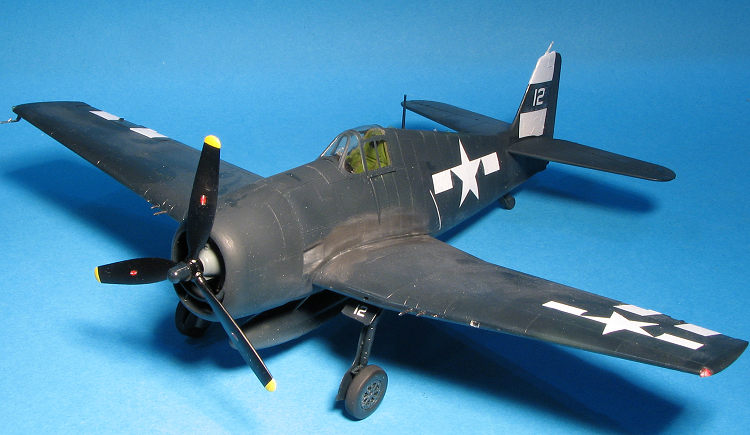
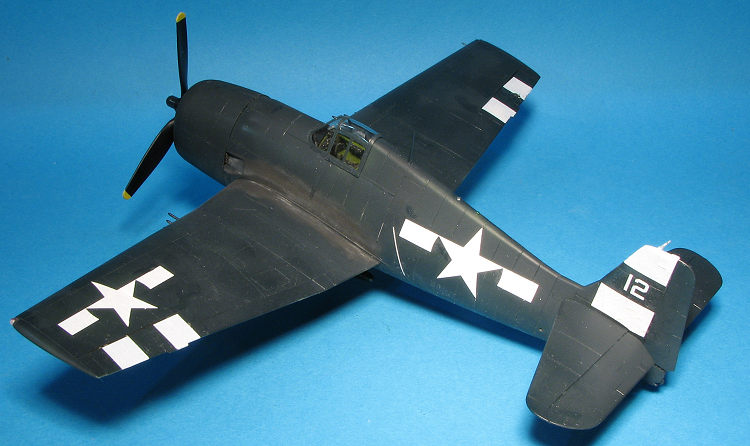
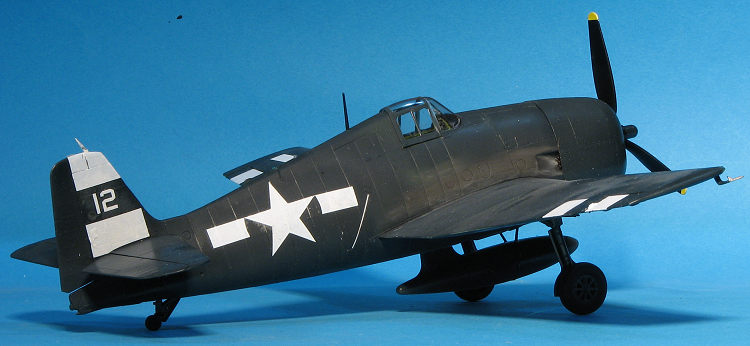
The instructions are quite small considering the kit, as if they were reduced in size from something larger. It makes the print a bit difficult to read. Paint references are by Gunze, which is too bad as they are not available in the US anymore. Markings are for one aircraft, the plane of 'Famous Navy pilot Lt Bob McCuddin' of whom I've never heard, from VF-20 on the Enterprise in 1944. Basically overall Sea Blue with insignia, kill markings and tail triangle. The Cartograf-printed sheet is well done, though I imagine that most who buy this kit will use aftermarket decals. There is a note on the instructions that a full color markings guide is on the Eduard website, though the same thing is on the side of the box without the placement indicators.
| CONSTRUCTION |
It has been nine years since I bought this kit and going over some decals I had, figured it may be time to actually build it. I've not been a huge fan of Eduard for some reason. It always take me an age to build any of their stuff. Doesn't mean I don't have a lot of their kits in the stash as I do, but actually building one is something else.
 So I pulled the parts out of the bag, opened up the instructions and got
underway. Not much in the way of subassemblies on this one save for the drop
tank. The weekend edition doesn't include the etched fins for the bombs so you
cannot use those. You can use the rockets, but you know, not many photos of
these planes show them installed. I should also mention that apparently the fuel
tank straps are photo etch as there are no plastic replacements. Easy enough to
fashion from heavy paper, but you should realize this before opening the hole in
the fuselage halves.
So I pulled the parts out of the bag, opened up the instructions and got
underway. Not much in the way of subassemblies on this one save for the drop
tank. The weekend edition doesn't include the etched fins for the bombs so you
cannot use those. You can use the rockets, but you know, not many photos of
these planes show them installed. I should also mention that apparently the fuel
tank straps are photo etch as there are no plastic replacements. Easy enough to
fashion from heavy paper, but you should realize this before opening the hole in
the fuselage halves.
Building up the cockpit was pretty straight forward. I installed all the major bits and sprayed everything US Interior Green with Testors enamels. I then got out some Tamiya flat black and painted the side consoles, instrument panel and control stick bits. I set of Eduard etched beltswere installed in the cockpit so it wouldn't look so naked. I then glued the cockpit, lower fuselage vent and the tail wheel in place before closing the fuselage halves. I have to admit that it was a bit of a struggle to get the cockpit in place as Eduard does not have really positive locators. They are there but quite shallow. Best to glue in the cockpit right after attaching the instrument panel so you have some wiggle room. I did not and think this may have been the issue. The fuselage was clamped to close all the seams and left to dry.
In the meantime I assembled the tailplanes. It has separate elevators, but they are not designed to be deflected. Once the fuselage seam was cleaned up, I glued on the rudder. Then I moved on to the wings. Now I'm not really sure why Eduard decided we needed separate ailerons and a separate flap insert when they are not designed to be anything but in the neutral position. I ran into two fit situations. One is that the ailerons are longer than the area into which they fit. This means sanding down the inside of the wing tip and even then the fit is not great. The flap section caused me problems on one side and that side has a step that is too large to sand or fill. You are also provided two gun barrel insert options. The one with the 'pointy tips' is for the -5. This has to be glued in before closing the wings, making clean up of the seam between the barrels difficult. The actual fit of the wing to the fuselage is good.
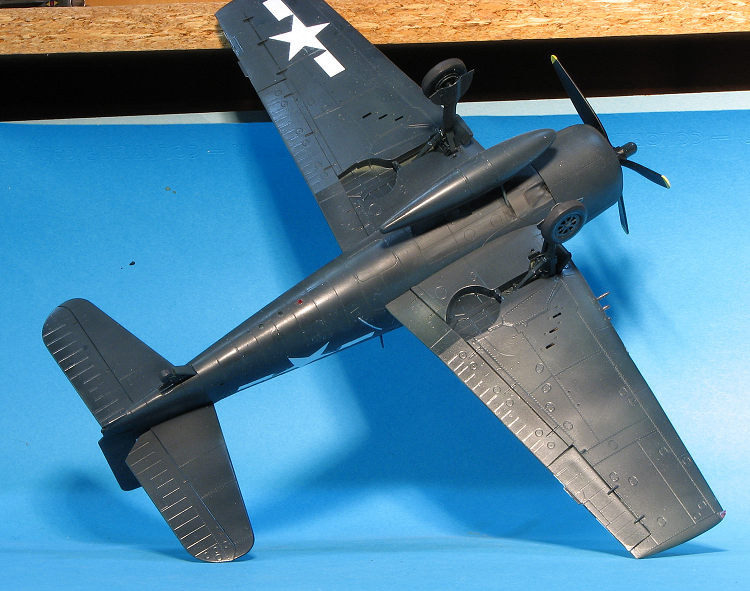 The next thing I did was to build up the landing gear. Eduard cannot be faulted
for providing all the little linkages that go on each landing gear. Those of us
who don't do well with nanoparts will find it difficult to clean these up and
install them. I do wonder why the oleo scissors aren't a single piece instead of
two. This sort of thing seems to just add another area to lose parts and screw
up construction. At this time, I added the various bits to the gear well and
glued the landing gear legs in place along with the catapult attachment points
and the retracted tail hook (why does this even have an extended option)?
The next thing I did was to build up the landing gear. Eduard cannot be faulted
for providing all the little linkages that go on each landing gear. Those of us
who don't do well with nanoparts will find it difficult to clean these up and
install them. I do wonder why the oleo scissors aren't a single piece instead of
two. This sort of thing seems to just add another area to lose parts and screw
up construction. At this time, I added the various bits to the gear well and
glued the landing gear legs in place along with the catapult attachment points
and the retracted tail hook (why does this even have an extended option)?
I finished painting and assembling the engine. Note that you don't have to paint the push rod housings for the rear cylinders as you won't see them. That was set aside while I assembled and painted the tires and the gear doors. I also painted the cowling. The drop tank was then assembled. The forward brace is a very loose fit and if pushed down will leave a very difficult to fill area. Much better to pull it up a bit where it only actually touches a few areas and then fill the gaps with super glue. While that was being dealt with, I masked and installed the windscreen. Fit is excellent.
| COLORS & MARKINGS |
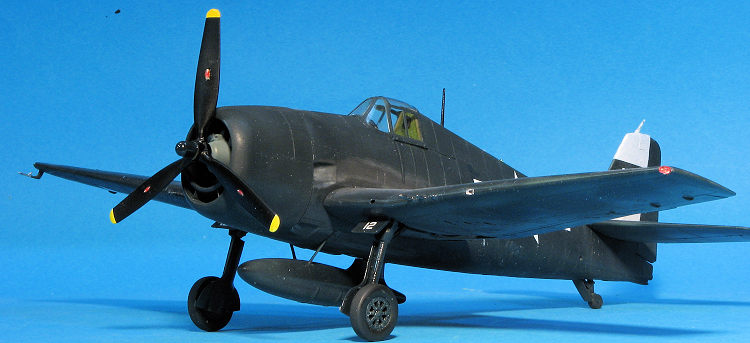 decals
are ones that I bought on line a short while back and apparently had not
been well cared for. They started to split and also did not like setting
solutions of any kind, permanently wrinkling when using Microsol, one of the
weakest around.
decals
are ones that I bought on line a short while back and apparently had not
been well cared for. They started to split and also did not like setting
solutions of any kind, permanently wrinkling when using Microsol, one of the
weakest around. | CONCLUSIONS |
 I think this
rounds off all the 1/48 Hellcats that have been produced. I've built them all
except the Hobby Boss kit and were I to do another, I'd build the Hasegawa kit
and get a replacement cowling. The Eduard kit is superbly detailed but the teeny
parts are more of a hassle than it is worth. I was also less than thrilled bout
the poor fit of the ailerons and the flap section. The weekend edition is
lacking the fins for the bombs and the straps for the fuel tank. At only $5-10
more street price, if you want to do one of these, go for the Profipack. Because
of all the fiddly bits and the the less than sterling decals as well as the
missing parts for the tank and bombs, I'd have to stretch it to recommend this
one to your average modeler.
I think this
rounds off all the 1/48 Hellcats that have been produced. I've built them all
except the Hobby Boss kit and were I to do another, I'd build the Hasegawa kit
and get a replacement cowling. The Eduard kit is superbly detailed but the teeny
parts are more of a hassle than it is worth. I was also less than thrilled bout
the poor fit of the ailerons and the flap section. The weekend edition is
lacking the fins for the bombs and the straps for the fuel tank. At only $5-10
more street price, if you want to do one of these, go for the Profipack. Because
of all the fiddly bits and the the less than sterling decals as well as the
missing parts for the tank and bombs, I'd have to stretch it to recommend this
one to your average modeler.
| REFERENCES |
http://en.wikipedia.org/wiki/F6F_Hellcat
23 February 2018
Copyright ModelingMadness.com. All rights reserved.
If you would like your product reviewed fairly and quickly, please
contact
the editor or see other details in the
Note to
Contributors.