| KIT #: | 01998 |
| PRICE: | 3000 yen SRP |
| DECALS: | One option |
| REVIEWER: | Scott Van Aken |
| NOTES: | 2012 Limited Edition |

| HISTORY |

The Avenger entered U.S. service in 1942, and first saw action during the Battle of Midway. Despite losing five of the six Avengers on its combat debut, it survived in service to become one of the outstanding torpedo bombers of World War II. Greatly modified after the war, it remained in use until the 1960s. As an interesting note, actor Paul Newman was an Avenger gunner, having failed his pilot's entrance test due to being color blind.
| THE KIT |
This is one of two kits that were found in Hasegawa's 'Escort Carrier Combo'. This kit allows you to build a TBF-1C and a TBM-3. I wish they'd have included the fuselages to do two of each, but they did not. This is the TBM-3 option.
The kit itself is standard Hasegawa 1/72 with very nicely done
crisp external engraving and a rather basic cockpit. This area has a one piece
lower floor, two seats, a control stick and an instrument panel. There are
decals for instruments. The kit has the ability to have the bomb bay built open,
but one only has the option of a torpedo as the weapon. The Avenger more often
carried bombs in the Pacific and depth charges in the Atlantic. Not sure just
where you can find depth bombs though standard 500 lb bombs can be located in
aftermarket or from other kits. The kit also comes with under wing rockets which
the kit instructions show as being for the TBF-1C. I'm pretty sure the others
could carry them as well, though they may not be germane to the other markings
options.
Clear parts are well done and all of the bits aside from the upper canopy and lower gun opening are installed prior to or during fuselage assembly. The turret is a single piece and the turret interior is adequate though not really that well detailed. One thing for sure, masking will be time consuming, especially the one-piece upper greenhouse canopy. Stabs are a single piece on either side and the wings are a left and right upper and lower half. Wheel well detail is adequate and the gear/wheels are well done.
Instructions are typical for Hasegawa. They offer one overall sea blue option for the TBM-3 and that is for a plane from VTMB-3 aboard the USS Block Island in May 1945. Decals are old school with off white white markings.
| CONSTRUCTION |
After allowing the kit to marinate on the shelves for several
years, I was motivated to build this one by a new MYK decal sheet on sea blue
Avengers. So the first thing I did was paint as much of the kit while still on
the sprue as I could. This mainly covered the interior bits and the engine. With
that done, I attached the decals to
 the instrument panel and side consoles. Then
all the inside pieces (which is mainly seats, front control stick and instrument
panel) were glued in place. This was then glued to one side of the fuselage. The
next step was to install the small side windows. Naturally, I got glue on them,
but what are you going to do. No contest winner here. The engine was installed
and the fuselage halves closed.
Once that was done, the base of the turret was glued in, followed by the front cowling and the closed bomb bay. I chose the closed option as there is a huge seam in the bomb bay that is nigh impossible to fill. Sure, the torpedo would cover much of that, but it is just easier to leave the doors closed. I then sanded the fuselage and did the usual filler, though there wasn't need for much. Eduard mask set CX046 was used to cover the fuselage windows. The wings were assembled and cleaned up. Then the tailplanes and the wings were glued in place.
While that was drying, I starting masking the clear bits. This is a fairly long and somewhat tedious task. Note that the -3 has a different lower gunner's position and the masks cover that well. Doing the turret was the most challenging as the right side flat parts were the most difficult. Eventually all was done and it was time to think of painting.
| COLORS & MARKINGS |
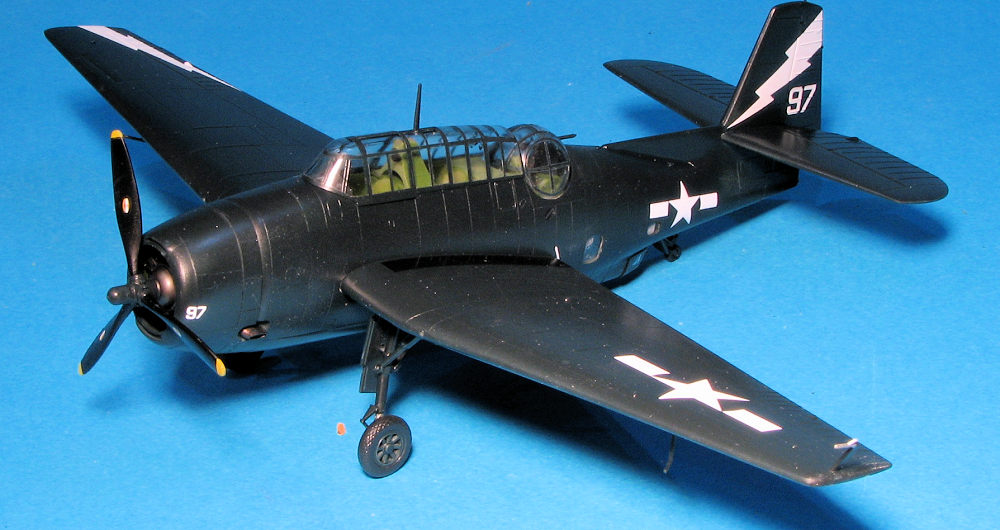
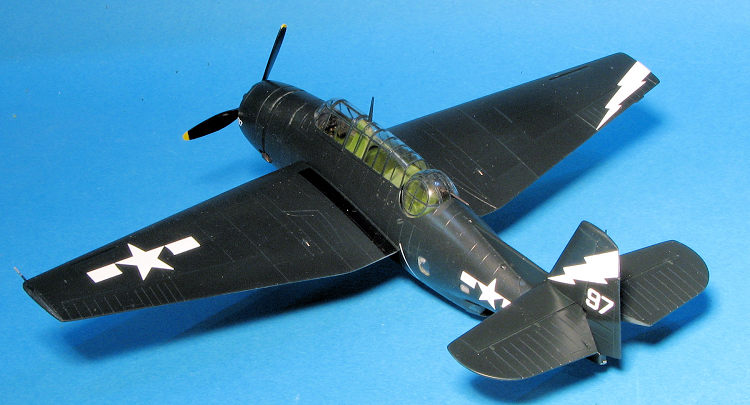
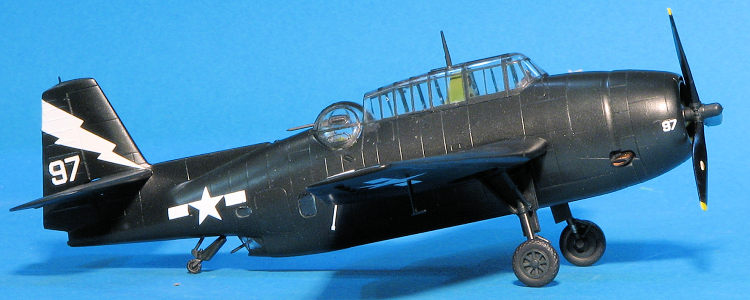
 For this one, I used MYK's most recent sheet, A-72153. It has
three TBM-3s and I picked the one from VT-85 aboard the USS Shangri-La in 1945.
This one has the lightning bolt as the wing identifier. It is overall gloss sea
blue. Having run out, I used Tamiya's flat sea blue. Before painting, I
installed the masked turret, then used silly putty to hold the main canopy in
place. I also filled the engine opening with this to keep paint from the engine.
Not only the airframe, but the landing gear, wheels and gear doors were painted sea blue. So was the prop hub. Gear wells were also painted this shade as it was normal to do so. When the wheels were dry, I used the hub masks and painted the main gear with Tamiya's tire black.
Back on the bench, the landing gear and doors were installed. The gear doors are not a positive attachment with small pins on the gear and large, shallow depressions on the inside of the gear doors. I then sprayed everything with Future gloss clear in preparation for the decals. The MYK decals apply just like regular decals and you can use mild setting solutions on them if you wish. They snuggled down just fine for the most part. After letting them dry for 24 hours, I used Tamiya tape to remove the clear carrier. This process works just fine, though one should be rather slow in removing the tape with the carrier on it. This was the second time I've used these decals and though there was some apprehension about putting tape over decals, it worked just fine.
A semi-gloss clear coat was applied. I then removed the canopy
and the turret to remove the masks. This was also a bit time consuming, but,
other than the flat part of the right side of the turret, all worked as
advertised. Getting the rear gun installed with the turret was a bit tricky. I
had to apply glue to the mounting area on the floor of the turret, then put the
gun in the turret, holding it from the outside while installing the turret. Then
wiggle the gun into the glued area. Another option would have been to cut the
barrel of the gun, drill a hole for it, install it, attach the turret then
thread in the barrel. Both not straight forward and took some fiddling.
Last steps were installing the greenhouse with a touch of clear glue. Then the radio mast was installed after making the hole a bit bigger. Exhaust was painted and the prop pushed in place (it is a very tight fit).
| CONCLUSIONS |
This is the second 1/72 Avenger I've built. The first was a rivet festooned Airfix kit that turned out fairly well for my skills 30 years back. This one was a great deal easier to build. Aside from masking the turret, the Eduard masks were a breeze, though time consuming. The fit of the Hasegawa kit is quite good and the MYK decals are simply superb. Due o the time it took to mask, it was about 3 weeks from start to finish. I know many of you could do it in less, but I am just slow by comparison. Well worth picking up when it is reissued.
| REFERENCES |
http://en.wikipedia.org/wiki/TBM_Avenger
11 October 2019
Copyright ModelingMadness.com. All rights reserved.
If you would like your product reviewed fairly and
fairly quickly, please
contact
the editor or see other details in the
Note to
Contributors. Back to the Main Page
Back to the Review
Index Page
Back to the Previews Index Page