| KIT #: | 1671 |
| PRICE: | $10-15.00 |
| DECALS: | Three options |
| REVIEWER: | Scott Van Aken |
| NOTES: | 1999 edition |
| HISTORY |
 The P-40 was a development of the P-36 that utilized a liquid-cooled V-12 engine
to provide a higher speed than what was available with the radial engine P-36.
In that means it was successful and when the US entered WWII, it was the most
widely used aircraft in the USAAC. It was not the 'dog' that many consider it to
be. At low and medium altitude it was able to hold its own against German and
Italian aircraft. This was proven in North Africa while in the hands of the RAF
and Commonwealth air forces prior to America's entry into the war. It was also
useful in the SWPA and CBI where its fairly long range and rugged construction
was effective against Japanese rifle calibre machine guns.
The P-40 was a development of the P-36 that utilized a liquid-cooled V-12 engine
to provide a higher speed than what was available with the radial engine P-36.
In that means it was successful and when the US entered WWII, it was the most
widely used aircraft in the USAAC. It was not the 'dog' that many consider it to
be. At low and medium altitude it was able to hold its own against German and
Italian aircraft. This was proven in North Africa while in the hands of the RAF
and Commonwealth air forces prior to America's entry into the war. It was also
useful in the SWPA and CBI where its fairly long range and rugged construction
was effective against Japanese rifle calibre machine guns.
The Warhawk/Kittyhawk really made its mark in the ground attack role. Despite its liquid cooled engine, which made it susceptible to ground fire, the P-40 was widely used in this role in areas with limited enemy air interference until the end of the war.
| THE KIT |
This is not the newest offering of the E model P-40 in 1/72 nor the oldest. However, it is considered to be a good one. It does surpass the Hasegawa kit in terms of interior detail though it is obviously based on it to some extent. But then, it is also that there are only so many ways to model a specific subject so there is that.
 Academy has done at least two other
variations on the later P-40 and that shows with parts on the sprues for the
other versions. What makes this the E model are the proper fuselage halves.
There is sidewall detail that is fairly nicely done. In addition, the
Academy kit includes rudder pedals and a flap handle missing in the Hasegawa
kit. It also has separate exhaust that can be added after painting.
Academy has done at least two other
variations on the later P-40 and that shows with parts on the sprues for the
other versions. What makes this the E model are the proper fuselage halves.
There is sidewall detail that is fairly nicely done. In addition, the
Academy kit includes rudder pedals and a flap handle missing in the Hasegawa
kit. It also has separate exhaust that can be added after painting.
Hasegawa missed the radio mast that Academy includes. Radiator intake, landing gear, cowl flap, bomb/drop tank, and the way the prop is attached are all identical to the Hasegawa kit. What is different is that there is an insert behind the pilot's seat for either the quarter windows or for the N model's better rear view section. The framework on the clear bits is also better pronounced, which will really help in masking.
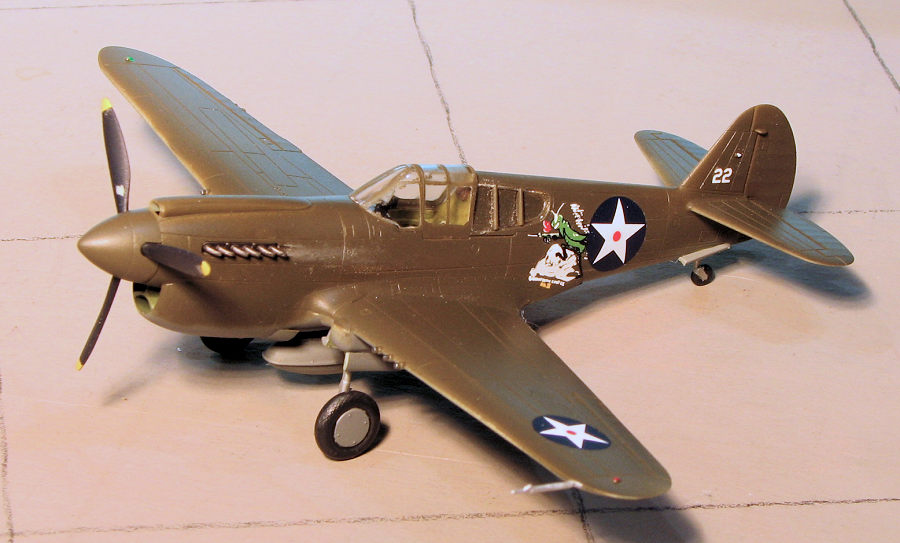
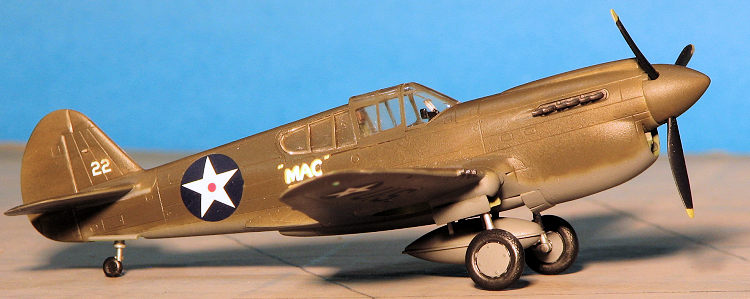
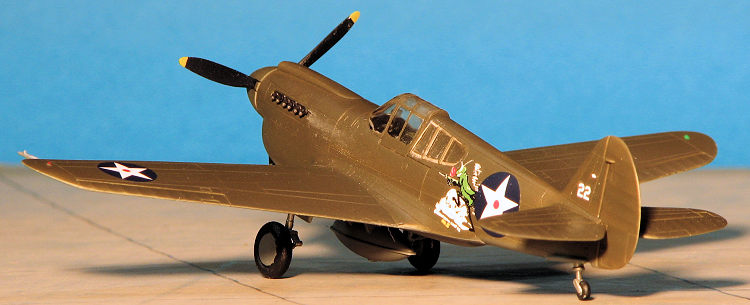
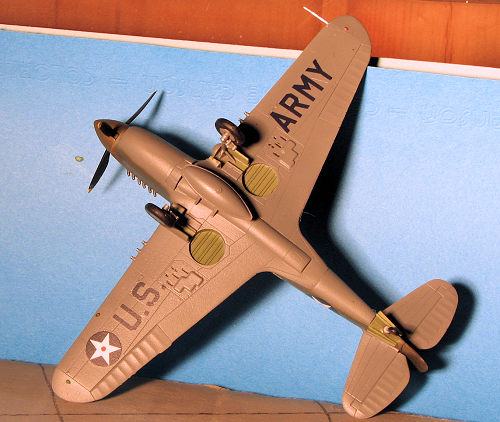
Instructions are well done with generic and FS color information. Three nice options are provided. The box art plane is a very popular scheme from the 343rd Fighter Group in the Aleutians with the tiger face. This plane is OD over neutral grey. The next is in a dark green and sand over neutral grey scheme with the 9th FS/49th FG in New Guinea during 1942. Finally an RAAF plane in dark green/dark earth over sky with 77 squadron, also in New Guinea during 1942. Decals are nicely printed, but there are aftermarket if you are so inclined.
| CONSTRUCTION |
I went pretty standard on this one. I started
with the cockpit and built it up as per the instructions. I then added the
instrument panel and the oil/glycol cooler pieces to one fuselage have. The
fit of the cooler assembly isn't the greatest and you need to fuss it about
a little to get it in well. The fuselage halves were then joined. While
dealing with the seams, I attached the tailplanes.
 Note that this kit comes
with a hole for a radio mast. Most, if not all P-40Es did not have one of
these, so I installed the mast and when dry, cut it off and filled in the
area.
Note that this kit comes
with a hole for a radio mast. Most, if not all P-40Es did not have one of
these, so I installed the mast and when dry, cut it off and filled in the
area.
I joined the upper halves of the wings to the fuselage to keep from having any sort of seam on the wing/fuselage join. The lower wing was then attached when dry. This seemed to work fairly well and is not the way I normally do this step. I did have a gap or two at the inner leading edge that may not have normally been there, but it iwas easy enough to deal with.
The airframe was fairly complete so the next step was to mask the clear bits and install the gun sight. I used a set of Montex masks that has masks for the P-40E/M/N. This is nice as you basically get two sets and I now have one for the N model. The canopy and windscreen were attached and then I ran into a lack of motivation that lasted about two months. This happens from time to time and it meant that I had a number partially completed kits that I worked on in very little steps, like cleaning and painting the landing gear then a few days off before painting the wheels, etc.
| COLORS & MARKINGS |
 At this stage, the kit was ready for painting. The thing about P-40Es is
that most of them were simply olive drab over neutral grey. I had a great
sheet for the first months of the Pacific war were just about all the planes
were in this scheme. So I used those shades. Initially, I painted them using
Model Master enamels, but the colors just seemed too light so I went with
Mr.Color lacquers, which are generally darker. Since the majority of the
P-40s at that time were fairly new, I figured the closer to fresh colors
would work out well.
At this stage, the kit was ready for painting. The thing about P-40Es is
that most of them were simply olive drab over neutral grey. I had a great
sheet for the first months of the Pacific war were just about all the planes
were in this scheme. So I used those shades. Initially, I painted them using
Model Master enamels, but the colors just seemed too light so I went with
Mr.Color lacquers, which are generally darker. Since the majority of the
P-40s at that time were fairly new, I figured the closer to fresh colors
would work out well.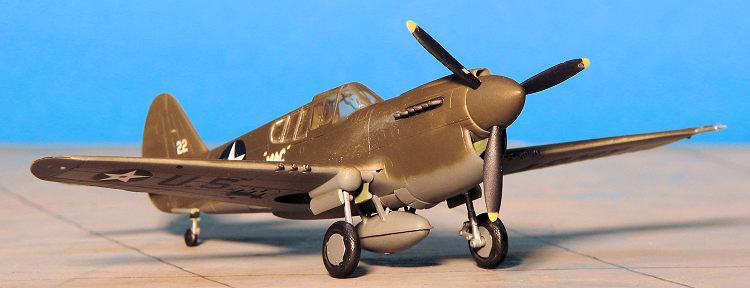 ustralia in 1942. Using cold water, the markings took a long time to come
free. They also required the surface to be flooded with water to keep them
from sticking where you put them on. I also found the single color ones to be quite thin and
easily damaged unless you treated them gently. Ovearall, they worked
superbly, snuggling down with no silvering. No setting solution was used.
ustralia in 1942. Using cold water, the markings took a long time to come
free. They also required the surface to be flooded with water to keep them
from sticking where you put them on. I also found the single color ones to be quite thin and
easily damaged unless you treated them gently. Ovearall, they worked
superbly, snuggling down with no silvering. No setting solution was used.
| CONCLUSIONS |
This kit has several things going for it. One is that it is inexpensive. Two is that it is readily available. Third is that it makes into a very nice model which is fairly easy to build for the beginners or those just wanting a nice kit with no real hassles.
January 2021
Copyright ModelingMadness.com. All rights reserved.
If you would like your product reviewed fairly and fairly quickly, please
contact
the editor or see other details in the
Note to
Contributors.
Back to the Main Page
Back to the Review
Index Page
Back to the Previews Index Page