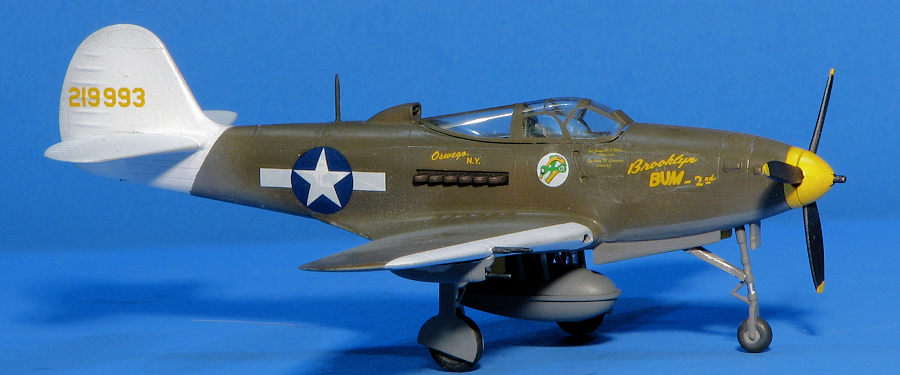
HobbyBoss 1/72 P-39N "AirCobra"
| KIT #: | 80234 |
| PRICE: | $12.00 SRP |
| DECALS: | Two options |
| REVIEWER: | Scott Van Aken |
| NOTES: | 2020 release |

| HISTORY |
 The Bell P-39 Airacobra was one of the principal American fighter
aircraft in service when the United States entered World War II. The P-39 was
used with great success by the Soviet Air Force, which scored the highest number
of individual kills attributed to any U.S. fighter type. Other major users of
the type included the Free French, the Royal Air Force, the USAAC/F and the
Italian Co-Belligerent Air Force.
Designed by Bell Aircraft, it had an innovative layout, with the engine installed in the center fuselage, behind the pilot, and driving a tractor propeller via a long shaft. It was also the first fighter fitted with a tricycle undercarriage. Although its mid-engine placement was innovative, the P-39 design was handicapped by the absence of an efficient turbo-supercharger, limiting it to low-altitude work. As such it was rejected by the RAF for use over western Europe and passed over to the USSR where performance at high altitude was less important.
Together with the derivative P-63 Kingcobra, the P-39 was one of the most successful fixed-wing aircraft manufactured by Bell.
| THE KIT |
These Hobby Boss easy assembly kits are actually quite nice. They are generally accurate in outline and detailed enough for most modelers. In addition, they are near snap kits with large peg and socket attachment points. This makes them attractive to both younger builders and those who simply want something easy after struggling with a difficult project.
 Most of the airframe is in two large pieces. One is the lower fuselage
that includes the wings. The other is a fairly complete upper fuselage. The
tailplanes are separate. Now this will generally leave a fairly large seam, but
easy enough to fill. There looks to be a lot of room in the nose section for
weight as that will be needed to prevent tail sitting. This kit has a more
complete cockpit than some of their earlier releases. A control stick and
instrument panel are molded into the interior section and there is a separate
seat. The hefty nose gear attaches to the underside of the cockpit. While I'd
like to leave the nose gear off until after painting, I'm not sure that is
possible.
The main gear traps the wheel between the gear leg and main gear door. This variant has underwing gun pods that snap into place. It also includes a centerline drop tank. The nose gear doors are molded in place and the inner main gear doors have large attachment tabs. The one piece canopy simply snaps in place using large tabs.
Instructions are printed on the back of the box. Two Soviet P-39s are offered. One in OD over neutral grey as shown on the box art. The other is soviet green over neutral grey with insignia that have a white background. This one also has a large nose art. It has been a while since I built one of these kits, but don't recall having any issues with the decals. These decals also include wing walk areas.
| CONSTRUCTION |
I have built a few of these 'Easy Assemble' kits in the past and have found them to be quite nice. They do fall short in terms of some details, expecially in the cockpit, but they have good overall shape and look nice on the display shelf. Probably their biggest issue is the inevitable seam that runs almost the entire length of the fuselage. It is simply something one has to deal with. Beginners won't mind it, but those of us who have been around will want to take care of it.
 I generally followed the construction sequence shown on the back of the box. I
deviated by not installing the nose gear along with the cockpit, nor did I
install the exhaust until after painting. In fact, I left off all the gear bits
until painting was done. Getting to a fairly complete airframe took no time at
all, after which I broke out the filler to deal with the long fuselage seam. I
should mention that I put as much weight in the front as I could, but I knew
from the start it would not be enough to prevent tail sitting.
Anyway, I then masked the canopy. This was a bit of a chore as many of the frame lines are quite indistinct and in some cases guesswork was required. This was especially true of the door areas where there were no guides. With that done, the canopy was pushed in place. I then painted the gear wells and inside of the gear doors with Testors yellow chromate enamels, after which these areas were filled with Silly Putty and I headed for the paint booth.
| COLORS & MARKINGS |
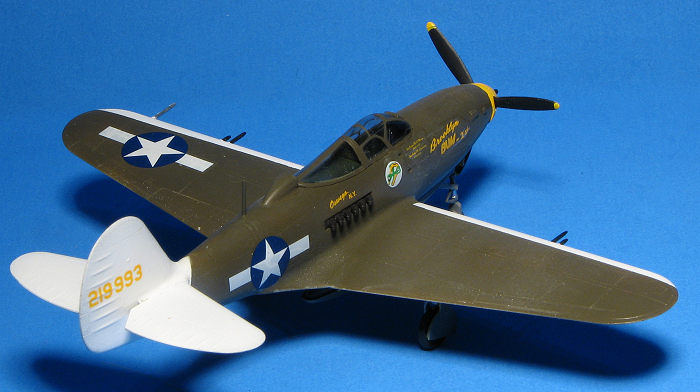
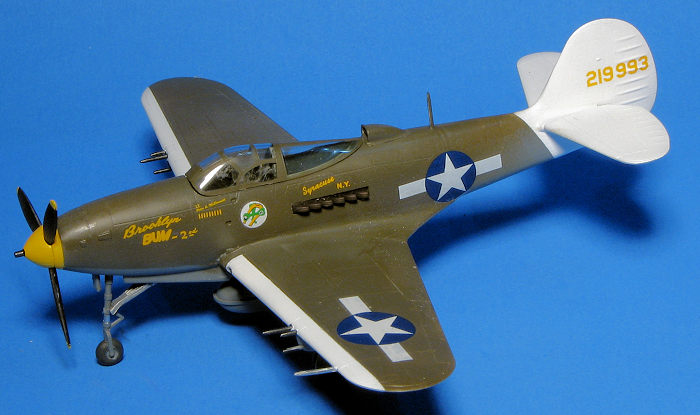
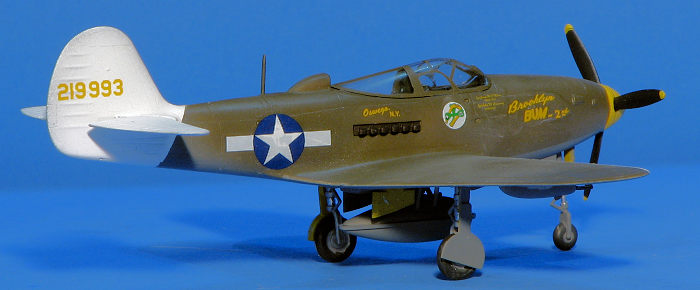
I was a bit undecided as to exactly what scheme to use, but I finally settled on an 82TRS aircraft operating in New Guinea as shown on a Wolfpak decal sheet (72-097). This one was a bit different from the usual options from this unit that you can find from various kits or other sources.
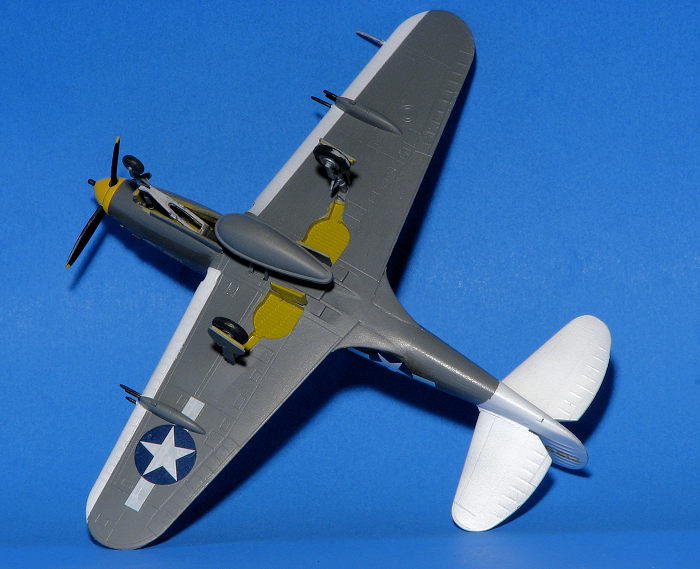
Painting is simple with the underside painted Neutral Grey using Testors Model Master enamel. When dry, the upper surface was painted with Mr.Color Olive Drab lacquer. Then some masking was done and the tail along with the wing leading edges and prop spinner were painted white using Tamiya acrylic. The spinner was later brush painted with Testors Yellow enamel in the little square bottles. All of these paints are fairly fast drying, which is a help.
Meanwhile I painted the nose gear leg with neutral grey and the main gear with Tamiya aluminum. The wheels were painted black using Mission Models tire black. I then popped off the canopy as the masking for the airframe painting had pulled off some of the tape masking and I didn't want to have to redo it. I brush painted a clear acrylic gloss on the airframe in preparation for decals.
 Meanwhile, the main gear was assembled and installed. I found that I had to
drill out the wheels and trim the small mounting tabs on the gear leg and door
to get the doors fairly close to the wheels. Not doing that has them look even
more toy-like than they are. I also discovered when installing the nose gear
that the side tabs on the retraction strut had to be cut away in order to get it
to fit into the well. Undoubtedly the reason the instructions show that being
attached before closing up the fuselage. The drop tank was then attached along
with the inner gear doors.
The main gear was then attached and after dry, I was not surprised to find it was a major tail sitter. About the only place to put weight was where the parts to have the prop spin were located. Having come to terms with not having a spinning prop, I put as much lead in there that I could fit. With this it barely stood on its nose gear, but a flea fart was enough to knock it back. Since there was room in the back of the nose gear well, weight was put in there as well and that pretty much took care of that.
Decals were applied and these were a bit of a disappointment as none of the setting solutions I had were enough to get them to conform to the various nooks and crannies. It isn't terrible, but there was a bit of silvering. Once on, I sprayed on a semi-matte clear, installed the exhaust, removed the masking from the canopy and pushed it into place. I also added a radio mast as that was shown in the decal instructions but missing from the kit. Finally, I glued on the prop.
| CONCLUSIONS |
The kit certainly lives up to the Easy Build note on the box and for youngsters, this is well worth building. More experienced modelers will be somewhat dismayed by the long seam that really has to be filled to look decent. The lack of really distinct framing around the doors is also a hindrance to making a neat build. You also have to deal with toy-like main wheels and the difficulty of finding room for nose weight. For a newbie to the hobby, these things are not an issue and the large attachment points are a real plus to getting the kit assembled in minimum time. For the rest of us, I think that kits from Academy, RS Models or Arma Hobby will be more to our liking.
8 November 2024
Copyright ModelingMadness.com. All rights reserved. No reproduction in part or in whole without express permission from the editor.
If you would like your product reviewed fairly and fairly quickly, please contact the editor or see other details in the Note to Contributors.
Back to the Main Page Back to the Review Index Page Back to the Previews Index Page