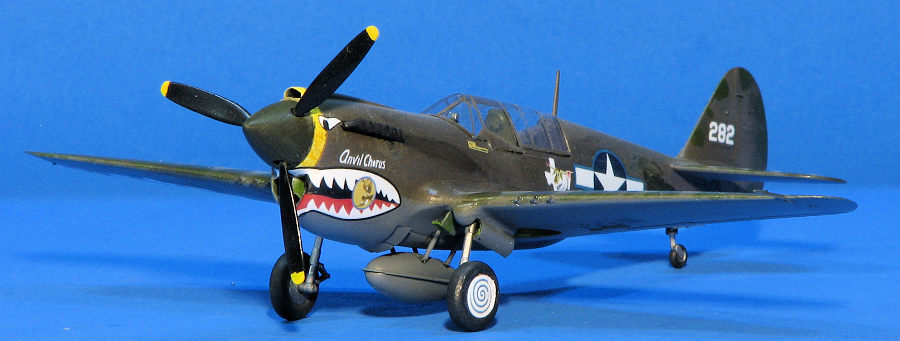
| KIT #: | 1115 |
| PRICE: | $ |
| DECALS: | One option |
| REVIEWER: | Scott Van Aken |
| NOTES: | Minicraft boxing |

| HISTORY |
The P-40 was one of those aircraft which would be characterized as 'the best that we have for the moment'. Though nearing obsolescence even when the war broke out for America in late 1941, the truth was that there wasn't anything better to be used. More potent aircraft like the P-38, P-47 and P-51 were being developed and wouldn't see combat for a year at the best. So, like in all wars, one fights it with what one has and hopes for the best.
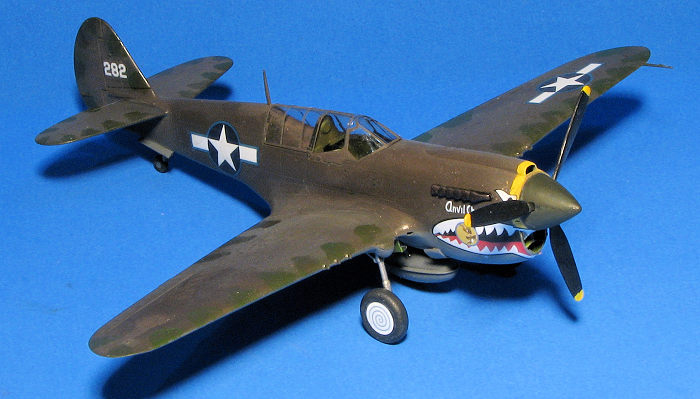 Fortunately, the P-40 had already been tried in combat
by the British in North Africa and so the results of that experience were added
to the later versions coming off the line. Truth is that at low level, the P-40
was a pretty good fighter. A bit heavy compared to some, but able to withstand a
lot of damage and able to carry a respectable load of ordnance. An experienced
pilot was able to do well in the Warhawk if they took advantage of its heavy
armament and high diving speed to do hit and run attacks. In a dog-fight,
especially against Japanese planes, it was not at its best.
Even when it was surpassed by other types, the P-40 soldiered on until late 1944 with the USAAF in the Pacific/CBI and even longer with some Allied nations. The most widely produced version was the P-40N. It was a result of extensive weight reduction and had the most powerful Allison engine that would fit into the airframe. It was also equipped with drop tank or bomb racks and provided good service in the fighter-bomber role. All but the very early P-40Ns could be distinguished by the altered canopy section to the rear that provided better rear view. Not surprisingly, most surviving P-40s are this version.
| THE KIT |
Hasegawa jumped on the engraved panel line bandwagon in the early/mid 1980s and this was one of a number of WWII fighter kits that they produced. It was still before the 'do multiple versions with one basic set of sprues', but you'd also find the two larger sprues with their P-40E kit; the smaller one with the fuselage containing the N specific bits. This is the Minicraft reboxing. Minicraft imported the entire Hasegawa line for many years, changing the box images, the decal sheet, and including English instructions.
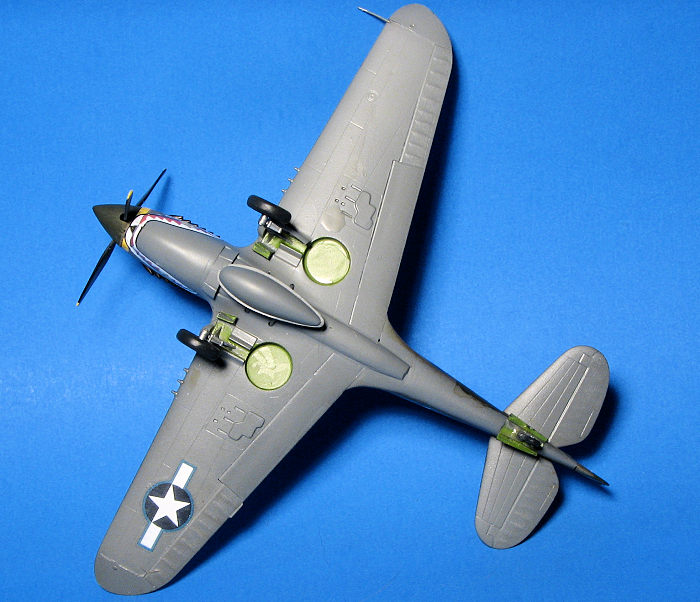 Even though tens of thousands of these kits have been
produced, this one is pretty clean. Probably the weakest part of this kit in
the minds of many is the
cockpit section. There is a generic tub with molded in seat and a control stick.
The instrument panel blank is set to accept a decal. Much of this Spartan
approach still continues with Hasegawa 1/72 kits, though not quite to this
degree. Fortunately for us all, there are aftermarket resin cockpit sets for
these kits so we can really fix things up. The canopy is a one-piece affair and
quite clear. Vacuform replacements are also available for those
interested.
Wheel wells are a respectable depth and have no detail at all. Gear are well done and quite scale as are the diamond tread tires. The gear is missing some of the smaller struts, but for most, this isn't an issue. Again, resin replacements are available for the wheels and in this case recommended as the N often had spoked wheels, something not provided in the kit. Hasegawa didn't bother including the proper, wider blade prop that was standard on the P-40N. The only underside options are a single bomb or drop tank.
Markings are provided for a single skull nose aircraft from the 80th FG based in India during 1944. The small sheet is nicely printed, but I'm sure the decals are toast after all these years. Fortunately, finding P-40N decals in this scale is a piece of cake.
| CONSTRUCTION |
I've been on a bit of a P-40 build run as of late and after finishing a pair of Special Hobby Warhawks, decided to pull this old favorite from the shelf. I have built this boxing probably a half dozen times and am fully aware of its issues. When assembling the wings, you'll find a seam on the underside of the flaps that will need filled. There are also span width sink areas on the upper flap area. Wheel wells and cockpit are devoid of detail and you'll find the wing guns are exactly on the leading edge instead of just below it. Then there is the wrong prop and the kit comes with covered main wheels, which is not accurate for most P-40Ns. Fortunately, I had several spare bits from the two Special Hobby kits that I could use with this one to improve it without having to spend $$ on aftermarket.
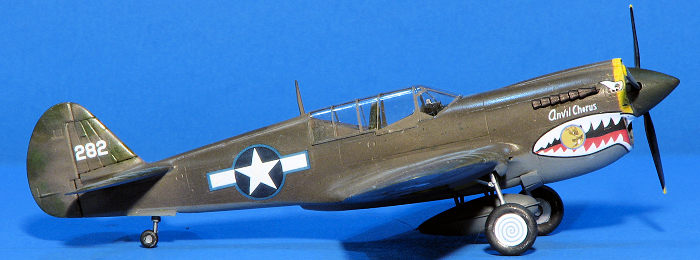 Construction
went pretty much like the earlier build. This one had the interior bits painted
with Interior Green once I glued the seat in place. I used a control stick and
instrument panel that were spares from the Special hobby kits and they both fit
fairly well. If you want to spend the funds, True Details makes/made a resin
cockpit for this kit.
Meanwhile, I cemented the fuselage halves together after installing the radiator and divider in place. I had to trim the rudder pedals that are on the SH instrument panel so that the stock cockpit would fit. I also added some tape seat belts to the kit seat. I then assembled the wings after filling the seam in the flaps on the underside. The wings were then attached to the fuselage. Fit is actually quite good. After the usual sanding at the back of the wings, I installed the stabilizers. Next the drop tank was assembled and I masked the canopy. For this I used Eduard CX028, which I was able to locate after a web search. Older Eduard masks are often nigh impossible to find so I consider myself lucky on this one.
| COLORS & MARKINGS |
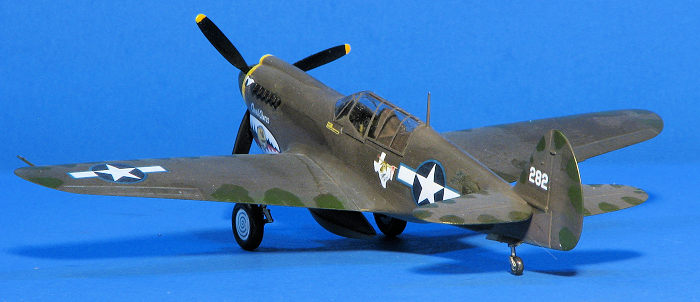 Meanwhile, I painted the landing gear aluminum, painted the gear wells in
green chromate (Model Master enamels), painted the prop black and the
exhaust with Alclad II exhaust manifold. The kit was then put on its gear.
After giving the shades a day to cure, the airframe was given a clear coat,
brushed on with the little Future I have left in a small paint bottle. For
some reason, this smeared the upper surface OD. I was then left with no
option but to repaint the affected areas. I then sprayed on the
current recommended replacement for Future, and while it works, it seems a bit thinner by
comparison.
 | CONCLUSIONS |
This is not the first Hasegawa kit I've built and while it does build into a fairly nice model, it is lacking in the interior detail of the newer toolings. It also has much more difficult to attach gear doors and the next time I build one, I'll see what I can do about fixing that with small strips of plastic. Anyway, they can be found for very little money from vendors at shows. It seems that on-line sellers are unaware that these are not rare kits and often ask more than they are worth, so one has to be careful in that regard.
6 December 2024
Copyright ModelingMadness.com. All rights reserved. No reproduction in part or in whole without express permission from the editor.
If you would like your product reviewed fairly and fairly quickly, please contact the editor or see other details in the Note to Contributors.