Italeri 1/72 C-47 Skytrain
| KIT #: | 127 |
| PRICE: | $8.00 in a bag with no decals |
| DECALS: | Two options according to the instructions |
| REVIEWER: | Scott Van Aken |
| NOTES: |
| HISTORY |
The C-47 was vital to the success of many Allied campaigns, in particular those at Guadalcanal and in the jungles of New Guinea and Burma where the C-47 (and its naval version, the R4D) made it possible for Allied troops to counter the mobility of the light-traveling Japanese army. Additionally, C-47s were used to airlift supplies to the embattled American forces during the Battle of Bastogne. Possibly its most influential role in military aviation, however, was flying "The Hump" from India into China. The expertise gained flying "The Hump" was later be used in the Berlin Airlift, in which the C-47 played a major role, until the aircraft were replaced by Douglas C-54 Skymasters.
In Europe, the C-47 and a specialized paratroop variant, the
C-53 Skytrooper, were used in vast numbers in the later stages of the war,
particularly to tow gliders and drop paratroops. In the Pacific, with careful
 use of the island landing strips of the Pacific Ocean, C-47s were even used for
ferrying soldiers serving in the Pacific theater back to the United States.
use of the island landing strips of the Pacific Ocean, C-47s were even used for
ferrying soldiers serving in the Pacific theater back to the United States.
C-47s (approx. 2,000 received under lend-lease) in British and Commonwealth service took the name Dakota, from the acronym "DACoTA" for Douglas Aircraft Company Transport Aircraft. The C-47 also earned the informal nickname Gooney Bird in the European theater of operations.
Other sources (C-47/R4D Skytrain Units of the Pacific and CBI, David Isby, Osprey Combat Aircraft #66, Osprey Publishing Limited, 2007) attribute this name to the first plane, a USMC R2D - the military version of the DC-2 - being the first plane to land on Midway Island, previously home to the native long-winged albatross known as the Gooney Bird which was native to Midway.
The United States Air Force's Strategic Air Command had Skytrains in service from 1946 through 1967.
With all of the aircraft and pilots having been part of the Indian Air Force prior to Independence, both the Indian Air Force and Pakistan Air Force used C-47s to transport supplies to their soldiers fighting in the Indo-Pakistan War of 1947.
Several C-47 variations were used in the Vietnam War by the
United States Air Force, including three advanced electronic warfare variations,
which sometimes were called "Electric Gooneys" designated EC- 47N, EC-47P, or
EC-47Qs depending on the engine used. EC-47s were also operated by the
Vietnamese, Laotian and Cambodian Air Forces. A gunship variation, using three
7.62mm miniguns, designated AC-47 "Spooky" often nicknamed "Puff the Magic
Dragon" also was deployed.
47N, EC-47P, or
EC-47Qs depending on the engine used. EC-47s were also operated by the
Vietnamese, Laotian and Cambodian Air Forces. A gunship variation, using three
7.62mm miniguns, designated AC-47 "Spooky" often nicknamed "Puff the Magic
Dragon" also was deployed.
The Royal Canadian Air Force and later, the Canadian Armed Forces employed the C-47 for transportation, navigation, and radar training, as well as for search and rescue operations from the 1940s to the 1980s.
After World War II thousands of surplus C-47s were converted to civil airline use, some remaining in operation in 2012 as well as being used as private aircraft.
| THE KIT |
This is one of Italeri's older kits, dating from back when the company was known as Italaerie. As such, it has to be one of the earliest of their engraved panel line kits. It comes with no optional parts aside from engine intake scoops and perhaps some antennas. There is a full cockpit/cabin layout with the seats in the cabin already molded in place. Actually, they are simply rectangles molded on the floor, but since the transparencies are small and somewhat thick, you will be unable to tell any detail.
The cockpit has an instrument panel, two controls wheels and a pair of seats.
Again, the small and somewhat distorted transparencies will mean that you won't
see much at all, but you will need them in
 place to keep it from looking barren.
There are bulkheads behind the cockpit and in the front and rear of the cabin
area. No radio room detail is provided and you won't see it anyway.
place to keep it from looking barren.
There are bulkheads behind the cockpit and in the front and rear of the cabin
area. No radio room detail is provided and you won't see it anyway.
Engines are two rather basic rows of cylinders, but more than adequate for
most. Those seeking additional detail are welcome to go ahead and get resin
replacements as they are available. The kit provided several different types of
carb intake scoop so one needs to either trust the instructions or have a photo
of a representative aircraft. Exhaust are somewhat long pipes. There were
shorter ones used as well so have your photos ready. This kit is molded in olive
drab and comes with paddle bladed props used on later aircraft. The initial
boxing (generally in green plastic) has the early, narrower props. An astrodome
is provided that is simply placed atop the fuselage in the appropriate
 position.
The kit also comes with a separate tail cone.
position.
The kit also comes with a separate tail cone.
Wings are five pieces with three lower sections and two overlapping upper pieces. The engine nacelles are incorporated into the wing halves. Landing gear is nicely done and looks the part. Main gear legs will have to be spread to insert the wheels. You can also get metal gear from Scale Aircraft Conversions for this kit if you wish. The tail wheel is molded in with the tail gear.
Instructions are well done with generic paint references. Two sets of marking are shown in the instructions. One is a post war plane with the USN that has a shark mouth. This aircraft has an anti-collision light on the tip of the fin. The other is a WWII RAF type in OD with invasion stripes. Can't tell you about the decals themselves as this kit did not come with them.
| CONSTRUCTION |
I was browsing the sales table at the LHS and spotted this one so decided to pick it up and give it a go. It is been quite a few years since I built one of these and thought I'd renew my acquaintance with it. I started by spraying all the interior bits using Model Master interior green enamel. I then painted the instrument panel black and dry brushed it with white, though you really will not see it when the fuselage halves are closed. The seats were glued in place and painted as were the control columns. I broke one of the control wheels when removing it from the sprue but it was repaired and installed. In the back, the 'seats' had the top surface painted a light brown using Vallejo US tan earth.
 I then installed all the bulkheads and set those aside to dry. The windows
were the next item installed. These fit very well and are designed for specific
places as one of the windows on each side is a bit smaller than the others due
to an exit door so be sure not to get them in the wrong place. Meanwhile, I
installed the cargo door and then the passenger door within it. These are a very
tenuous fit as they do not provide a lot of places for the glue to grab due to
their design. I backed up all the joins on the inside with super glue to stiffen
things up.
I then installed all the bulkheads and set those aside to dry. The windows
were the next item installed. These fit very well and are designed for specific
places as one of the windows on each side is a bit smaller than the others due
to an exit door so be sure not to get them in the wrong place. Meanwhile, I
installed the cargo door and then the passenger door within it. These are a very
tenuous fit as they do not provide a lot of places for the glue to grab due to
their design. I backed up all the joins on the inside with super glue to stiffen
things up.
While that was drying, I assembled the wheels and the engines. I also attached the upper wing sections to the lower wings. The fit here is quite good, but for whatever reason, the edges are a bit shallow so you'll need filler all the way around, which will take some time. I used super glue so there would not be issues with shrinking later on. This was also the case with the horizontal stabilizers. Once those were done, I set them aside.
Back at the fuselage, the windows were masked (an easy job thanks to their shape) and the interior was glued into one half. This is not the most positive fit in the world as you are given just a few small ledge sections to use when aligning things. I then attached the other fuselage half. I should mention that since this is going to be a WWII C-47, I drilled out the hole for the nose radar antenna on the right fuselage half before installing the interior. The one on the left was already open. The fit of the fuselage halves is fair and needed to be taped together to get the best fit. Again, the seams on the halves needed to be filled once the glue dried.
 The wing center section was the next item to be glued in place. Fit
on this and the rest of the large parts was fairly good, but all of the
joins needed filler. Guess it is either my building or the age of the kits.
Nothing major, no huge steps or gaps, just not a tight fit. Next, the
horizontal stabilizers were glued into place. I then attached the wings to
the center section. The gaps between the upper wing and fuselage was
probably the worst on the kit, though some of the horizontal stab gaps were
pretty big as well. With all that sanding done, I attached the windscreen.
Note for others, mask this before installation as it is a lot easier to do.
I also found the windscreen a bit too tall or the opening a bit too small. I
trimmed both and found I should have done one or the other, but not both.
The wing center section was the next item to be glued in place. Fit
on this and the rest of the large parts was fairly good, but all of the
joins needed filler. Guess it is either my building or the age of the kits.
Nothing major, no huge steps or gaps, just not a tight fit. Next, the
horizontal stabilizers were glued into place. I then attached the wings to
the center section. The gaps between the upper wing and fuselage was
probably the worst on the kit, though some of the horizontal stab gaps were
pretty big as well. With all that sanding done, I attached the windscreen.
Note for others, mask this before installation as it is a lot easier to do.
I also found the windscreen a bit too tall or the opening a bit too small. I
trimmed both and found I should have done one or the other, but not both.
| COLORS & MARKINGS |
Let me start with a bit of a confession. I rarely
build planes with D-day markings as I find it to be a lot of work. However, I
decided to do this one in such a fashion as I felt I should do at least a C-47
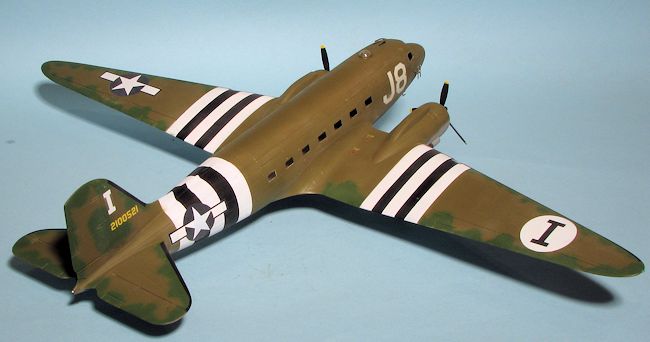
in full markings. First, I painted large sections in white and when dry,
started on the masking. The decal sheet I was using told me to space the stripes
7.4mm on the wings and 9 mm on the fuselage. I rummaged through my tape
collection and found some 7.4 mm and 9 mm tape....Not. However, I did have 6mm
tape a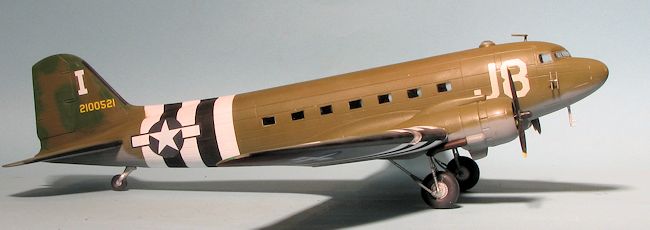 s well as tape in 1 and 3mm that I could use to get pretty close. After
much fussing and reapplication, I had the white masked so painted in the black.
The black was masked and I continued with the other colors.
s well as tape in 1 and 3mm that I could use to get pretty close. After
much fussing and reapplication, I had the white masked so painted in the black.
The black was masked and I continued with the other colors.
For the OD and Neutral Grey I used Testors enamels. This plane had a lot of medium green on the fin and edges of the tailplanes and wings. I guess FS 34102 is pretty close as that is what I used. But I was not over yet. I still had to mask off the anti-icing boots on the wings and tail bits. First, I unmasked the wing stripes and found it didn't look too bad. Then more tape for the leading edges of things. Trouble with Tamiya tape for some of these is that it is difficult to find the curvature of the panel lines under it, but I stumbled through it and eventually the plane was painted. Actually semi-colorful as WWII C-47s go. I had forgotten to install the carb intakes so, picking the long ones, installed those and repainted.
| FINAL CONSTRUCTION |
With the airframe painted, I still had bits to attach.
I started with the mounting posts for the radar antennas and the radio antenna
on the top of the fuselage. The little U antenna for the fuselage top broke
while removing it from the sprue but I had a backup and used that. I then
painted the landing gear legs and the exhaust as well as the tail wheel
assembly. When installing the gear legs, I also glued on the retraction struts.
Made it a bit more difficult to get the wheels installed, but I had no issues
with the plastic breaking. Installing the tail wheel required enlarging the
hole. Once on its gear, it was time for any touchup painting where I had issu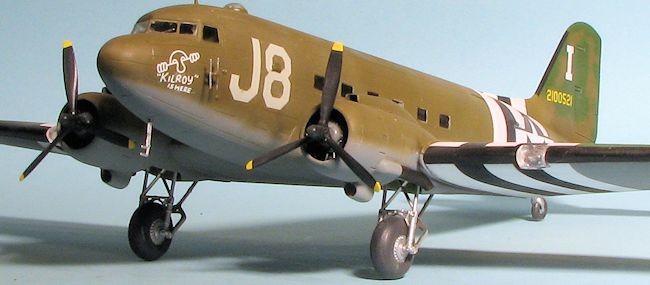 es
with overspray. Then an overall clear gloss (Future/Kleer/Pledge) in preparation
for the decals.
es
with overspray. Then an overall clear gloss (Future/Kleer/Pledge) in preparation
for the decals.
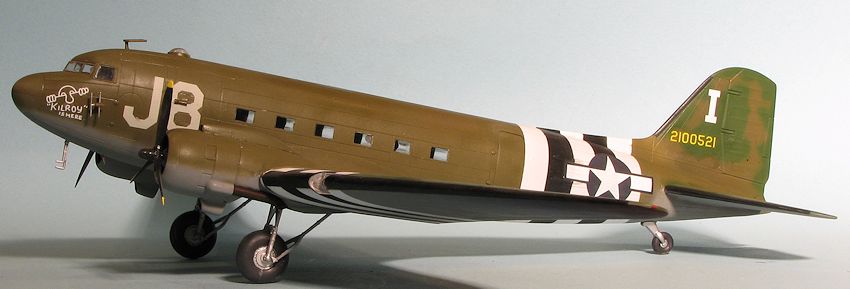
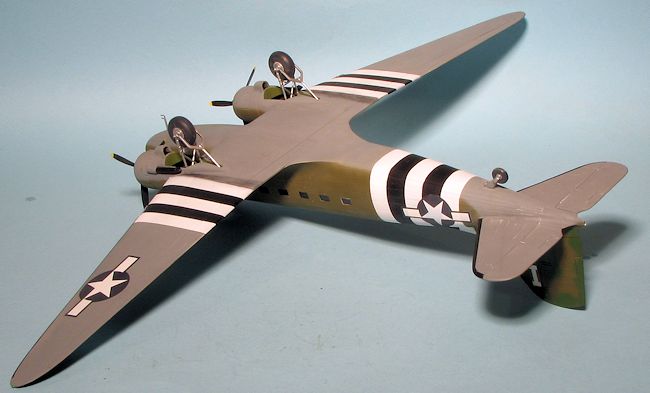
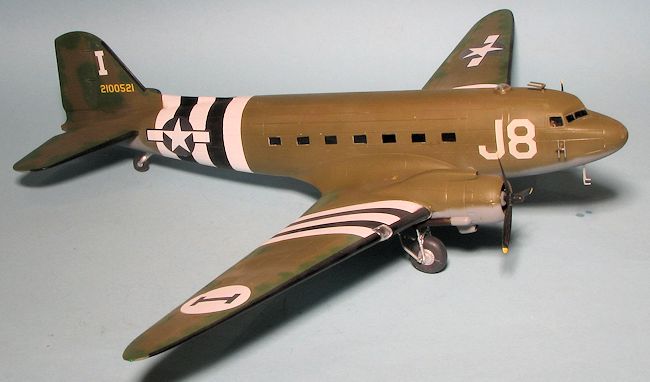
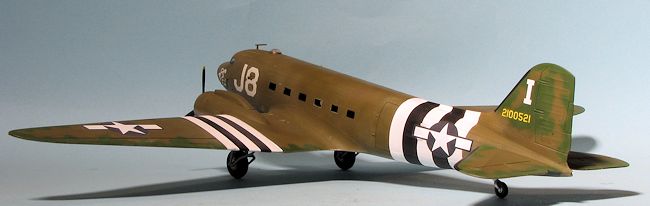
The sheet I used for this one was FCM sheet #72-28 which has markings for a D-Day plane from the 92nd TCS/439 TCG. This particular one is named 'Kilroy is here'. The decals went on with no real issues except that one should remove the molded in venturi from the left side of the fuselage. The code decal had some issues molding around this feature. Typical of most decals, including Microscale's, the white is not opaque enough to block out the black entirely and so the stripes show through on the fuselage. I did not put on the zillions of data markings.
I then sprayed everything with matte clear using my normal Future and Tamiya Flat Base mixture. The props were pushed in place. A note on the props. The kit provides paddle blade props, which I do not think are appropriate for this aircraft as it is an early build. Fortunately, I have more than one of this kit so swapped out the earlier props from that kit. For final bits, this includes the astrodome, engine exhaust, landing light covers, pitot probe and the radar antennas. The masking was removed from the windows, some pastel exhaust stain added, and formation lights painted. That was it.
| CONCLUSIONS |
No matter how many times I build a C-47/DC-3 kit, I'm happy with the end results. This one took a lot more work to paint, thanks to the invasion stripes and the de-icer boots, but it does make for a very nice looking model. The FCM sheet is a good one and I had no issues with the decals as they are printed by Microscale so work with their setting solutions.
| REFERENCES |
http://en.wikipedia.org/wiki/C-47_Skytrain
August 2013
Thanks to me and browsing the sales tables for the review kit. Thanks to FCM for the decal sheet.
If you would like your product reviewed fairly and fairly quickly, please contact the editor or see other details in the Note to Contributors.