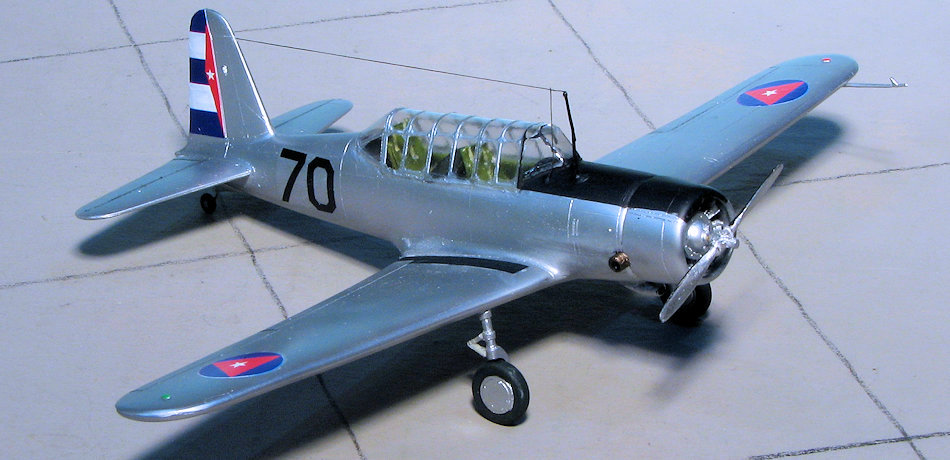
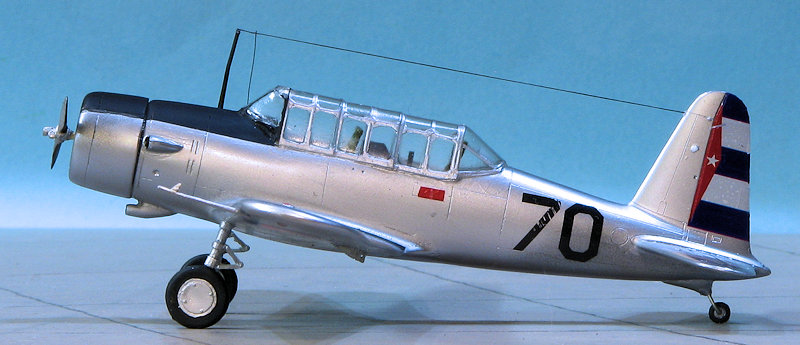
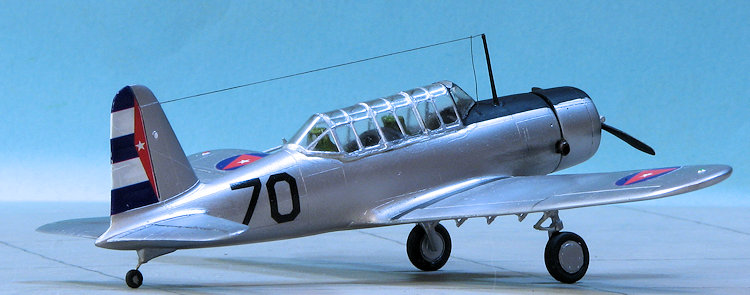
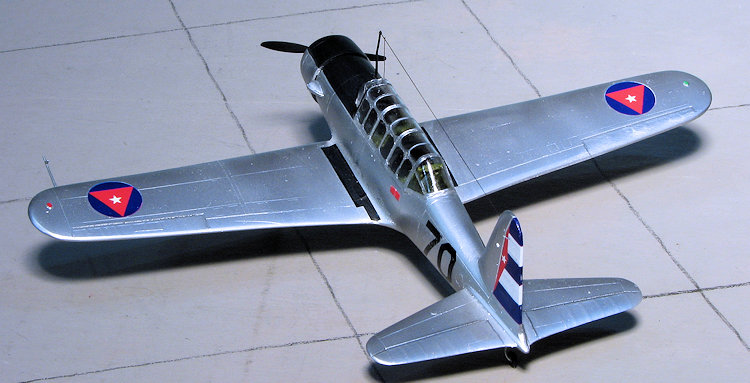
Pavla 1/72 BT-13 Valiant
| KIT #: | 72028 |
| PRICE: | $19.95 |
| DECALS: | Three options |
| REVIEWER: | Scott Van Aken |
| NOTES: | Short run with resin parts and vac canopy |
| HISTORY |
The plane that actually put Vultee on the map was the BT-13. The initial design was for four different planes all based on the same airframe. Three were trainers of various types and a fighter. The fighter was the P-66 and 100 were eventually built, with some going to China and the rest being used in the US as advanced fighter trainers.
 Of the trainer variants, only the basic trainer was built. In
fact there were over 11,000 of them eventually produced. Normal training was
initially started on the Stearman PT-13, then on to the BT-13 and finally to the
AT-6. The BT-13 was also produced as the SNV for the US Navy, some 2,000 being
delivered. The plane was a good transition from the biplane Stearman and allowed
an increase of performance that made moving up to the much faster and more
difficult to fly Texan. Though officially called the 'Valiant', most who flew it
called it the 'Vibrator' for the way that the engine shook the airframe.
Of the trainer variants, only the basic trainer was built. In
fact there were over 11,000 of them eventually produced. Normal training was
initially started on the Stearman PT-13, then on to the BT-13 and finally to the
AT-6. The BT-13 was also produced as the SNV for the US Navy, some 2,000 being
delivered. The plane was a good transition from the biplane Stearman and allowed
an increase of performance that made moving up to the much faster and more
difficult to fly Texan. Though officially called the 'Valiant', most who flew it
called it the 'Vibrator' for the way that the engine shook the airframe.
The aircraft was also sent to a number of foreign countries during and after the war. As with other trainers, a large number of them survived to be bought by civilians after the war. If you saw the movie 'Tora, Tora, Tora' then you saw a number of these planes converted to look like the Val dive bomber and Kate torpedo bomber.
| THE KIT |
I would call this a near second generation Czech short run kit. It comes on a single sprue of plastic with the cockpit components and engine in resin and the canopy in vacuformed plastic. Also typical of these types of kits, some of the parts needed will have to be made from stretched sprue or scrap plastic. For this kit, that means the rudder pedals/assembly and the rear support for the radio.
External detailing is very good with the usual nicely engraved lines. However, you'll undoubtedly have to rescribe those that will be sanded away. There is some flash present and the large parts have ejector stubs that will need trimmed off. I found several of the thicker parts (tail wheel assembly and wheels) to have some sink marks on them. The wheels were not particularly well formed in my example and I'll probably have to find replacements for them.
 In terms of options, you really only have one. That is to use the streamlined
fairings around the landing gear or not. The prop is three pieces; a hub and two
separate blades. Though the sprue attachment points are commendably thin, it
would be easiest to replace this prop with one from the Aeroclub line of metal
props. The vac canopy is well formed though a bit cloudy.
In terms of options, you really only have one. That is to use the streamlined
fairings around the landing gear or not. The prop is three pieces; a hub and two
separate blades. Though the sprue attachment points are commendably thin, it
would be easiest to replace this prop with one from the Aeroclub line of metal
props. The vac canopy is well formed though a bit cloudy.
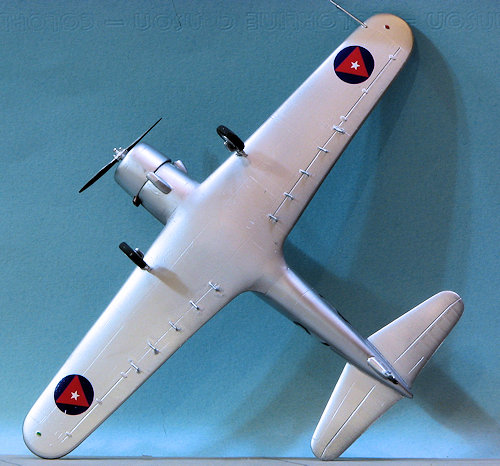
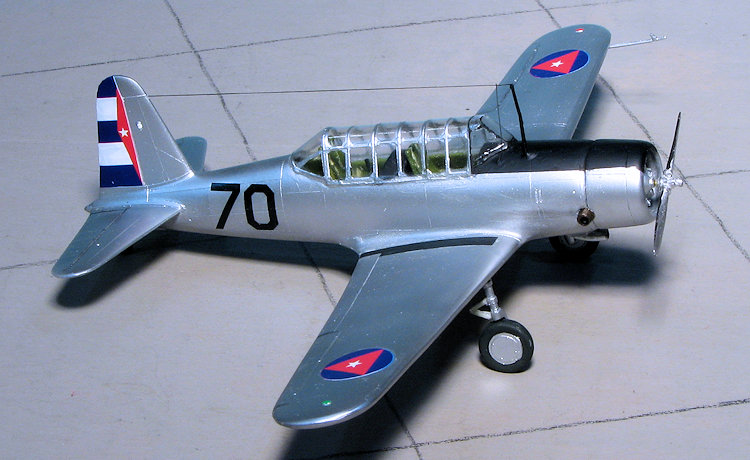
The instructions are very good and some of the best you'll find in short run kits. All the paint colors are given with Humbrol references so that matching some of the more interesting colors won't be a problem if you have access to Humbrol paints. There are numerous small drawings showing the proper alignment of various parts and assemblies, a very nice feature. Decals are for three planes. The first is the cover plane used as a hack at Wright Field. Next is a Navy SNV in medium blue-grey over light gull grey. Finally, a French version used post war. The decals are well printed and very gloss. I can't tell if they are a continuous film or not but will find out when I use them. It seems to me that the blues are a bit light and the font for the US Army is off a bit as well. However, I have no references against which to check the font so will undoubtedly use them as is.
One really nice thing about this kit is that there are a slew of countries that flew the plane. It was provided to nearly every Central and South American country. That means if you don't like what is provided on the decal sheet, finding something interesting will not be a problem.
| CONSTRUCTION |
This kit was purchased on the second hand market. The previous owner had done a 'service' by removing all the plastic parts from the sprue and stuffing them in a zip bag. He also managed to clip off the prop shaft and the little attachment pieces for the exhaust in his zeal. The resin and vac bits were still in their blister package and all the parts are present.
 My first task was to cut the seats from their resin pour
stubs. These were then glued to the interior floor along with the control
sticks. I also took the time to assemble the prop while vowing to hunt through
the Aeroclub bag for an appropriate metal replacement. With the interior bits
dry, I broke out the big brush and Polly Scale Interior Green, painting not only
all the interior bits, but also the fuselage interior walls with this paint.
My first task was to cut the seats from their resin pour
stubs. These were then glued to the interior floor along with the control
sticks. I also took the time to assemble the prop while vowing to hunt through
the Aeroclub bag for an appropriate metal replacement. With the interior bits
dry, I broke out the big brush and Polly Scale Interior Green, painting not only
all the interior bits, but also the fuselage interior walls with this paint.
Next step was to glue the wing bits. Typically, the plastic is rather thin and also typical of the genre of the time, the thickest part of the plastic is a few mm inside the trailing and leading edges of the wings. Now a real modeler will spend quality time scraping the wings to get a good match, but I'm a fake modeler so simply glued the parts together, later filling the gaps with super glue.
With the wings together and cleaned up (a coat of primer really helped find the seams), I assembled the interior pieces. These fit OK, though not great. The main instrument panel needs to be heavily trimmed in order to fit and still have the fuselage halves close. I attached the flat engine attachment plate to one half, using the 'squeeze, super glue, accelerator' method to get it to fit properly as the thick plastic had far too much of a gap. The interior was then glued in place and the fuselage halves taped until the one side dried. Then the other half was attached in sections starting from the back. Again, I had to use the S,SG,A method to get the forward fuselage piece to fit properly. I also assembled the cowling and located a nice Aeroclub prop to later go into the engine. I drilled a hole in the resin engine and promptly broke the prop shaft test fitting it. Fortunately, I know how to drill holes so did so and replaced the broken shaft with a section of paper clip.
 With the halves fairly well together, I installed the rear
seat anti-glare panel and instrument panel. Then the tailplanes were glued on.
The inside of the tailplanes are curved and the mating surface is flat. Thanks
to Blap's Super Sanding Blocks, I was able to do some sanding to get a good
match. Then time to fit the wing. I had been warned that the fit would be poor
and so it was. The fuselage wing roots were far too wide. Again, the SSBs were
used to trim these down. The real benefit to the SSBs is that they are very hard
backed so are able to sand things flat. They are well worth the cost if one is
building short run kits as they also have square edges which help on other
surfaces as well. Eventually the fuselage roots and the inside of the wings
themselves were sanded to a point where they pretty much just slipped into
place. Still needed a bit of filler, but nothing major as with other projects.
With the halves fairly well together, I installed the rear
seat anti-glare panel and instrument panel. Then the tailplanes were glued on.
The inside of the tailplanes are curved and the mating surface is flat. Thanks
to Blap's Super Sanding Blocks, I was able to do some sanding to get a good
match. Then time to fit the wing. I had been warned that the fit would be poor
and so it was. The fuselage wing roots were far too wide. Again, the SSBs were
used to trim these down. The real benefit to the SSBs is that they are very hard
backed so are able to sand things flat. They are well worth the cost if one is
building short run kits as they also have square edges which help on other
surfaces as well. Eventually the fuselage roots and the inside of the wings
themselves were sanded to a point where they pretty much just slipped into
place. Still needed a bit of filler, but nothing major as with other projects.
With the wings in place, I used the SSBs on the tailplanes as well as the parts are curved at the root where the fuselage is flat. I then started trimming the canopy. As usual, quite a bit of trim work had to be done to get even a semblance of fit. Since only one vac canopy was provided, I had to be careful. Finally, I got it to where it wouldn't look half bad and attached it with clear gloss paint. Once dry, it was nice and tight. I then started to mask it, a rather tedious task not helped by noticing the the upper windscreen was pushed in. I was able to remove the canopy with a bit of effort and pushed it out. It was then reattached and the masking continued.
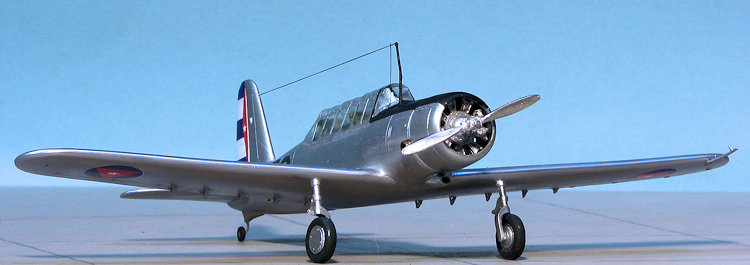
 I was doing an an unpainted version without the gear
fairings. The holes for the main gear were enlarged and the main gear attached.
The tail gear piece was broken away from the housing so I had to bend a piece of
wire to substitute for the missing tail leg. A hole was drilled in both the main
and tail wheel so they would be able to be slipped onto the gear. The resin oleo
scissors were then attached as were the ten minute flap hinges. I managed to
knock one free so just made a wedge of plastic card as a replacement.
I was doing an an unpainted version without the gear
fairings. The holes for the main gear were enlarged and the main gear attached.
The tail gear piece was broken away from the housing so I had to bend a piece of
wire to substitute for the missing tail leg. A hole was drilled in both the main
and tail wheel so they would be able to be slipped onto the gear. The resin oleo
scissors were then attached as were the ten minute flap hinges. I managed to
knock one free so just made a wedge of plastic card as a replacement.
The resin engine was glued into the cowling and the exhaust pipe glued to the opening in the cowling. There is a cutout on the fuselage for the exhaust, but it is way too small and had to be enlarged. To back up a tad I also had to trim quite a bit from the inside portion of the curved exhaust in order to get the engine to fit. Eventually all of that was done and the engine/cowling was glued onto the front of the aircraft. I then drilled out the exhaust and the two small intakes, which were then glued into place.
| COLORS & MARKINGS |
 h Alclad
II Aluminum then masked off the nose area for the black anti-glare panel.
When that was done, I attached the tail wheel, radio mast and pitot tube
then repainted those areas. The radio mast was missing from the kit so one
was produced using stretched sprue.
h Alclad
II Aluminum then masked off the nose area for the black anti-glare panel.
When that was done, I attached the tail wheel, radio mast and pitot tube
then repainted those areas. The radio mast was missing from the kit so one
was produced using stretched sprue. | FINAL CONSTRUCTION |
| CONCLUSIONS |
Typical of older short run kits, the paucity of parts belied the difficulty I had building this one. This wasn't helped by the missing/broken bits. I made plenty of mistakes on this one, the biggest being installing the interior too far back. This meant there was no room for the resin roll over assembly. The end result is pleasing enough, but won't be entered in any contests! I have a terrible attraction to these sorts of kits and always run into issues with every one I build. I often wonder why I don't just sell these off and stick with mainstream kits. It sure would make life easier, but then it wouldn't be as much fun.
March 2016
Copyright ModelingMadness.com. All rights reserved. No reproduction in any form without the express permission of the editor. Thanks to me for picking
this one up from the dusty shelves of the LHS. If you would like your product reviewed fairly and fairly quickly, please contact the editor or see other details in the
Note to
Contributors.