Italeri 1/72 B-25B/C Mitchell
| KIT #: | 123 |
| PRICE: | This one was bought started for $4.00 |
| DECALS: | Two options |
| REVIEWER: | Scott Van Aken |
| NOTES: | Original 1978 release |
| HISTORY |
The North American B-25 Mitchell is an American twin-engine, medium bomber manufactured by North American Aviation(NAA).
The design was named in honor of Major General William "Billy"
Mitchell, a pioneer of U.S. military aviation. Used by many Allied air
forces, the B-25 served in every theater of World War II and after the war
ended many
 remained
in service, operating across four decades. Produced in numerous variants,
nearly 10,000 Mitchells rolled from NAA factories. These included a few
limited models, such as the United States Marine Corps' PBJ-1 patrol
bomber and the United States Army Air Forces' F-10 reconnaissance
aircraft and AT-24 trainers.
remained
in service, operating across four decades. Produced in numerous variants,
nearly 10,000 Mitchells rolled from NAA factories. These included a few
limited models, such as the United States Marine Corps' PBJ-1 patrol
bomber and the United States Army Air Forces' F-10 reconnaissance
aircraft and AT-24 trainers.
Though quickly withdrawn from the US inventory after WWII. Many late build B-25Js were sold to foreign governments or converted to TB-25 and VB-25 trainer/utility aircraft, staying in service into the late 1950s. Many of these planes have, for the most part, been reconverted to bombers by enthusiasts and that is what you see flying as today's warbirds.
| THE KIT |
 There is no wheel well detail as when the plane was on the ground,
most of the doors were closed. This means that one also has to install the main
gear before closing the engine nacelles. There are two engine cylinder banks
provided and you have two different cowlings. One is smooth for the B and early
C while the other has ejector exhaust used on all subsequent Mitchells. The only
real difference between a B-25C and B-25D is where it was made.
There is no wheel well detail as when the plane was on the ground,
most of the doors were closed. This means that one also has to install the main
gear before closing the engine nacelles. There are two engine cylinder banks
provided and you have two different cowlings. One is smooth for the B and early
C while the other has ejector exhaust used on all subsequent Mitchells. The only
real difference between a B-25C and B-25D is where it was made.
There are two different tail cones, one with a hole for a gun
and the other no such. The nose piece is the same for both options with just a
single gun. The Testors kit came with options to do a SWPA strafer. The kit does
not include the side packs but the instructions show how to make one. One thing
that is not shown is how much nose weight to include. Finding space for it will
be a bit of a challenge with the clear nose. The kit includes a tail stand for
those who cannot find enough room. It will take a considerable amount but is not
impossible.
| CONSTRUCTION |
 Since the interior was already painted, I started this
by gluing the wing halves together. I then built up the cockpit. Note that
the seat pedestals have huge ejector pin indentations in them so they will
need to be sanded flat in order for the seats to stay attached. The rear
bulkhead should be open to allow access to the bomb bay and the rest of the
plane, but the kit has this closed off. I glued this bulkhead to one
fuselage half and taped the halves shut while it dried. I then added the
rest of the interior pieces. The instrument panel is supposed to be cut from
the instruction sheet and pasted on, but the decal sheet I was using
included one so I used that.
Since the interior was already painted, I started this
by gluing the wing halves together. I then built up the cockpit. Note that
the seat pedestals have huge ejector pin indentations in them so they will
need to be sanded flat in order for the seats to stay attached. The rear
bulkhead should be open to allow access to the bomb bay and the rest of the
plane, but the kit has this closed off. I glued this bulkhead to one
fuselage half and taped the halves shut while it dried. I then added the
rest of the interior pieces. The instrument panel is supposed to be cut from
the instruction sheet and pasted on, but the decal sheet I was using
included one so I used that.
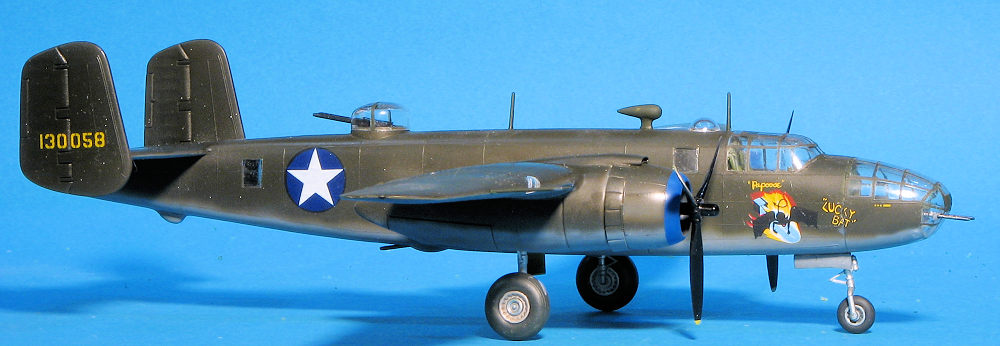
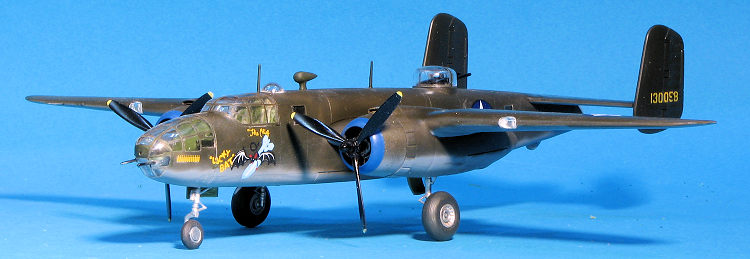
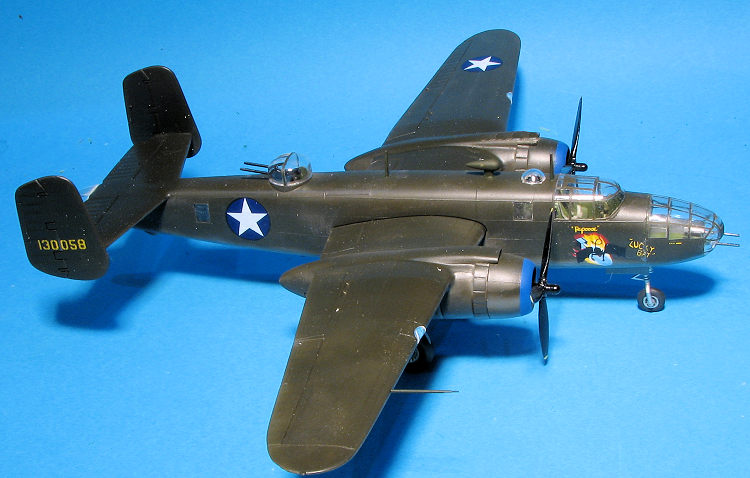
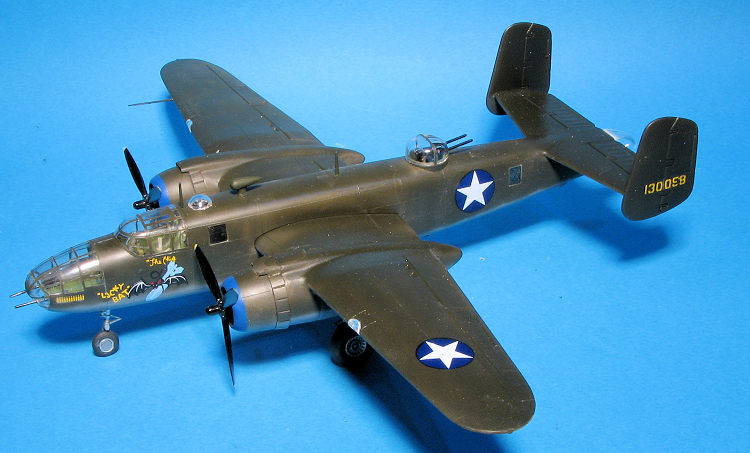
Before going any further, I researched the plane I wanted to build, which was 'Lucky Bat' of the 499th BS. Thankfully, the reference has photos of this plane and showed several differences regarding both the kit and the decal instructions. First off, this plane only had two additional nose guns rather than the four shown on the decal sheet. It also had the early cowlings without the ejector exhaust stubs all over them. It did not have the side gun packs, so I get to save the Quickboost ones I bought for another build.
 The kit does not provide the small circular side windows
that are just above the trailing edge of the wings. Instead, it provides a large
oval window that you can cut out. The smaller windows near the tail and just
behind the cockpit are too large. The smaller forward window should be bulged.
The size issue can be dealt with by masking a smaller area and then filling in
the window frame when it is installed. The bulge is another issue and the small
circular window can be drilled out and filled with some suitable clear
substance. Of course, if you don't care then you can skip all that stuff. I like
to at least get close.
The kit does not provide the small circular side windows
that are just above the trailing edge of the wings. Instead, it provides a large
oval window that you can cut out. The smaller windows near the tail and just
behind the cockpit are too large. The smaller forward window should be bulged.
The size issue can be dealt with by masking a smaller area and then filling in
the window frame when it is installed. The bulge is another issue and the small
circular window can be drilled out and filled with some suitable clear
substance. Of course, if you don't care then you can skip all that stuff. I like
to at least get close.
Once the small side windows were installed, those were masked off. The nose gear was then attached and I placed 17 grams of weight above it and under the cockpit section. The halves were closed, trapping the upper turret base. Then followed the usual repetitive filling and sanding that often occurs with these older kits. There are several sink areas on the fuselage that need to be filled as well. I used super glue for all my filler work.
I also built up the tailplane assembly. Note that the tails are fairly flat whereas the join surface on the horizontal stab has a definite curve to it. This was glued to the fuselage. I moved to the wings. Using all three hands, I was able to trap the landing gear in the engine nacelles. These nacelles were then attached to the wings. There is a considerable gap on the underside of the wings near the leading edge where these fit. Using a spreader bar would then make it difficult to attach the cowlings, so I did not go that route.
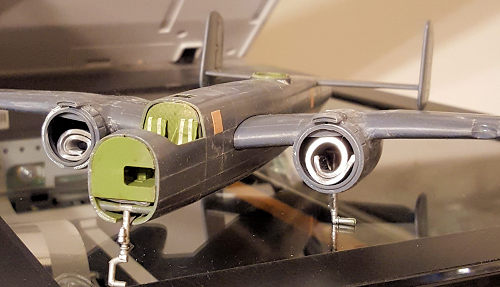 Once the
nacelles were attached, I installed the cowl flap piece and got rid of the seam
on the intake. The wings were then glued on and once dry, I noticed that the
weight I put in was not enough. So I rolled up some more lead (16 grams) into
each of the nacelles. That was enough and though it will tail sit if you push
down on the back, for all intents and purposes, it will sit on its gear.
Once the
nacelles were attached, I installed the cowl flap piece and got rid of the seam
on the intake. The wings were then glued on and once dry, I noticed that the
weight I put in was not enough. So I rolled up some more lead (16 grams) into
each of the nacelles. That was enough and though it will tail sit if you push
down on the back, for all intents and purposes, it will sit on its gear.
I then started the tedious job of masking the transparencies. Unfortunately, there is no aftermarket mask set for the Italeri kit and the frames are too indistinct for Tamiya tape so I fell back on something I've not used in 30 years; Scotch clear tape. This works quite well, but it is real pain to remove. It leaves a residue and removing this will often goober up the frame lines. However, it was done and the cockpit transparency was then glued in place. The nose was just tacked on as I had to install the two nose guns, which would have broken away from handling.
After the engines were built up and installed in the cowlings, I filled those and the various openings with either Silly Putty or tissue and headed to the paint shop.
| COLORS & MARKINGS |
 For this
build, I decided to use Superscale 72-691 and do an early plane from the 499
BS, 'Lucky Bat'. This meant using the smooth B-25B cowlings, the down side
of which is that there are no proper exhaust stacks. I first tacked on the
nose transparency and the cowlings as I'd have to remove those later.
For this
build, I decided to use Superscale 72-691 and do an early plane from the 499
BS, 'Lucky Bat'. This meant using the smooth B-25B cowlings, the down side
of which is that there are no proper exhaust stacks. I first tacked on the
nose transparency and the cowlings as I'd have to remove those later. | FINAL CONSTRUCTION |
 There
were a few final bits that needed done. The nose and main wheels were
painted and installed. The aforementioned masking removal was done. The
props painted and put into the cowlings. Those were then glued in place.
I also cut the handles from the two single machine guns and after
installing the bombardier's floor, installed these guns in holes I'd
previously drilled in the nose transparency. This was then glued to the
nose.
There
were a few final bits that needed done. The nose and main wheels were
painted and installed. The aforementioned masking removal was done. The
props painted and put into the cowlings. Those were then glued in place.
I also cut the handles from the two single machine guns and after
installing the bombardier's floor, installed these guns in holes I'd
previously drilled in the nose transparency. This was then glued to the
nose. | CONCLUSION |
| REFERENCES |
11 January 2019
Back to the Main Page Back to the Previews Index Page
Back to the Previews Index Page